Are you looking for a way to boost sales and build trust with your target audience? If so, we’ll show you how to add testimonials to your WordPress site to get the most out of it.
Add testimonials to your website
Using Strong Testimonials, you’ll have three options for adding testimonials from your customers to your website.
1. Add testimonials manually
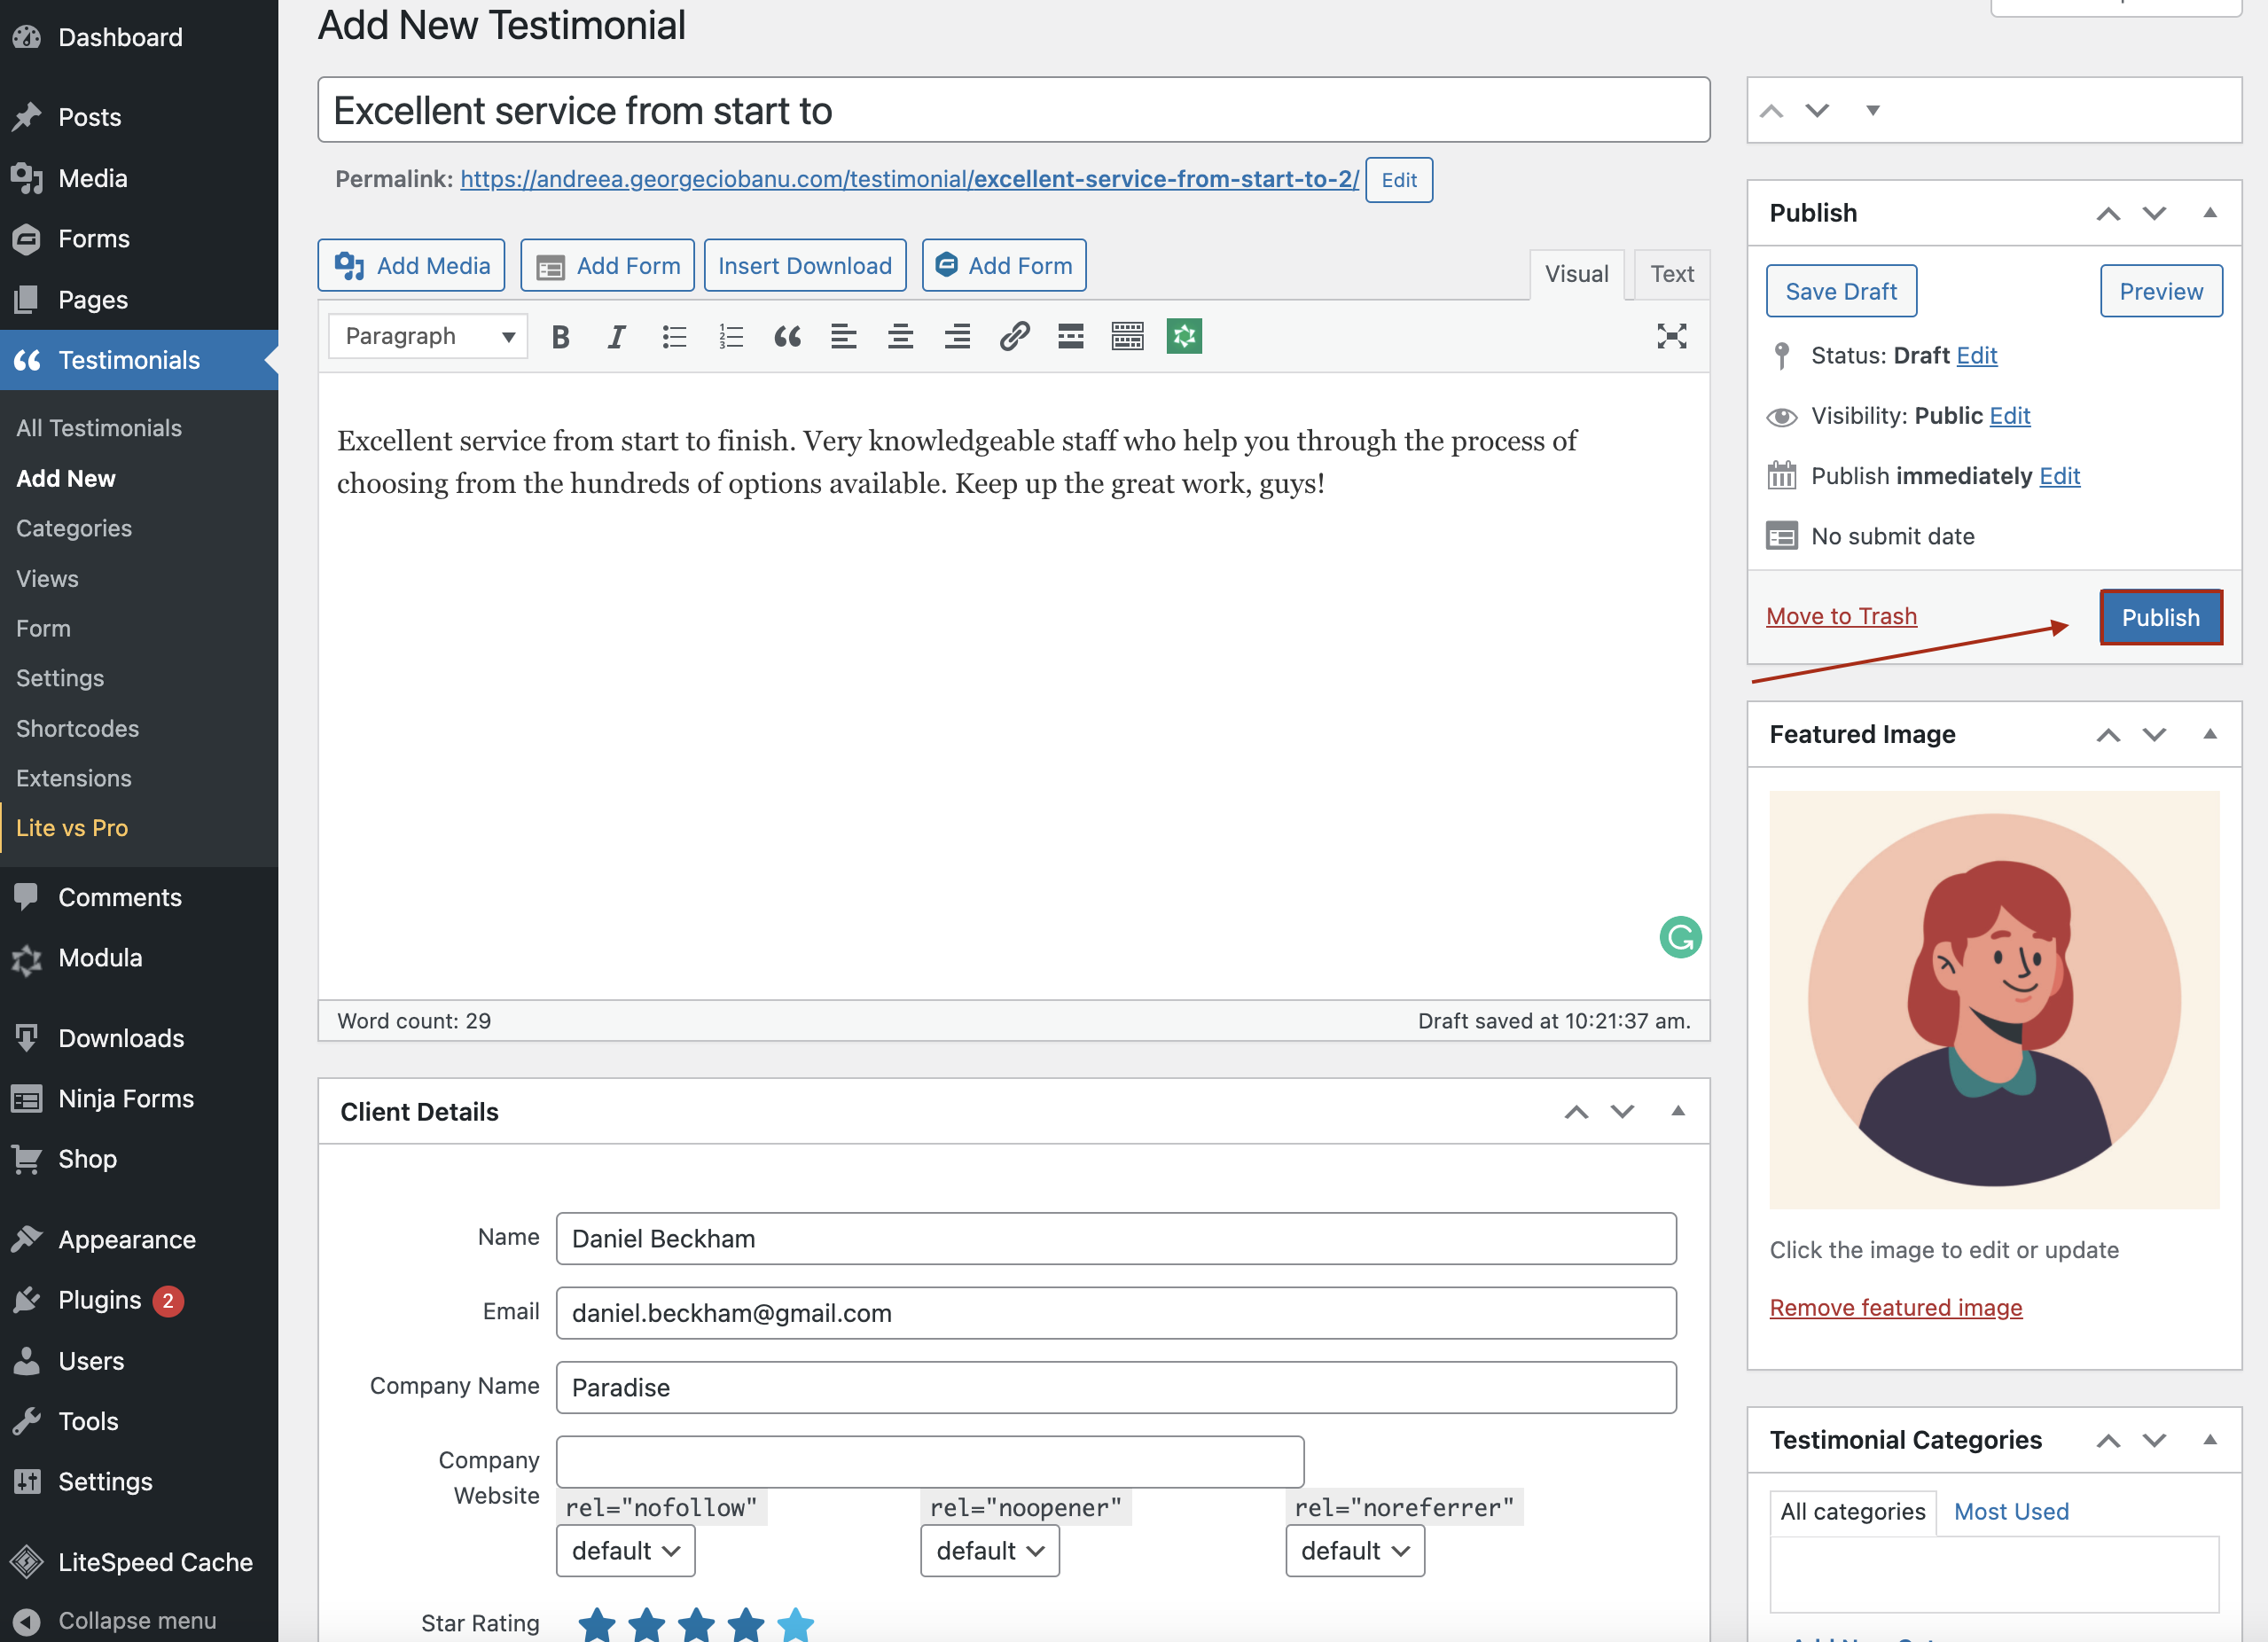
If you go to your Dashboard > Testimonials > Add New, you can manually add testimonials along with customer details. So, add a title for your testimonial, text, client details such as name, email, company name, company website, star rating, including featured image, and divide testimonials into categories if you want to.

Once you’re done customizing the testimonial, don’t forget to click Publish.
2. Approve testimonials using a testimonial form
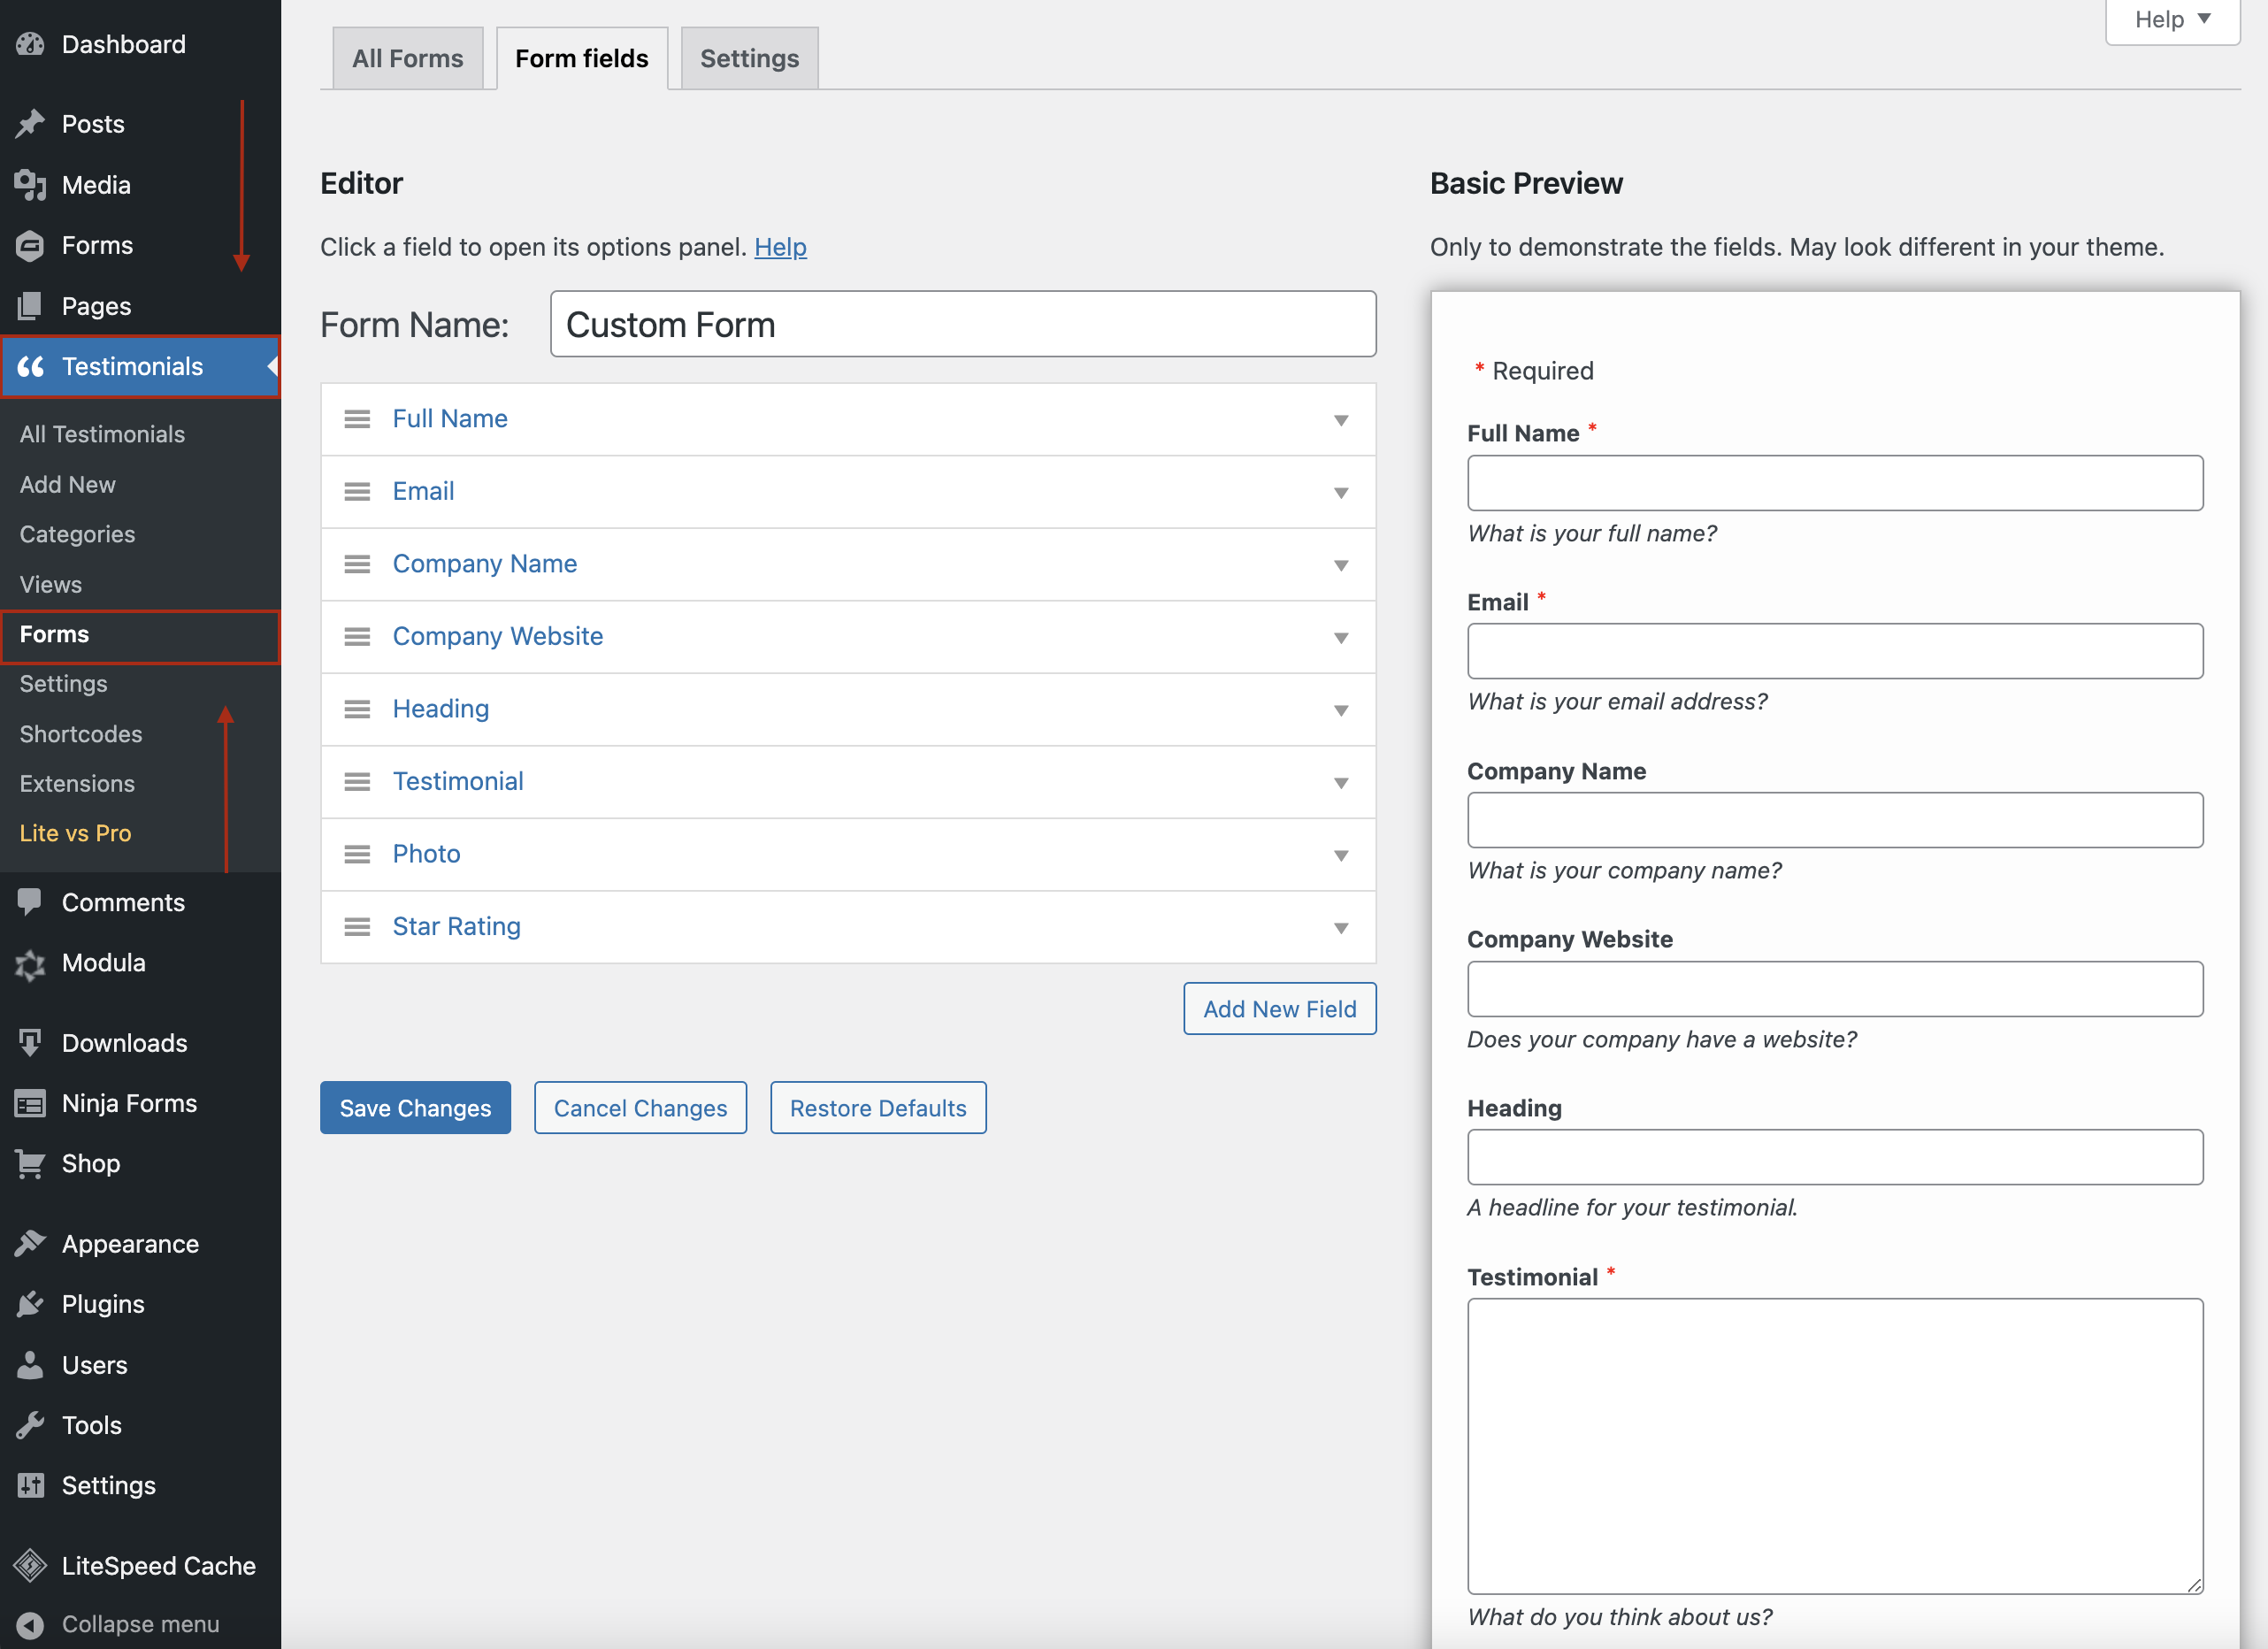
Strong Testimonials includes a fields editor that makes it easy to customize the testimonial form. You can quickly add or remove fields and change several display properties to meet your needs.
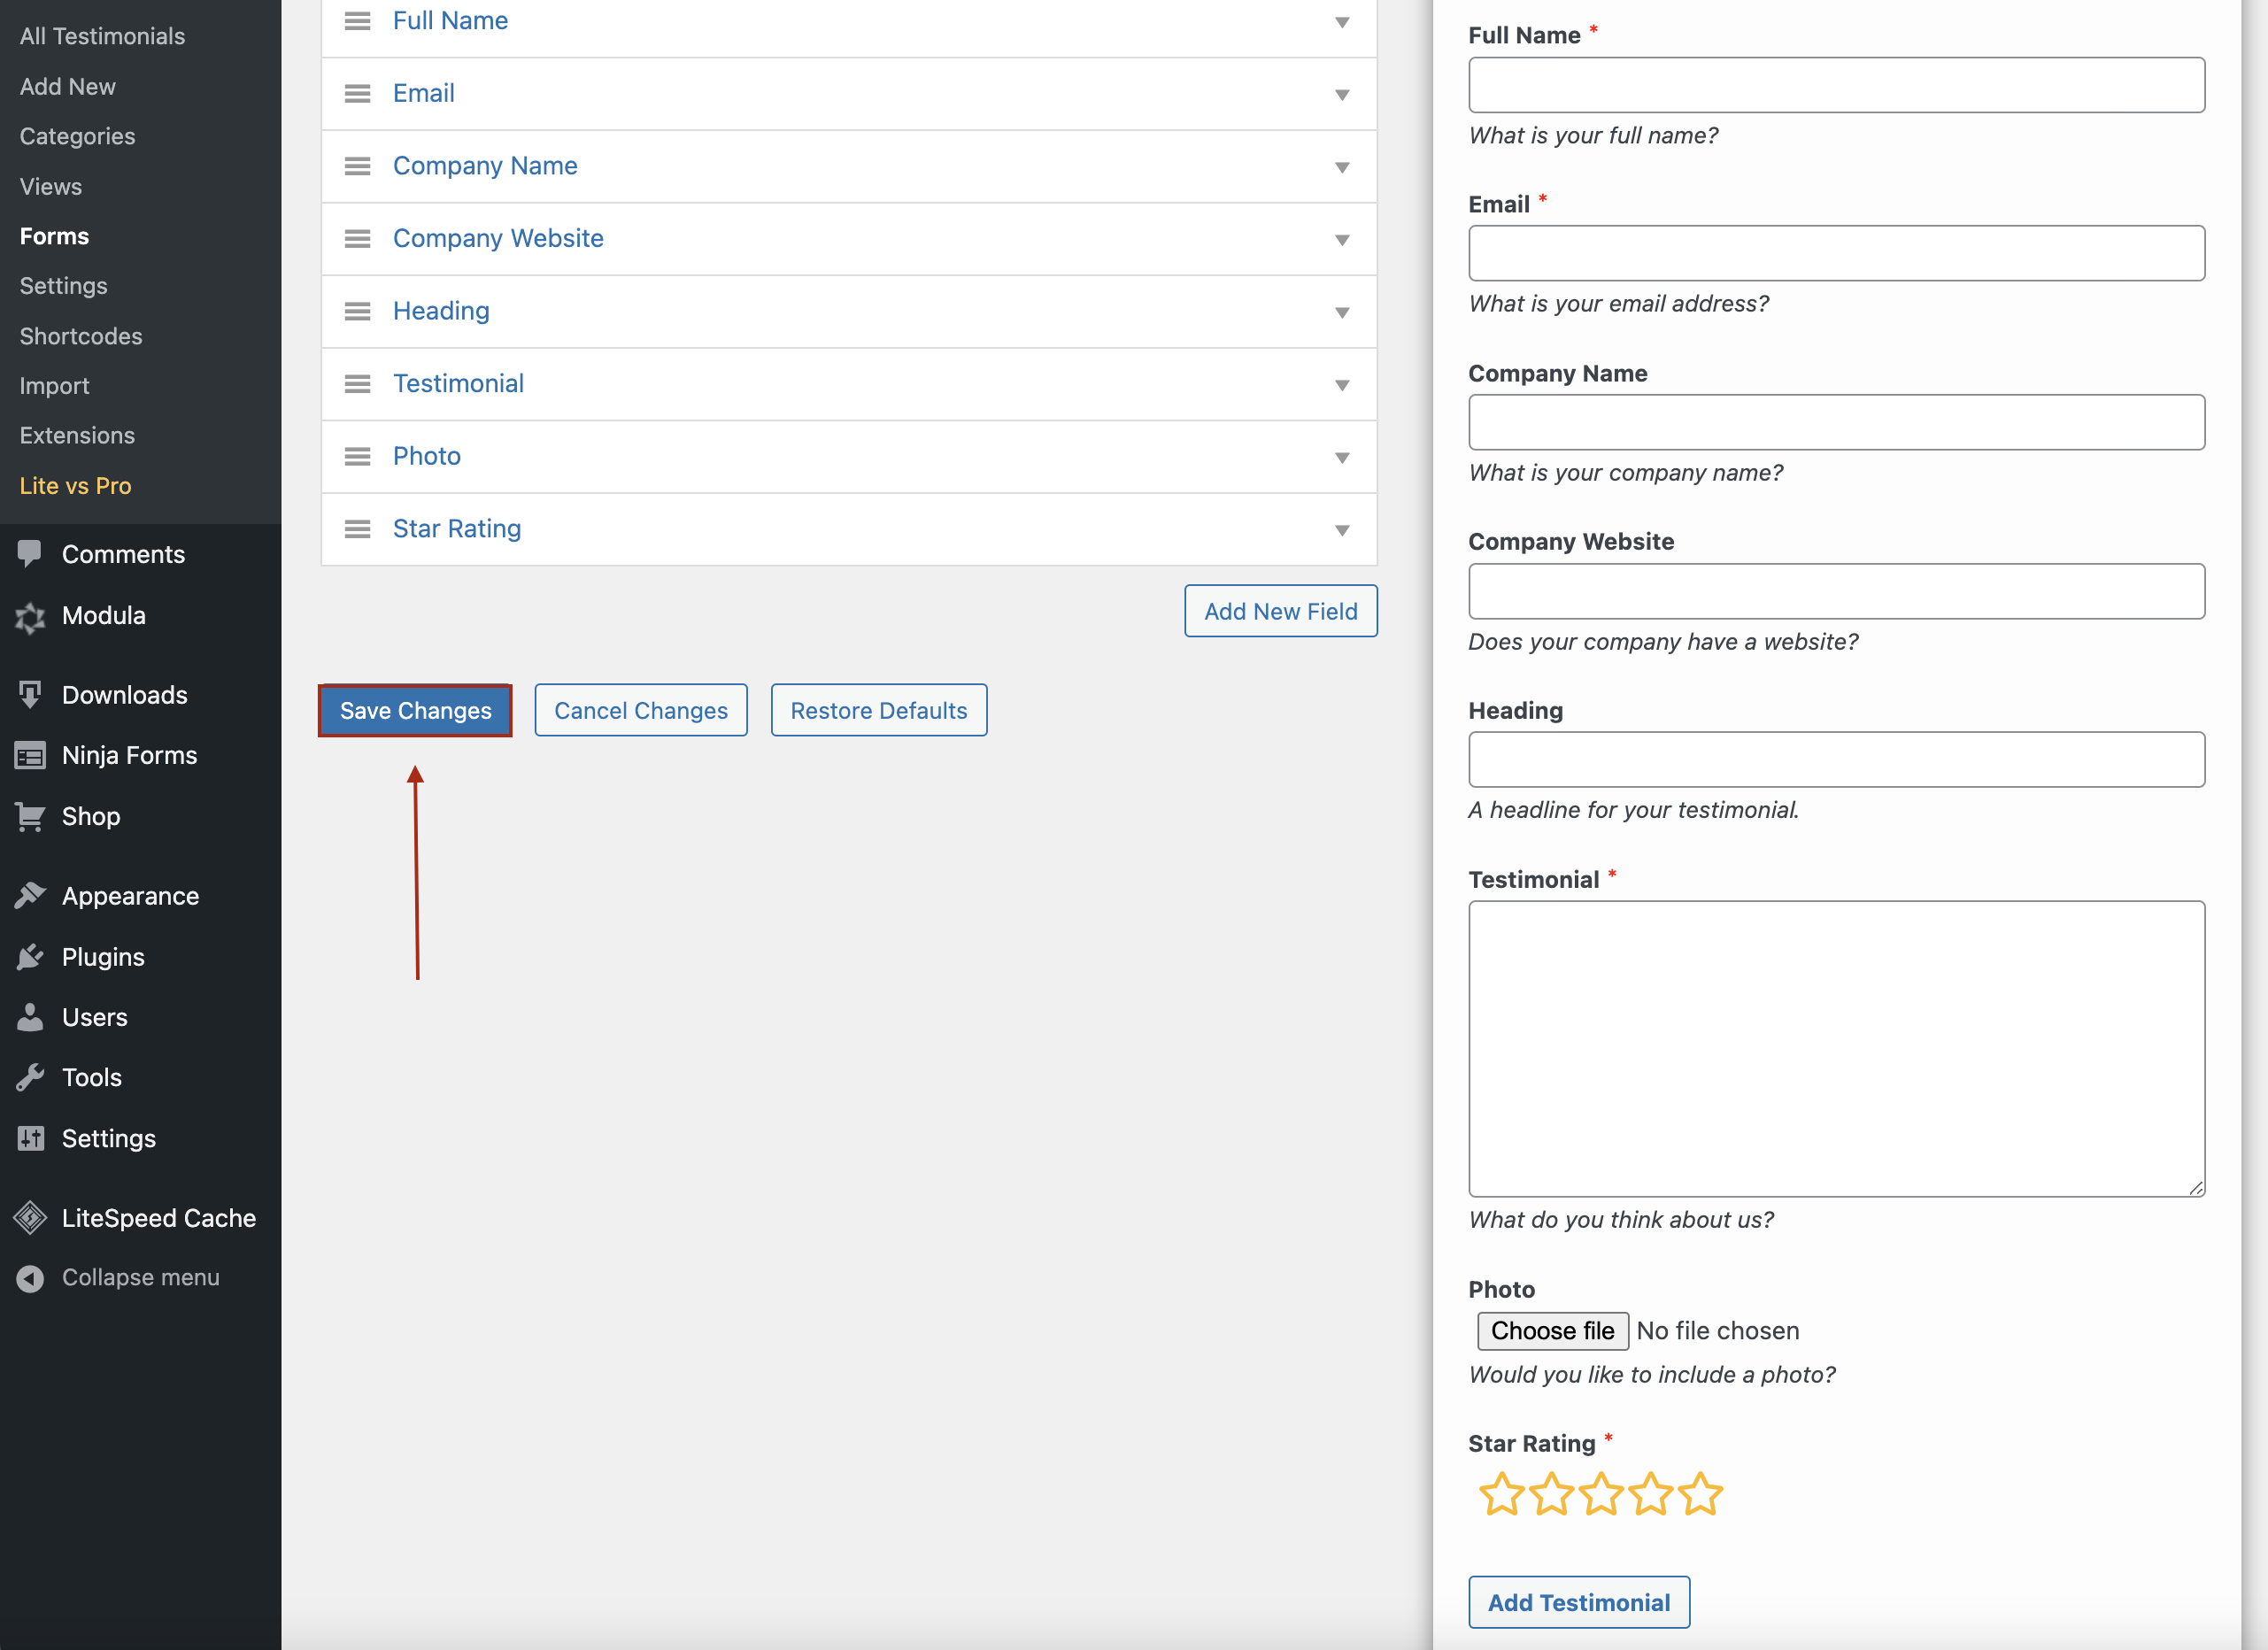
Head to Testimonials > Forms. As you can see in the image below, Strong Testimonials comes with a built-in testimonial form that contains full name, email, company name, company website, heading, testimonial, and star rating fields.
Customize the testimonial form
If you have the free version, you can add text, email, URL, checkbox, shortcode, and star rating fields.
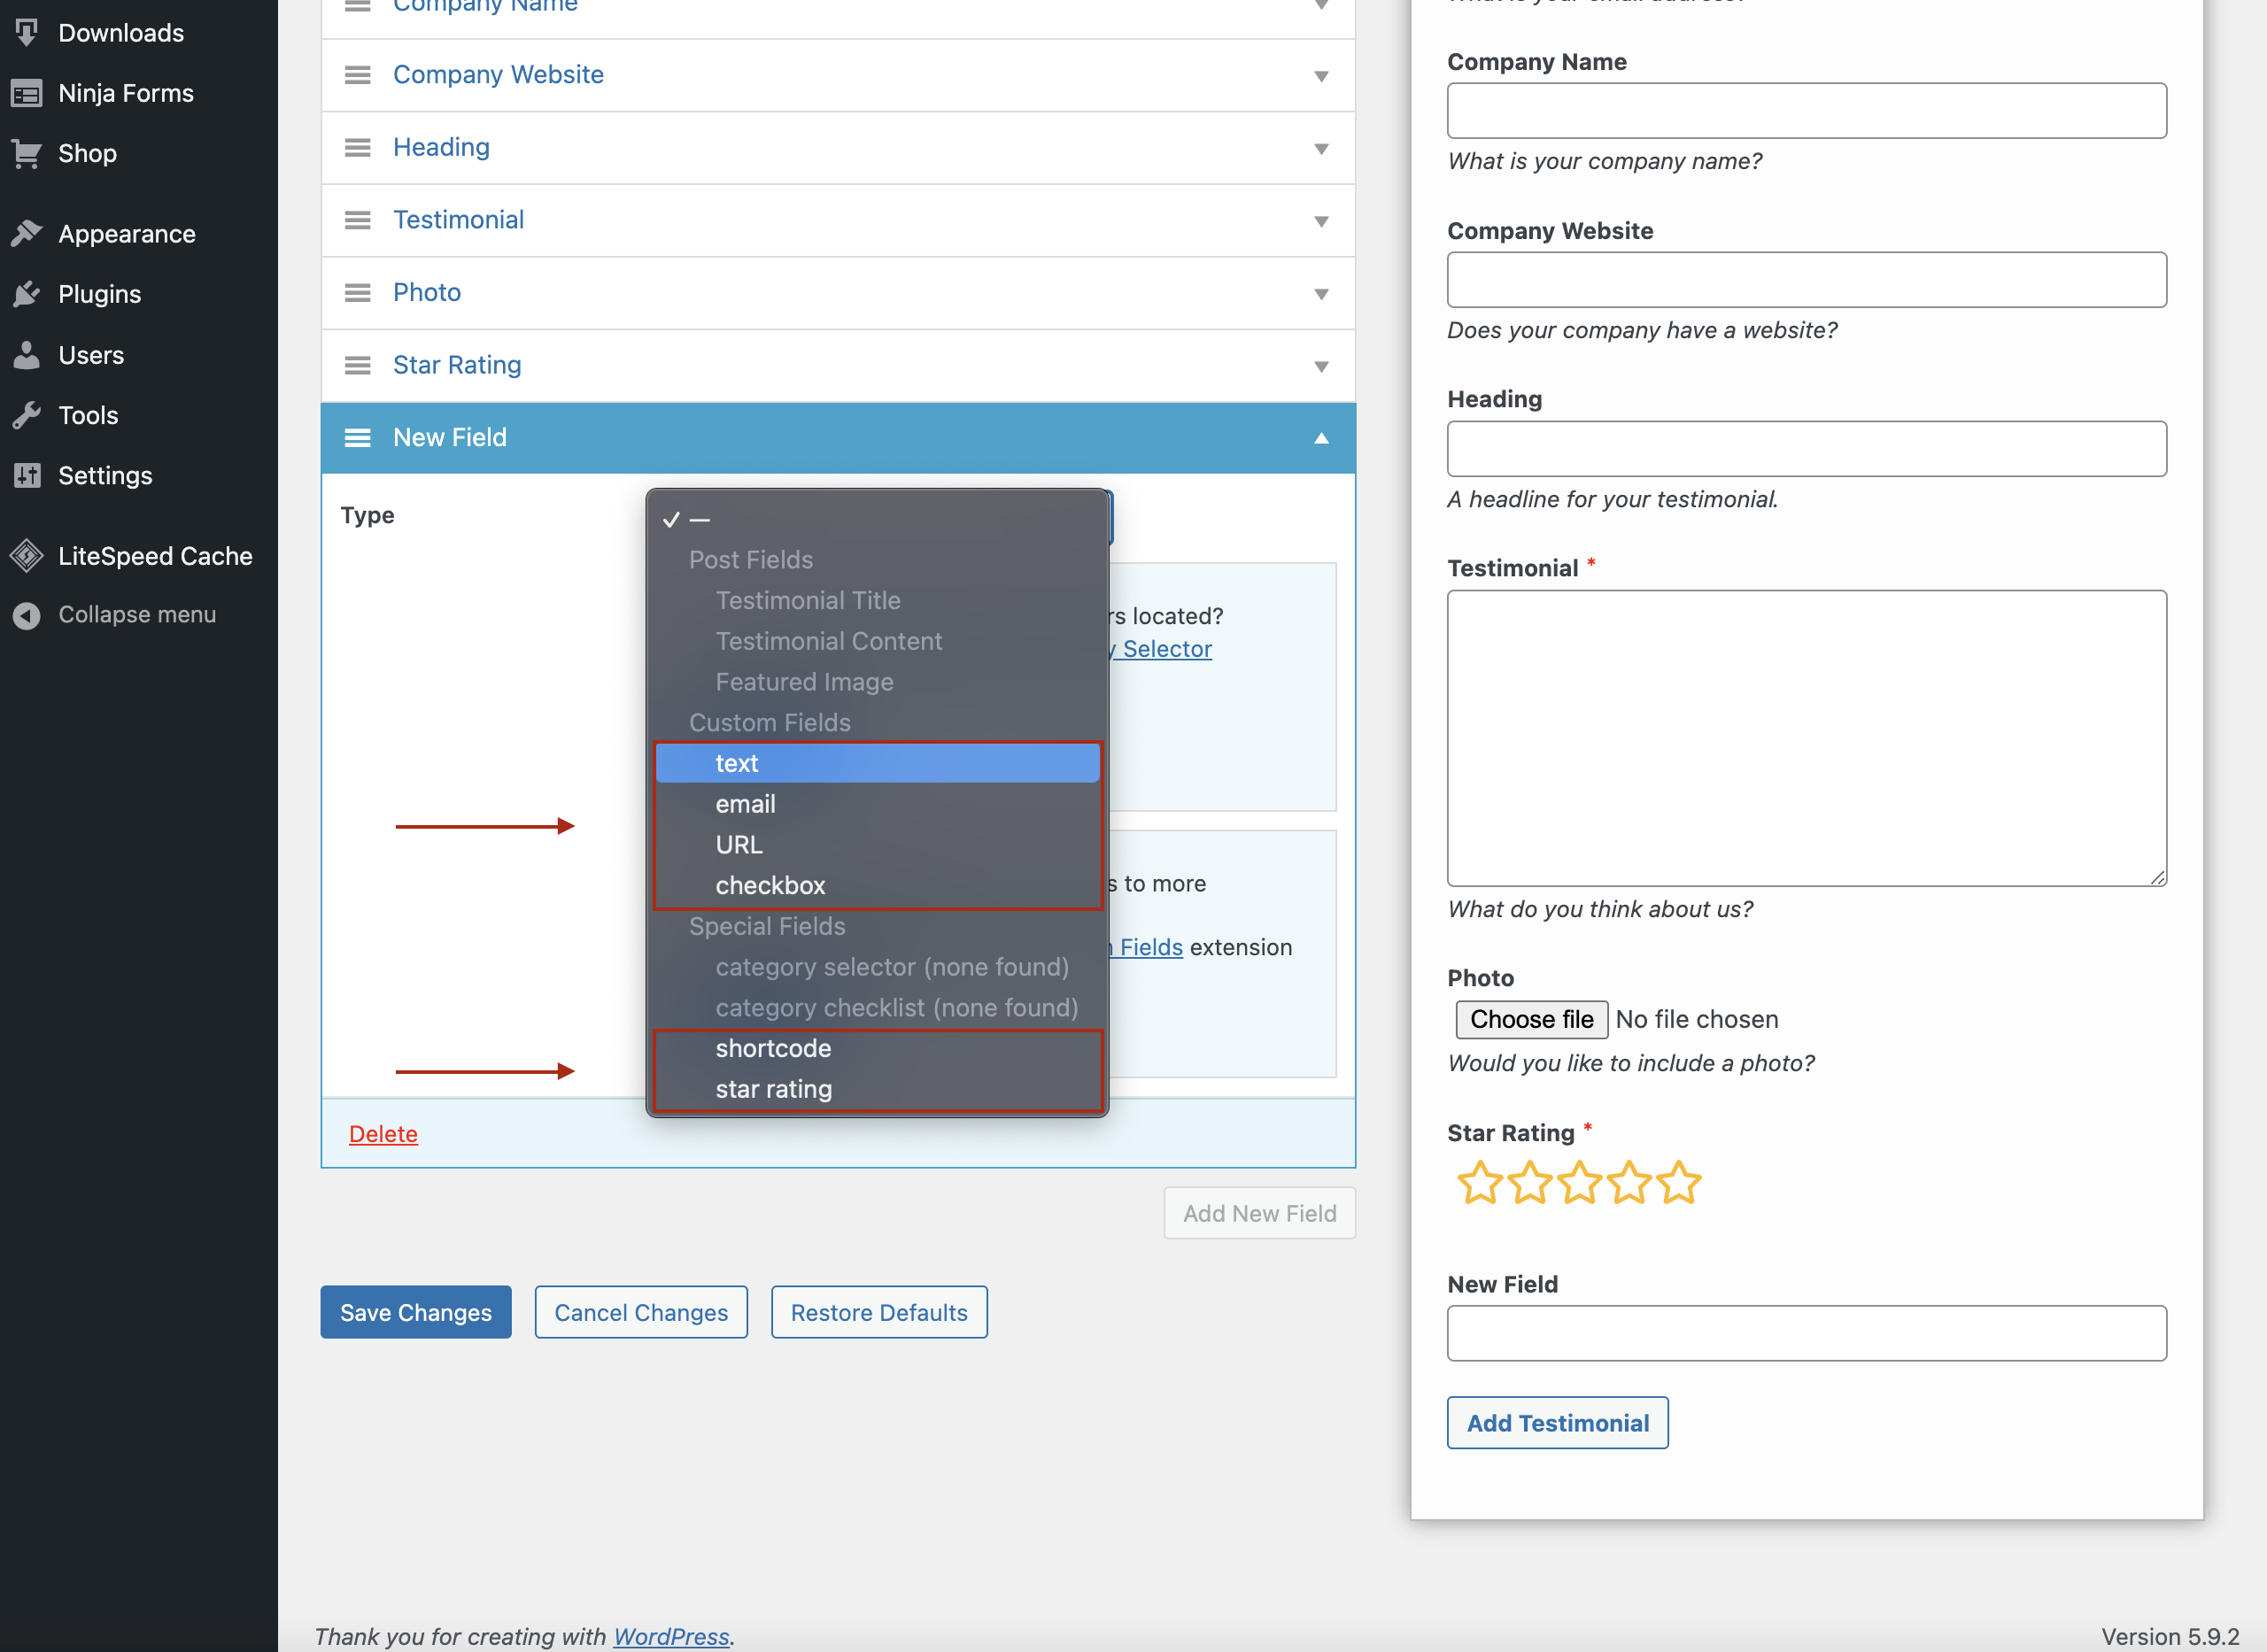
However, installing the Custom Fileds, Country Selector, and Asignment extensions will give you more fields:
- Textarea – This field will offer users enough space for users to leave a comprehensive testimonial.
- Select – This field provides the ability to create a list where users will choose the answer that best suits them.
- Video – Users will be able to add a video testimonial in the form.
- Assignment – To automatically assign the testimonial to a specific service, post or page.
- Country Selector – Users will be able to select from the drop-down list the country they are from.
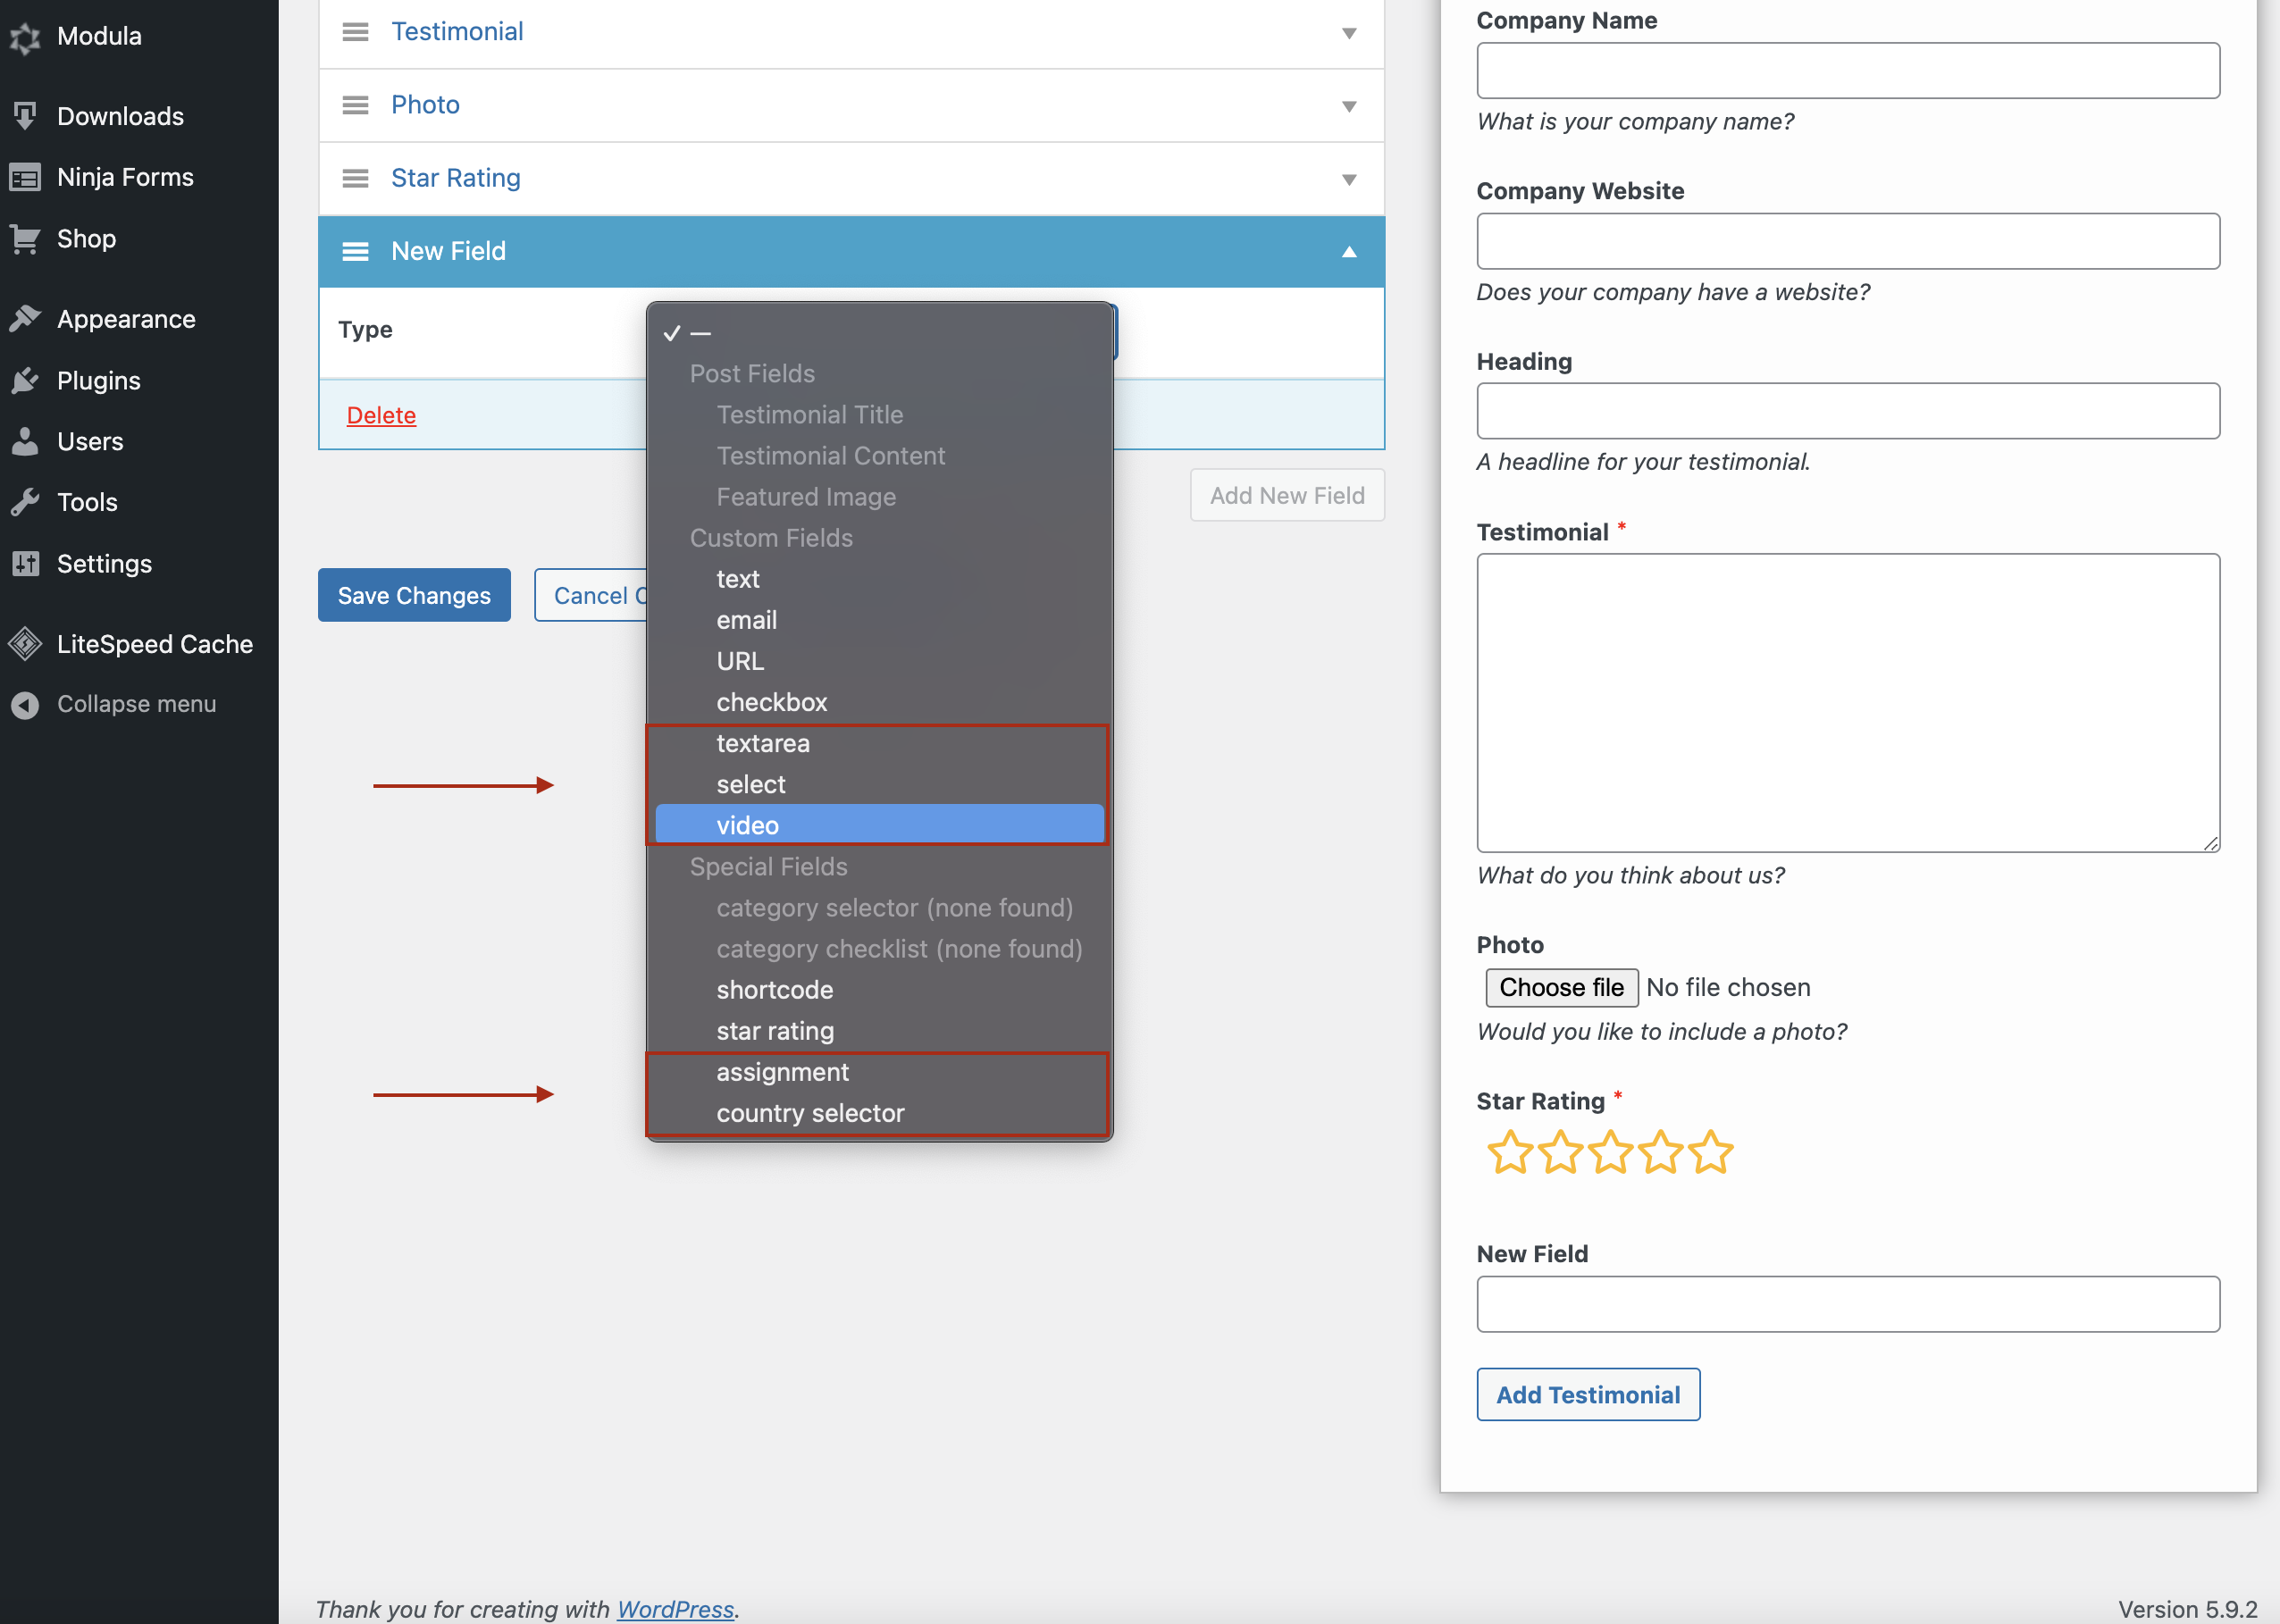
Customize the form as needed, add fields that best fit your site, and click Save Changes.
Set up email notification
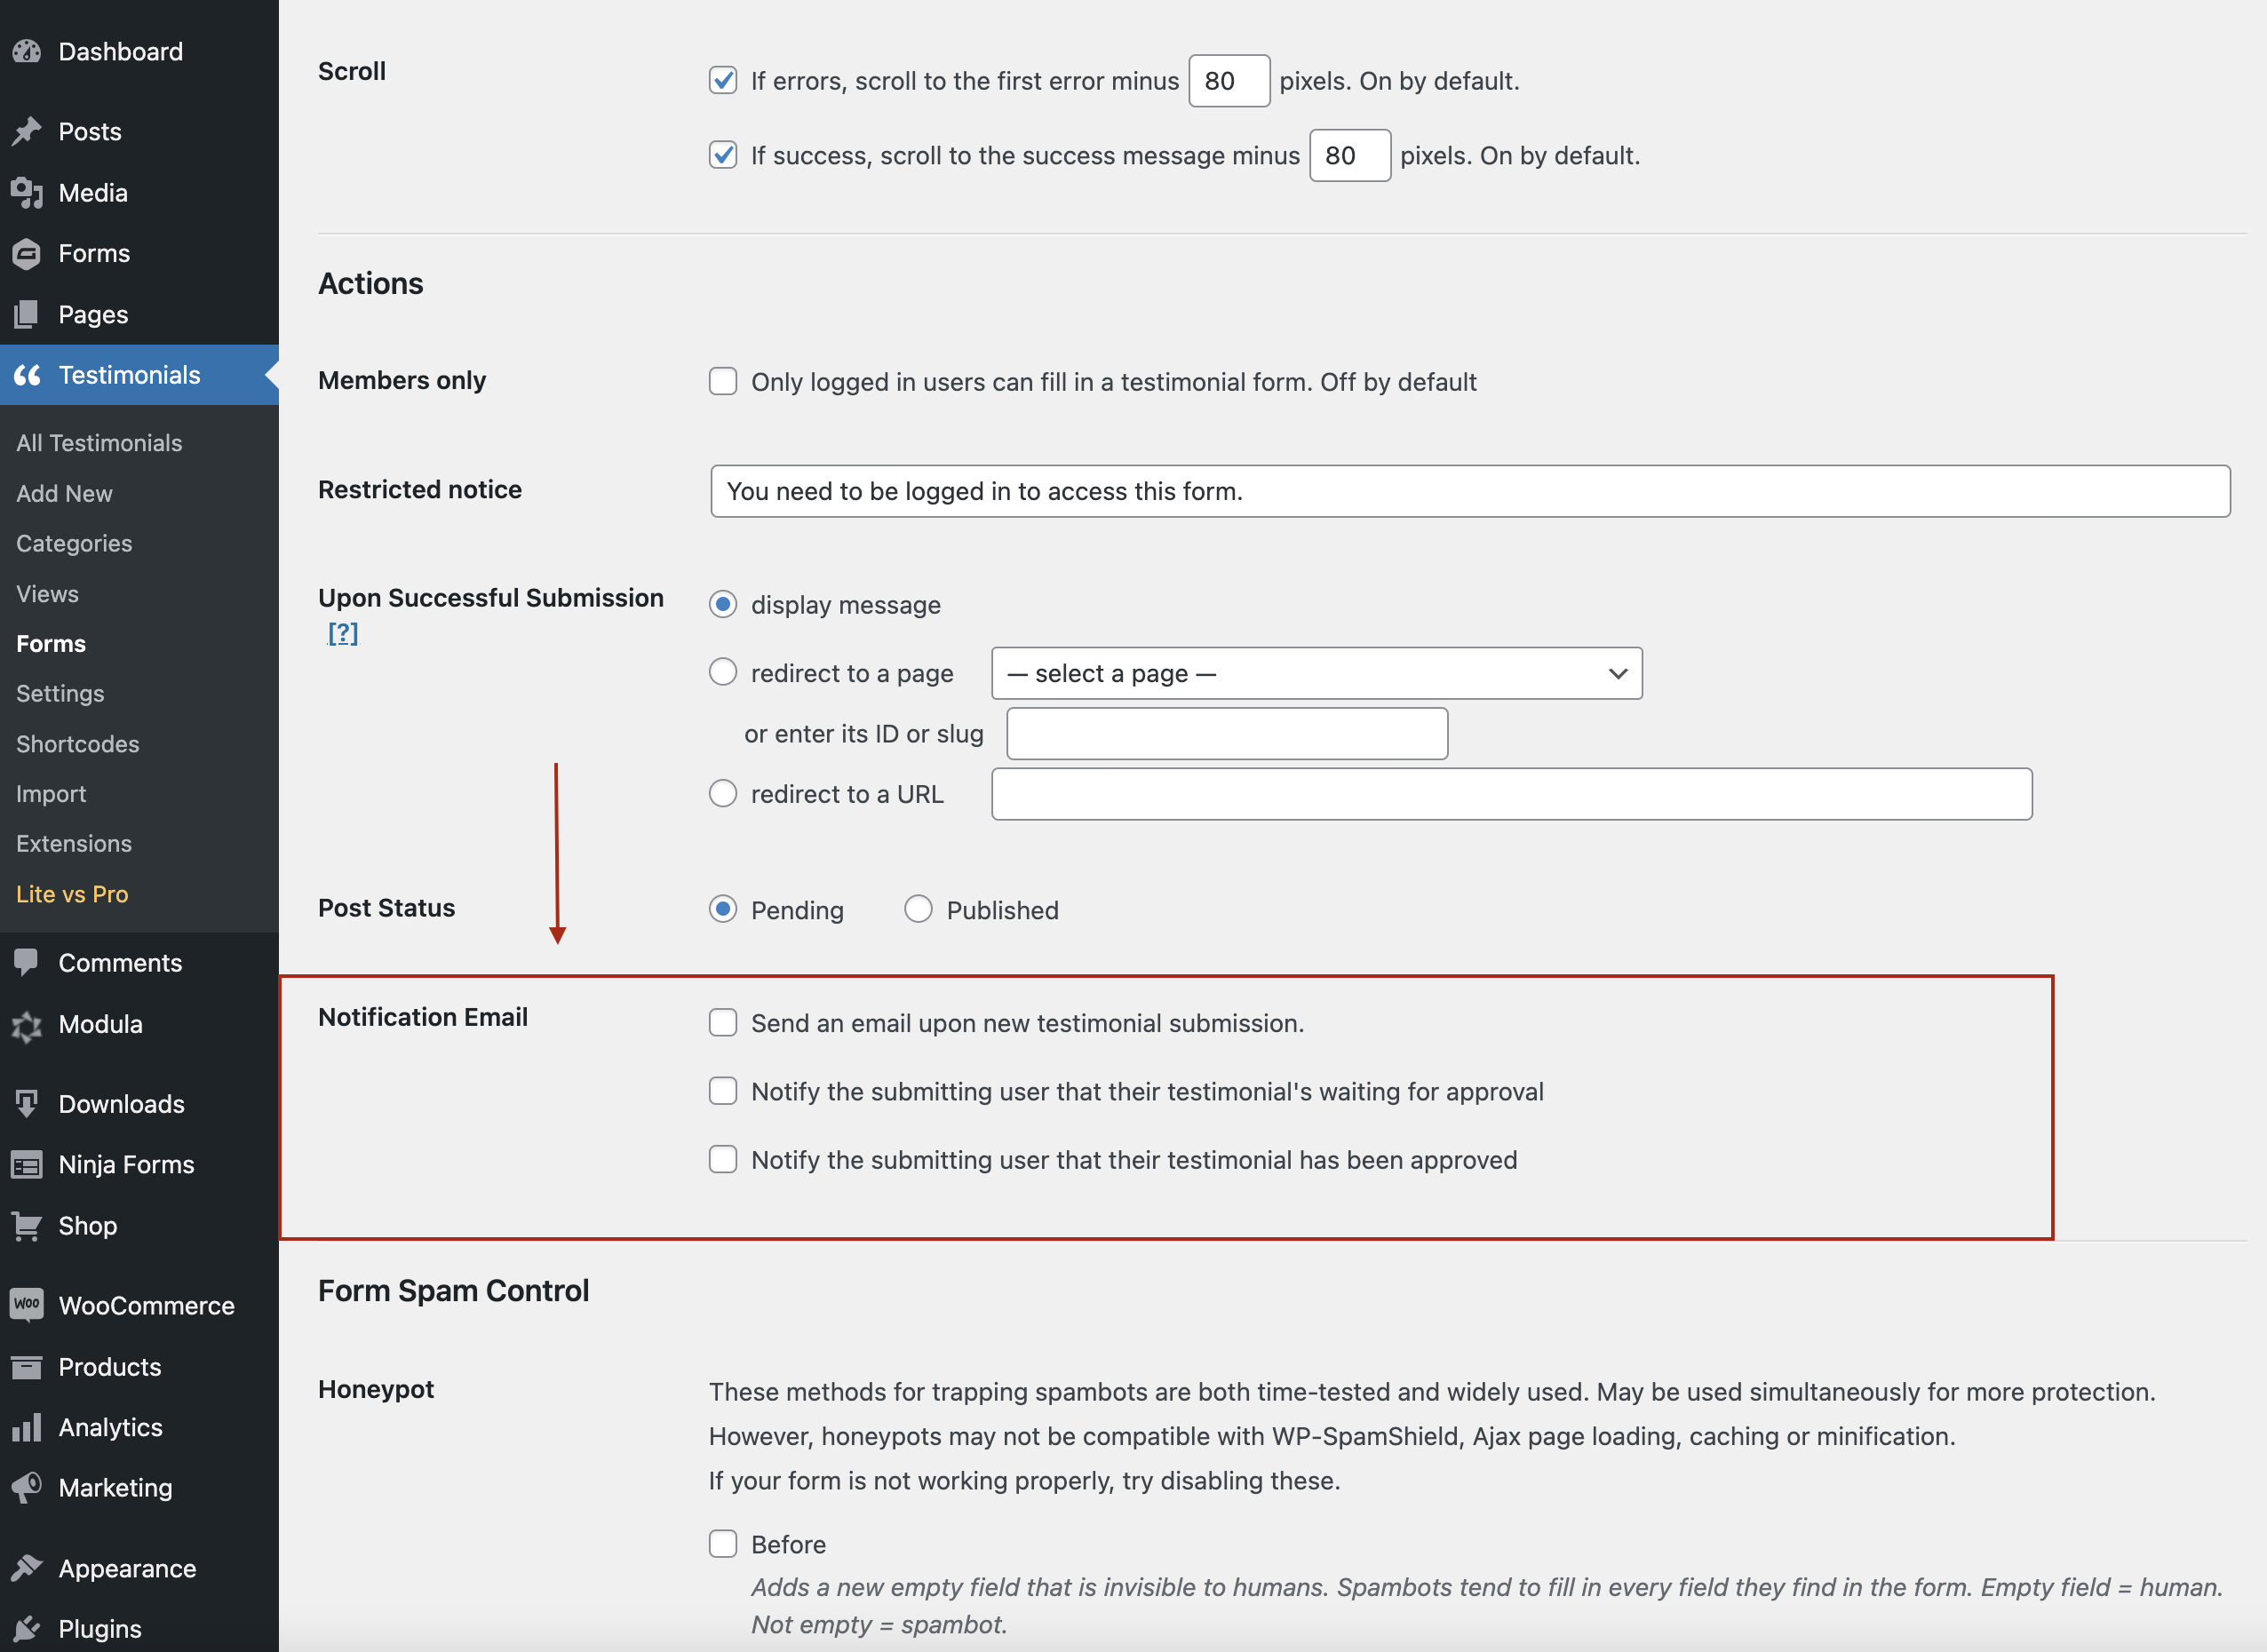
There’s more! With the help of the Enhanced Emails extension (available in Strong Testimonials PRO), an email will be sent to the customer upon new testimonial submission and also when the testimonial is approved. To use and enable it go to Testimonials > Forms > Settings > scroll down to Actions. You will see in the ‘Notification Email’ section that you have 3 options:
- Send an email upon new testimonial submission;
- Notify the submitting user that their testimonial’s waiting for approval;
- Notify the submitting user that their testimonial has been approved.
Using the MailChimp extension, you can automatically subscribe your users to a MailChimp email list. Follow up with a targeted message or a coupon to thank them for leaving a good review.
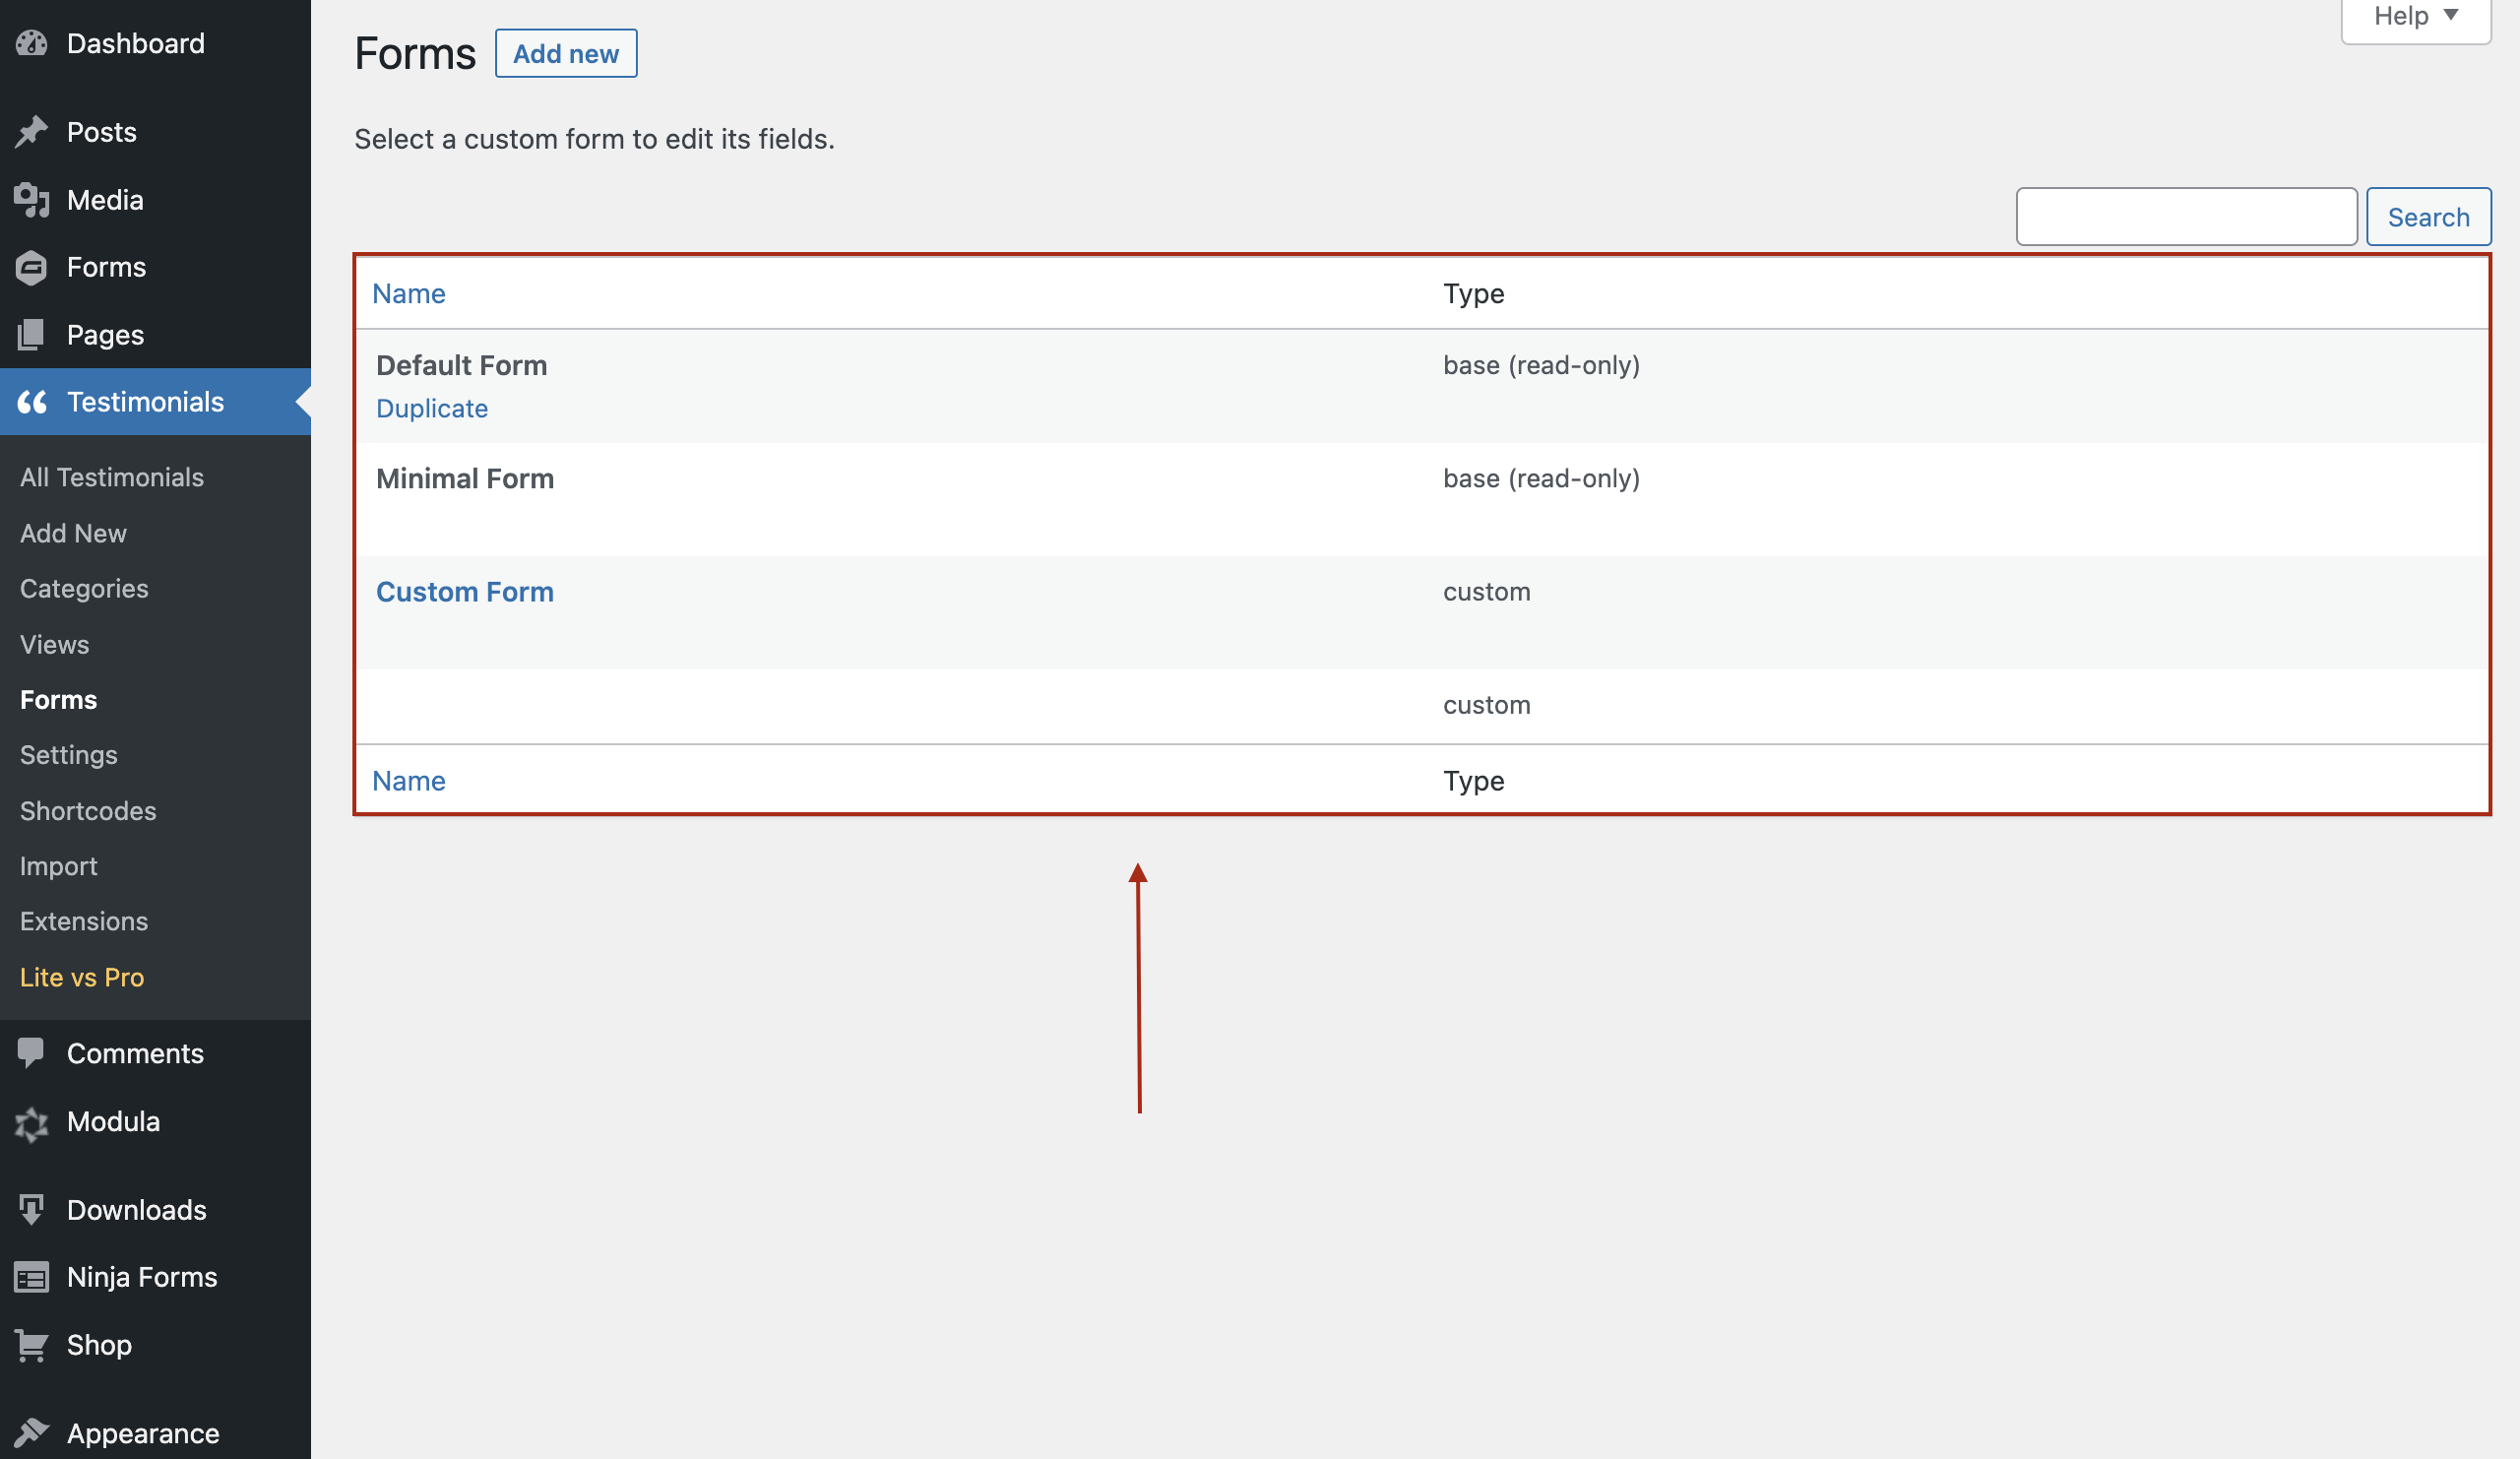
Strong Testimonials includes a form to approve new testimonials from your customers. With the Multiple Forms extension (available in Strong Testimonials PRO), you can create a unique form for each product or service you offer. These fields can then be added to any testimonial view.
Create a view
To be able to post the testimonial form on your website, go to Testimonials > Views > Add New and select the Form mode.
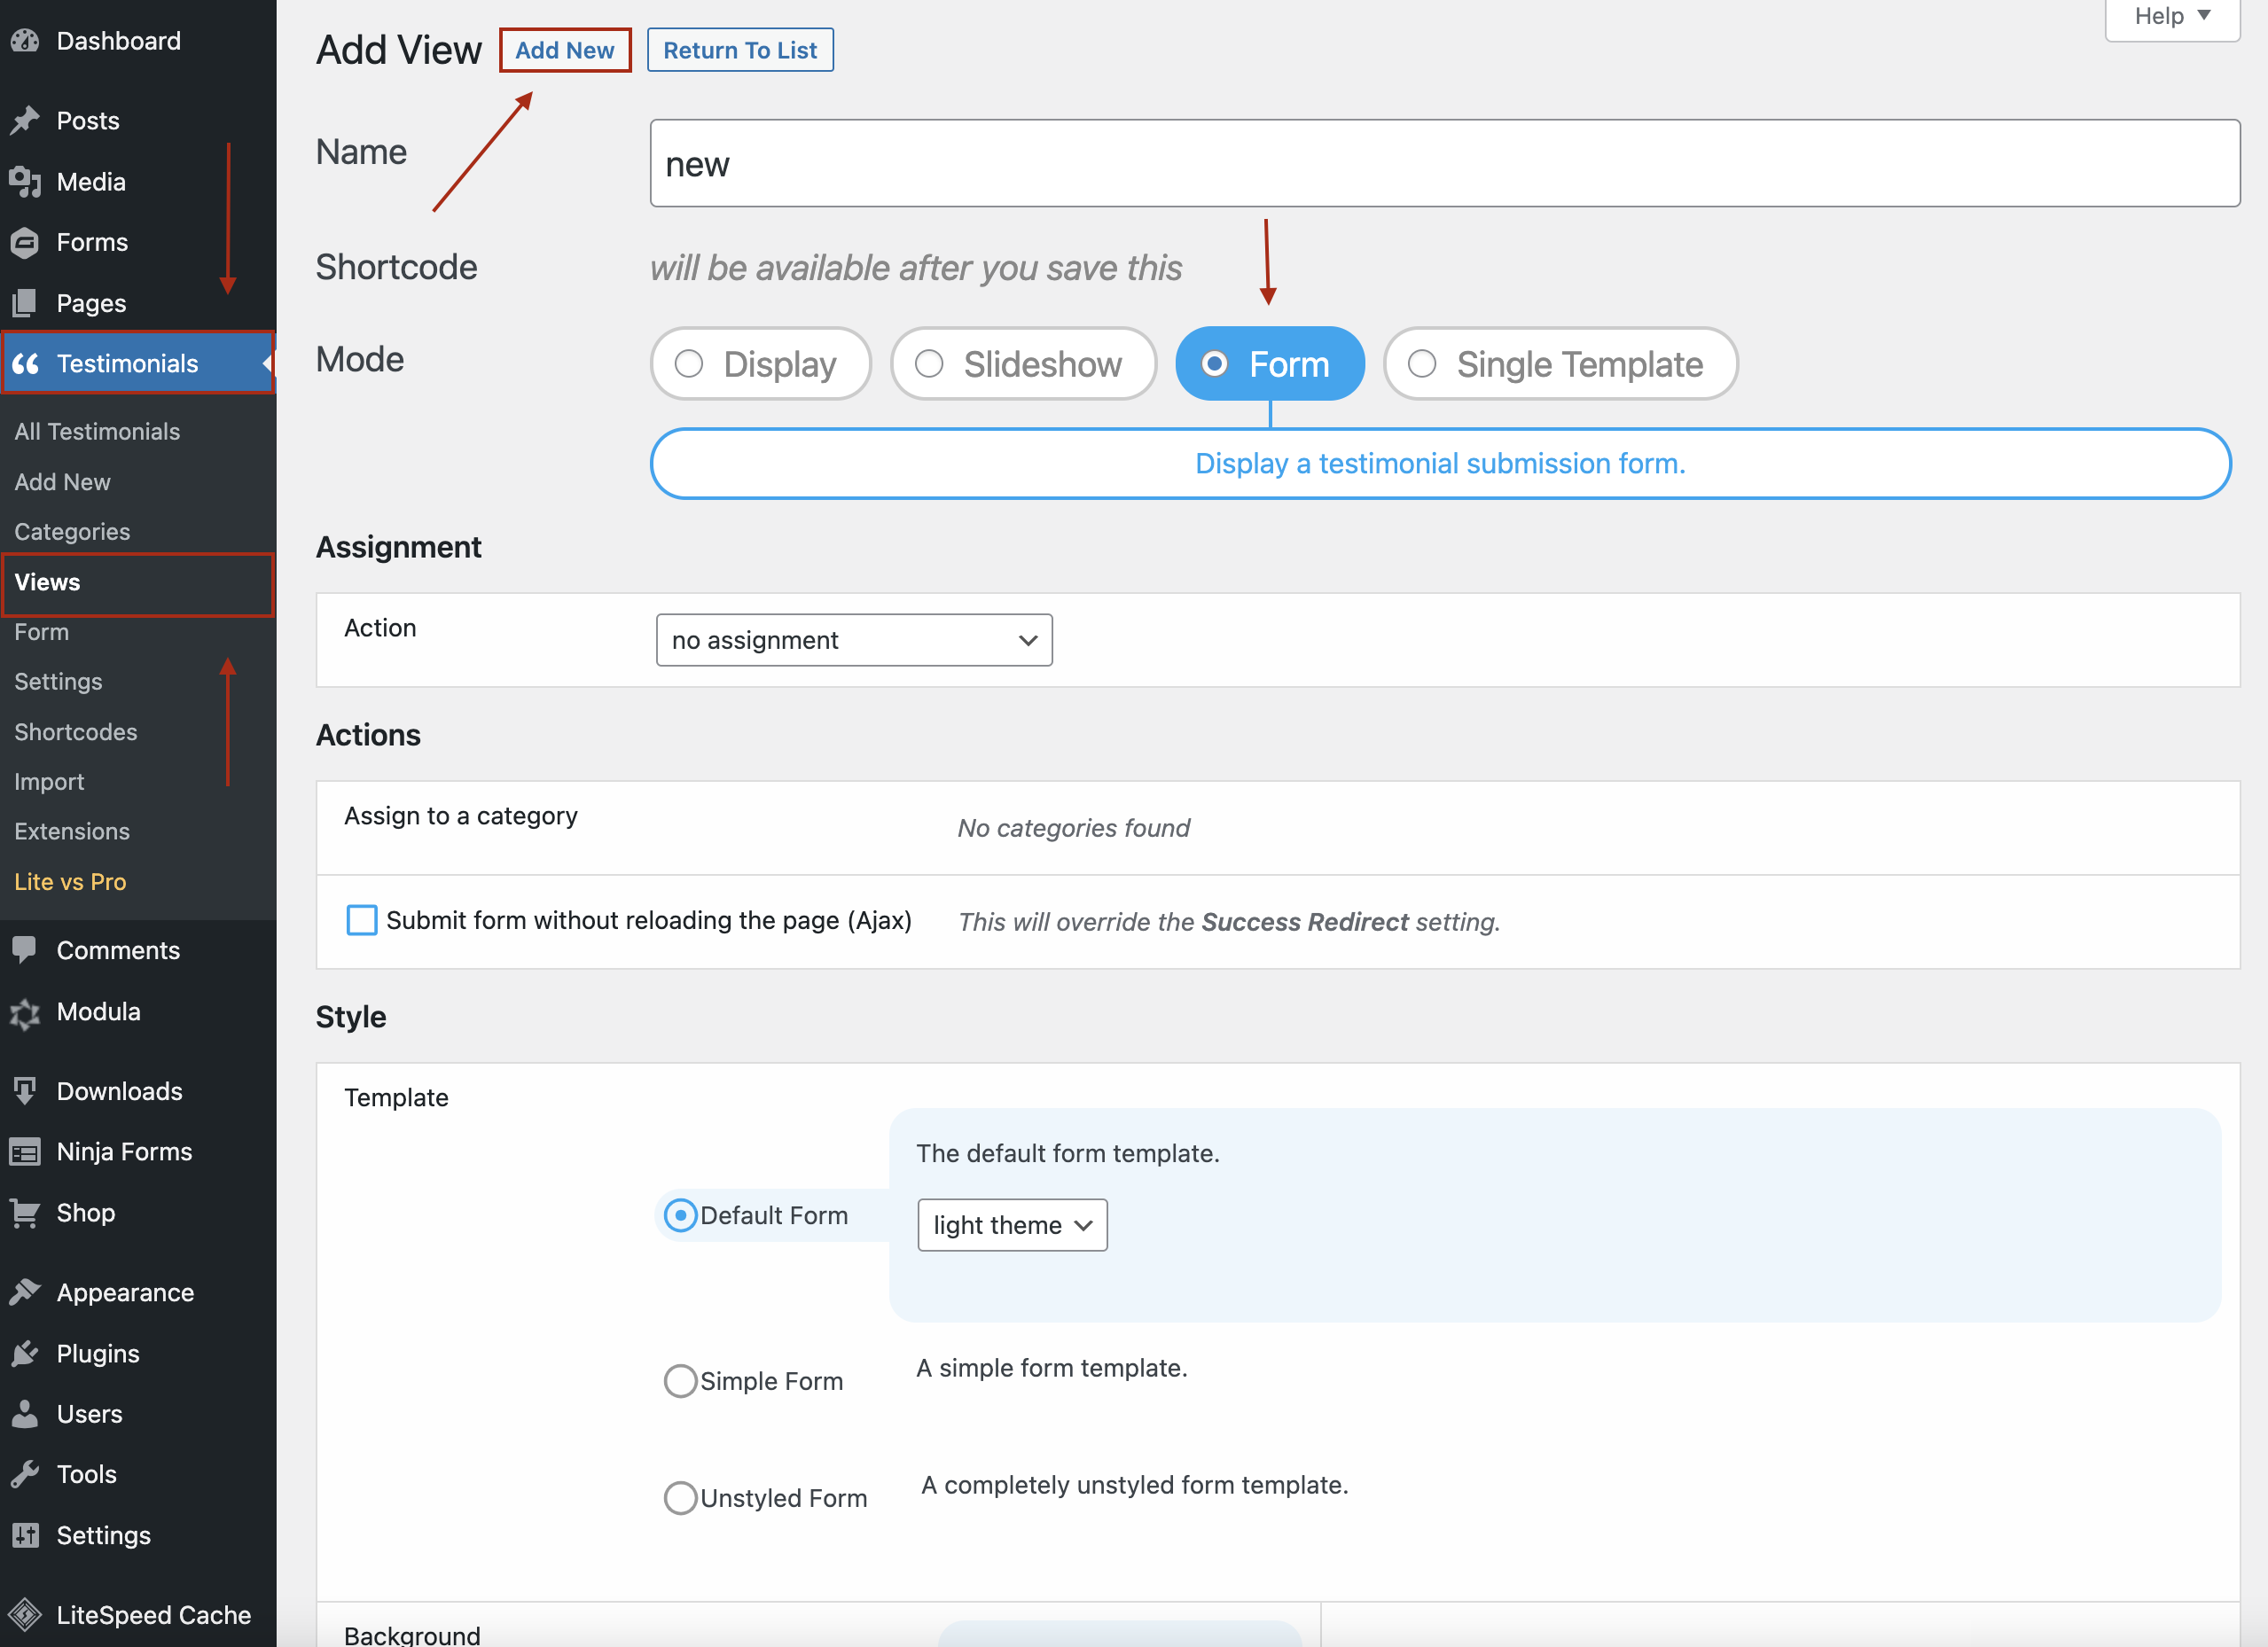
You can also customize your form by choosing a template, background, and font color. Once you’re done, click Save Changes.
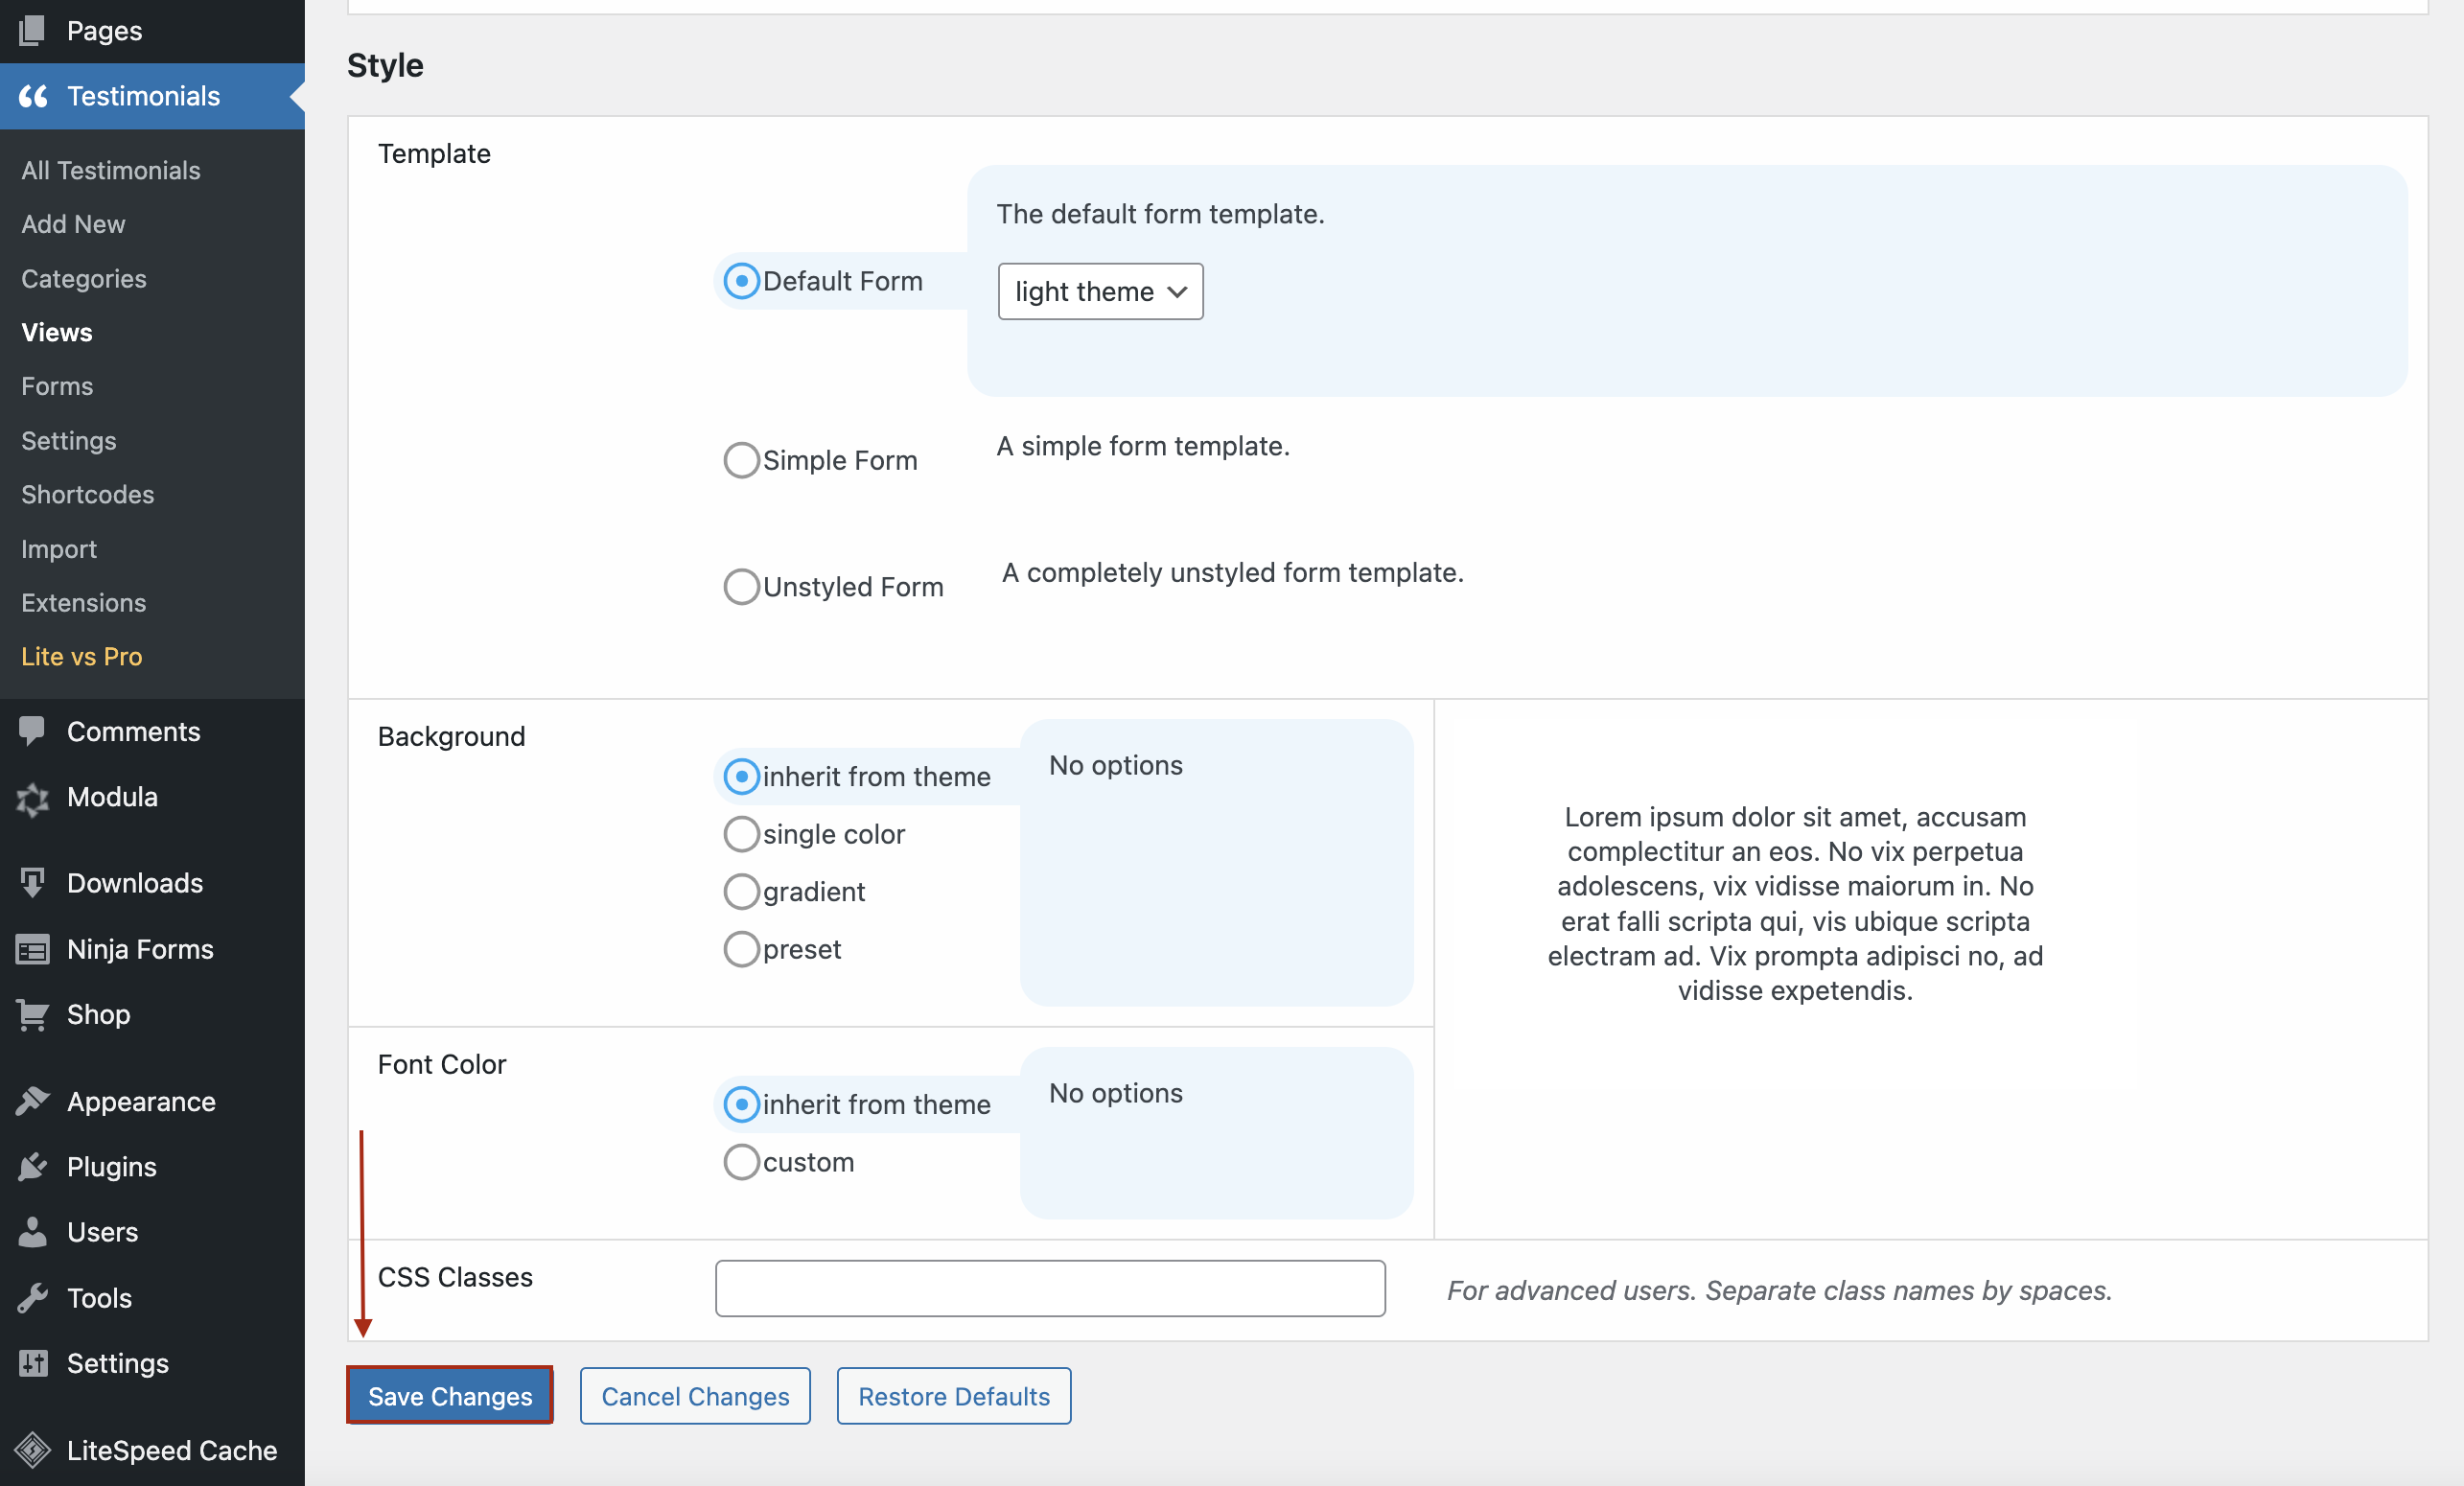
After saving the changes, Strong Testimonials will generate a shortcode for your form.
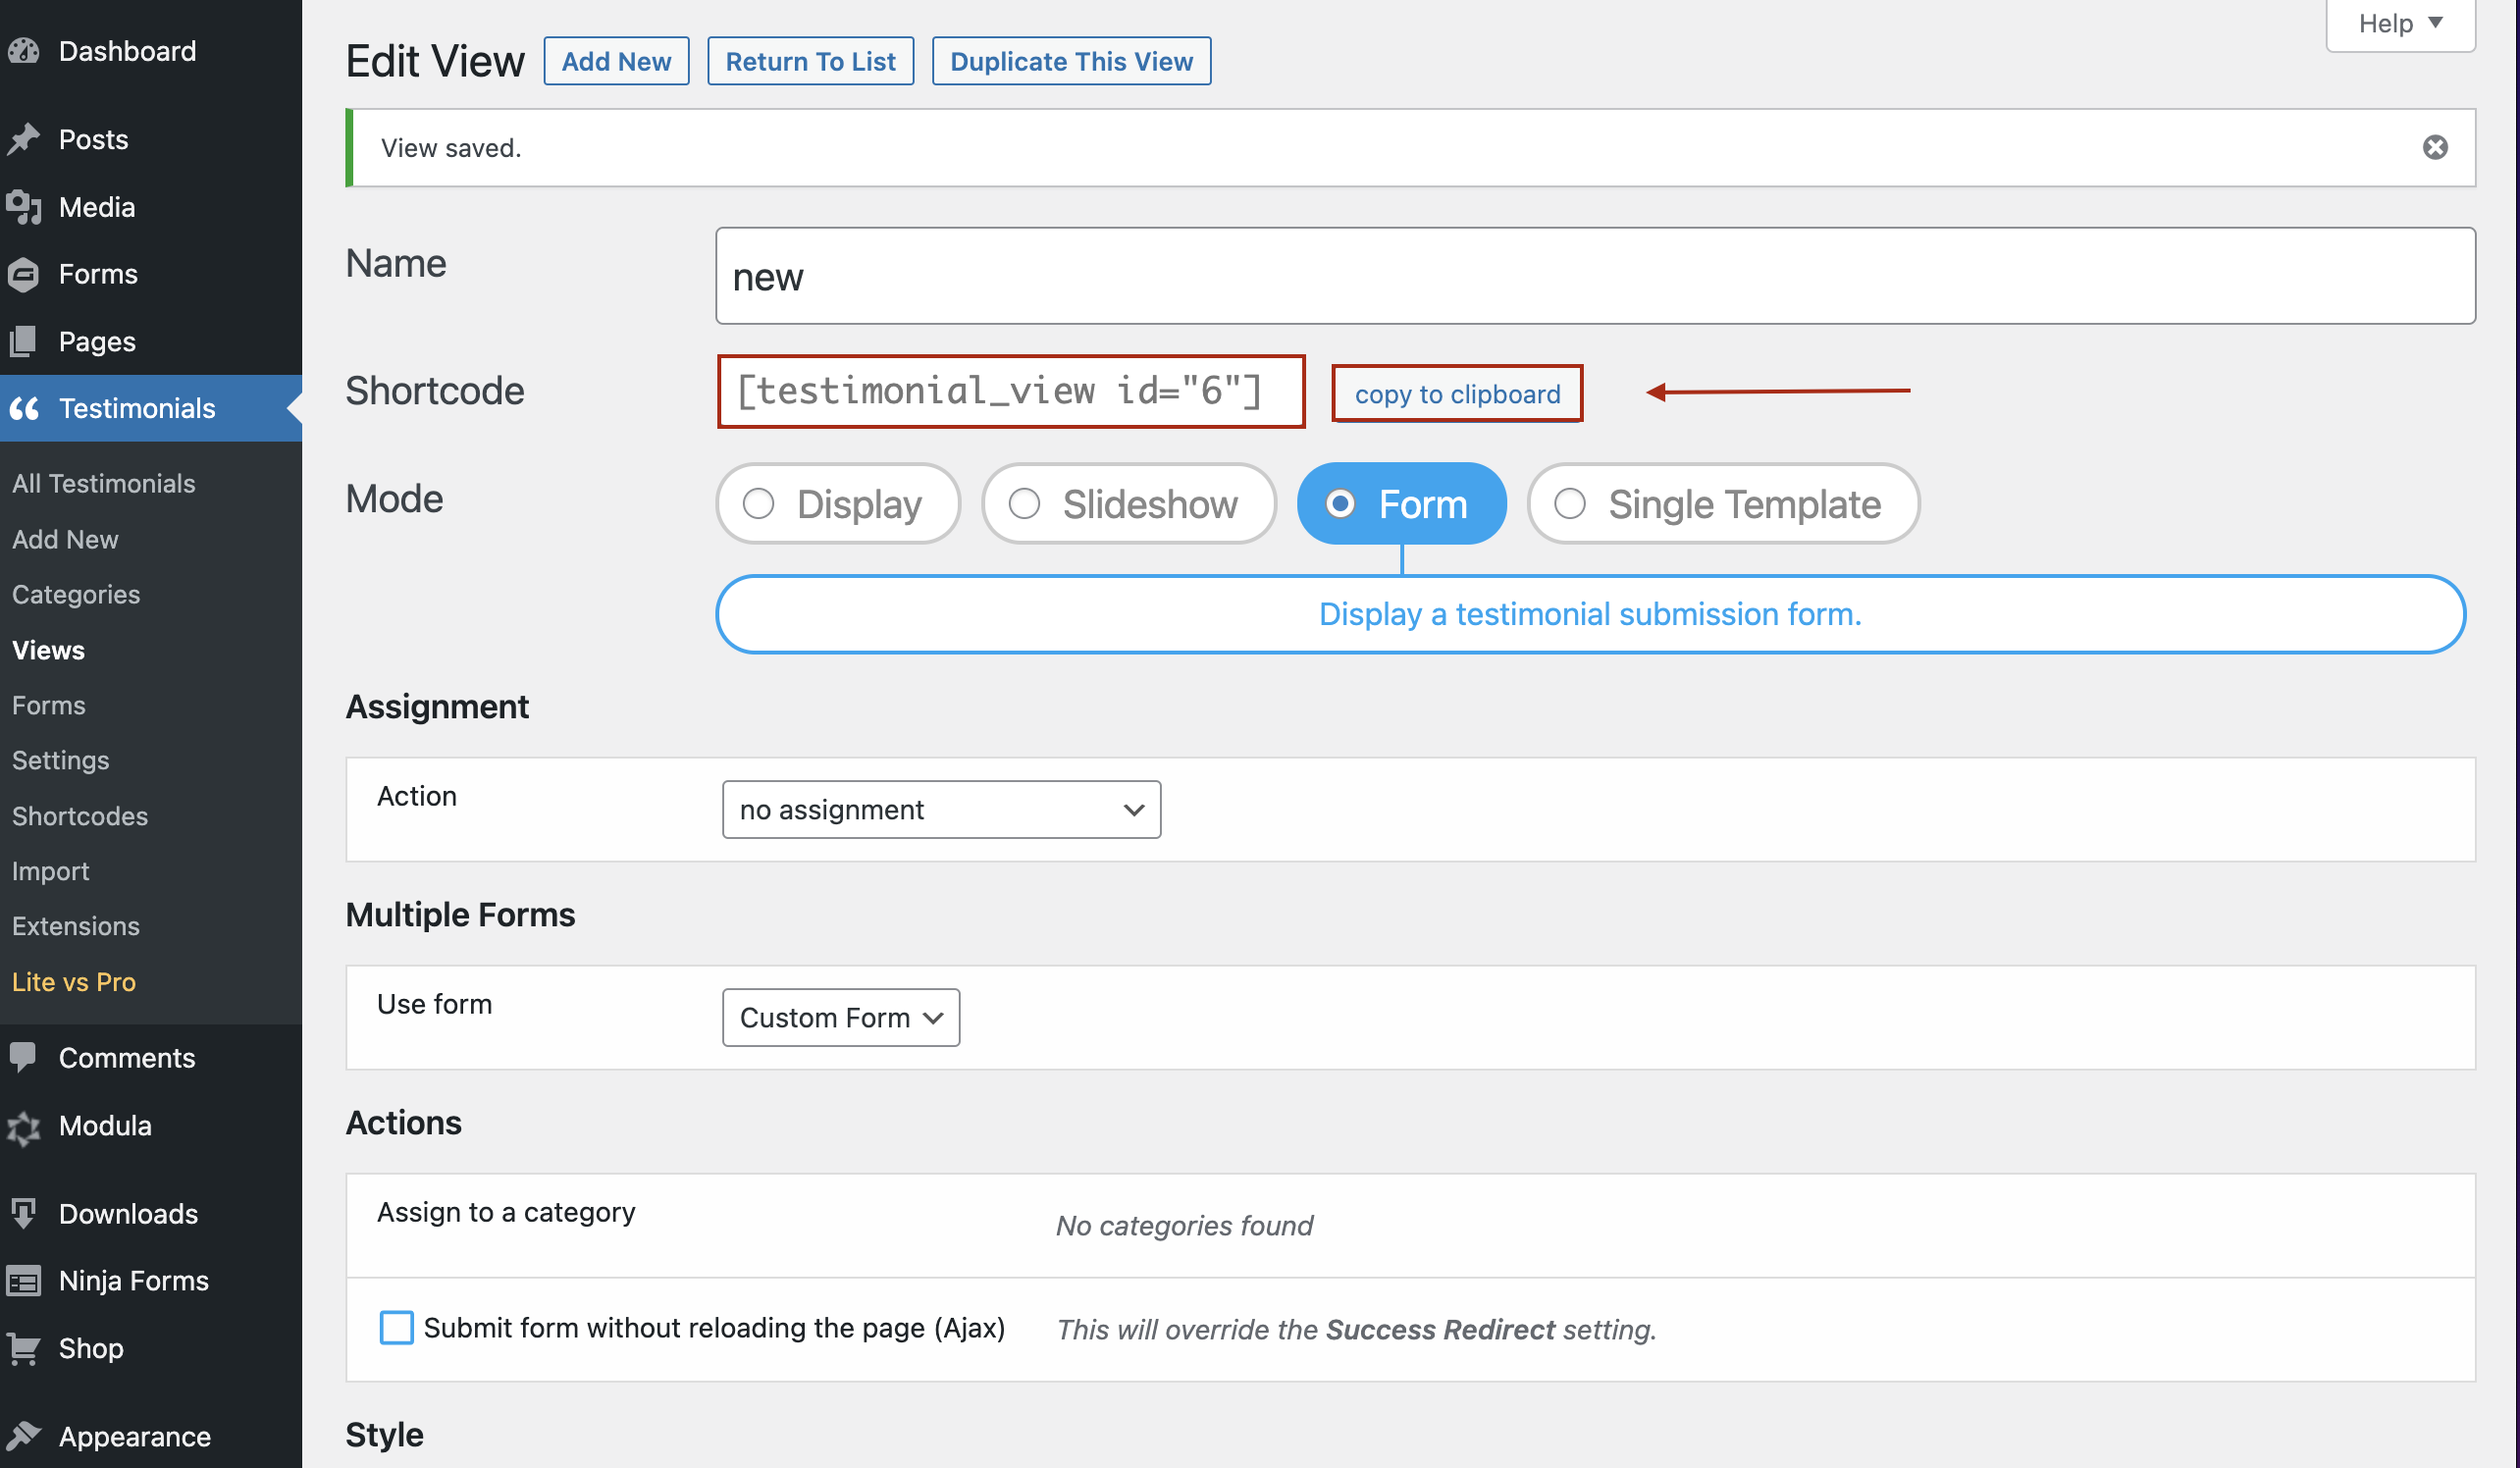
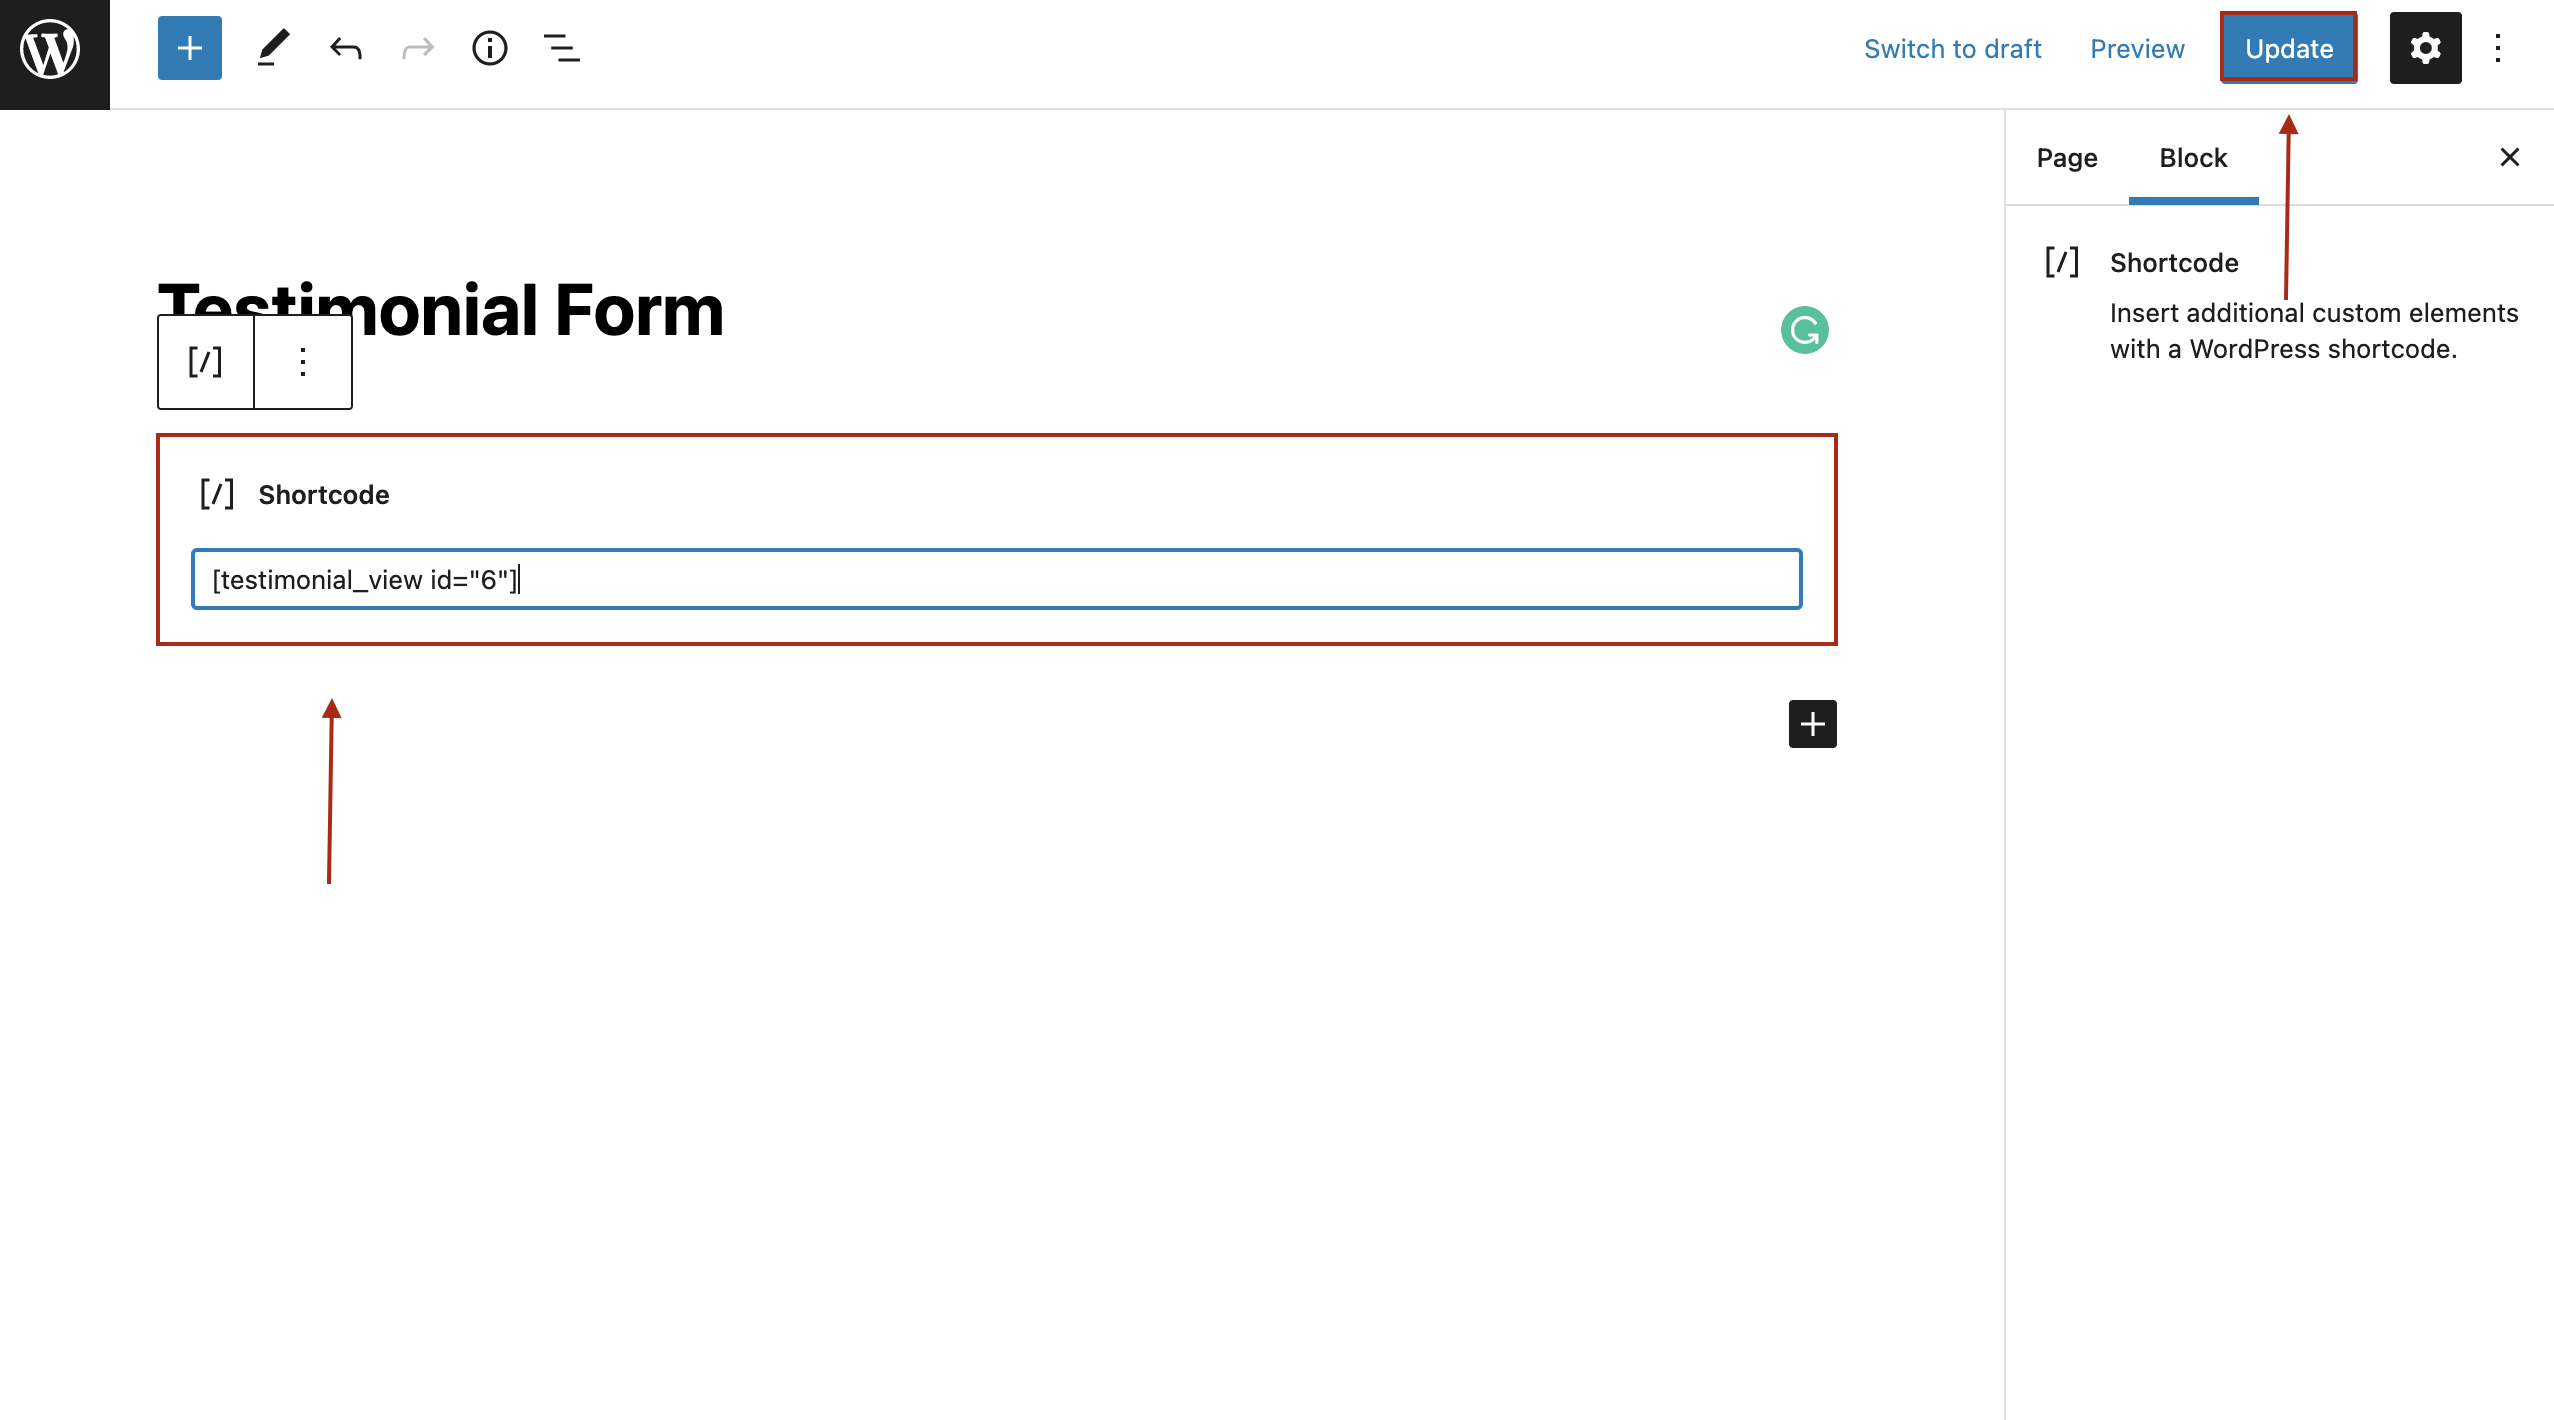
Copy the shortcode, paste it into a page or post and click Publish or Update.
Once your customers fill in the testimonial form, if you go to Testimonials > All Testimonials, you’ll see pending testimonials waiting for your approval.
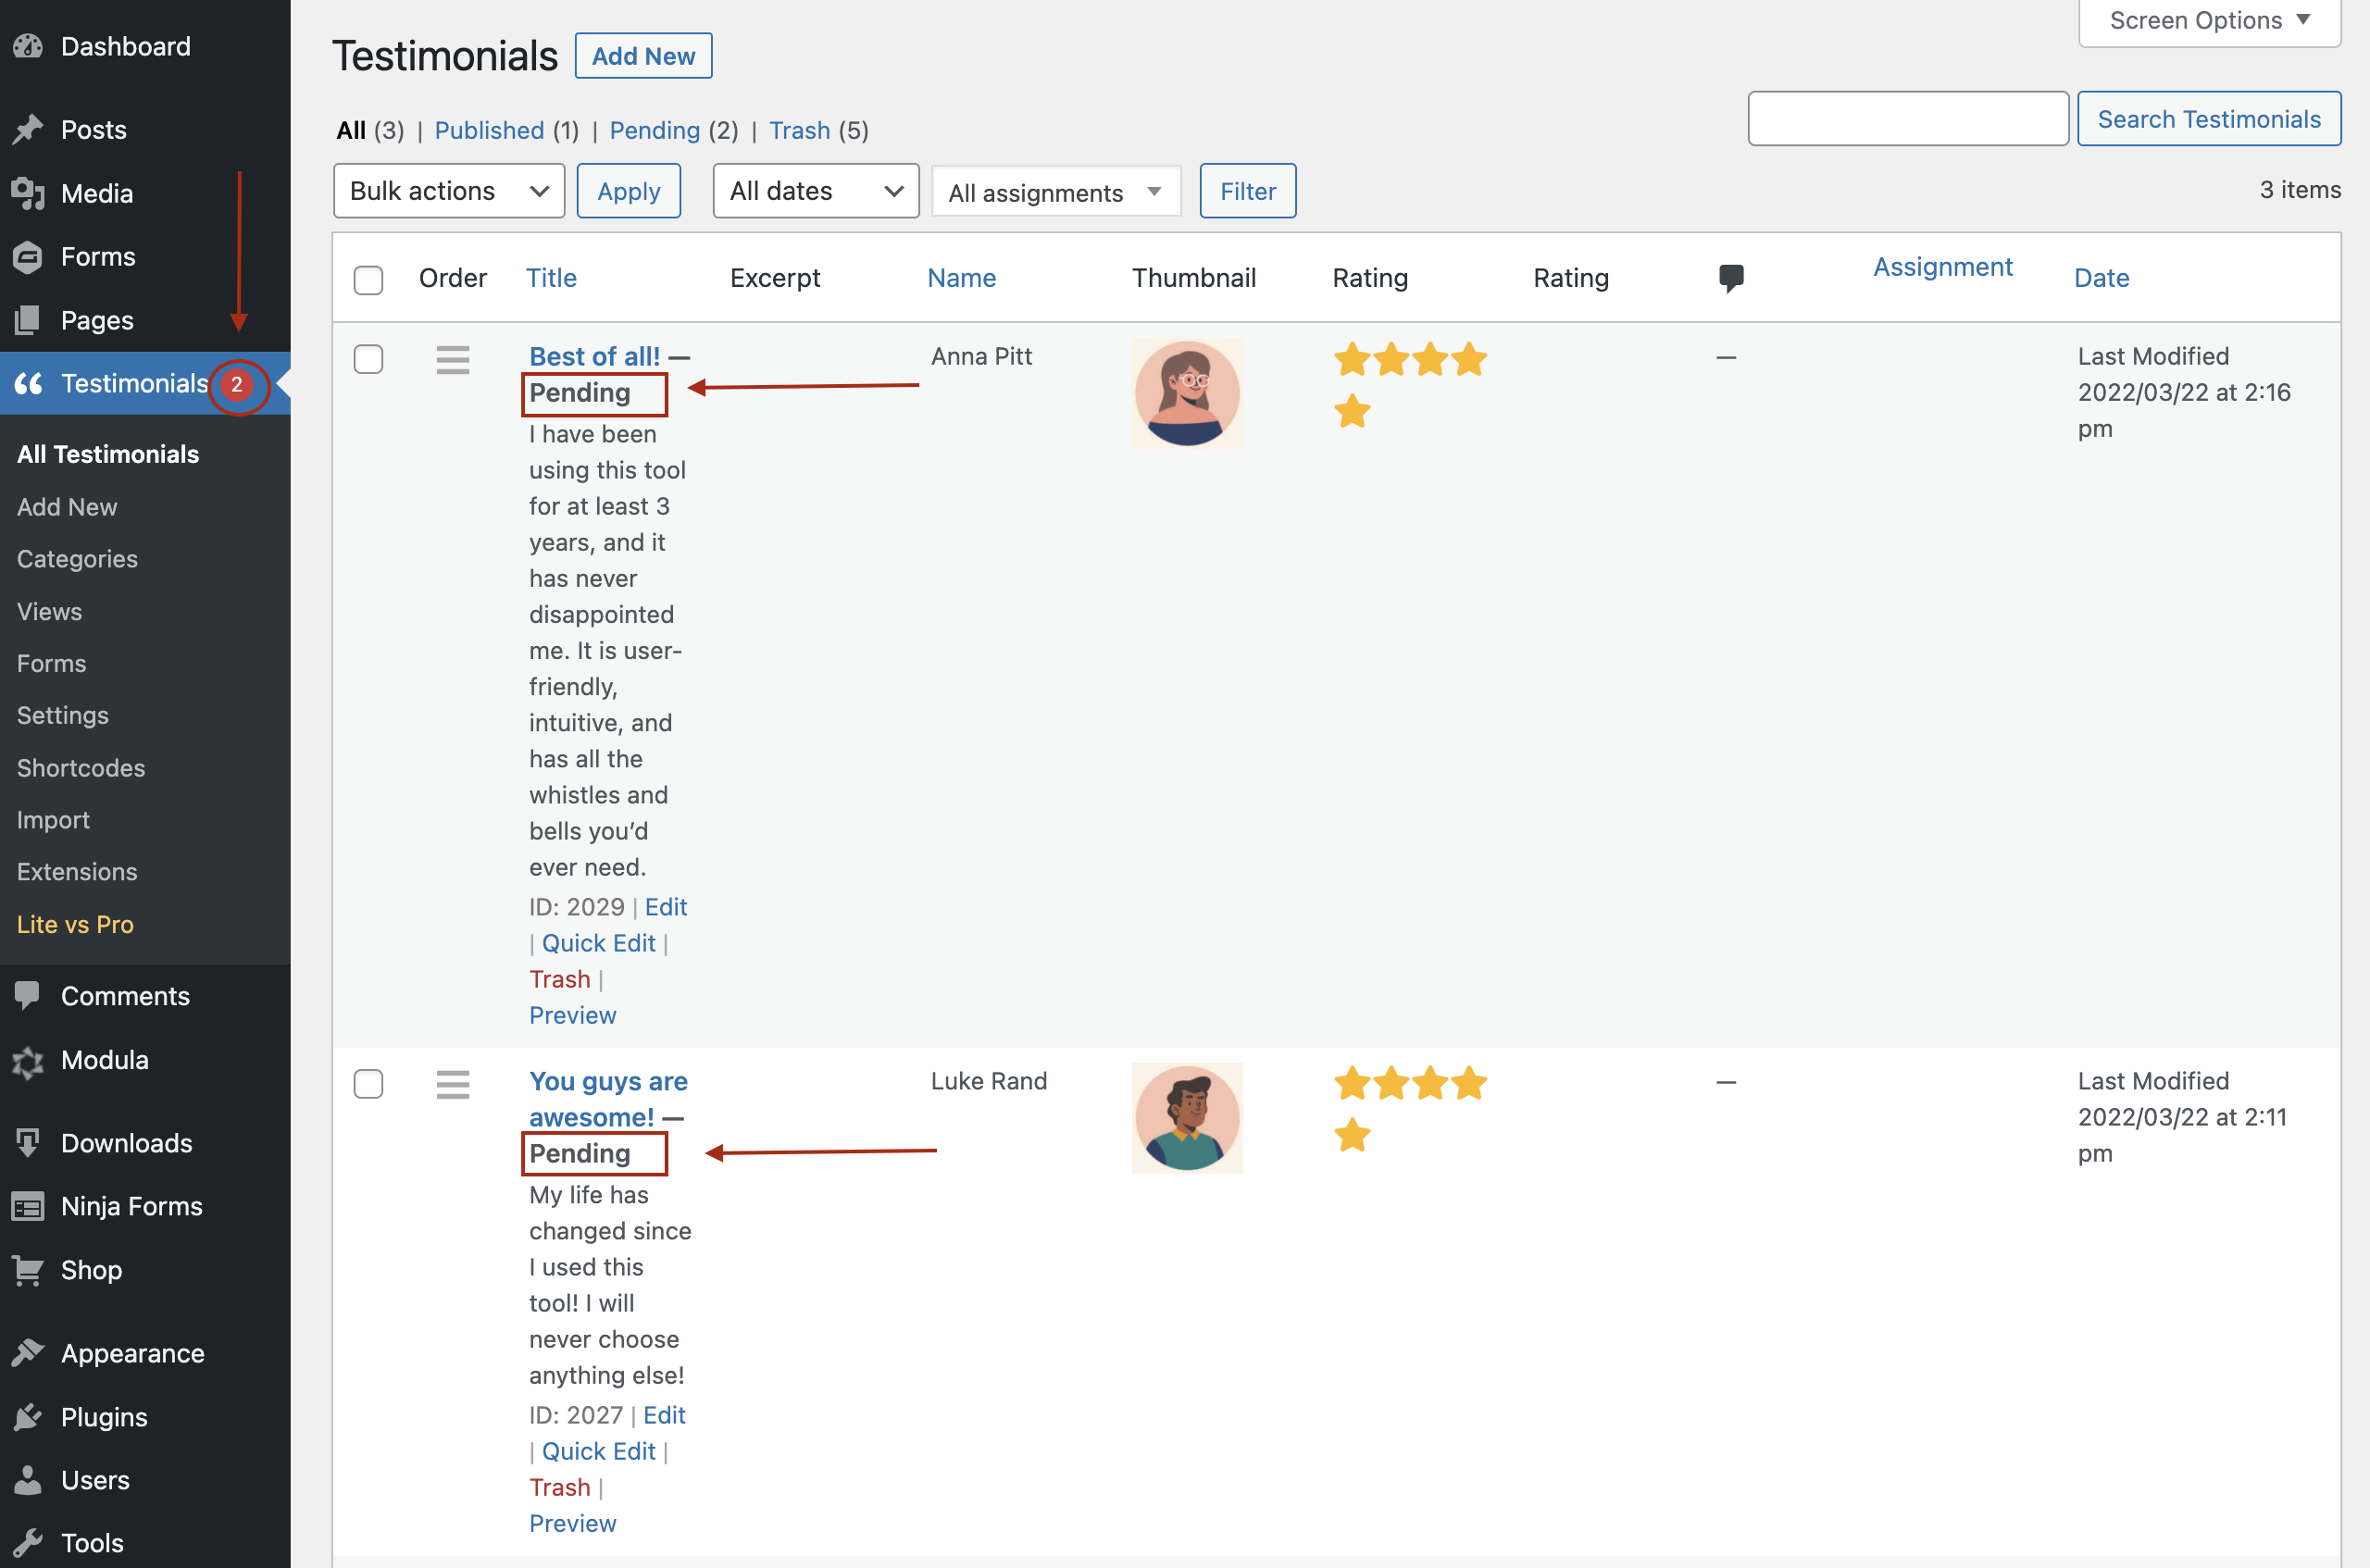
So, click on a testimonial, and you’ll be redirected to the Edit testimonial page. To approve the pending testimonial, click Publish.

3. Import reviews from third party websites
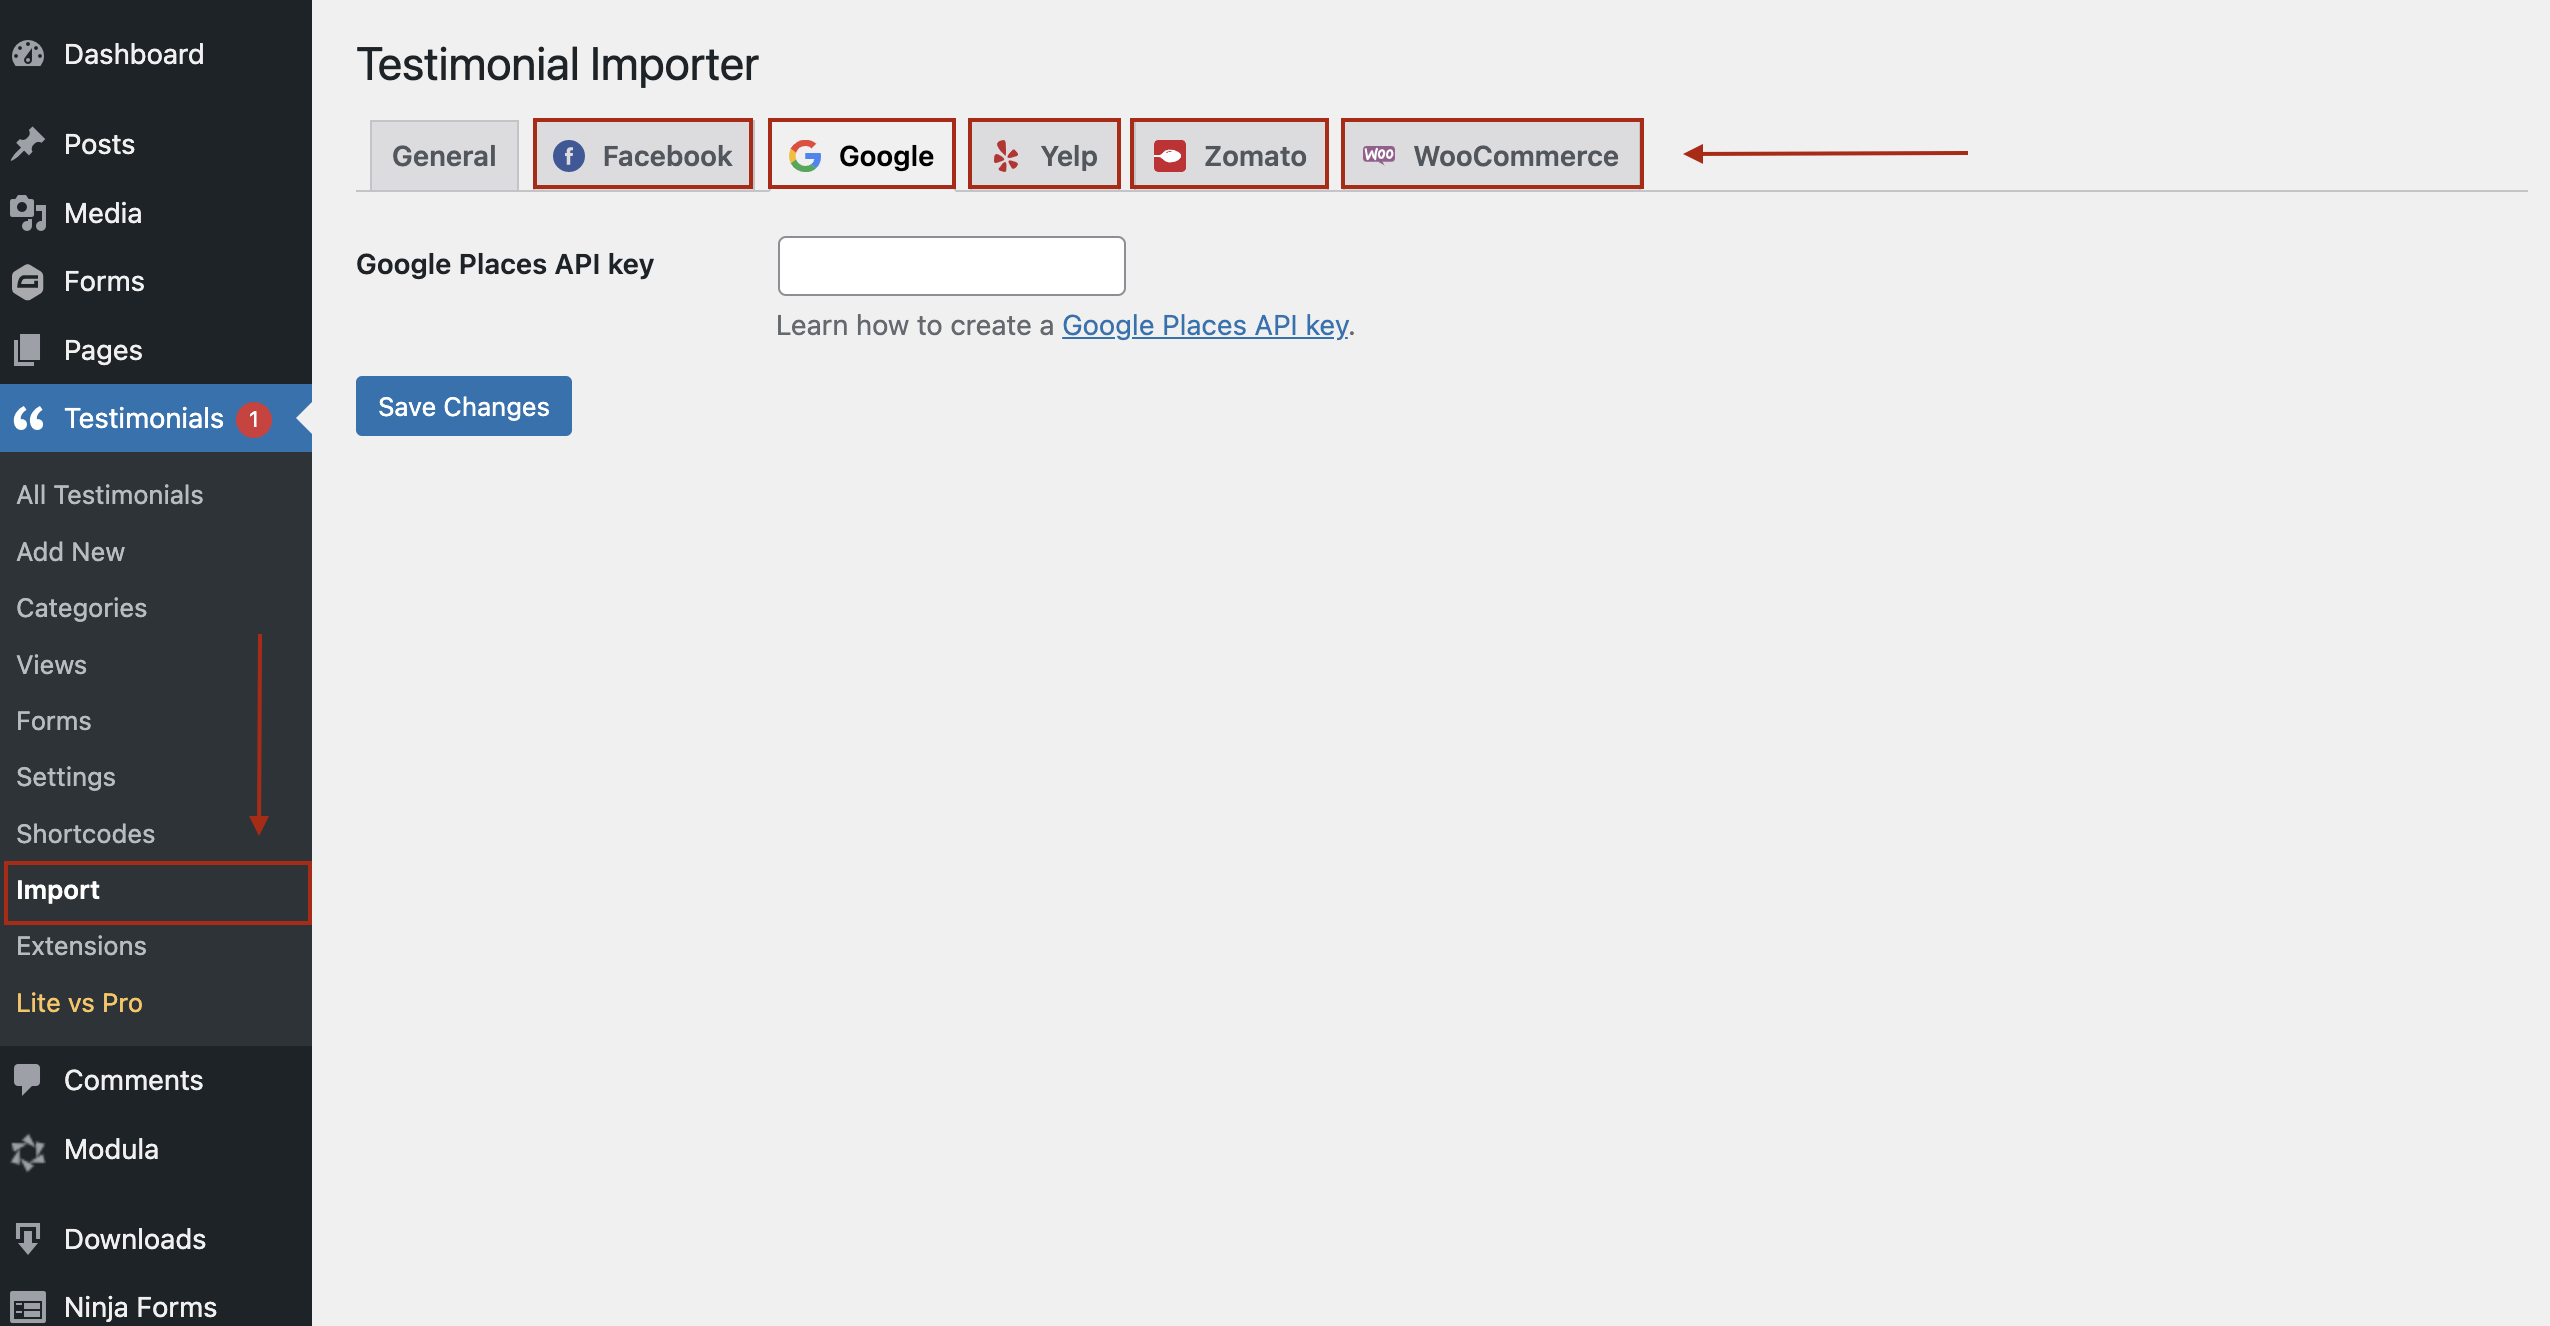
Using the Strong Testimonials Importer extension (available in Strong Testimonials PRO), you can import testimonials/reviews from these third-party sites Google, Facebook, Booking, Airbnb, Yelp, Trustpilot, Capterra and G2.
After activating the extension, go to Testimonials -> Import. You’ll need to create an API key for each website and add it to the meta box to allow Strong Testimonials to import reviews.
Create a view
The Views setting is basically a collection of settings with a simple editor. You can make as many views as you like. For example, one view for your testimonials, another for your testimonial submission form, and a third view for a slideshow of your testimonials on your website.
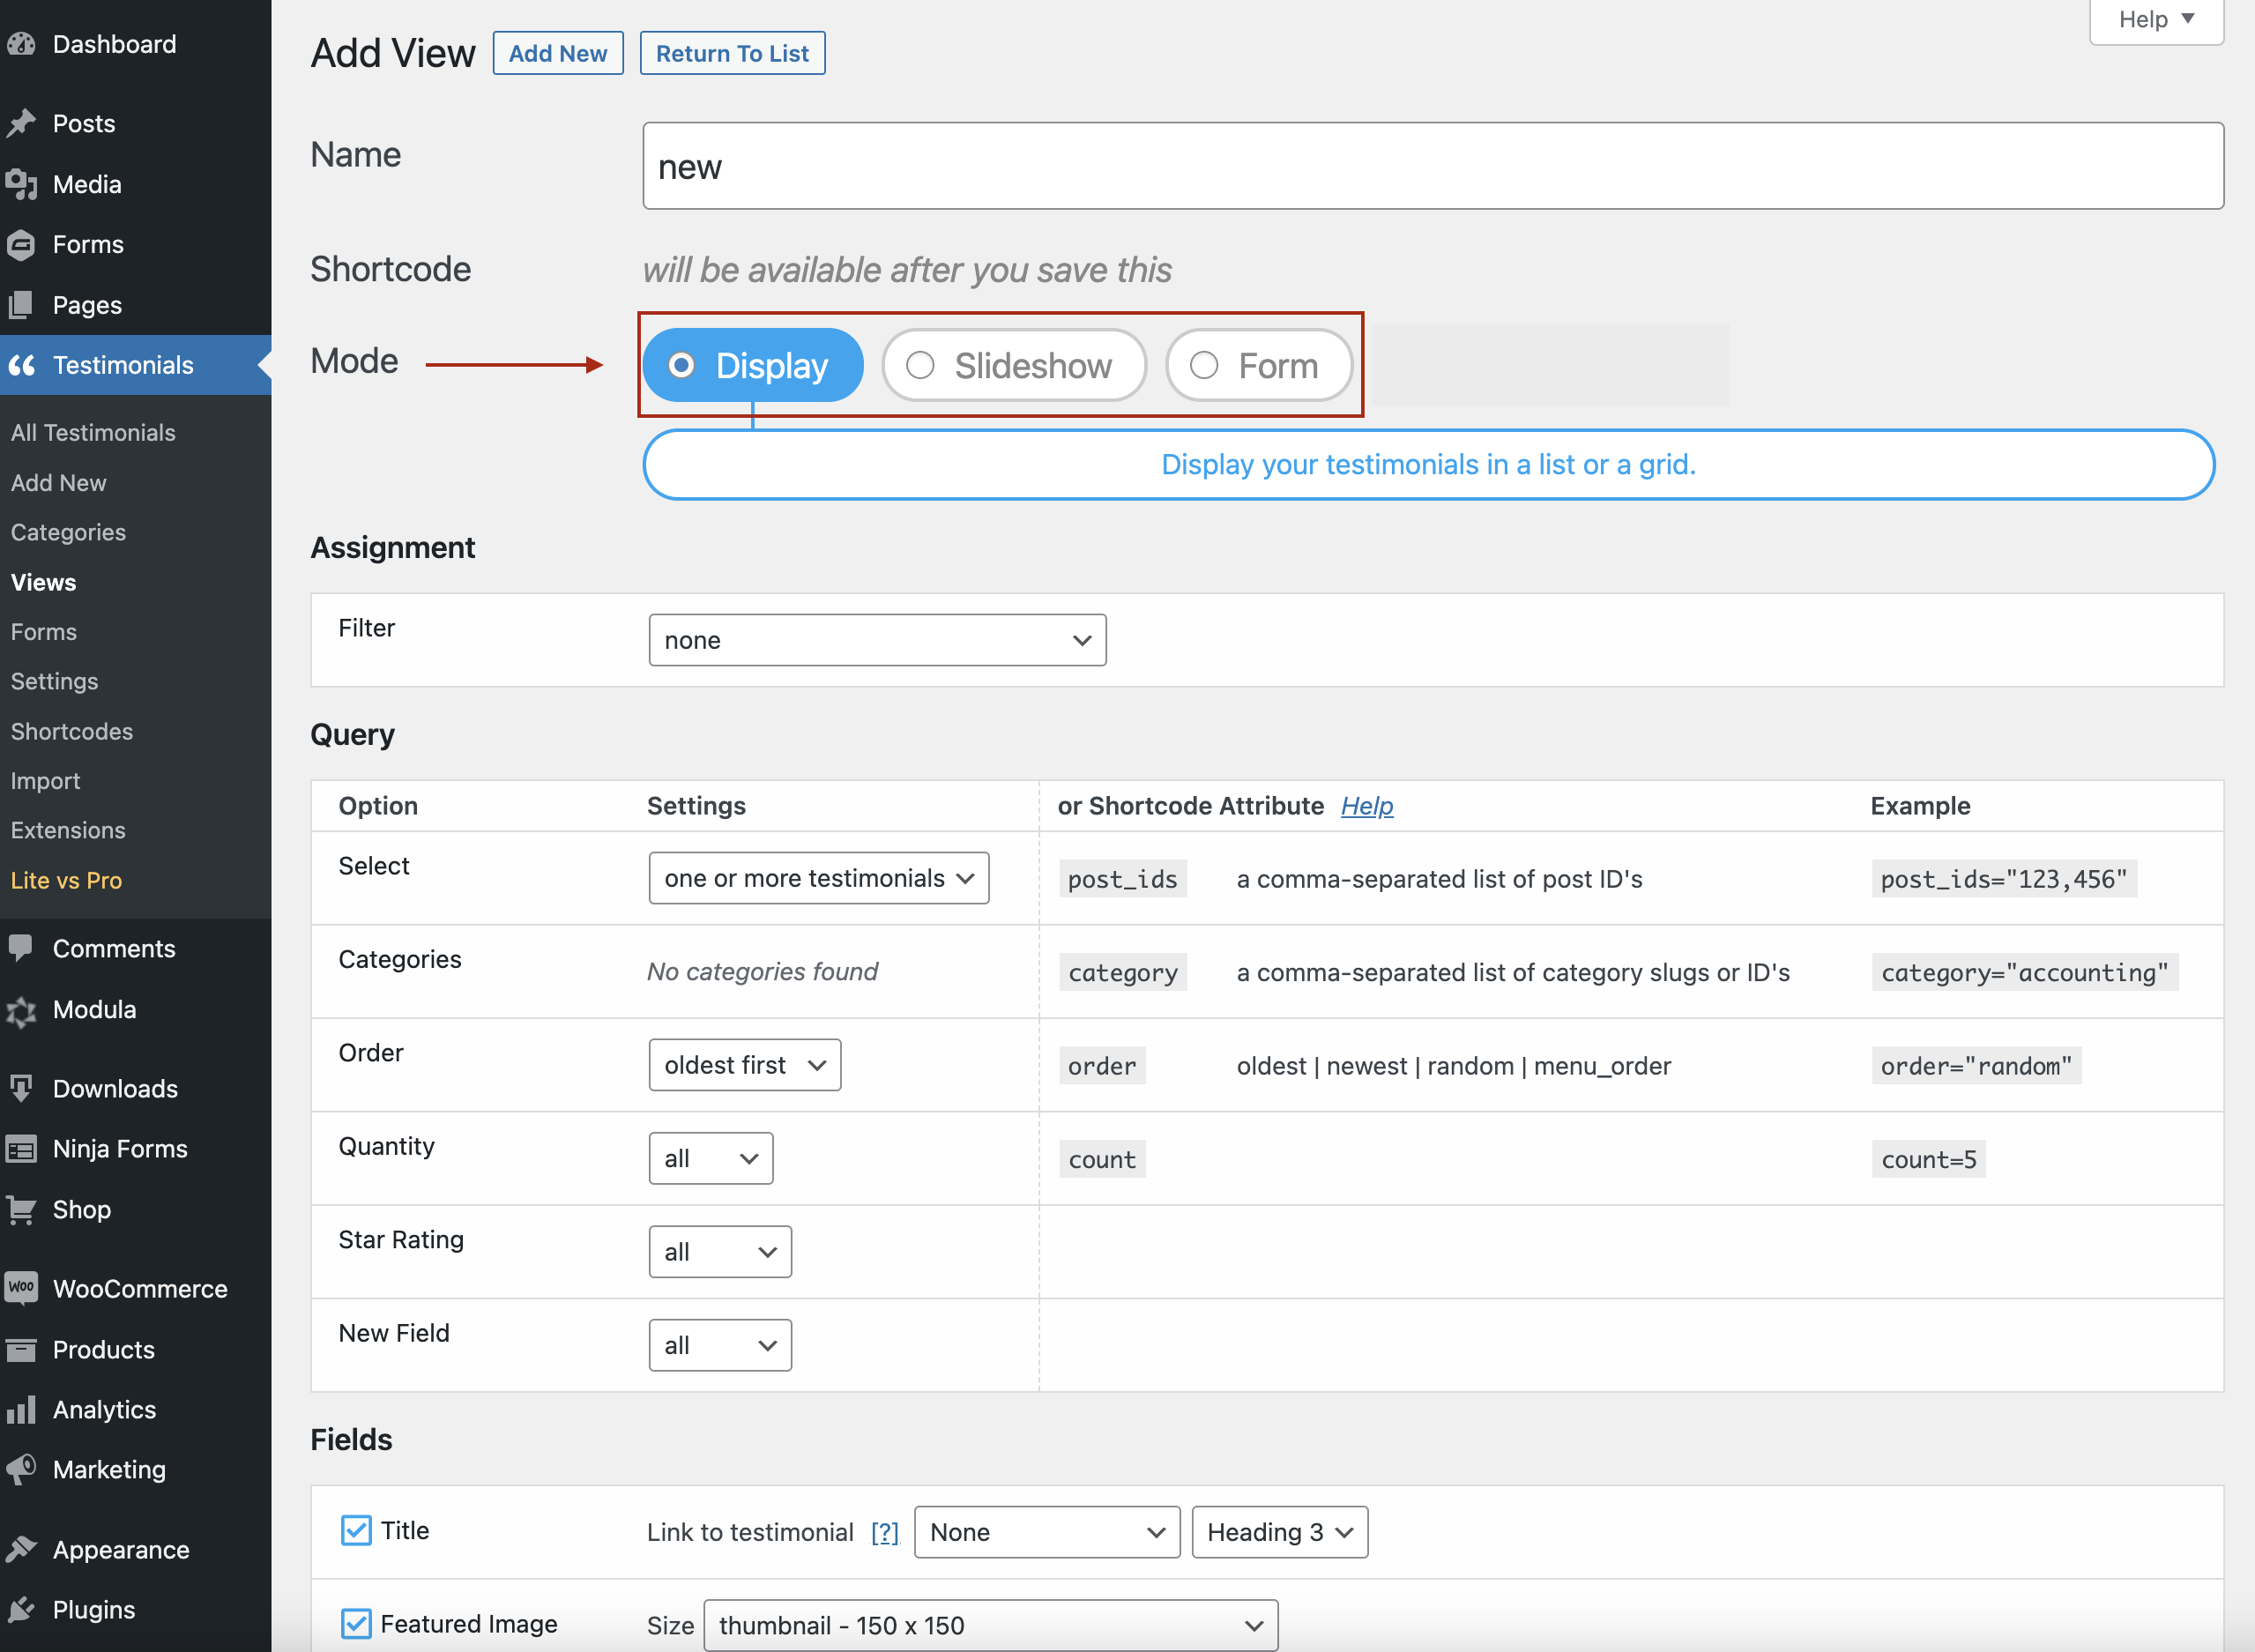
To create one, go to WordPress Dashboard > Testimonials > Views > Add New. You should start by giving the view a name to help you distinguish it later.
Customize the view
You can choose from three different view modes:
- Display — This mode lets you display testimonials as a list or a grid. You can find plenty of settings to customize them, such as modifying the queries, fields, style, font color, background, etc. You can post this testimonial mode basically everywhere: on the front page, sales page, or testimonial dedicated page.
- Slideshow — The difference between Slideshow and Display and the previous one is that you will display a slideshow instead of a list or a grid with this mode.
- Form — This is the best mode when asking your customers for a testimonial. We’ve discussed it earlier.
After choosing the testimonial mode, scroll down to take advantage of more customizations. You can change testimonial featured image size, enable it to open in a Lightbox, or choose other options if there’s no featured image (show Gravatar, default image, author initials, or custom avatars).
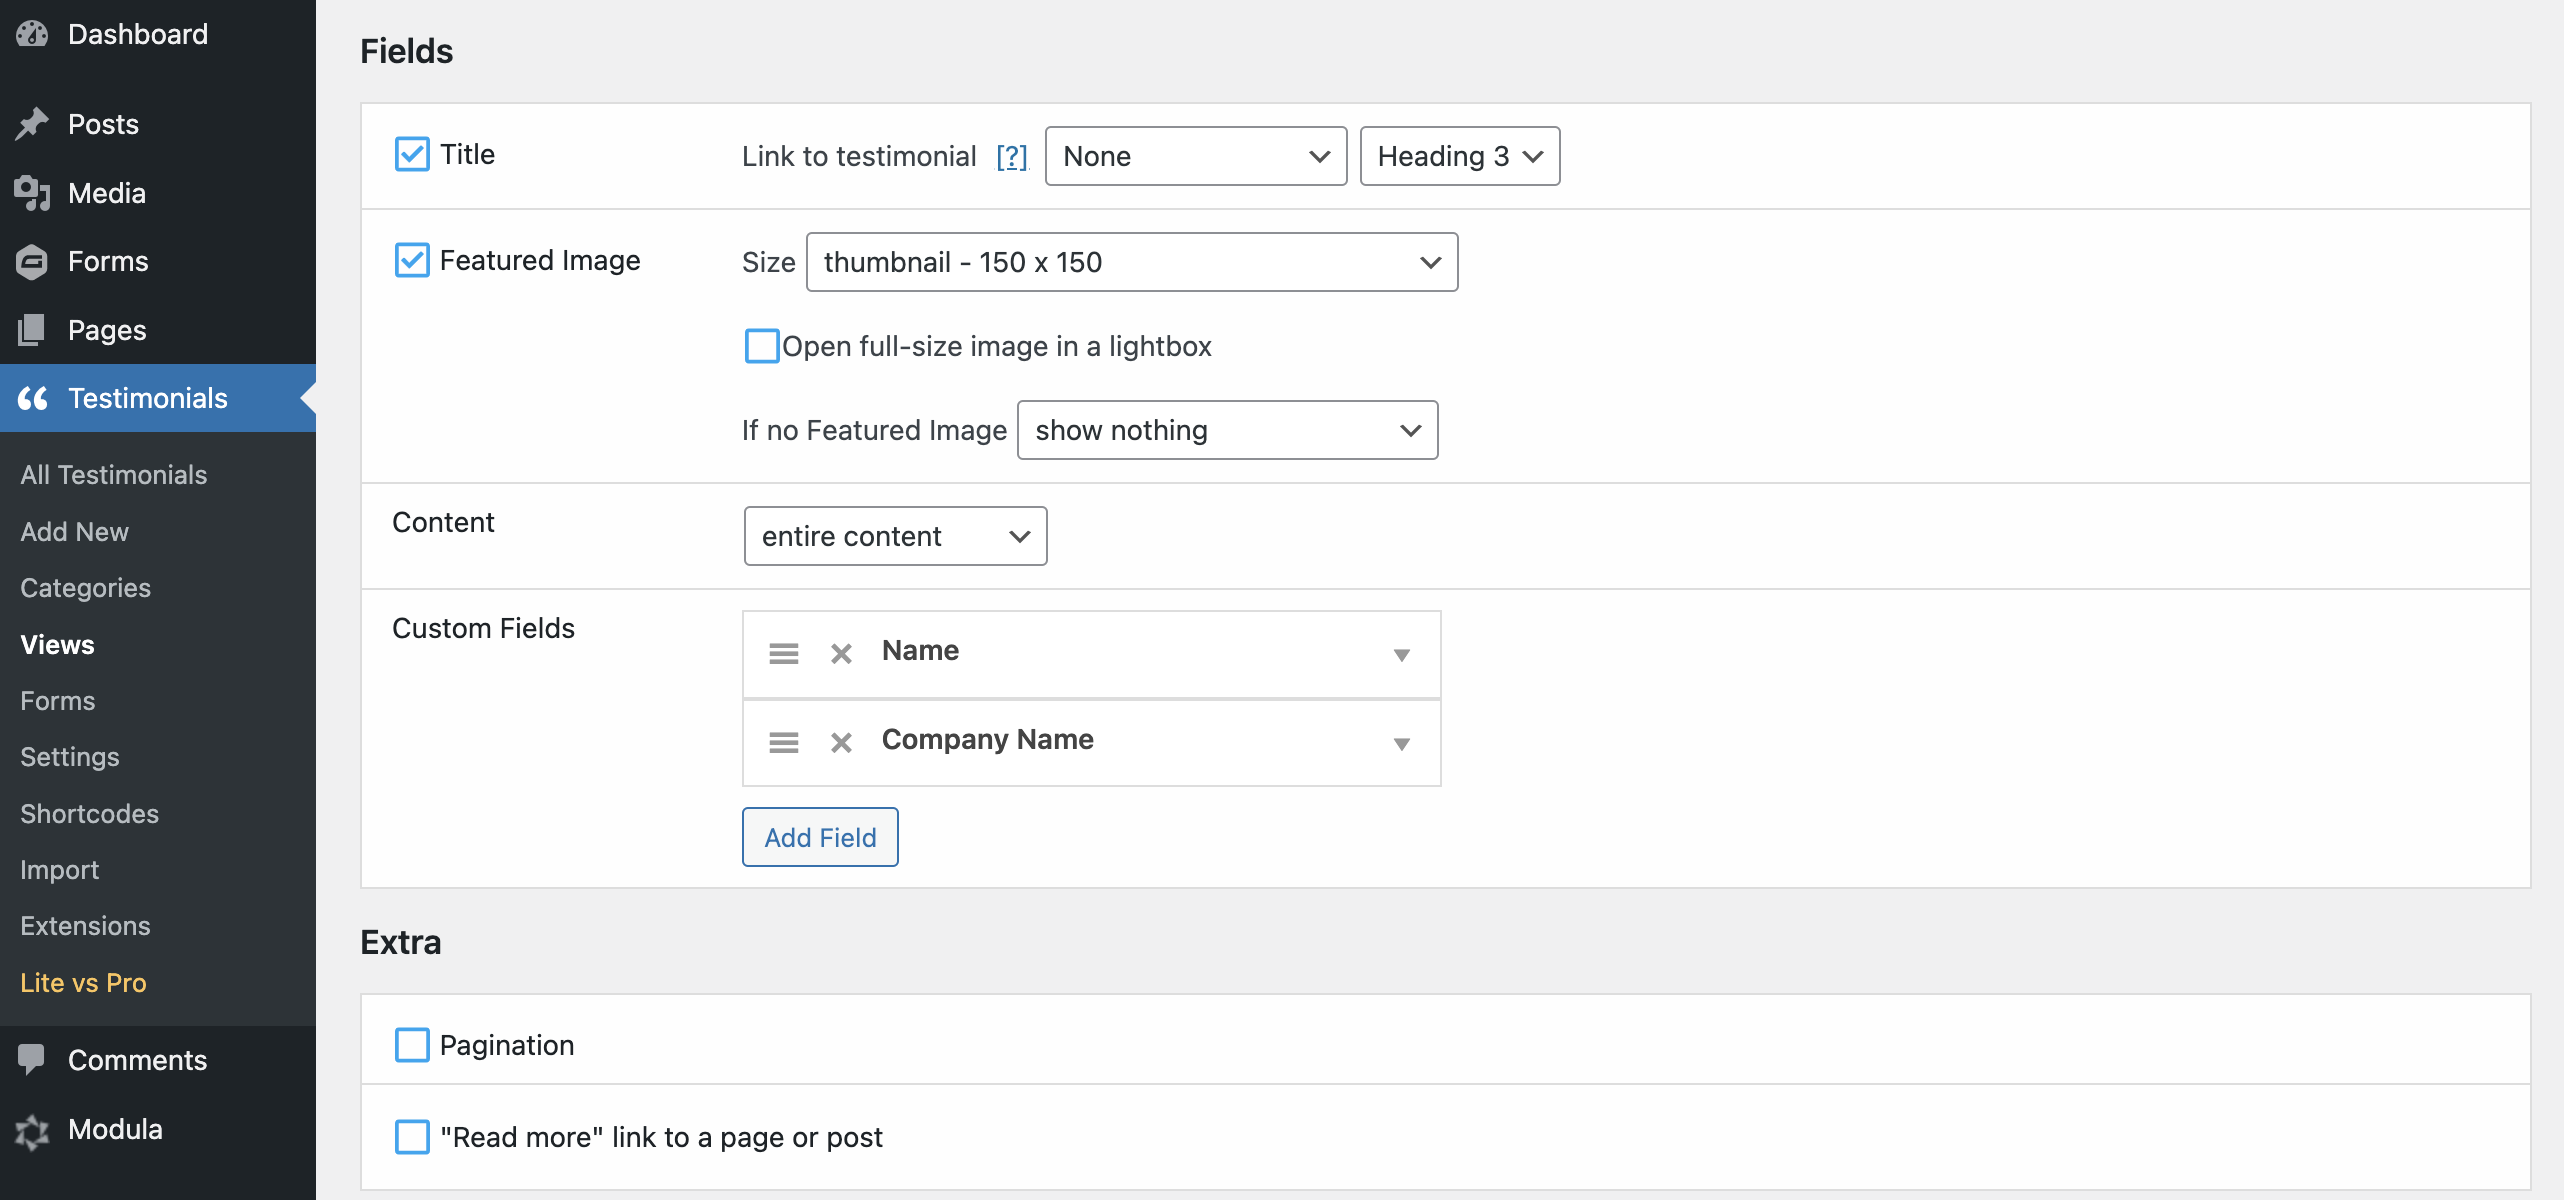
If you need, you can also add more fields to your testimonial. If you have the Infinite Scroll extension (available in Strong Testimonials PRO), you’ll benefit from a new type of pagination. Instead of having to click through pages to get to the next set of testimonials, you can just scroll down the page and read the testimonials flawlessly. You can also link to another page/post and add a “Read more” button.
Pick a template
Choose a pre-built design template – default, modern, bold, small widget, simple, and unstyled. The Pro Templates extension comes with a number of pre-designed and easy-to-use testimonial templates (card, elegant, minimalist, side, table) that you can use on your website right away.
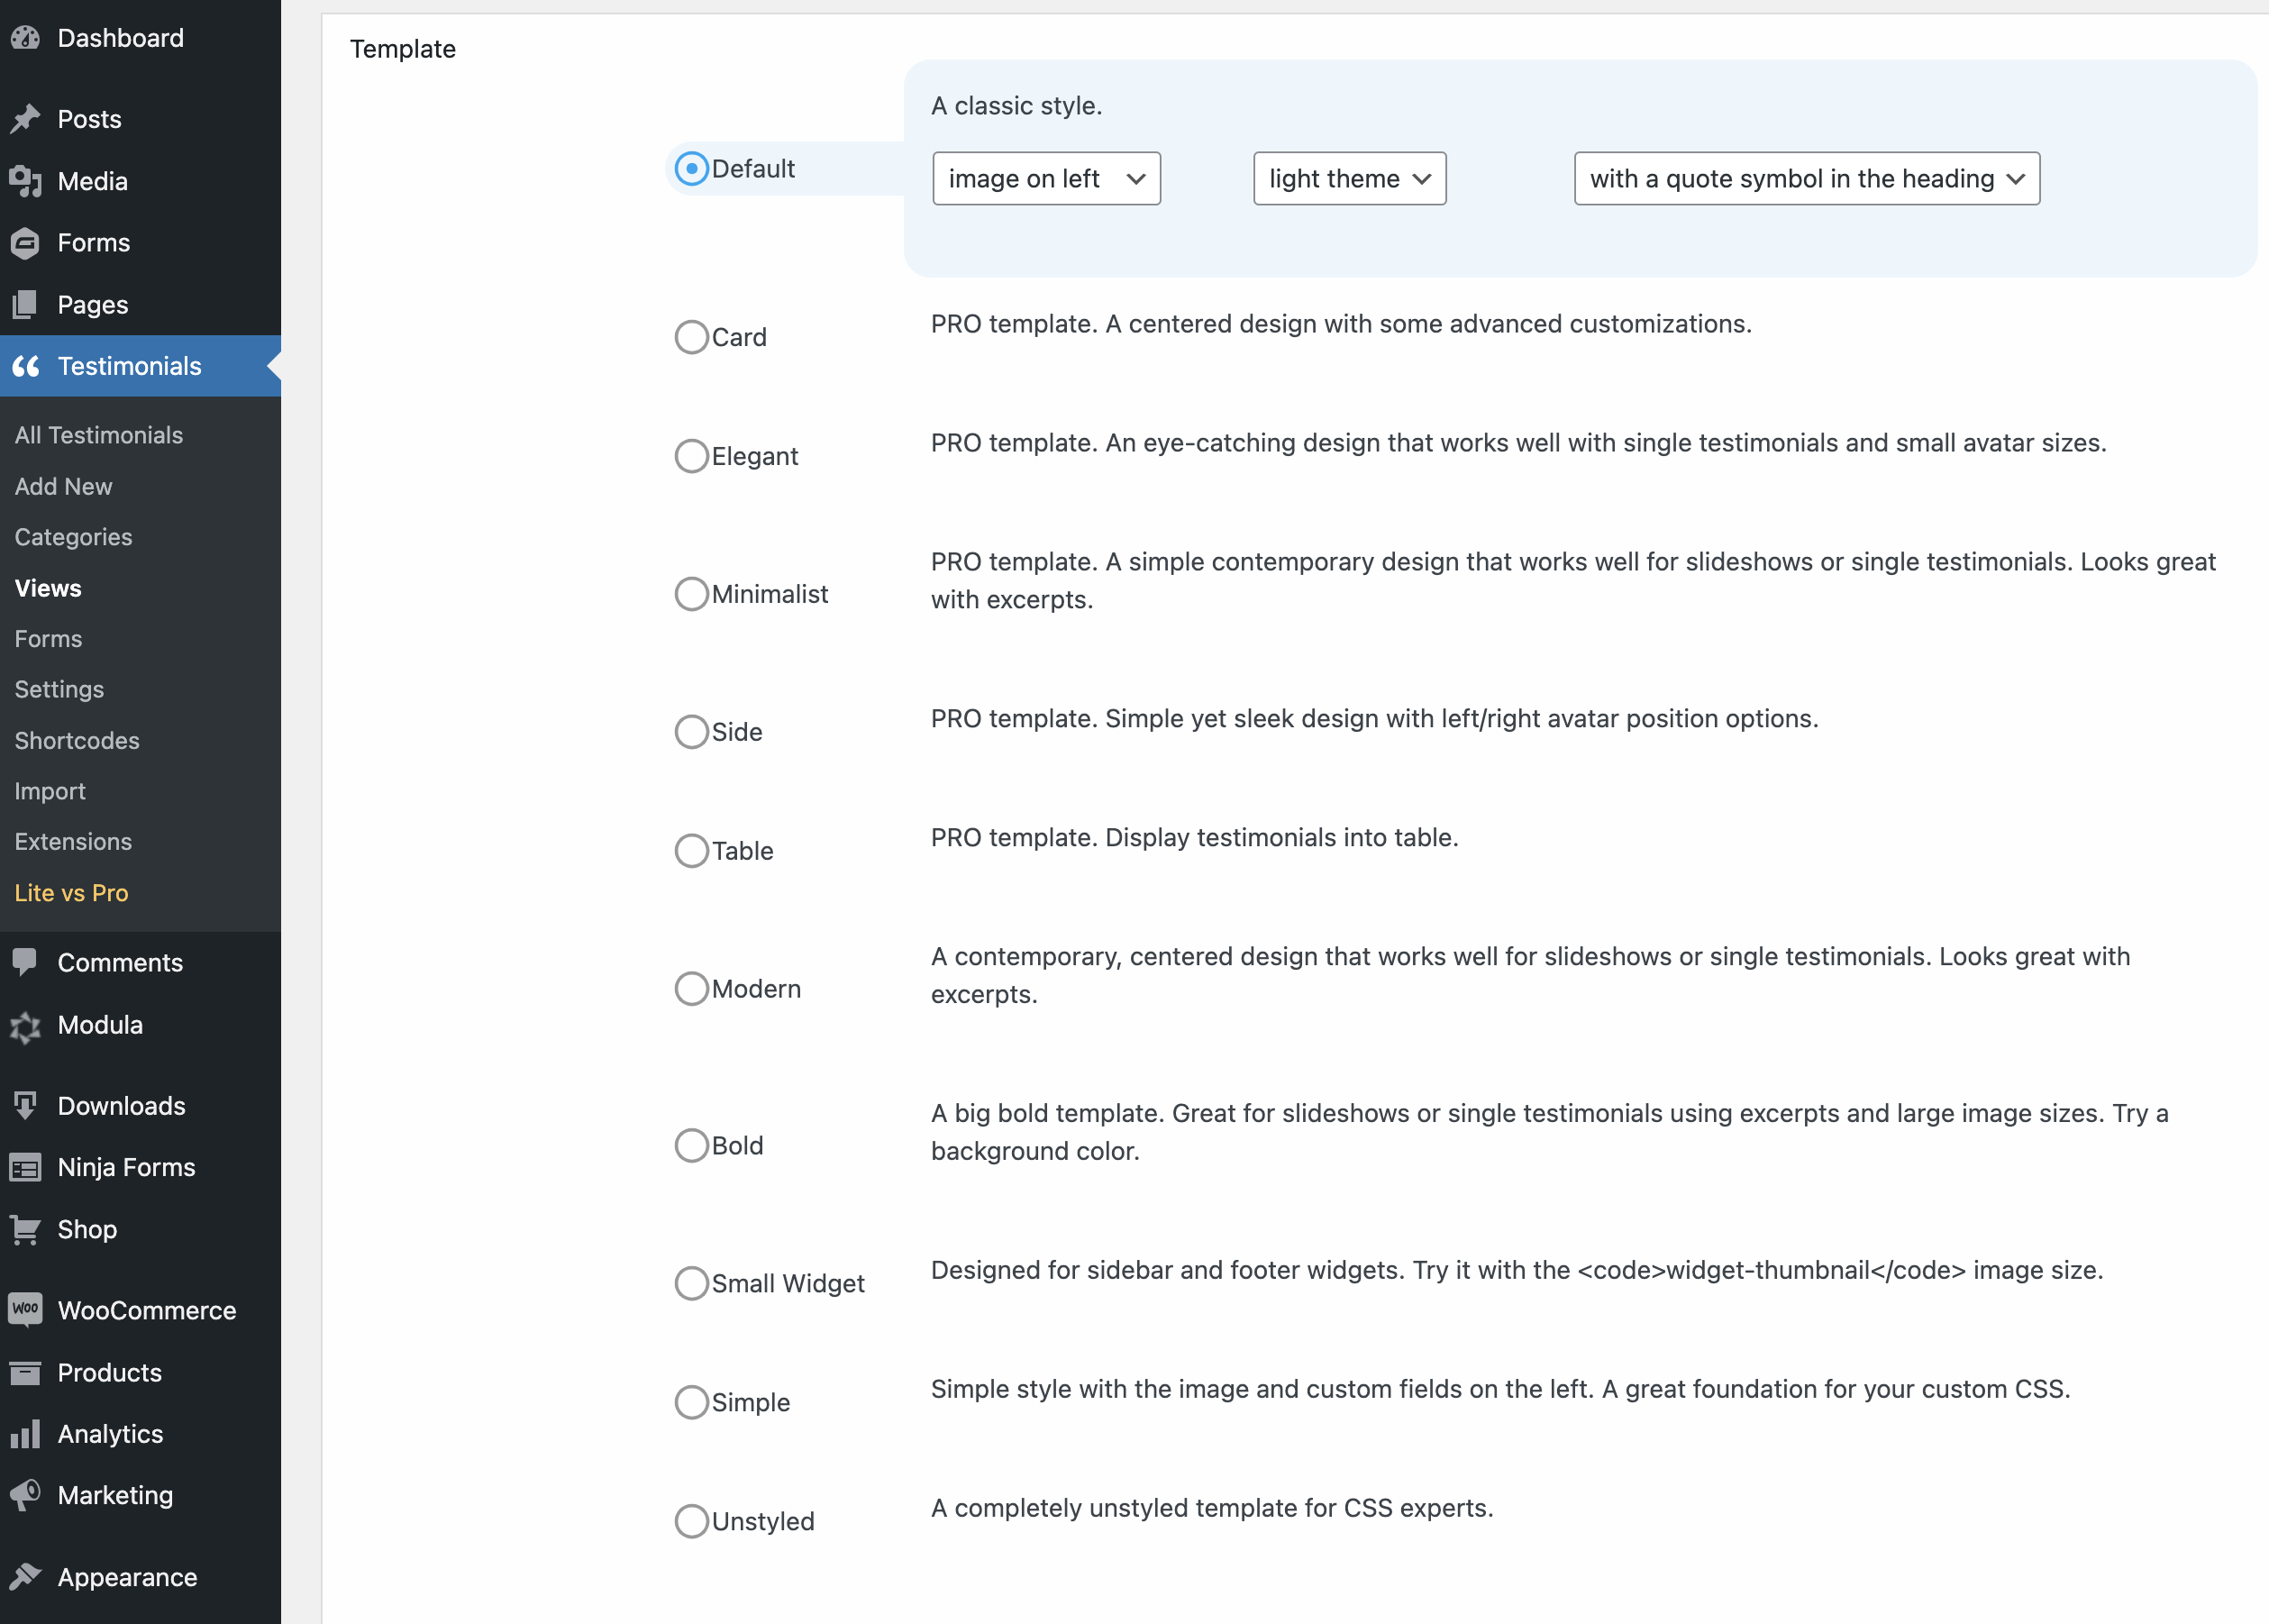
To get the best out of your testimonial, make sure you select a layout, background, and font color.
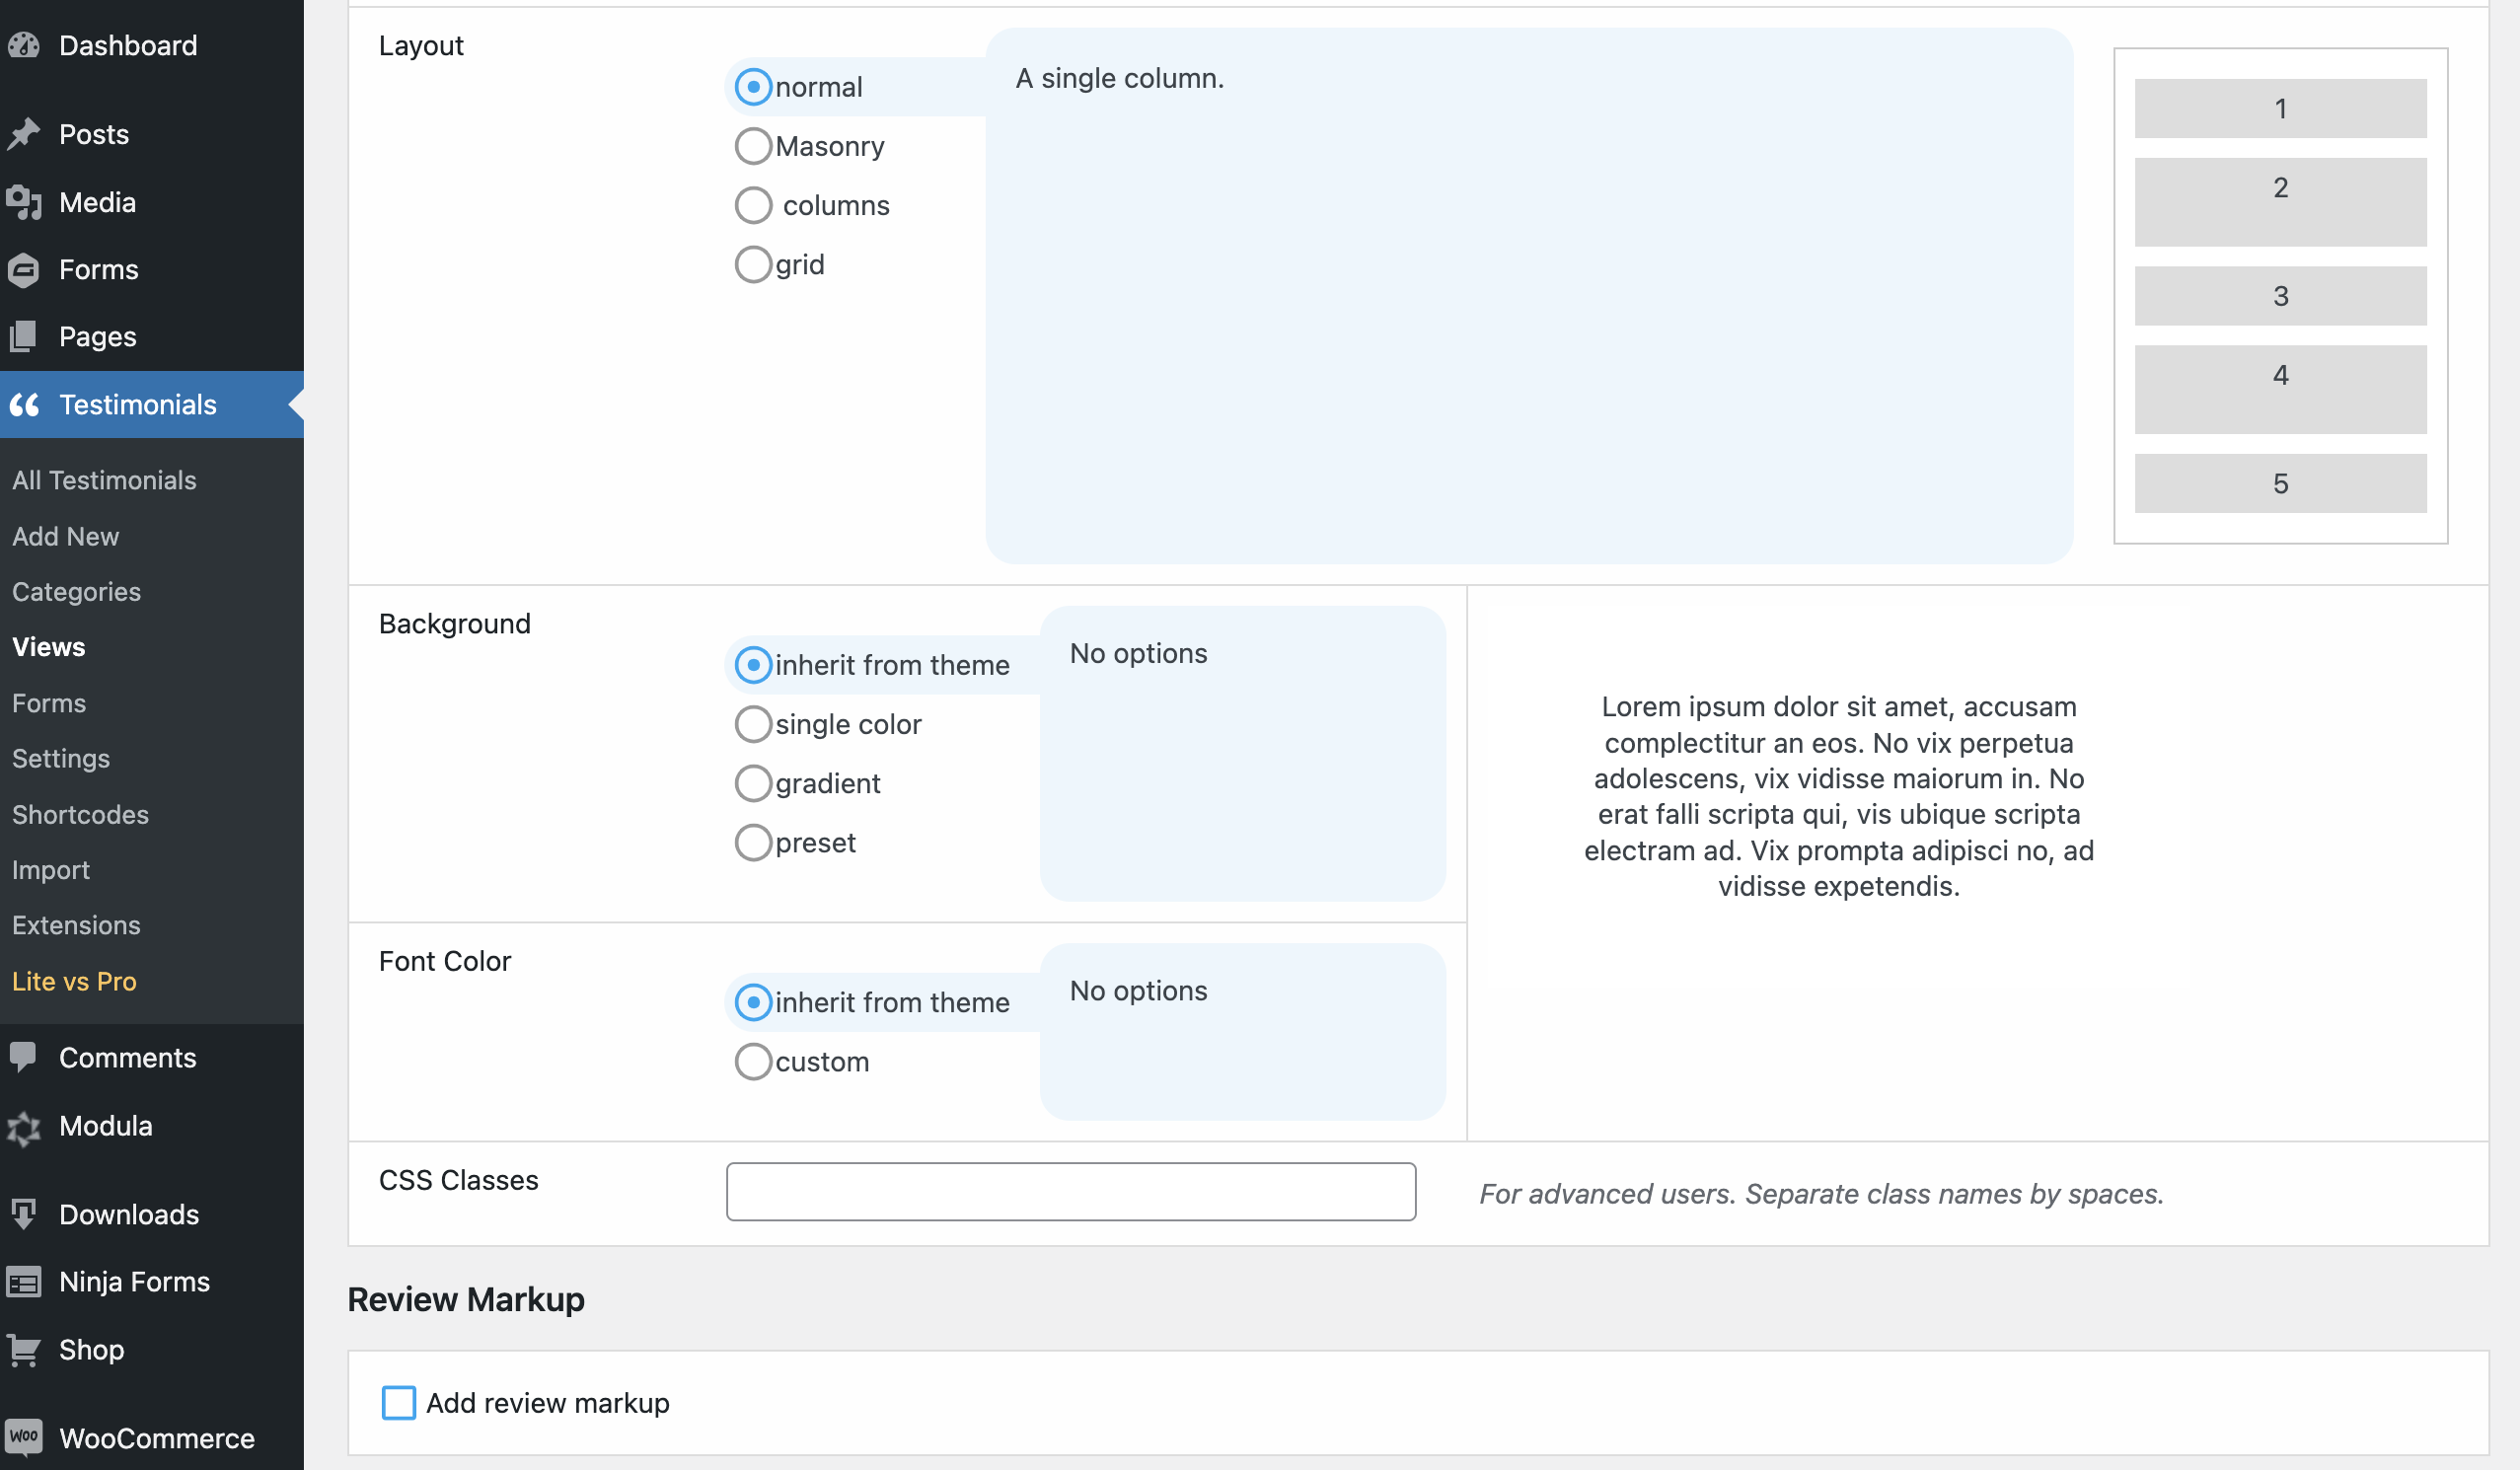
Another handy feature is the Review Markup add-on which helps search engines identify your testimonials as reviews in search results. Within the review markup, you can include rating markup to encourage search engines to display rich snippets – whether or not you use a star rating field on your testimonials.
💡 Head over to our knowledge base article dedicated to the review markup to learn more.
Filter testimonials
Next, you’ll have the possibility to filter your testimonials. The Filters extension allows users to create categories to group testimonials and to have users read reviews grouped by service/product type or star rating, choose filter positioning and style.

Once you’re done customizing your testimonial, click Save Changes.
Display testimonials on your website
Strong Testimonials will generate a shortcode for your testimonial view.
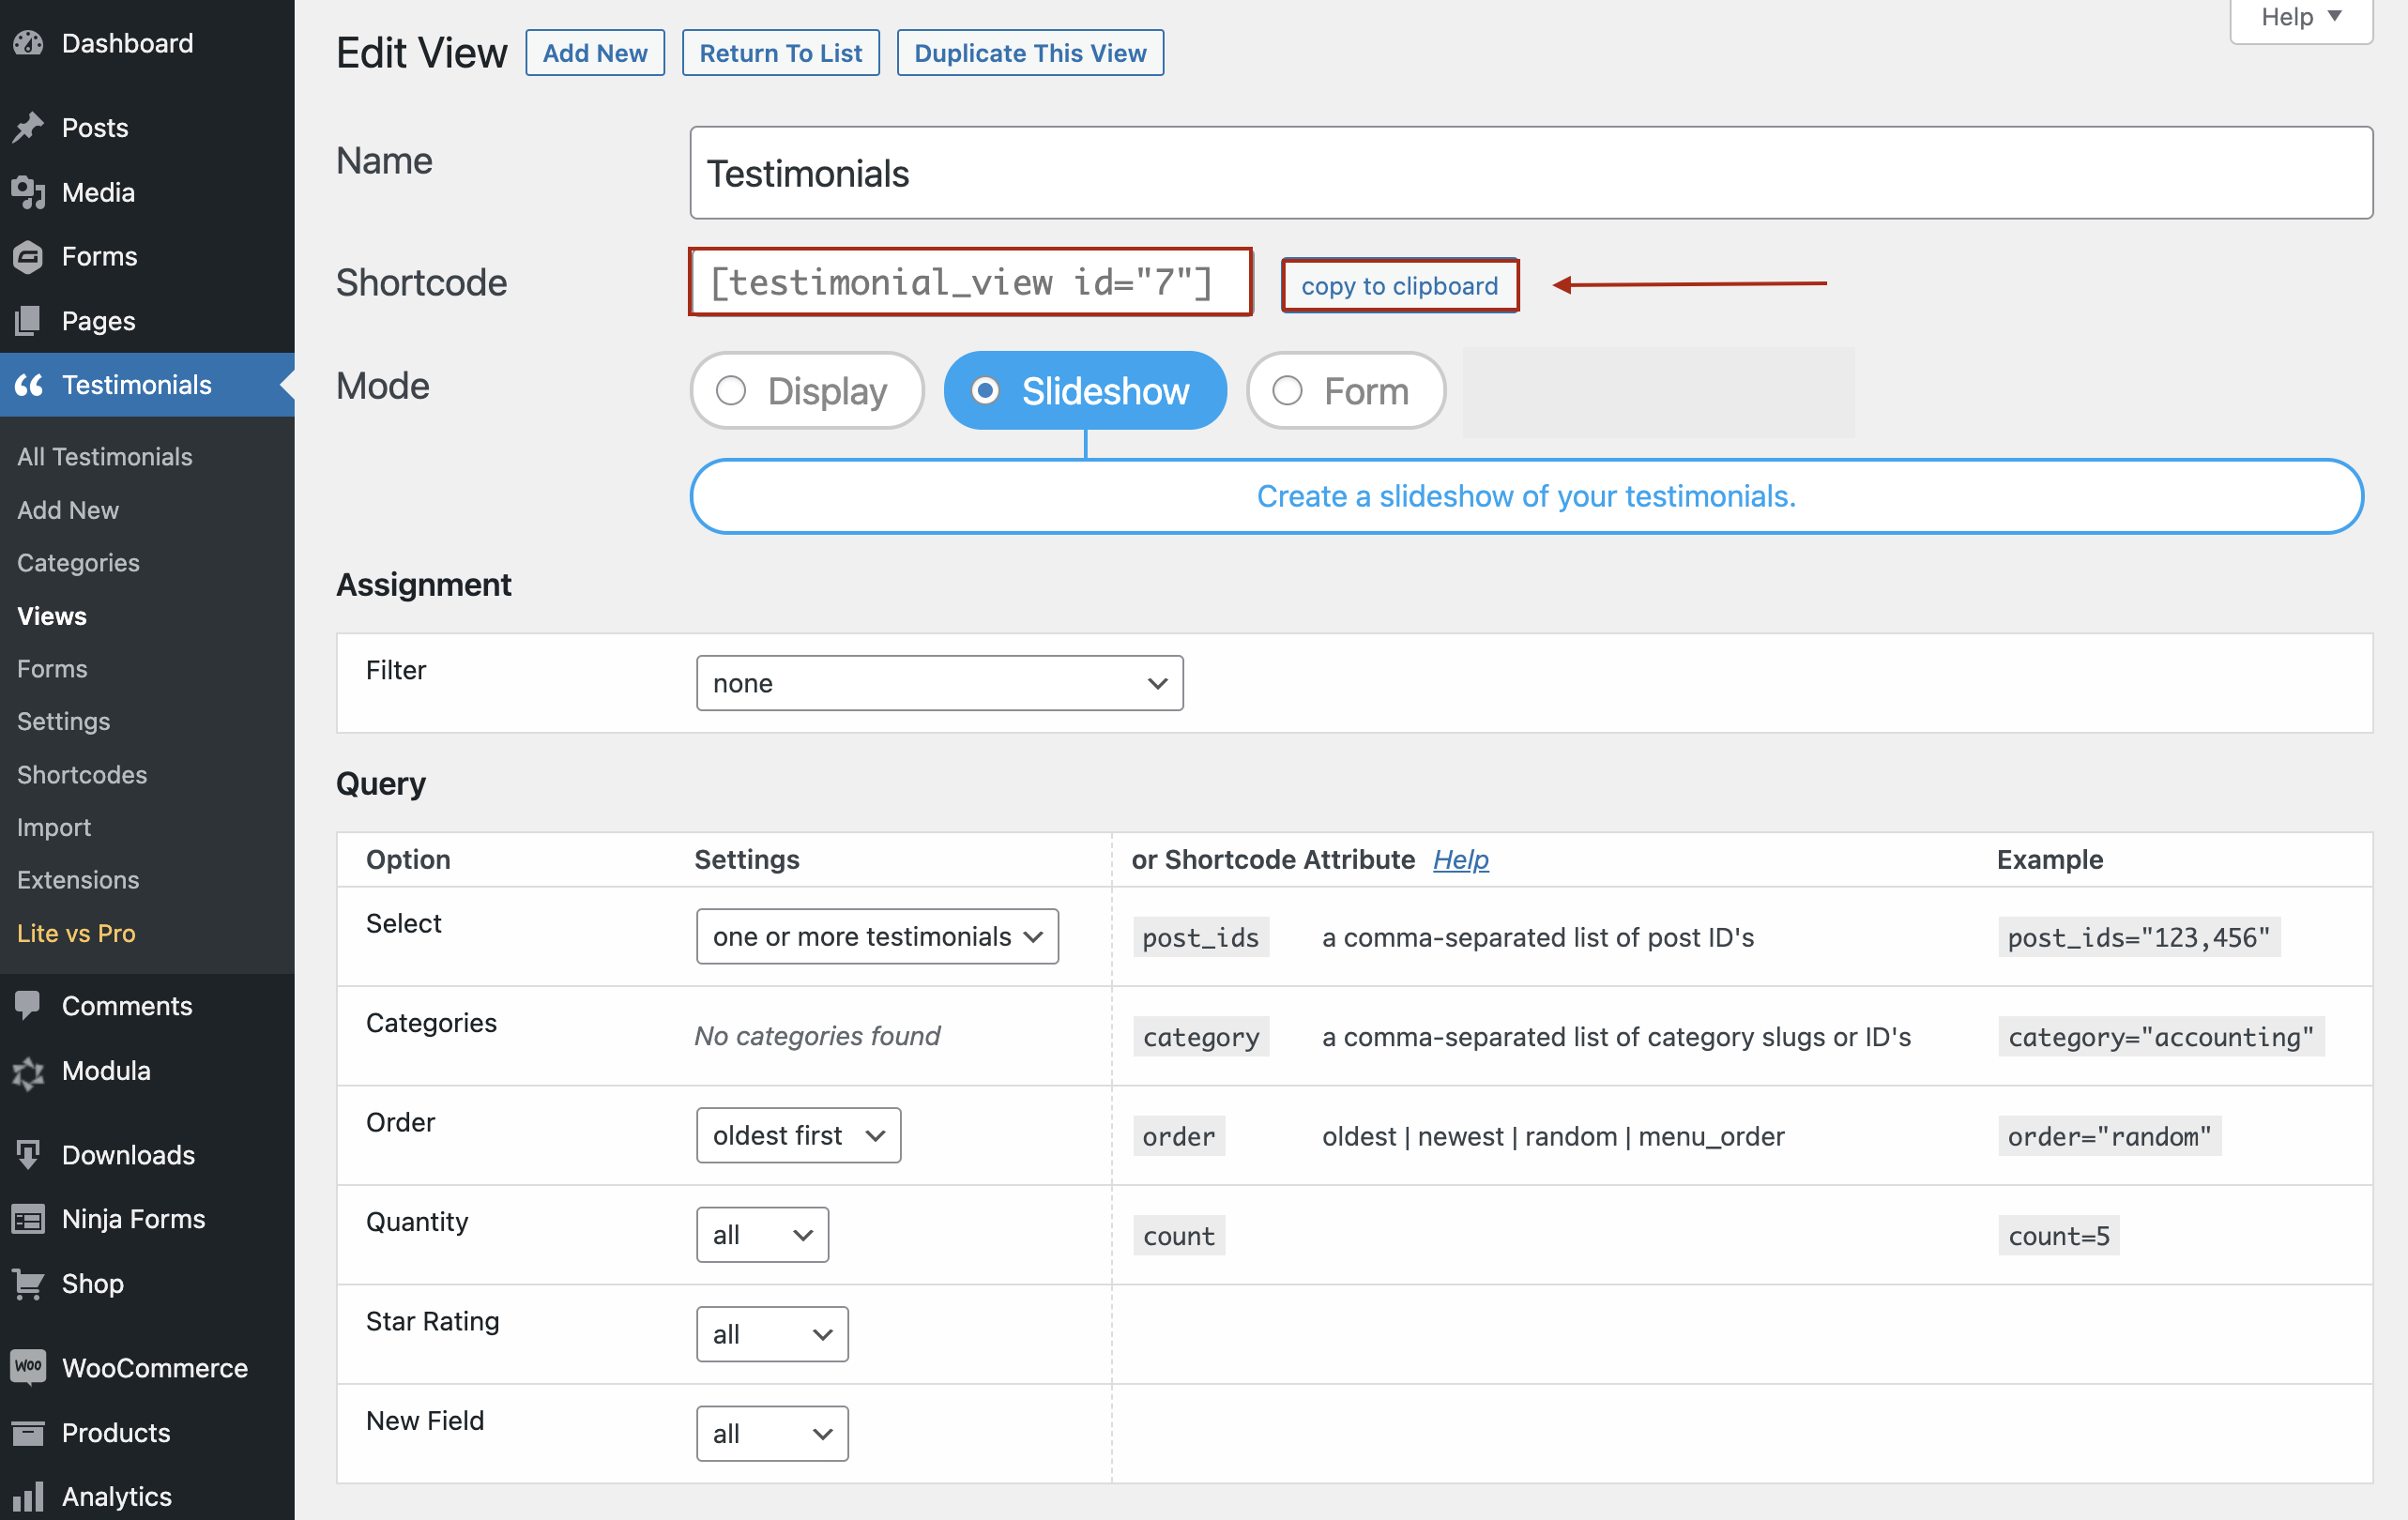
You need to follow the same procedure as publishing the testimonial form, so copy the shortcode and paste it into a page or post.
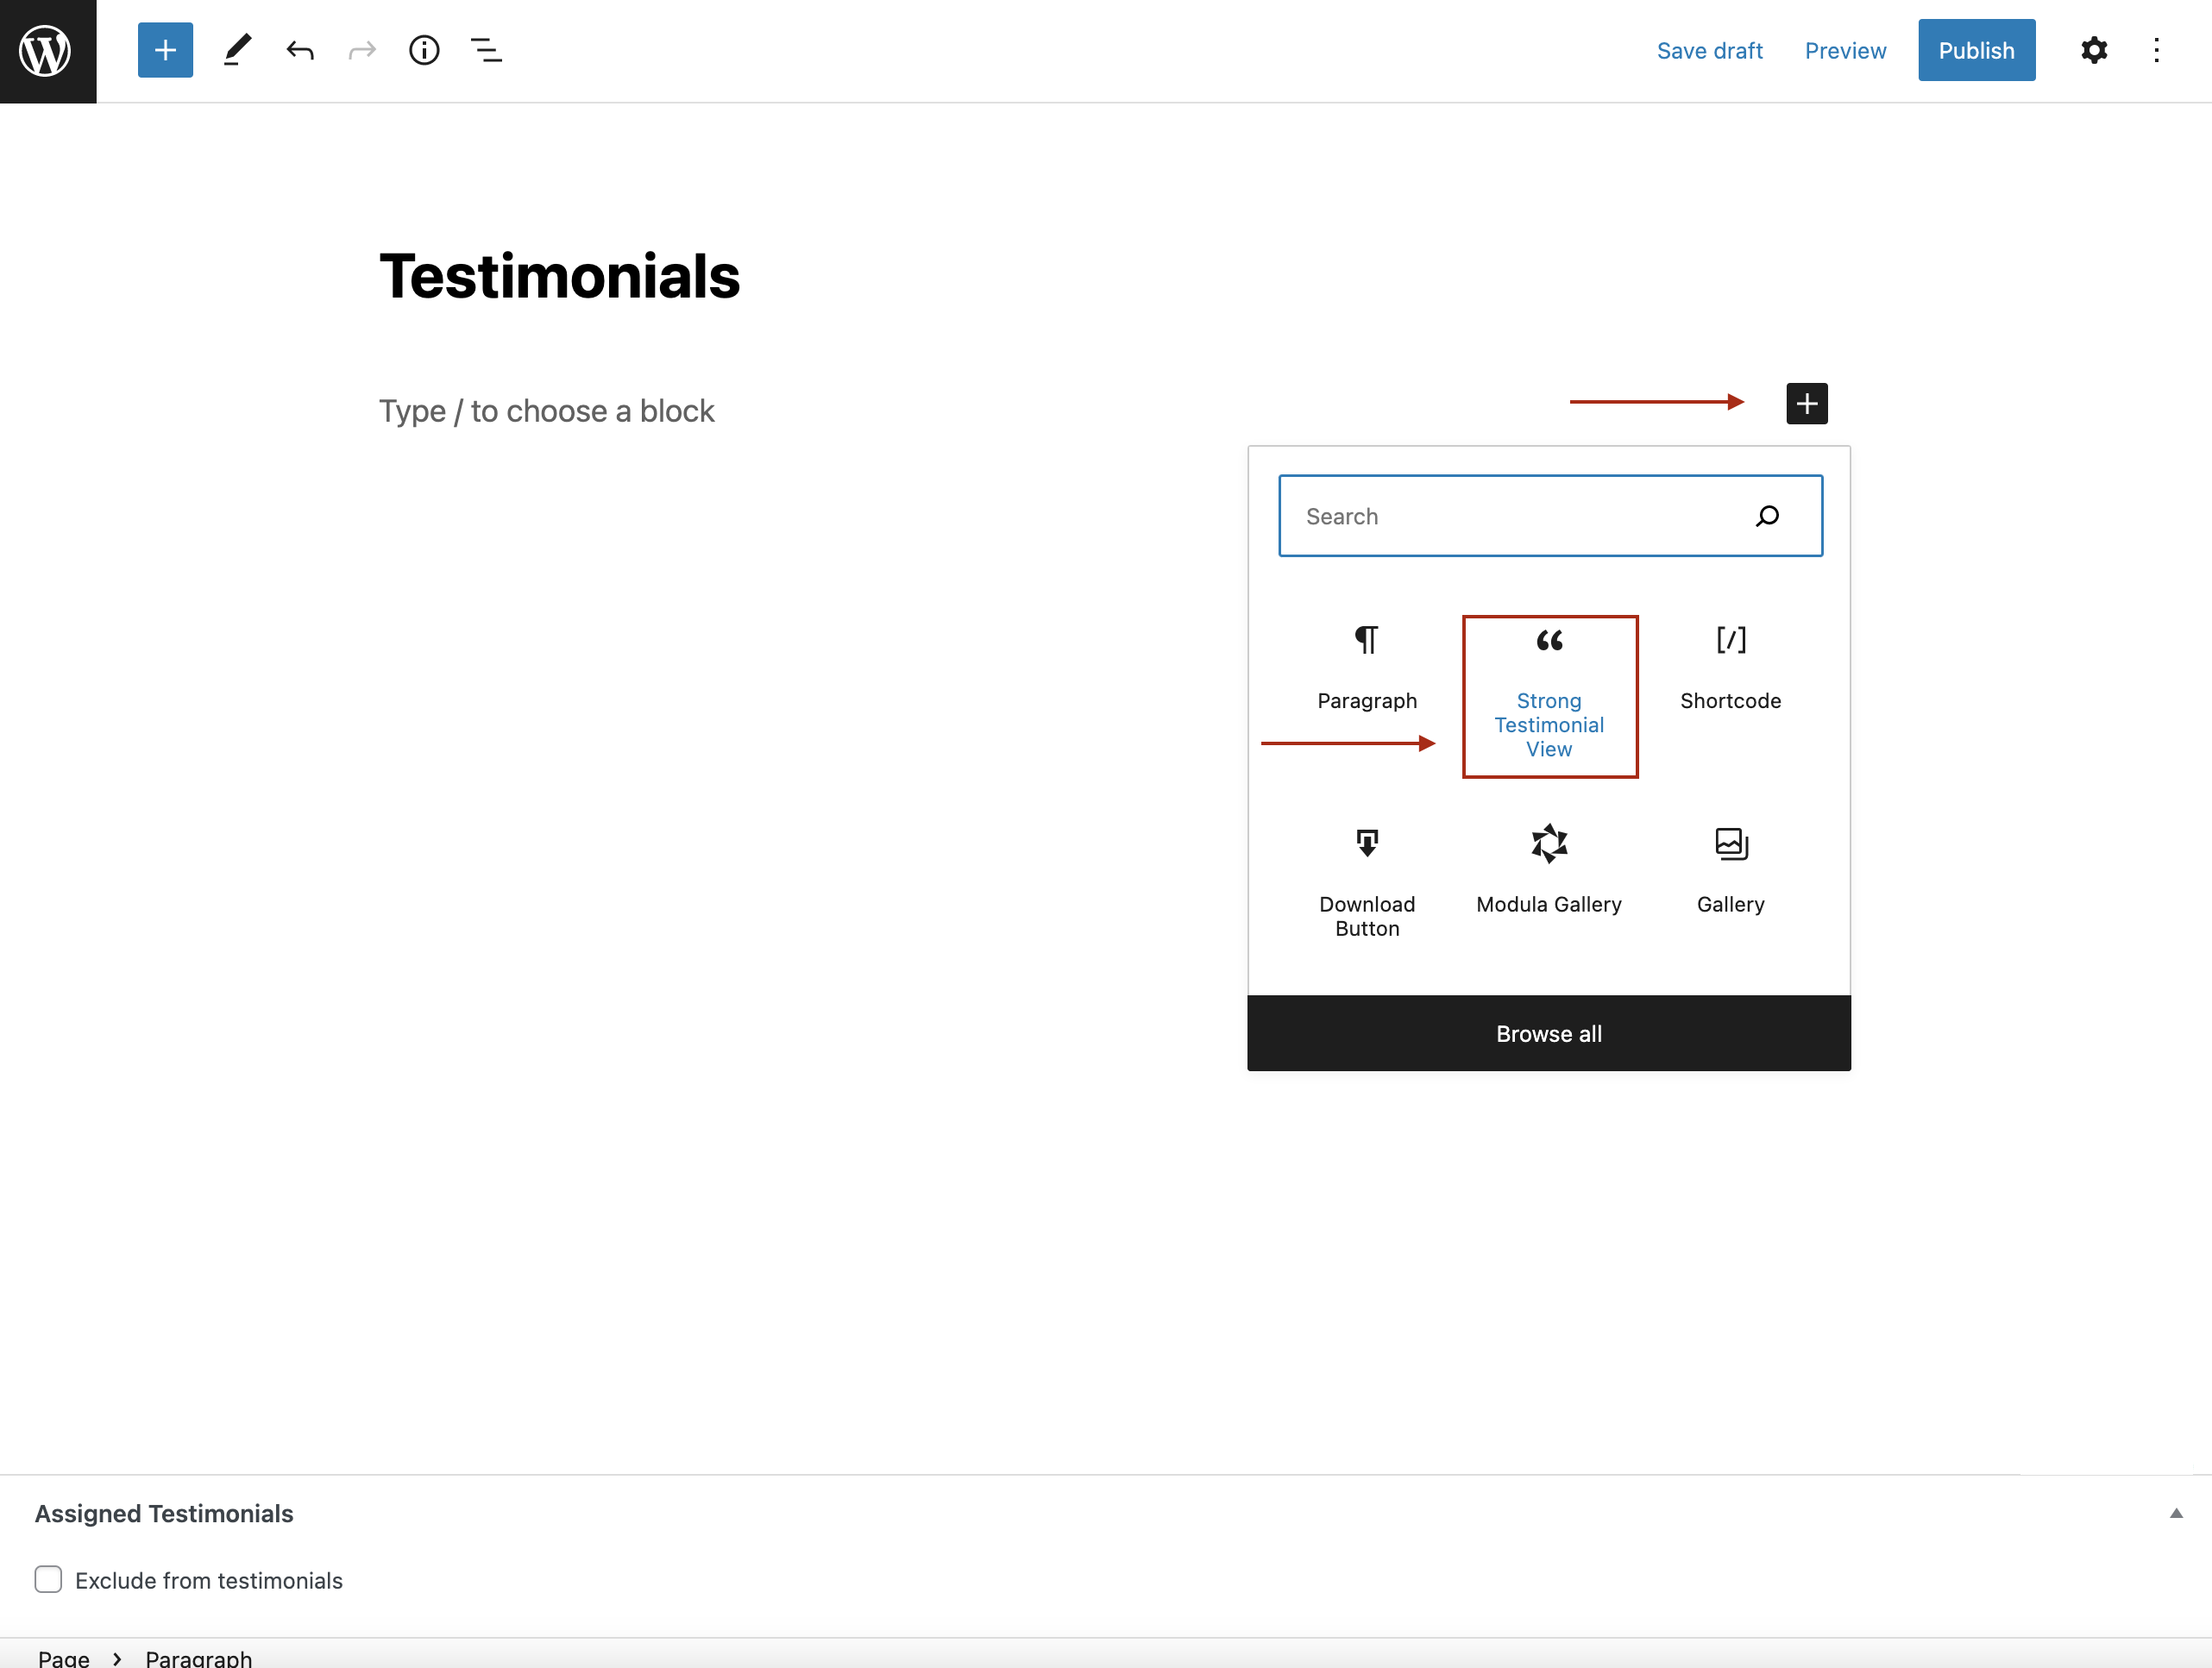
Add testimonials with the Guteberg Block Editor
Strong Testimonials works seamlessly with the Block Editor, so you can also click on the “+” icons and look for Strong Testimonials View.
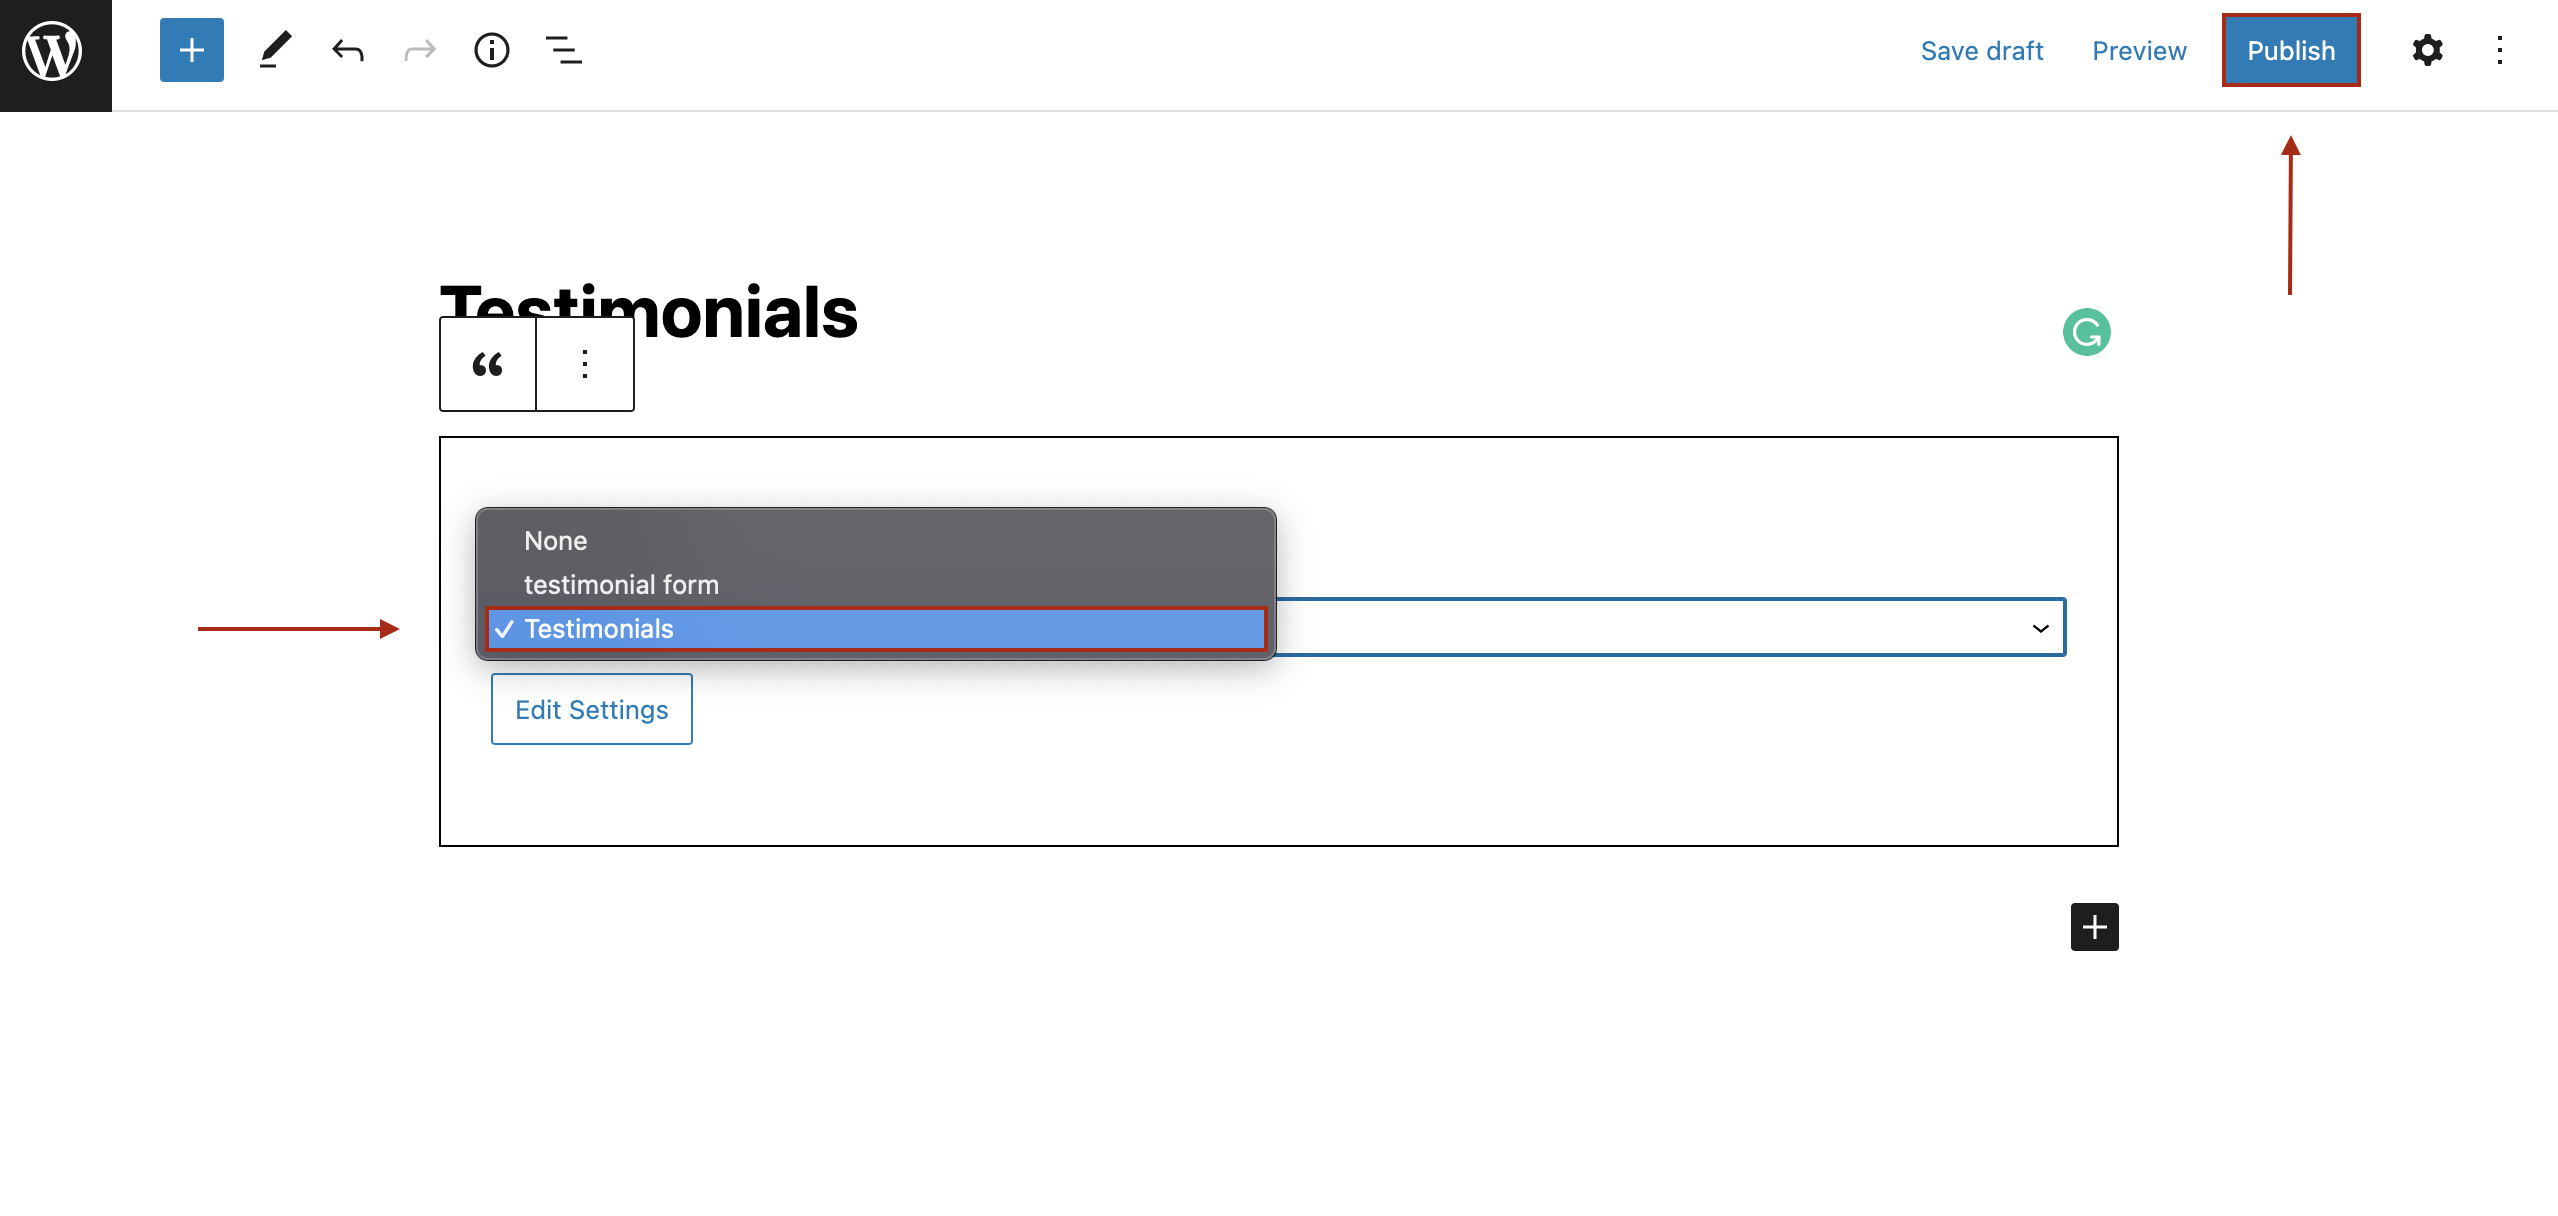
Select the testimonial view created and then click Publish.
Add Testimonials in sidebar or footer
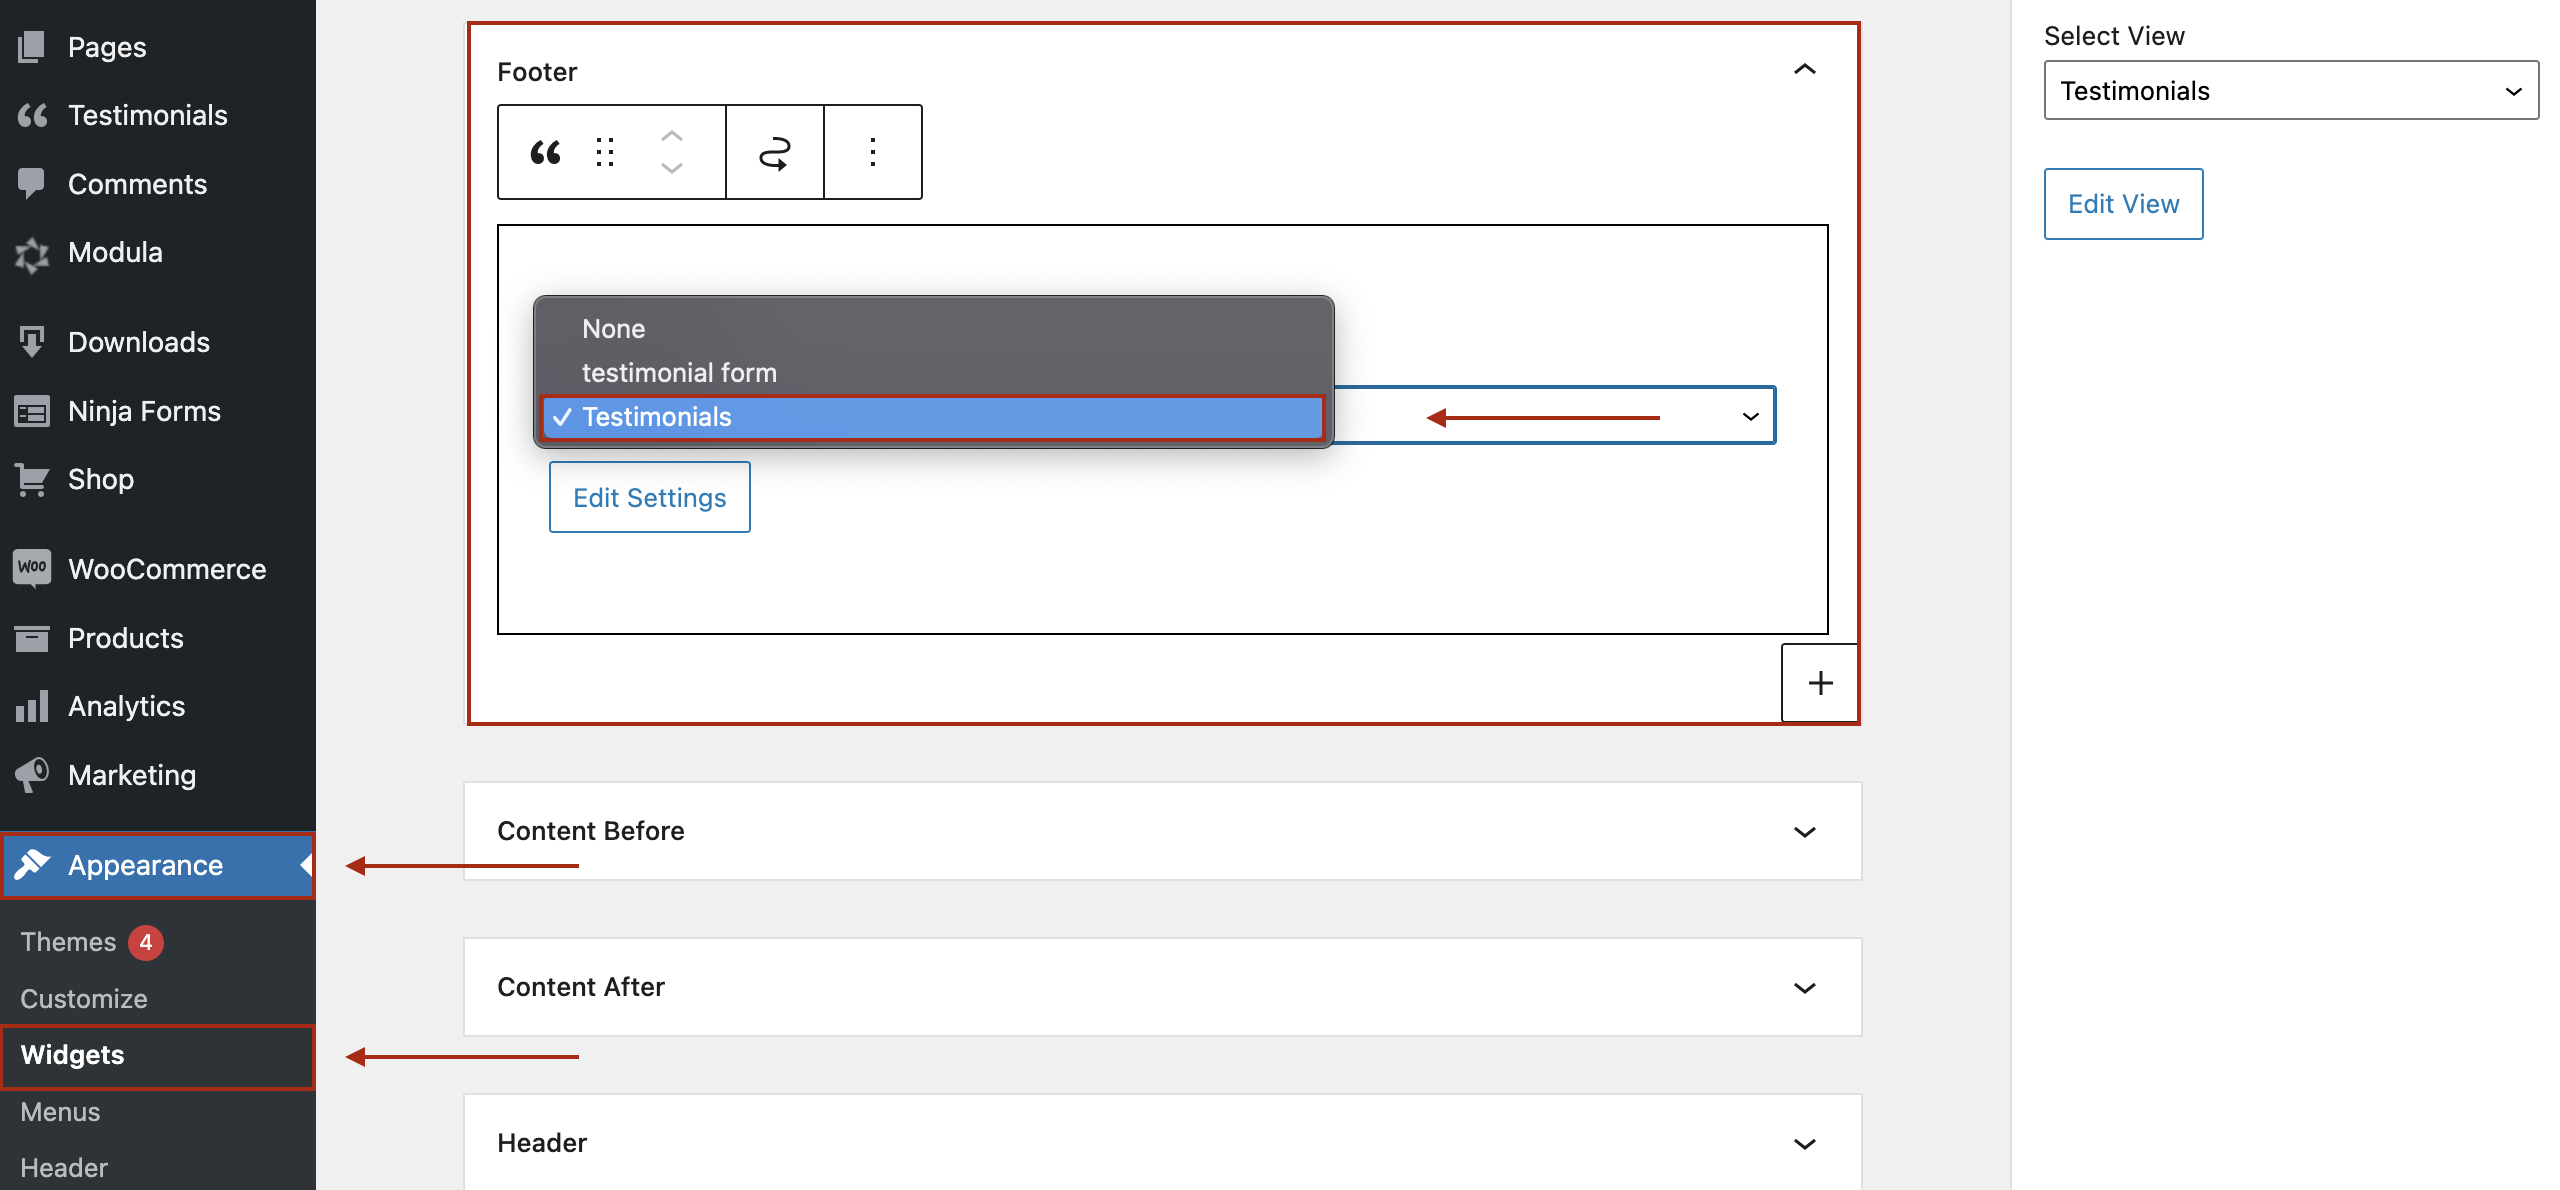
You can also add the Strong Testimonials View widget to a sidebar and select the view by name (that’s why you gave it a descriptive name).
To add it in a sidebar go to Appearance > Widgets > click on the Strong Testimonials View widget and select where to add it.
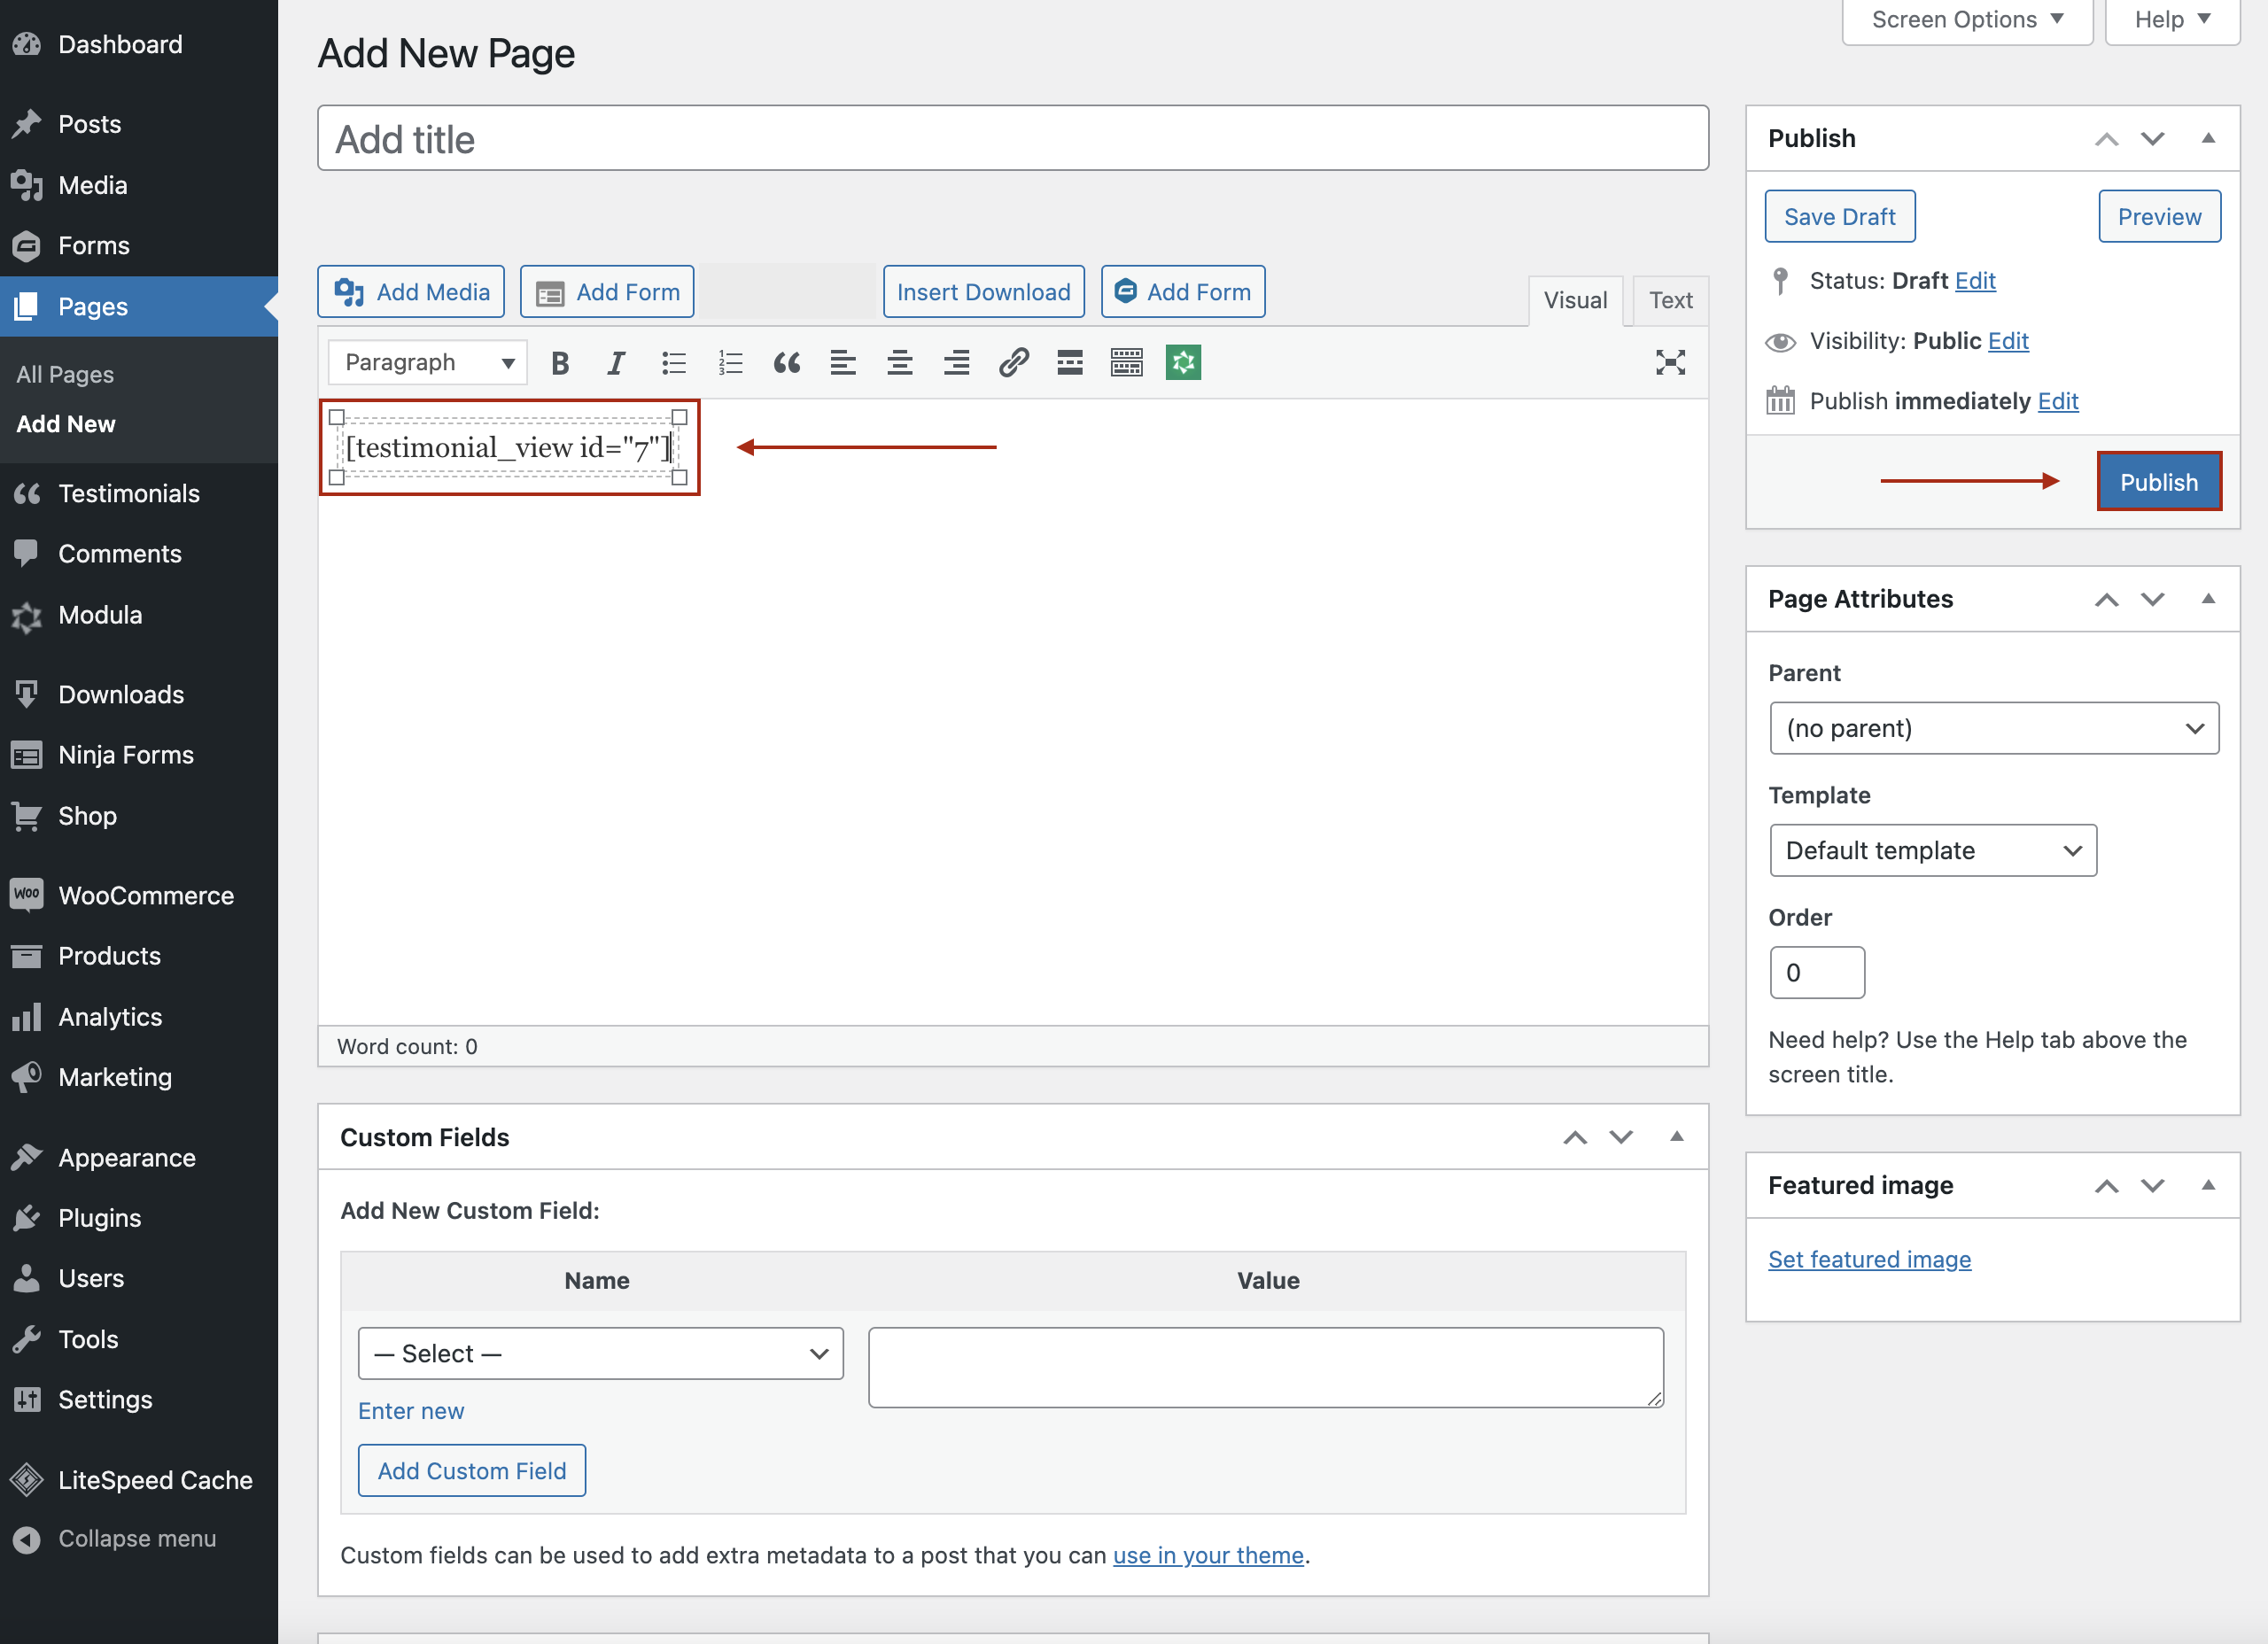
Add testimonials with the Classic Editor
If you’re using the Classic Editor, you simply need to add the shortcode to your page/post and click Publish.
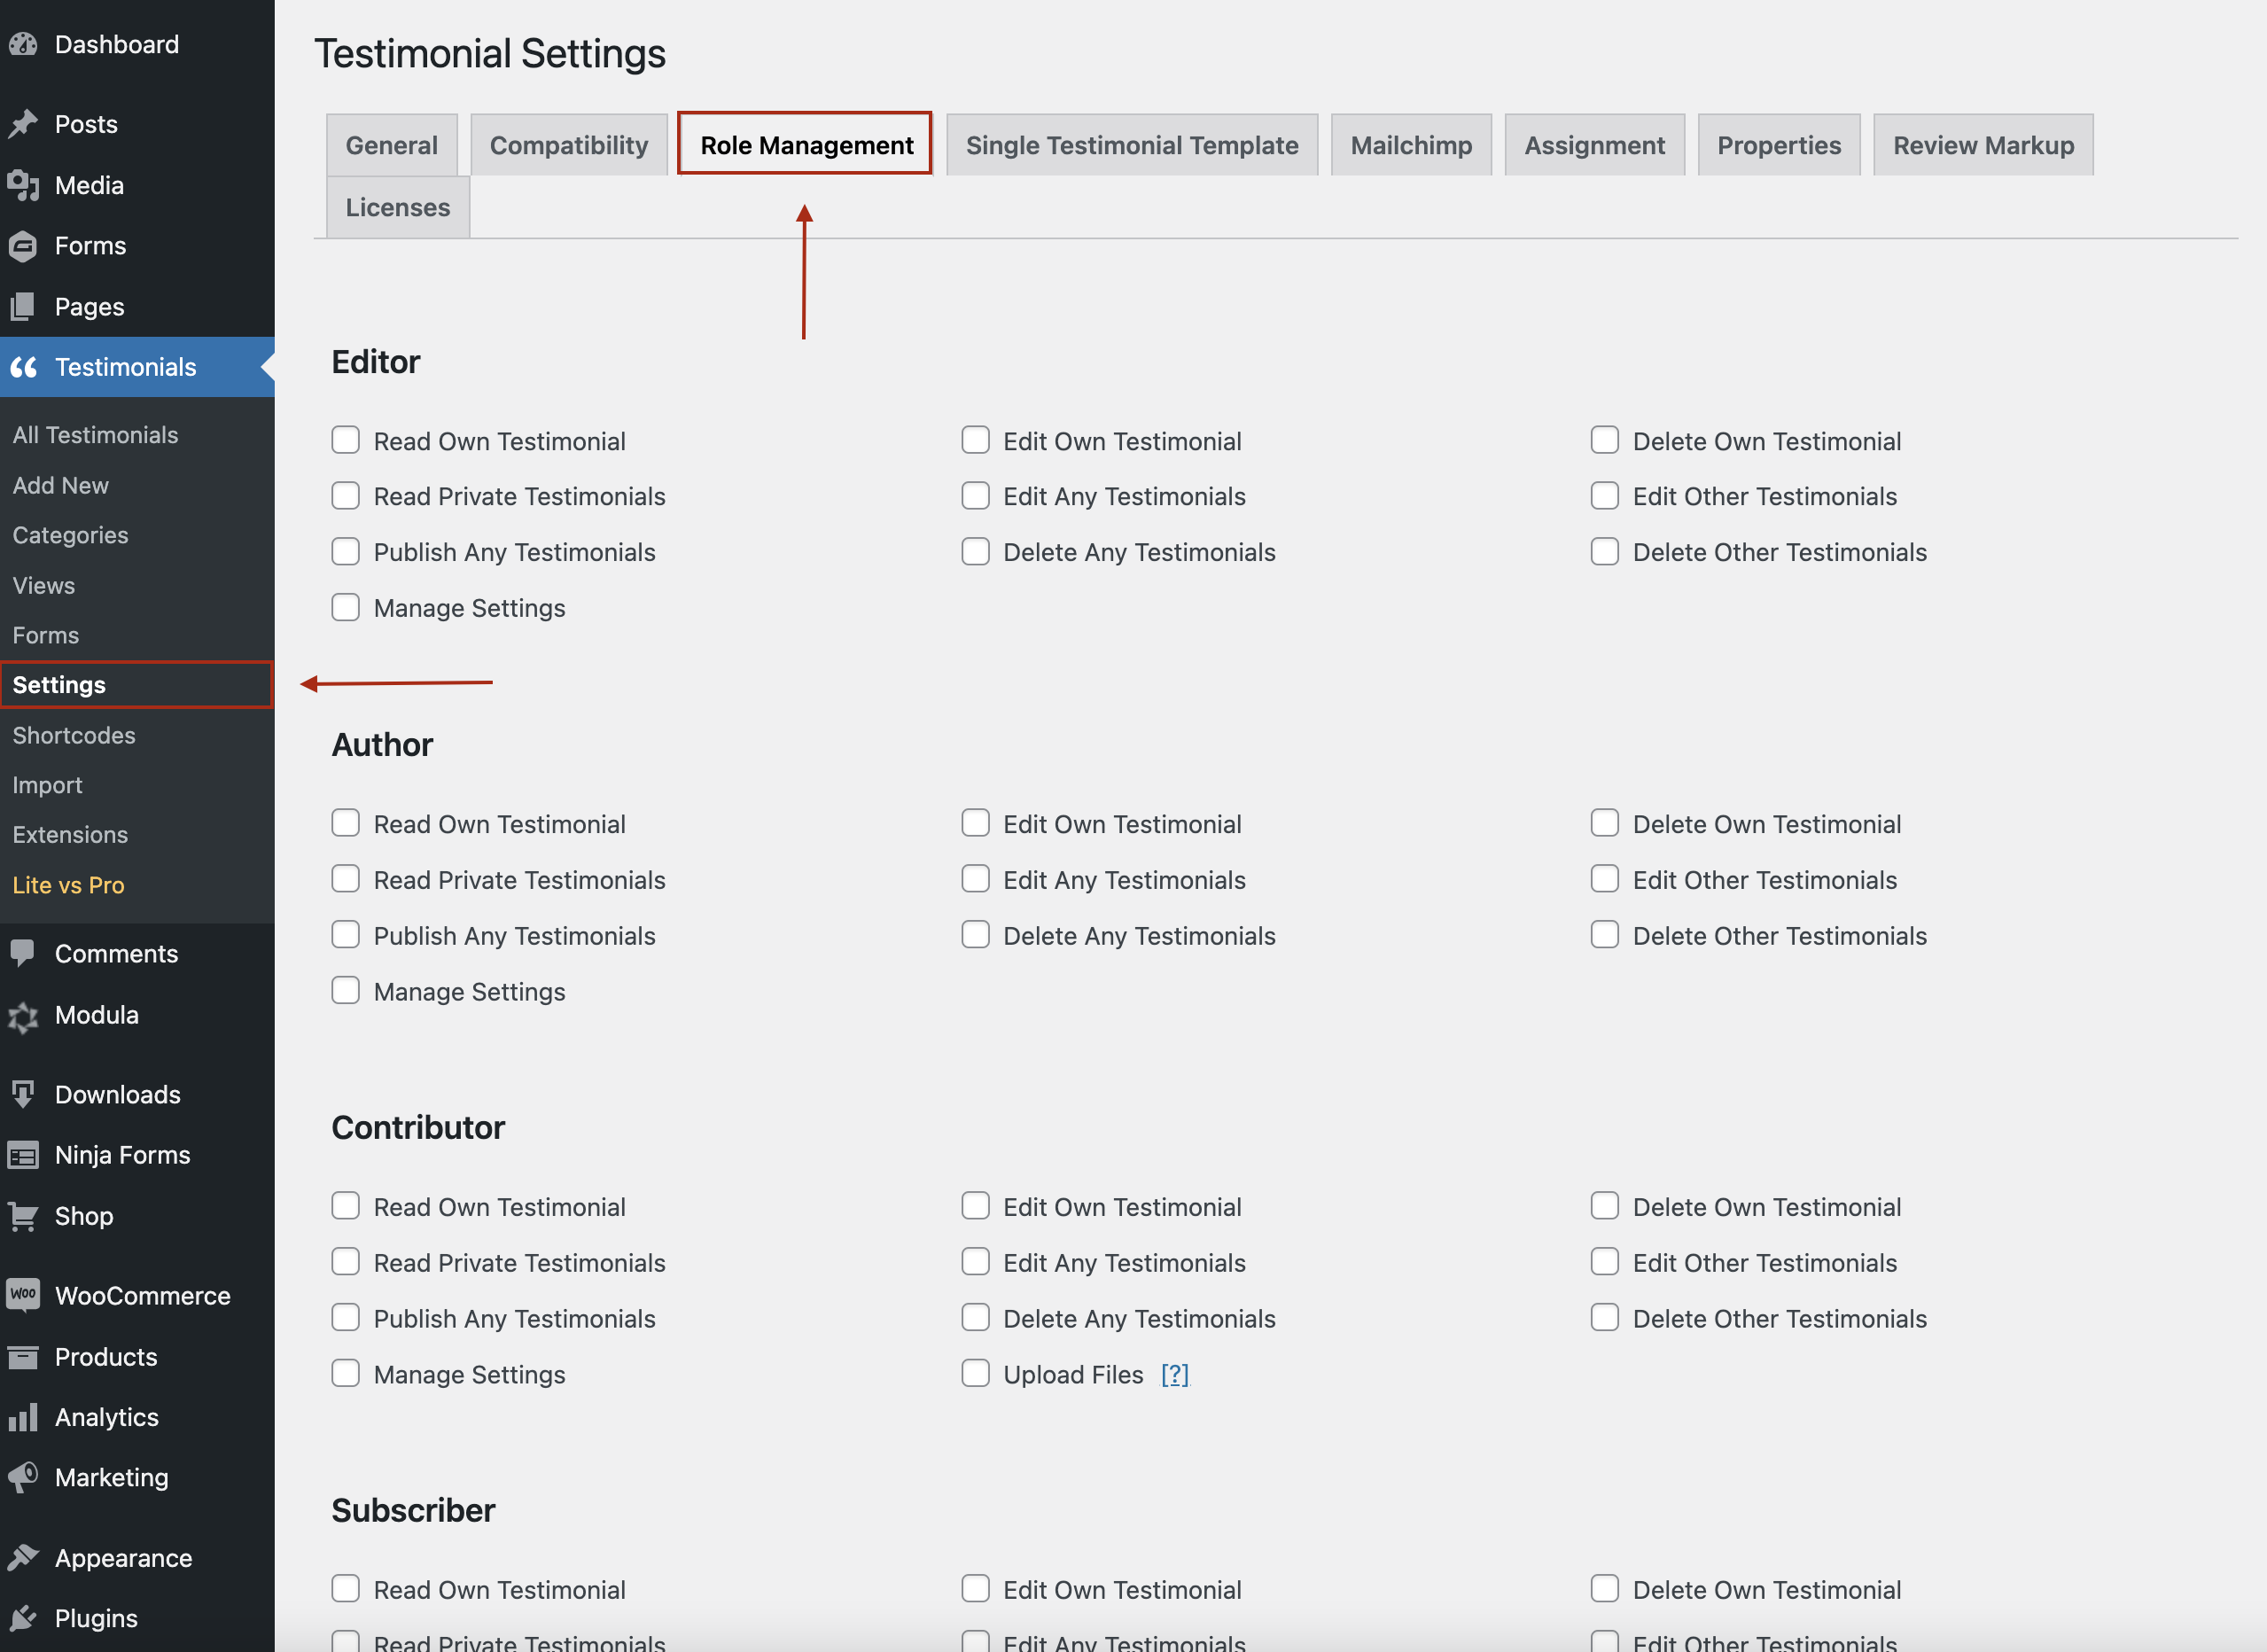
We’re giving power back to the users and, as such, we’ve created the Role Management extension where admins can decide which user roles are worthy of adding, editing, or removing testimonials. To use it, you need to go to your WordPress Dashboard > Testimonials > Settings > Role Management. You will see there all user roles, and you can set permissions for each one.
And this is it! Now you know how to create and add testimonials on your website without touching a single line of code and use them as social proof in minutes.