The “Read More” button is a feature that allows you to display a larger number of testimonials on a page without overwhelming your visitors with too much information at once. This functionality hides the additional testimonials behind the button until the user clicks on it, revealing the rest of the content.
By utilizing this feature, you can present your testimonials cleaner and more organized, making it easier for potential customers to browse through them. The “Read More” button is an excellent solution for improving the user experience on your website by minimizing clutter and improving the overall visual appeal.
To install and activate Strong Testimonials, make sure to check our documentation.
For more information and a step-by-step guide on creating new testimonials, check out our knowledge base guide.
Step 1: Create an all-testimonials page and view
First, you need to set up a page to display all the testimonials.
To do so, create a new view and give it a suggestive name, such as the All testimonials page view. Select all the testimonials you want to be displayed with this first view, save the changes, and copy the generated shortcode.
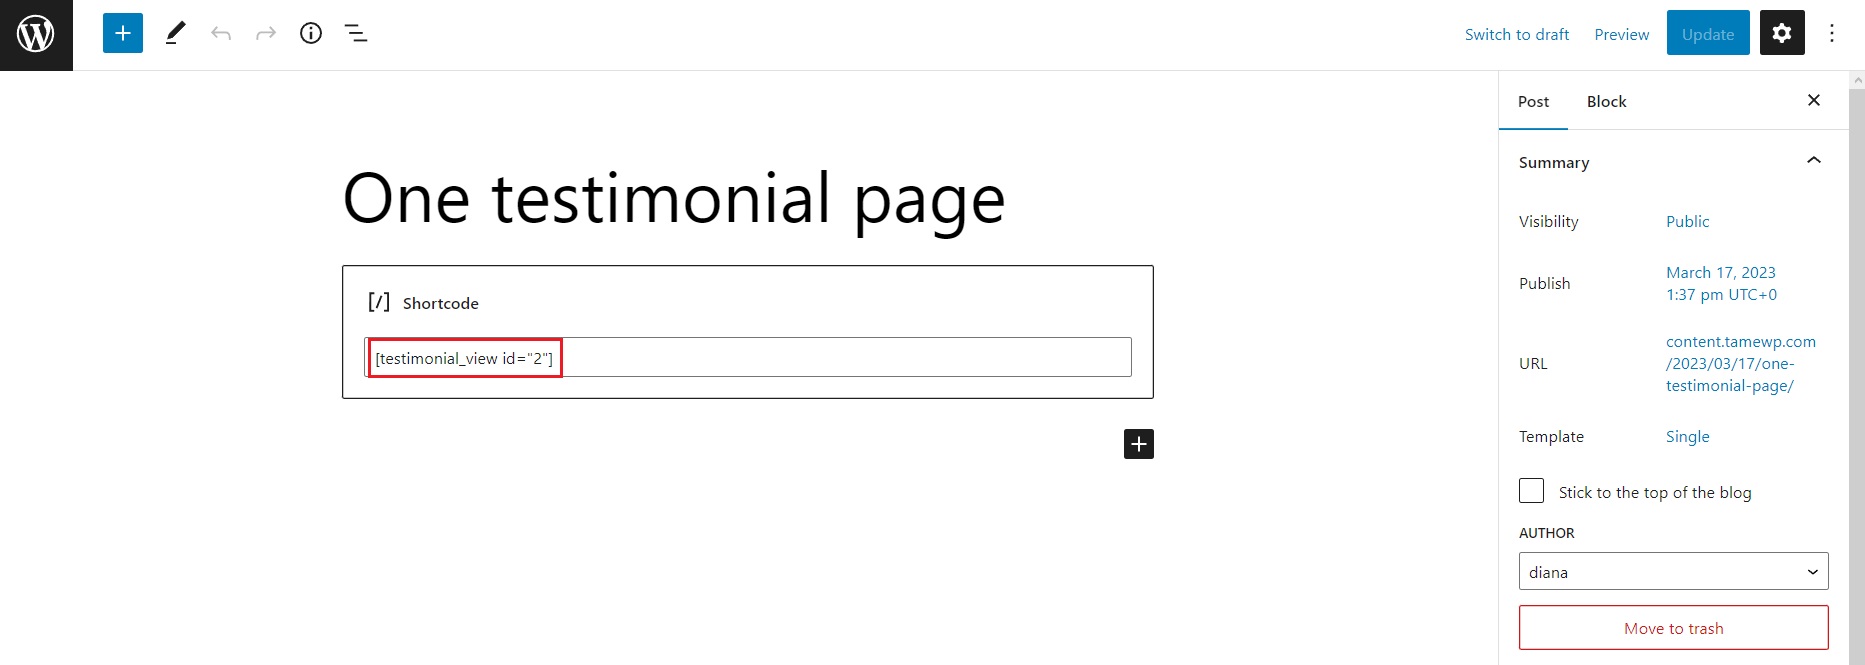
Next, go to the page you want to display all your testimonials on or create a new one and paste the shortcode there. Save or publish the page.

Step 2: Create a second view and add a “Read more“ button
This second view will be for displaying a small number of testimonials which will have a read more button or link to the first page we created, the one with all the testimonials.
Go to Dashboard > Testimonials > Views > Add new and give it another suggestive name.
In the settings of each View, in the section Extra, there’s this option: “Read more” link to a page or post.
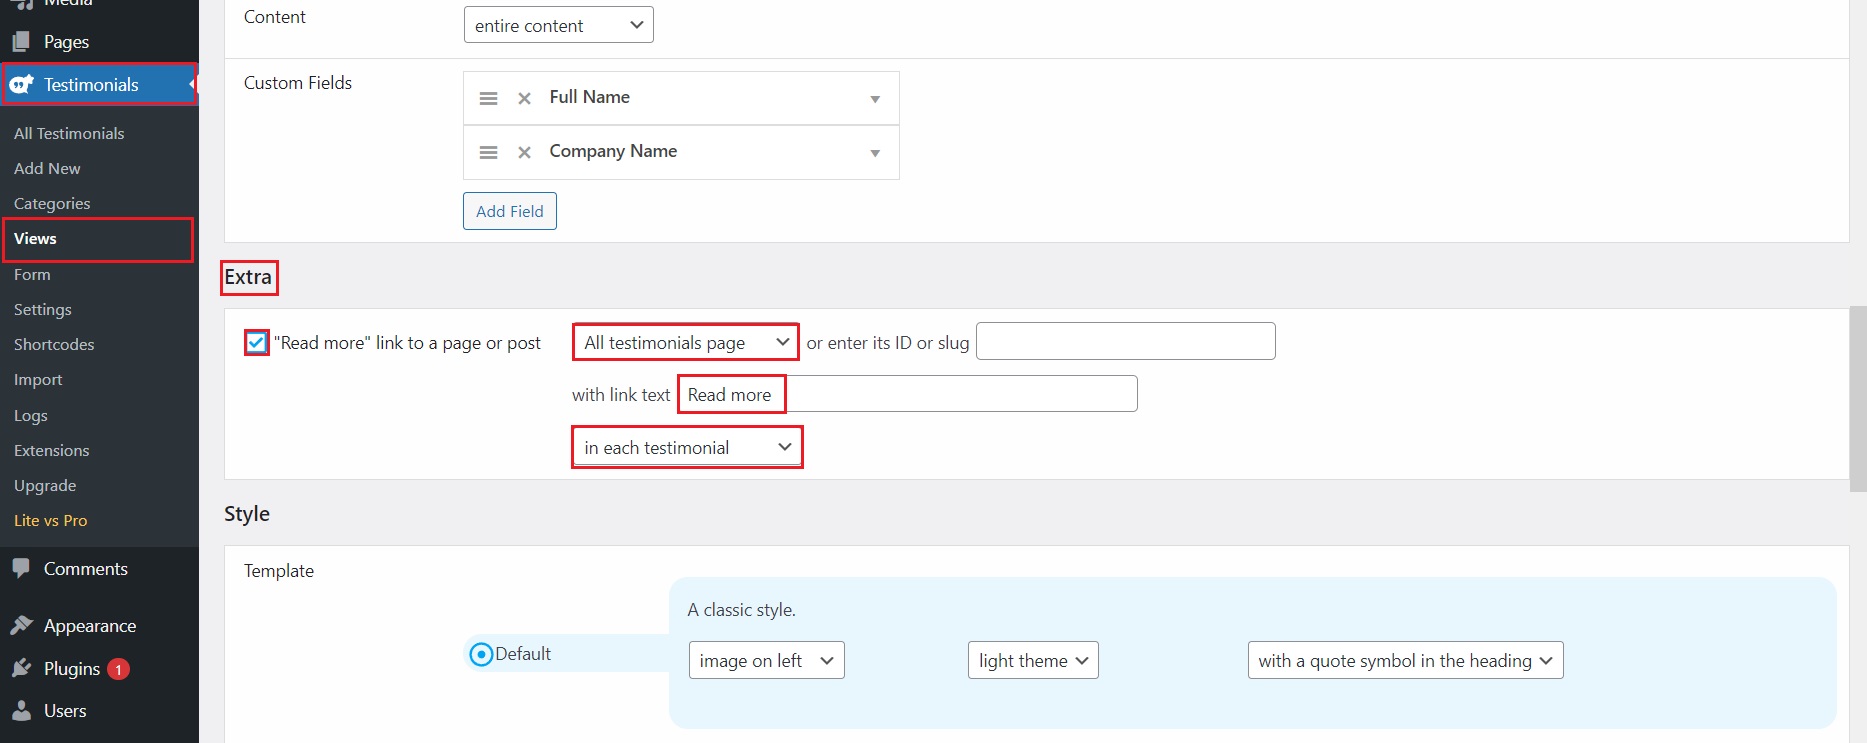
In the Extra section, select the All testimonials page from the drop-down menu.
Step 3: Display your testimonials
Once you are happy with all the customizations in the step above, don’t forget to click the Save changes button.
A new shortcode will be generated. Head over to another page or post, where you want your low number of testimonials to be on.
This results in several testimonials displayed on the front end, followed by a Read More link. A new page will load when you click the link, showing all/more testimonials.

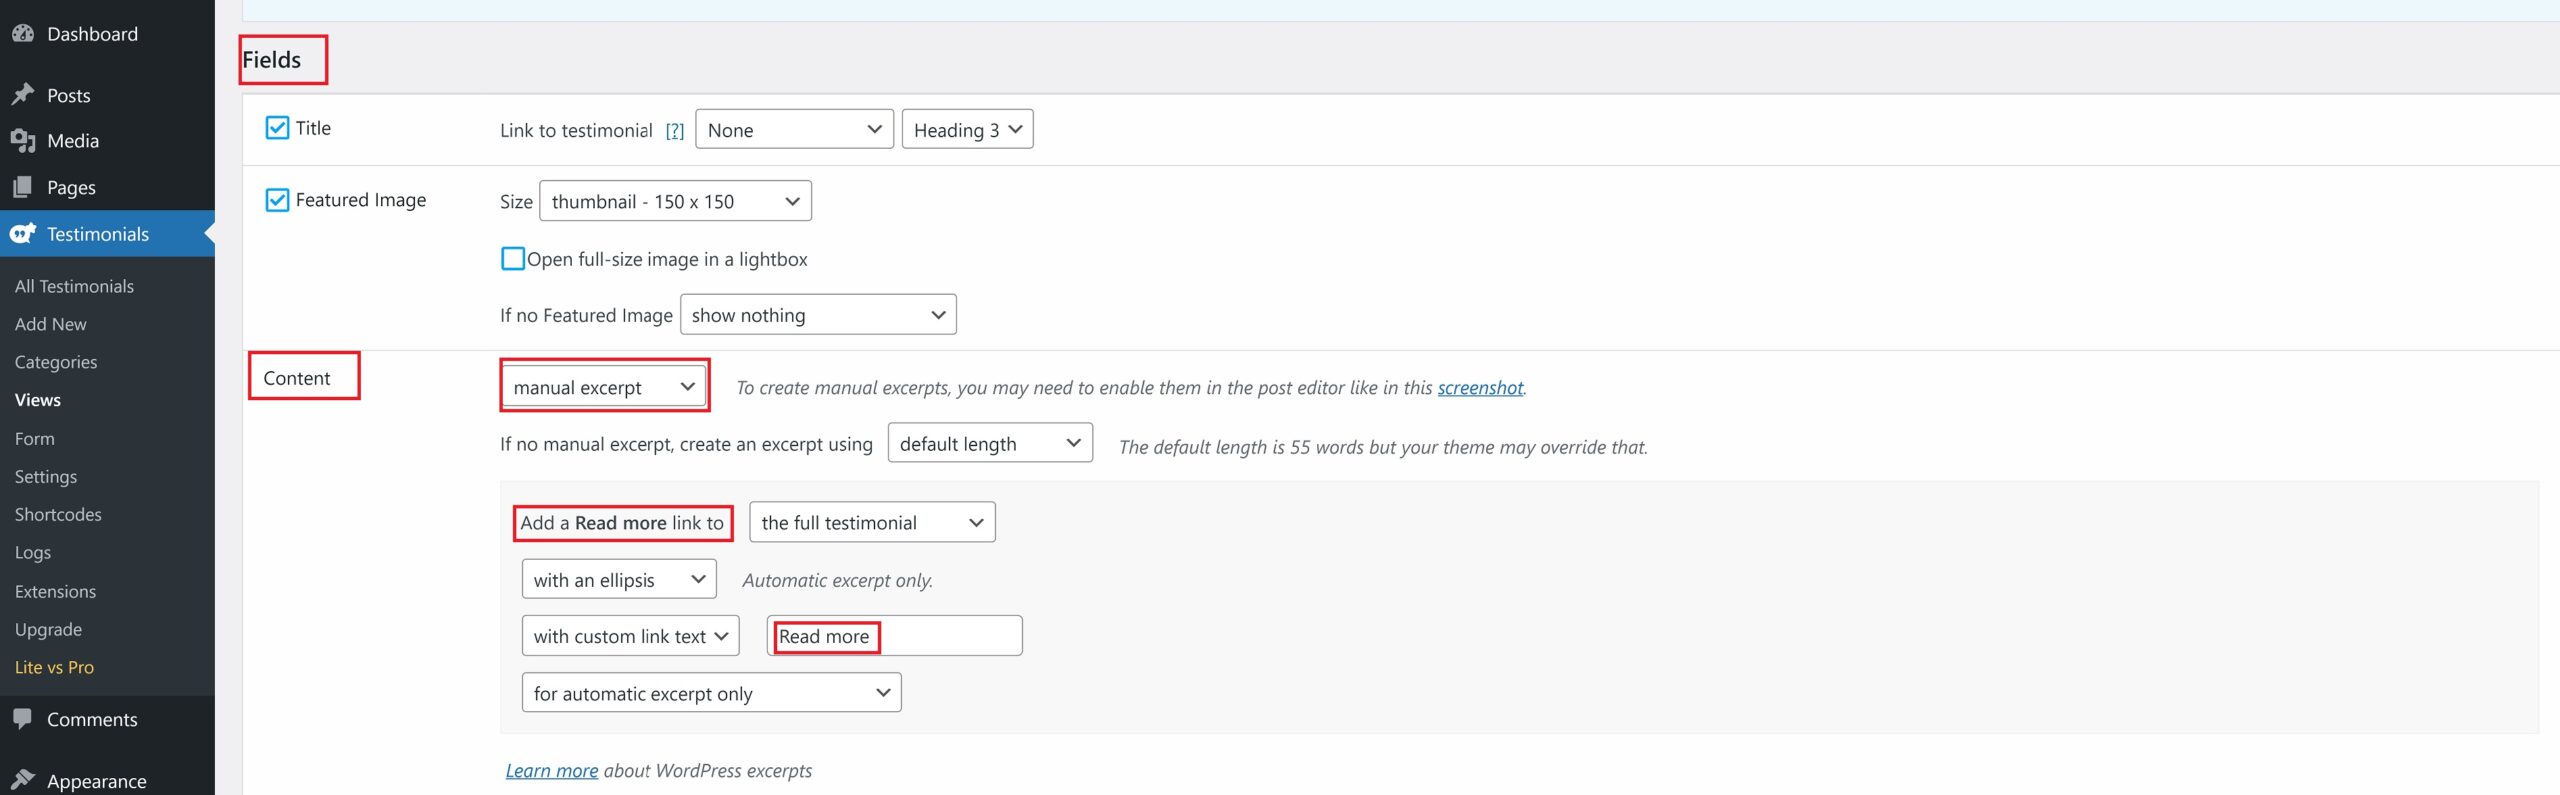
Note: In case of longer testimonials, there’s an option to create either an automatic or a manual excerpt of the testimonial, specify the length of it, and add a Read more link text to either the full testimonial or expand the content in place.
With the Infinite Scroll Extension, you can create pages of testimonials with a custom number on each page. You can insert a load more button for displaying testimonials progressively. Visitors can scroll effortlessly, and you have the flexibility to customize the appearance and number of testimonials shown.