
Social proof can be a convincing metric for any business. If you run a testimonial directory, users can browse through every business within, and choose the right one for their needs. However, it can be tough and time-consuming to curate the right testimonials then display them.
With the right WordPress plugin in place, you can automate the entire process. Users can submit a testimonial for one of the directory entries, the plugin will assign it to the right post or page, then you can add it to your directory.
For this tutorial, we’ll show you how to collect, assign, and add testimonials using an automated process. By the end, you’ll be able to showcase testimonials from real users for each business within your directory.
Table of contents
- What a Testimonial Directory Is (and why Automating Yours is a Good Idea)
- Our Use Case for Collecting, Assigning, and Adding Testimonials to a Directory
- How to Collect, Assign, and Add Testimonials for Your Testimonial Directory Website Using Automation
- How to Add Filters and Average Ratings to Your Testimonials
- Conclusion
What a Testimonial Directory Is (and why Automating Yours is a Good Idea)
Almost every customer will read reviews before they make a purchase. As such, you’ll want to make sure you help the companies within your directory curate only the best reviews and ratings to show off. One fantastic way you can do this is through asking for testimonials.
Even better, you can add all of these to a testimonial directory. This is an online listing of businesses, establishments, and other bodies within a chosen industry. Within each entry of your directory, you can add comments, reviews, and ratings to help other users make a good decision.
However, it’s ironic that the greater your product or service, the longer this process can take. After all, you’ll need to solicit testimonials, collate and organize them, then add them to each entry.
However, you can automate the process within WordPress. While there is some setup involved, once you finish, you’ll hardly need to touch your testimonial directory again.
Our Use Case for Collecting, Assigning, and Adding Testimonials to a Directory
In order to show you how straightforward it is to automate your testimonial curation, we’ll walk you through an example. Here’s what it will cover:
- Our example website will list companies from specific niches and fields. While our case will be based on universities, yours could be a list of tradespersons, doctors, gyms, or anything else relevant.
- There will be a directory page on the site that lists all of the universities in our database.
- Each entry in this list will have its own dedicated page. This will include information about the university, a batch of testimonials from students, and a form to solicit new testimonials from users.
Under the hood, our chosen plugin will take the testimonial submission and assign it to the same page where it was submitted. As such, you won’t be able to see the testimonial on any other page on the website.
You can check out the Cooliversity website to see a real-world example of our use case:

However, you can create your own website in a flash. Next, we’ll look at how to do it.
How to Collect, Assign, and Add Testimonials for Your Testimonial Directory Website Using Automation
Across the rest of the article, we’ll show you how to put together an automated testimonial directory using the Strong Testimonials plugin. Before that though, you’ll want to set up a directory. Let’s look at this first.
1. Set Up Your Directory
Before you look at WordPress plugins and automating the testimonial collection process, you’ll need an online directory to center everything around. This will involve a defined structure for your directory, that will include the following:
- A main page to act as the directory hub. You’ll add links to the individual pages here.
- Speaking of which, you’ll also need to create individual pages too – we’re going to add WordPress posts in our example. These should often be of a similar structure, using a comparable template. You may even want to use custom post types, if you have a relevant suitable plugin to help you create them.
This doesn’t have to be a complex layout, just with enough similarities to support the User Experience (UX) If you don’t know what to cover, here’s a quick list of our recommendations:
- You’ll want to offer a ‘blurb’ to help give the reader context about what you’re presenting (and what they’re reading). Of course, this will be specific to your own industry and niche. It may help to present this in the style of a landing or sales page.
- Images always help the UX, and you’ll want to include something here too. The same ‘rules’ for typical layouts will also ring true here.
However, it’s worth dedicating some extra time to your testimonials section, as it’s the most important part of your page.
The Elements You’ll Need to Include in Your Testimonial Section
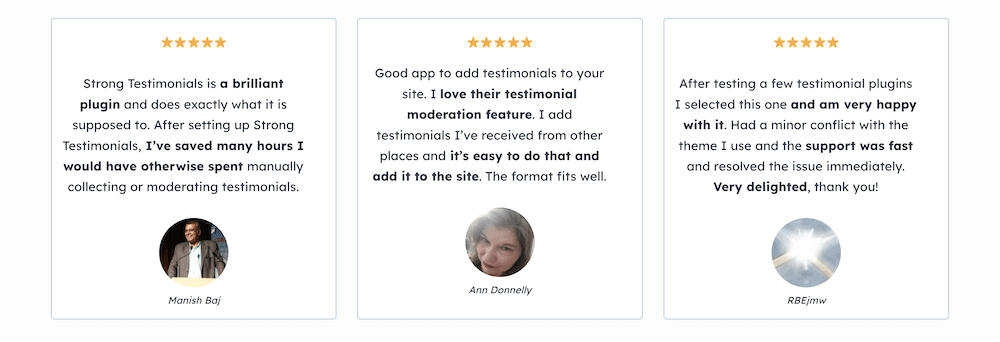
The testimonial section is going to be non-negotiable – at least for our purposes. We’ll discuss how to add this later, but it will include the testimonial itself and details on the user giving feedback. There are also additional features such as ratings that can help to hammer home the positive feedback.
The final element of the testimonial directory page is a dedicated submission form. You can think of this kind of like a Call To Action (CTA) in that you want a feedback submission to be the end goal for the reader.
While there are many different ways to add these to your page, only one WordPress plugin can give you the right blend of features and functionality.
2. Choose the Right Testimonials Plugin for the Job
If you have the right knowledge and experience, you could code up a testimonial solution for your WordPress website. However, there are some significant drawbacks to this approach:
- You may not have the required level of skill to implement everything you need to.
- Bugs and errors could cause havoc with the rest of your site. This will take time to hunt down and fix.
- By extension, you’ll have to use a lot of time and resources to code your own solution. This will also cost money. It could be that you don’t have any of this to spare.
Instead, you can opt for a WordPress plugin. This should have good development, reliable support, and a feature set you’ll need to run a successful testimonials directory.
While there are a lot of WordPress testimonials plugins on the market, there are some absolutes you’ll want to make sure are in place. Of course, the plugin will need to offer the right level of features and functionality for your needs.
This will be a subjective decision, but there are some absolutes you’ll want to consider:
- For instance, you’ll want to be able to offer a filtering system throughout your testimonial directory. This will help users find testimonials, reviews, and ratings relevant to them.
- Your plugin will need to help you assign the right testimonials to the correct pages within your directory. If it can automate the process, even better.
- The testimonials pages will use forms, as this is perfect for usability. As such, your plugin will want to offer form functionality in the box.
In more objective terms, a plugin will need to have current development. You can check this out on WordPress.org in some cases. We’d argue that a plugin with a recent update within the last six months is sufficient.
Much like the entries in your testimonials directory, you should take user ratings and reviews of the plugin into account. You can see this on WordPress.org too, as a star rating:
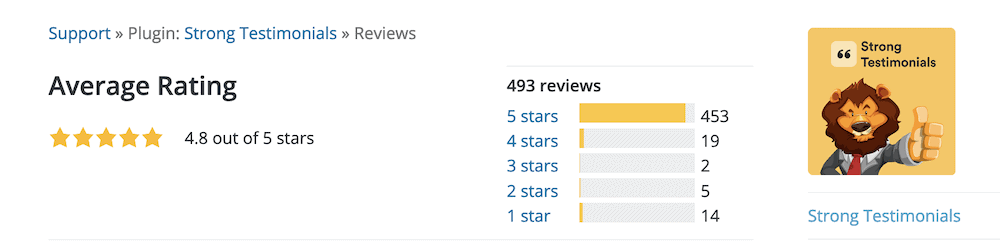
There are also reviews you can read about user experiences. Our recommendation is to choose a plugin with at least a four-star rating. We’d read up on any one-star reviews too, as this will give you more of an idea about the quality of development and level of support.
Introducing Strong Testimonials
When it comes to suitable testimonials plugins for WordPress, we know of one that offers stellar support, consistent development, and hundreds of five-star reviews from satisfied users. Strong Testimonials is arguably the best plugin on the market to create a testimonials directory.

Strong Testimonials Lite is free, and will cover almost all of the bases you need. However, the premium version includes much more, and will be what you’ll need to follow along with this post:
- Styling comes from your theme in the first instance, and is enhanced from some customization options from within the plugin.
- There’s a built-in form that will mean you won’t need another solution to collect testimonials.
- If you have specific branding for your testimonials (such as “feedback”) you can change this terminology.
- You have plenty of ways to change up how your testimonials and forms look with regards to layout.
- You’re able to import reviews from third-party services such as Facebook, Yelp, Google MyBusiness, WooCommerce, and more.
There’s plenty more to discover about Strong Testimonials, and our dedicated page will compare and contrast each pricing plan.
Strong Testimonials’ Pricing
Speaking of which, Strong Testimonials has plans to suit every budget:
- Basic. At $29 for a single-site license, you’ll get the basic functionality and the Country Selector extension.
- Plus. This plan gives you three site licenses for $49 per year, and comes with a batch of extensions. For example, the Post Types Assignment extension is something we’ll come back to later.
- Business. For $69 per year, you have the full Strong Testimonials experience. There are five site licenses to take advantage of, and the complete collection of available extensions.

Strong Testimonials Plugin
We’ve built the #1 WordPress plugin for collecting, managing, and displaying testimonials. Drive more sales by leveraging your existing user audience.
To follow along with our example, you’ll need the Plus plan at least. This will give you access to the Post Types Assignment extension. In simple terms, this lets you specify which post types can display testimonials, and it doesn’t require code to use.
The Plus plan also includes some other essential extensions such as CAPTCHA and Honeypot Spam. Combined, these will help you control any spam comments, review bombs, and any other scenario that arises from an automated testimonial form on the front end.
If you’d like to opt for the Business plan, this also includes some valuable extensions. For example, the Filters extension lets you implement a powerful and advanced filtering system to help further refine choices on the front end.
Installation
Once you choose your plan and make a purchase, you’ll need to install and activate the core Strong Testimonials plugin, and any necessary extensions. Our documentation shows you how to install both the free version of the plugin, and the premium edition.
Also, you’ll install each extension with the same process as the premium version of Strong Testimonials. This means you can carry out the same familiar process for each, which should leave you ready to create your testimonials directory.
3. Create Your Testimonial Structure, Then Assign It to a Form and the Directory
Once you have your directory structure in place and the Strong Testimonials plugin on your WordPress website, you can begin to create your testimonials infrastructure.
Creating Your Form
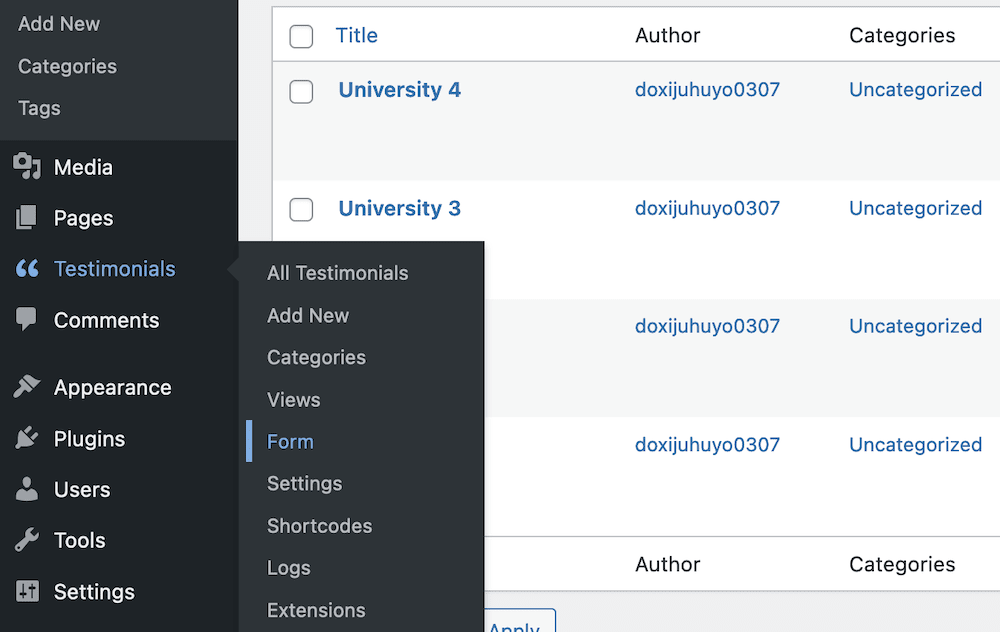
The first step is to create a form. To do this, head to the Testimonials > Form link within WordPress:
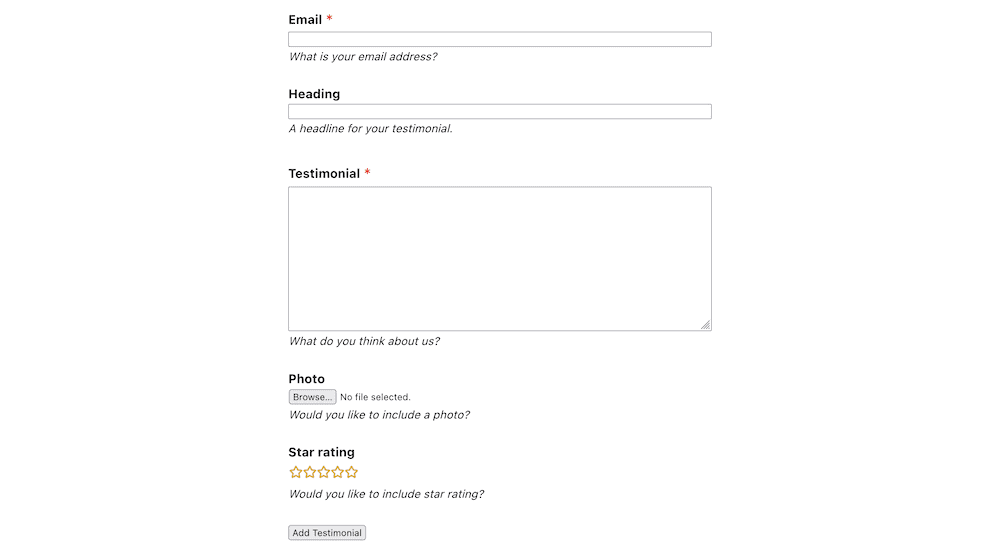
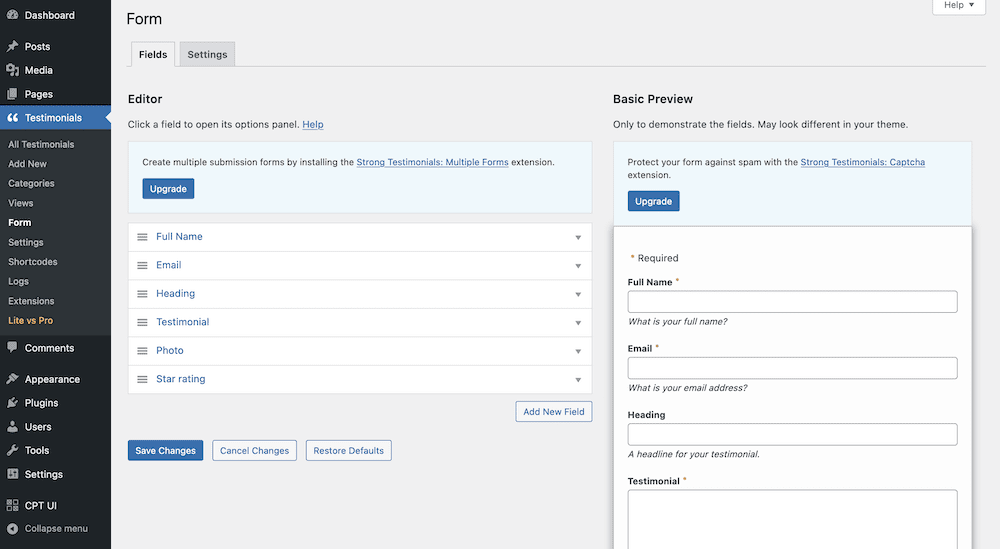
This will bring up a screen with an editor on the one side, and a basic preview on the other:
Here, you’ll use the Add New Field button to open up a new dialog, then choose the correct type of field from the drop-down menu:
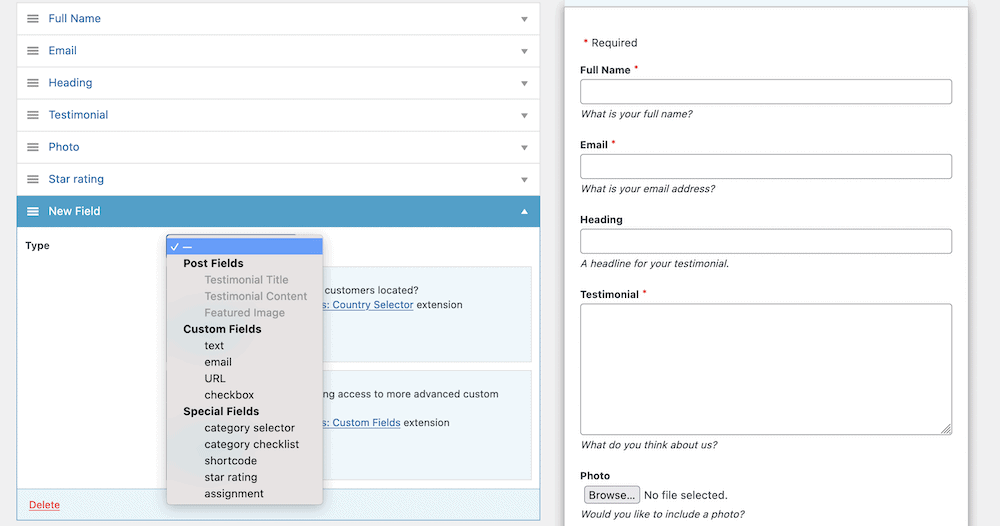
When you finish, click Save Changes, then scroll back up to the top of the screen.
Adjust Settings for Your Testimonial Form
At the top, choose the Settings tab and check out the options:
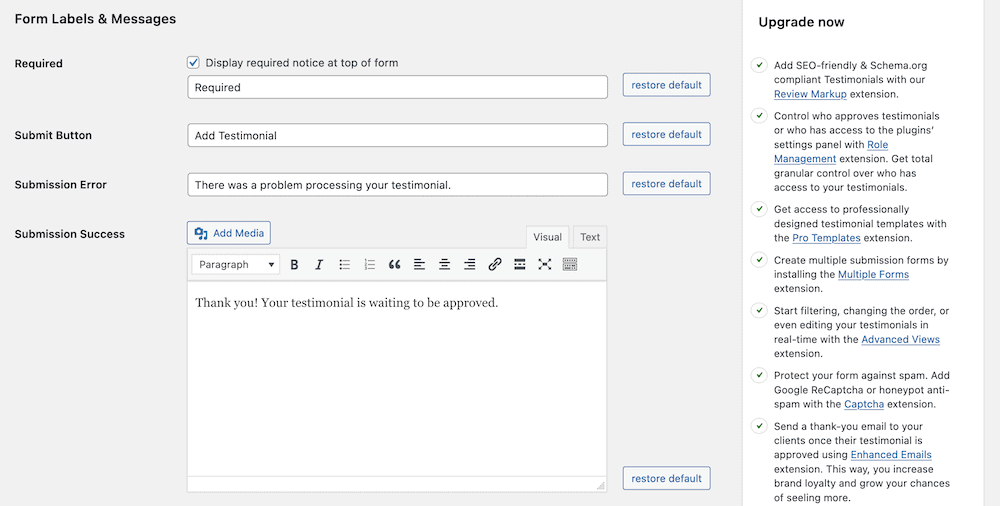
This gives you a wealth of options that we can’t run through here, but you can read about in our documentation. It gives you ways to customize the Submit button, the front-end messages a user will see, and much more.
However, there’s one option we want to focus on: scroll down to the Post Status radio buttons:
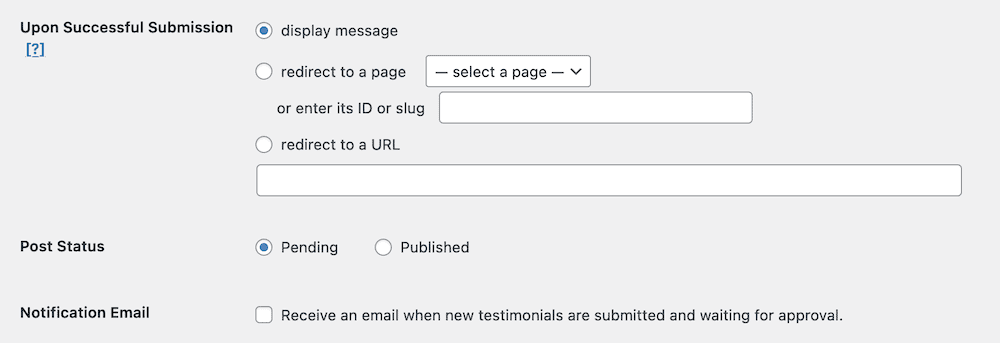
The one you choose for your form will depend on what action you’d like to take with a submission:
- Pending. If you want to choose and moderate testimonials before submission, this is the option for you.
- Published. You’re able to automatically publish testimonials using this option. This is a good use case for the CAPTCHA and Honeypot Spam extensions in Download Monitor’s Plus plan.
Once you choose the right option for you and make further tweaks to the settings here, save your changes at the button, then look towards assigning your testimonials form to other pages.
Assigning the Form to Your Posts and Pages
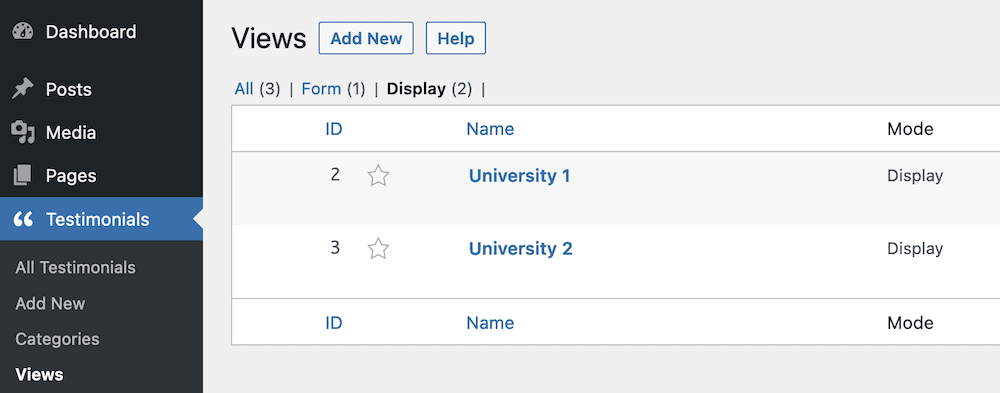
This part of the process involves using the Post Types Assignment extension. First of all, head to the Testimonials > Views page in WordPress, and click the Add New button:
In short, you need to create views to link forms and testimonials to certain pages. This is a collection of settings that help you control how the testimonials (and forms) display on the front end. This screen lets you achieve one aspect of it:
The process here is as follows:
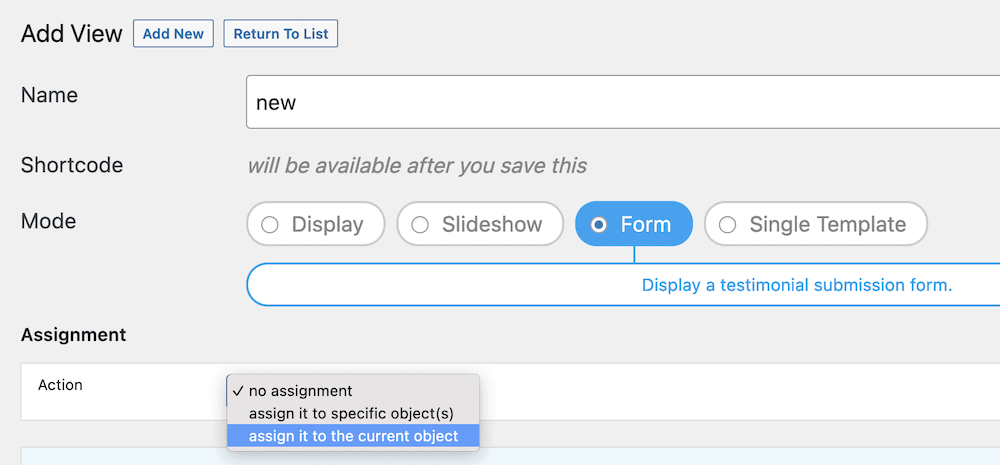
- Give your new view a descriptive name.
- Choose the Form mode, and select the form you’d like to use.
- In the Assignment > Action drop-down menu, choose Assign it to the current object.
- Save your changes.
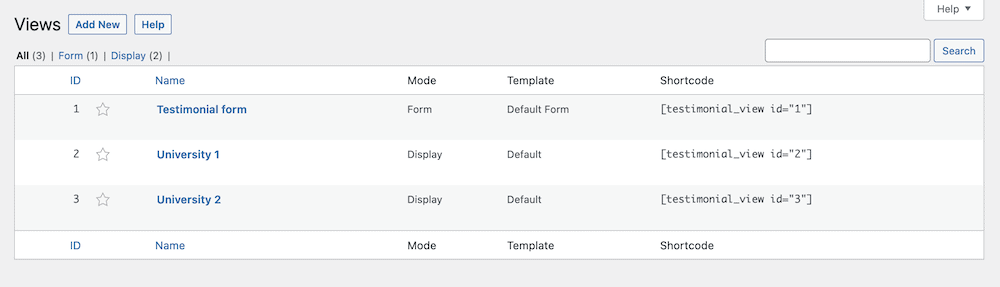
Next, head back to the Views screen:
Here, click Add New, and carry out the following:
- Provide a descriptive name again.
- Select the Display mode.
- From the Assignment > Filter drop-down menu, choose Assigned to the current object(s) and save your changes.
The final step is to head to the Testimonials > Settings > Assignment tab:
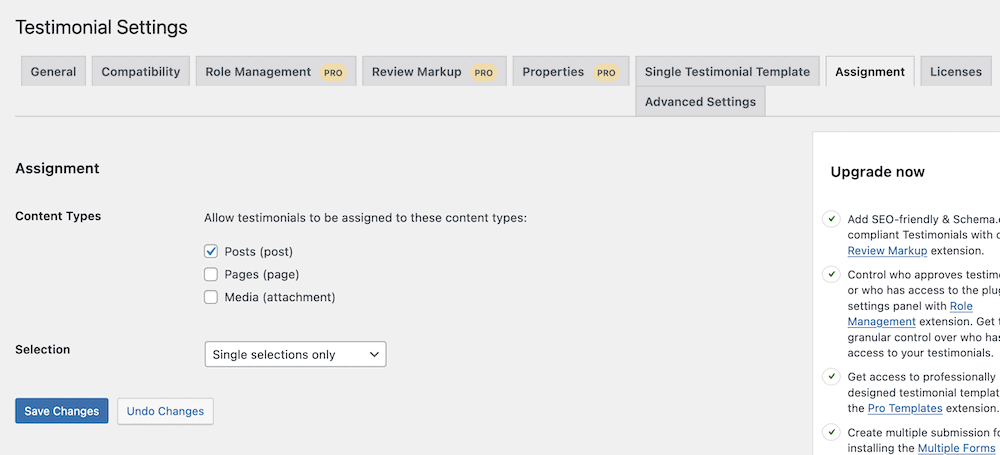
The Content Types section is important to us here. You’ll choose the relevant option that fits your workflow. In our case, we are using posts, so we’ll check the Posts (post) option and save our changes.
This is all you’ll need to do to automate the entire process of collecting, assigning, and displaying testimonials. However, you can take things further using other Strong Testimonials extensions.
How to Add Filters and Average Ratings to Your Testimonials
You’re able to use some of the other Strong Testimonials extensions to build in additional functionality to your testimonial directory. For example, the Business plan provides the Filters extension. This lets you filter and search different testimonials types.
To take advantage of this, you’ll need to head to an existing view (through Testimonials > Views) and edit it. If you scroll down the page, you’ll spot the Filters options:
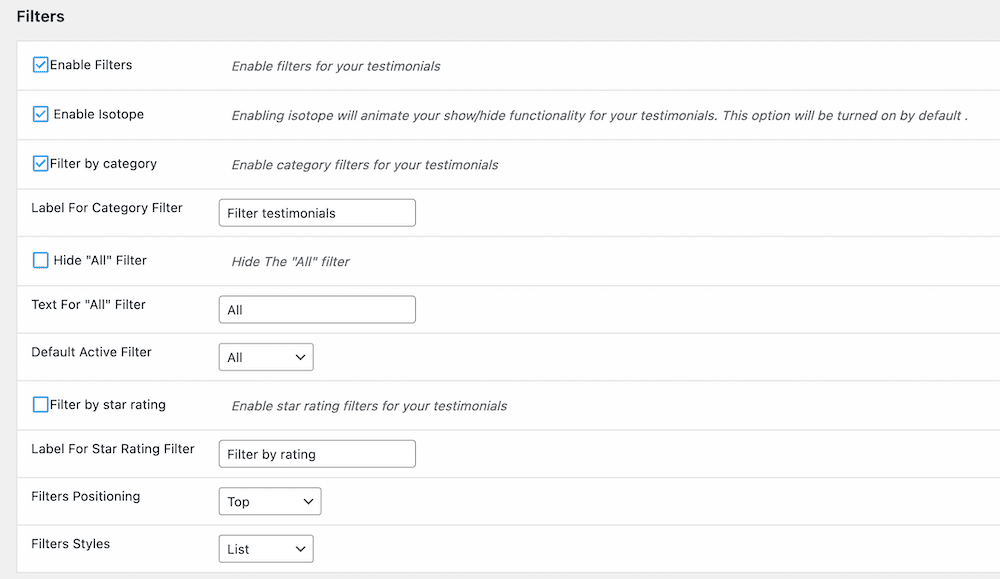
To get this feature working, you’ll want to check the following boxes:
- Enable Filters
- Filter by category
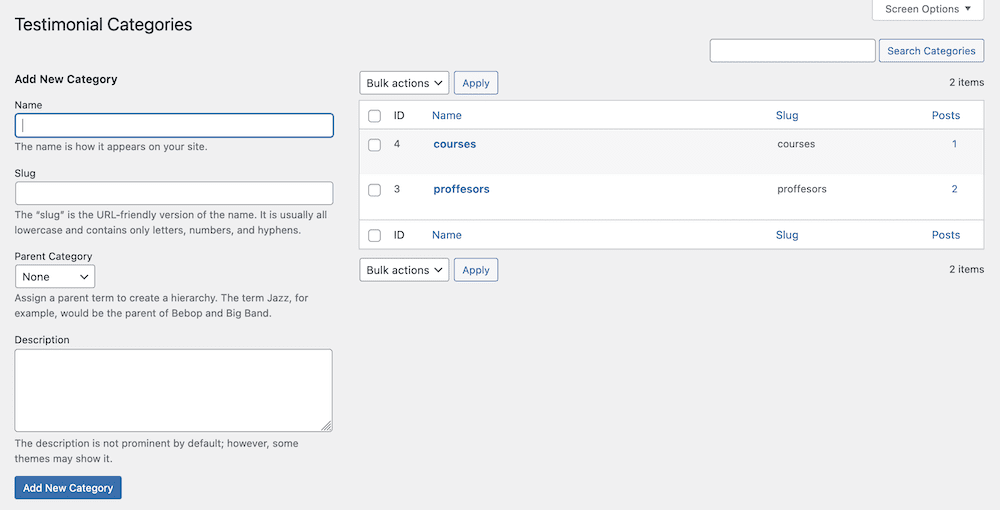
Once you save your changes, you’ll need to set categories and assign them to individual testimonials. The Testimonials > Categories screen will look familiar if you already use the built-in WordPress functionality:
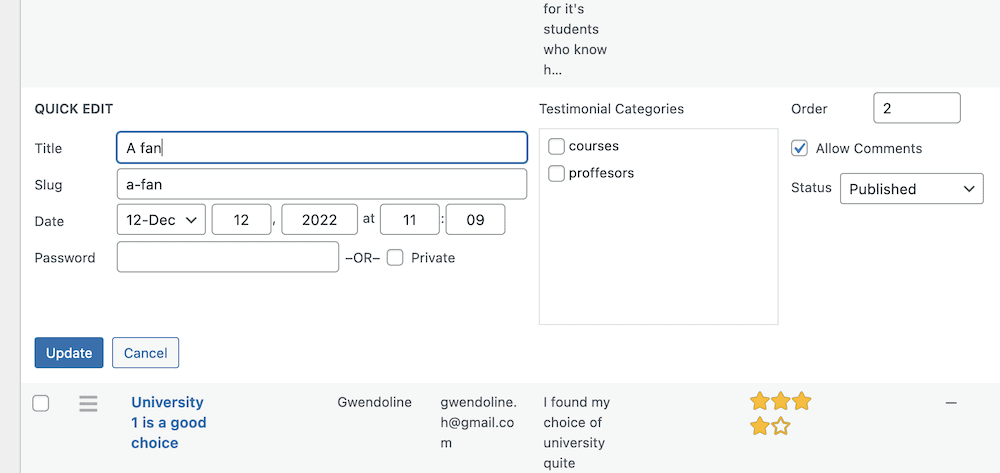
To assign testimonials to these, head to Testimonials > All Testimonials. If you edit an individual testimonial, you can also assign an existing category. The full Edit screen lets you create those categories too:
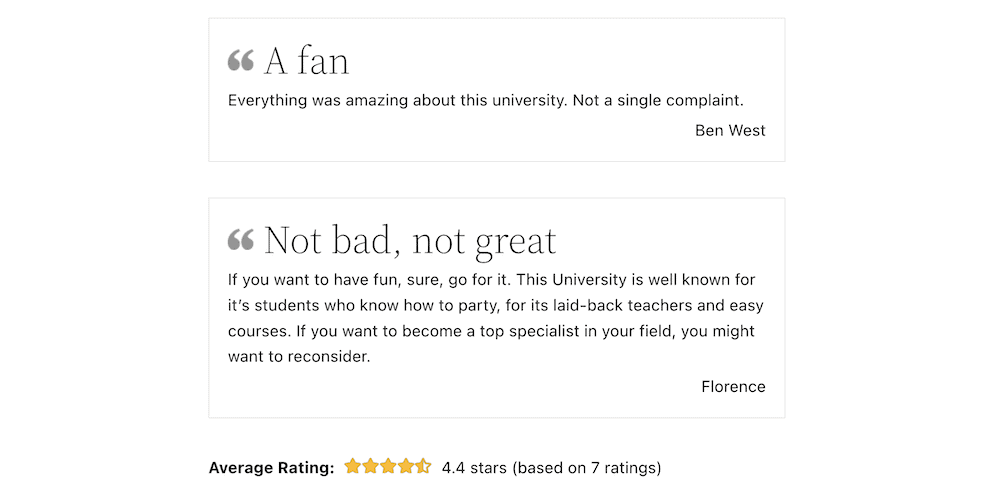
You’ll use shortcodes on your directory posts to showcase testimonials. You’ll find the shortcode for each view on the Testimonials > Views > Edit View screen. However, you can also use the [testimonial_average_rating] shortcode on the post to display the rating of testimonials assigned to that post. This gives you some flexibility, and lets you provide a visual clue as to how positive the testimonial will be.
Conclusion
A testimonial directory serves a multitude of purposes. First, you give businesses a way to show off the best takes on what they offer directly from its users. Second, you can collate feedback on the same niche or subject and give readers those testimonials with less effort. However, without automation, this important job can take time and effort.
The Strong Testimonials plugin can help you automate the entire collection process. What’s more, you’ll have a minimal amount of work to do when it comes to displaying them in your directory. In fact, your entire workflow will give you much more time and headspace to tend to other areas of your testimonial directory and make it even greater.
Strong Testimonials offers a 14-day, risk-free, money-back guarantee. A single-site license starts from only $29 per year.
Strong Testimonials Plugin
We’ve built the #1 WordPress plugin for collecting, managing, and displaying testimonials. Drive more sales by leveraging your existing user audience.