Introduction
Strong Testimonials includes a fields editor that makes it easy to customize the testimonial form. You can quickly add or remove fields and change several display properties to meet your needs.
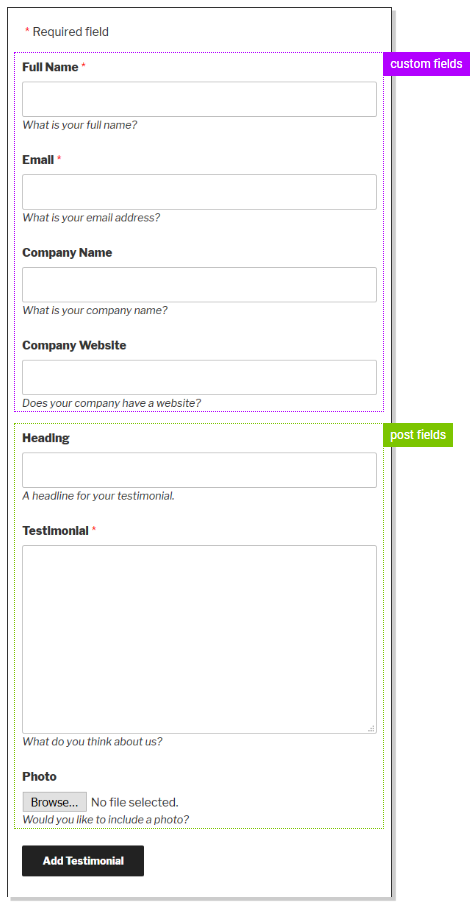
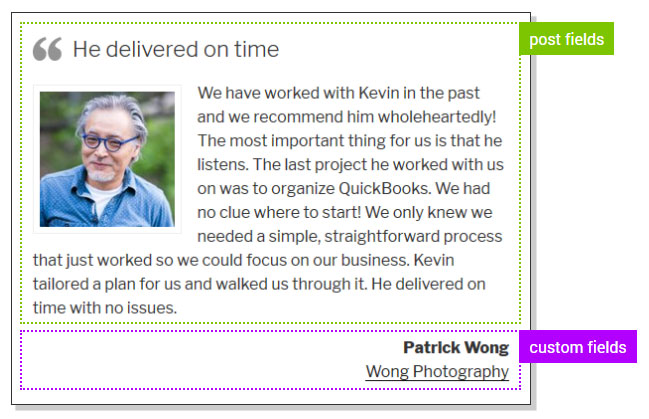
Testimonials are a custom post type. This is a very popular approach that makes many powerful features available to you and helps this plugin keep up with changes in WordPress. Since they are posts, you will see some fields referred to as post fields in this tutorial.
While this tutorial is about the front-end form that your visitors will use to submit a testimonial, keep in mind that any changes also affect the custom fields available in the post editor and the view editor.
In other words, you’re really doing two things:
- modifying the form as it appears on your site, and
- modifying the custom fields to suit your situation
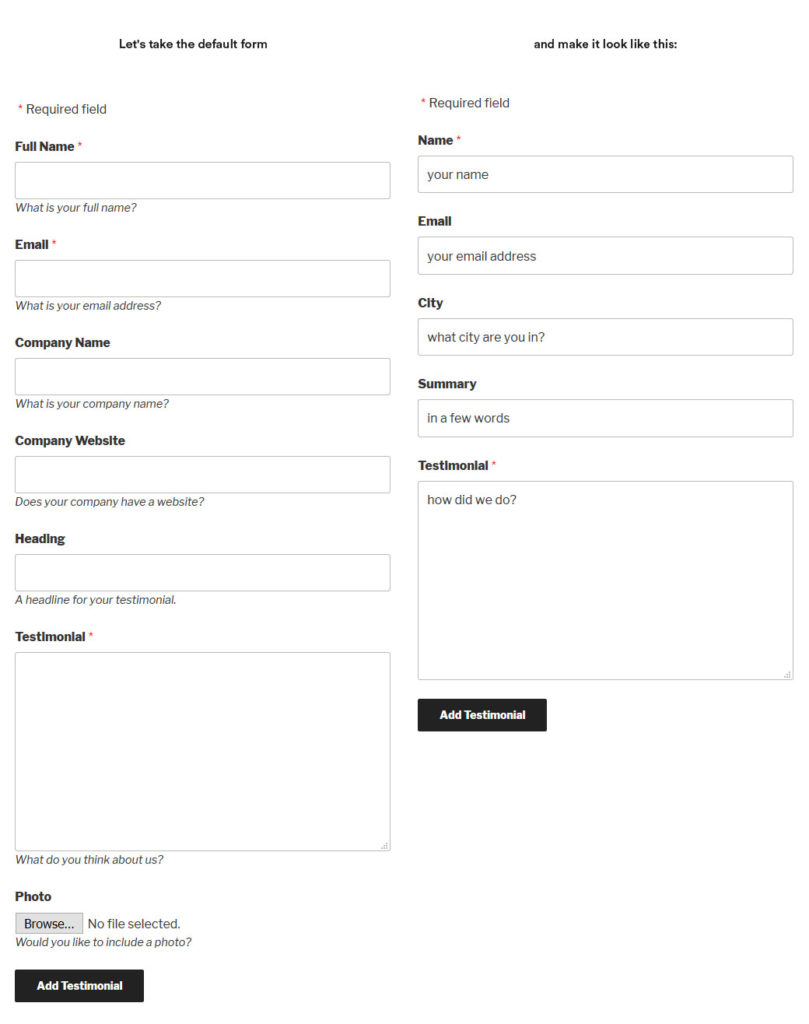
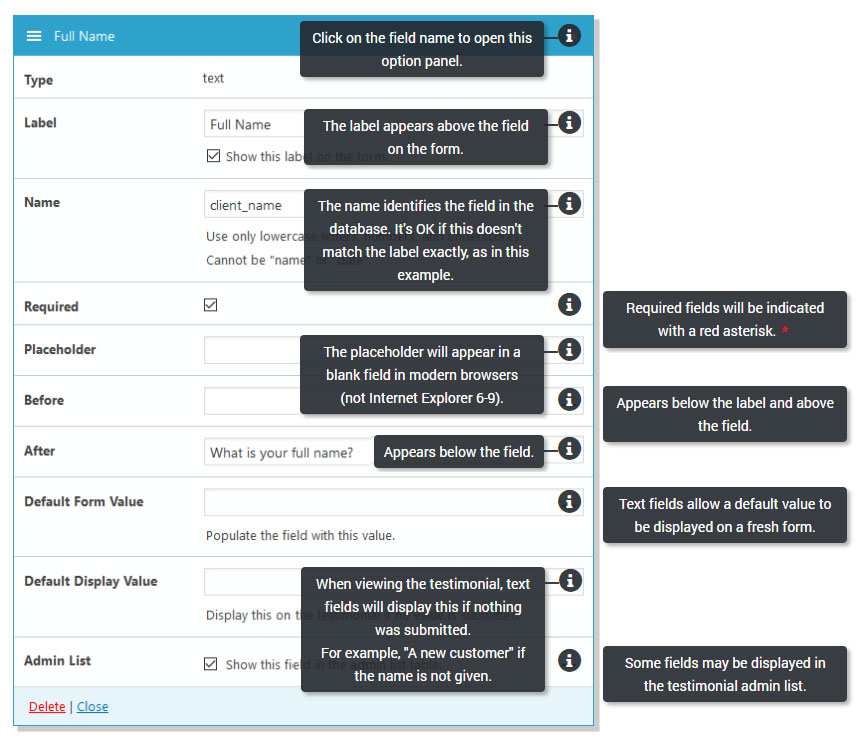
Before and after
The fields
| Post Fields | Default Custom Fields | Special Fields Available |
|---|---|---|
| title content featured image | a name an email address a company name a website | a category selector a category checklist a shortcode a star rating |
You can always restore the default fields and start over.
The default fields on the form:
The default fields when displayed:
The editor
Go to your WP dashboard > Testimonials > Form
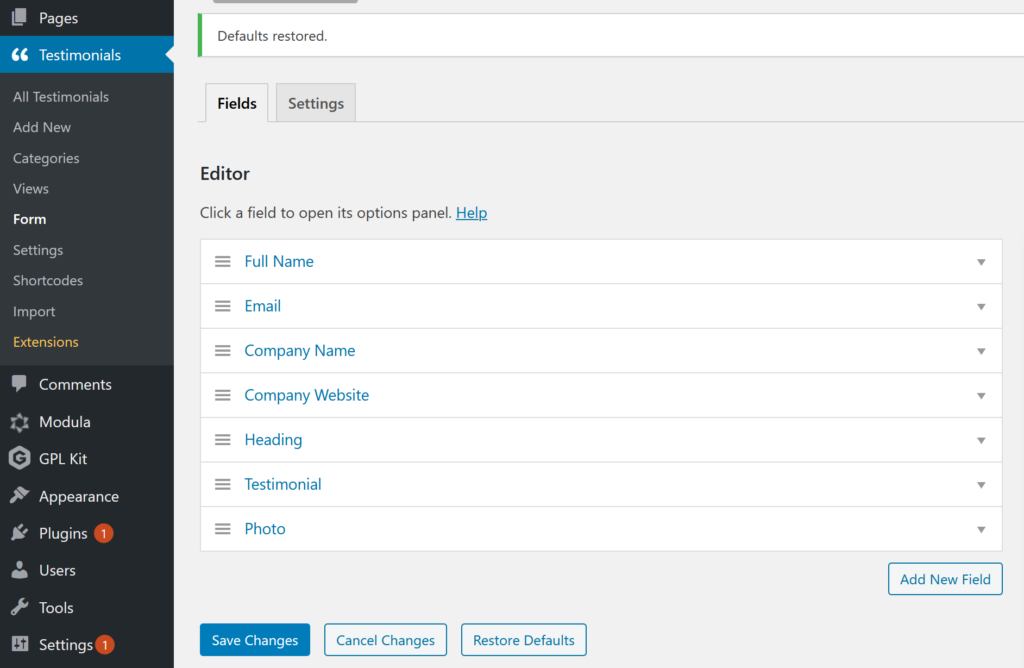
Field options
Deleting fields
You’ve seen the default fields and the editor. Let’s see how simple it is to customize the form. We are going to remove three fields, change three fields, and add a new one.
Open the Photo field and click Delete. Do the same for Company Name and Company Website.
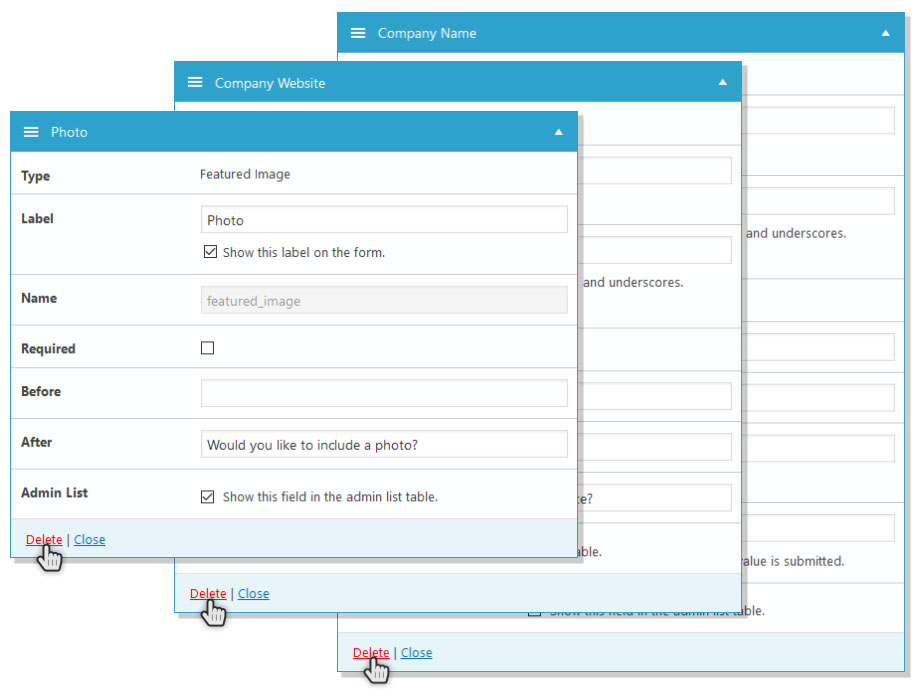
This only removes the field from the form. It does not delete any data.
Changing fields
Let’s change Full Name field.
- Change the Label to just “Name”.
- Add “your name” to the Placeholder.
- Remove the After text.

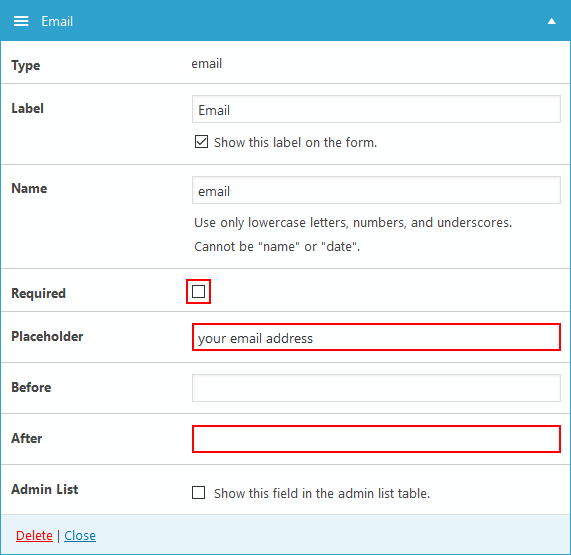
Now, let’s change the Email field.
- Uncheck “Required”.
- Add “your email address” to the Placeholder.
- Remove the After text.
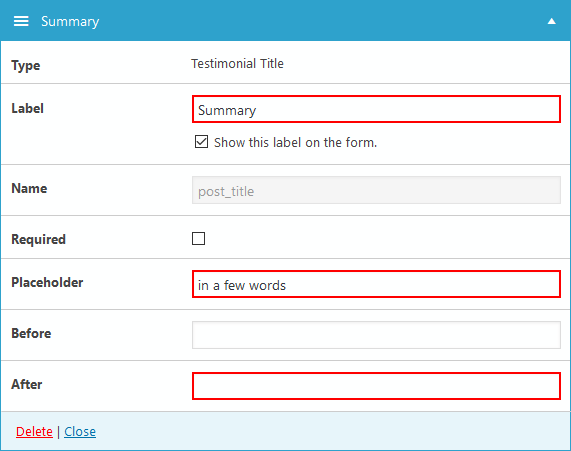
Let’s change the Heading field.
- Change the Label to “Summary”.
- Add “in a few words” to the Placeholder.
- Remove the After text.
The Name property is disabled because this is the post title, not a custom field.
If the post title field is removed from the form, a title will be automatically generated using the first few words of the testimonial when it is submitted. Of course, you can edit the title later.
Let’s change the Testimonial content field.
- Add “how did we do?” to the Placeholder.
- Remove the After text.

The Name property is disabled because this is the post content, not a custom field.
Adding fields
Let’s add a new field by clicking Add New Field

Expand the Type drop-down and select “text”.
Notice the Testimonial Title and Testimonial Content options are disabled, but Featured Image is available because we removed “Photo” before.
Only one new field can be added at a time so the Add New Field button is disabled until this field is complete.

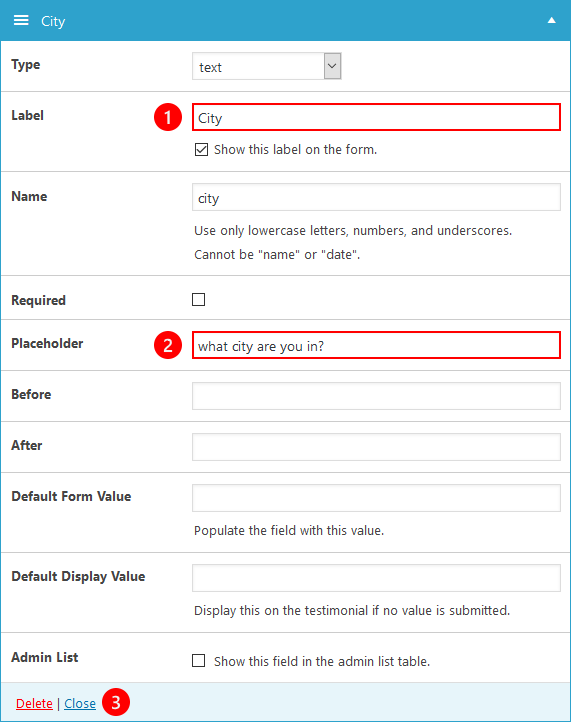
- Enter “City” in the label property.
Move to the next property by Tab or click and the Name and Title will update automatically.
Change the Name if you want. Or erase the Name and it will be generated again. - In the Placeholder property, enter “what city are you in?”
- We’re done with this field so click Close
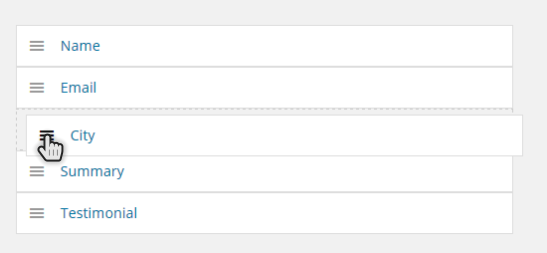
Reordering fields
Let’s drag our new City field up and drop it between Email and Summary.
The new form
Don’t forget to save your changes.

Form Settings
Form settings can be found and set up when you go to Testimonials > Form > clicking the ‘Settings‘ tab next to ‘Fields’.
Form Labels & Messages
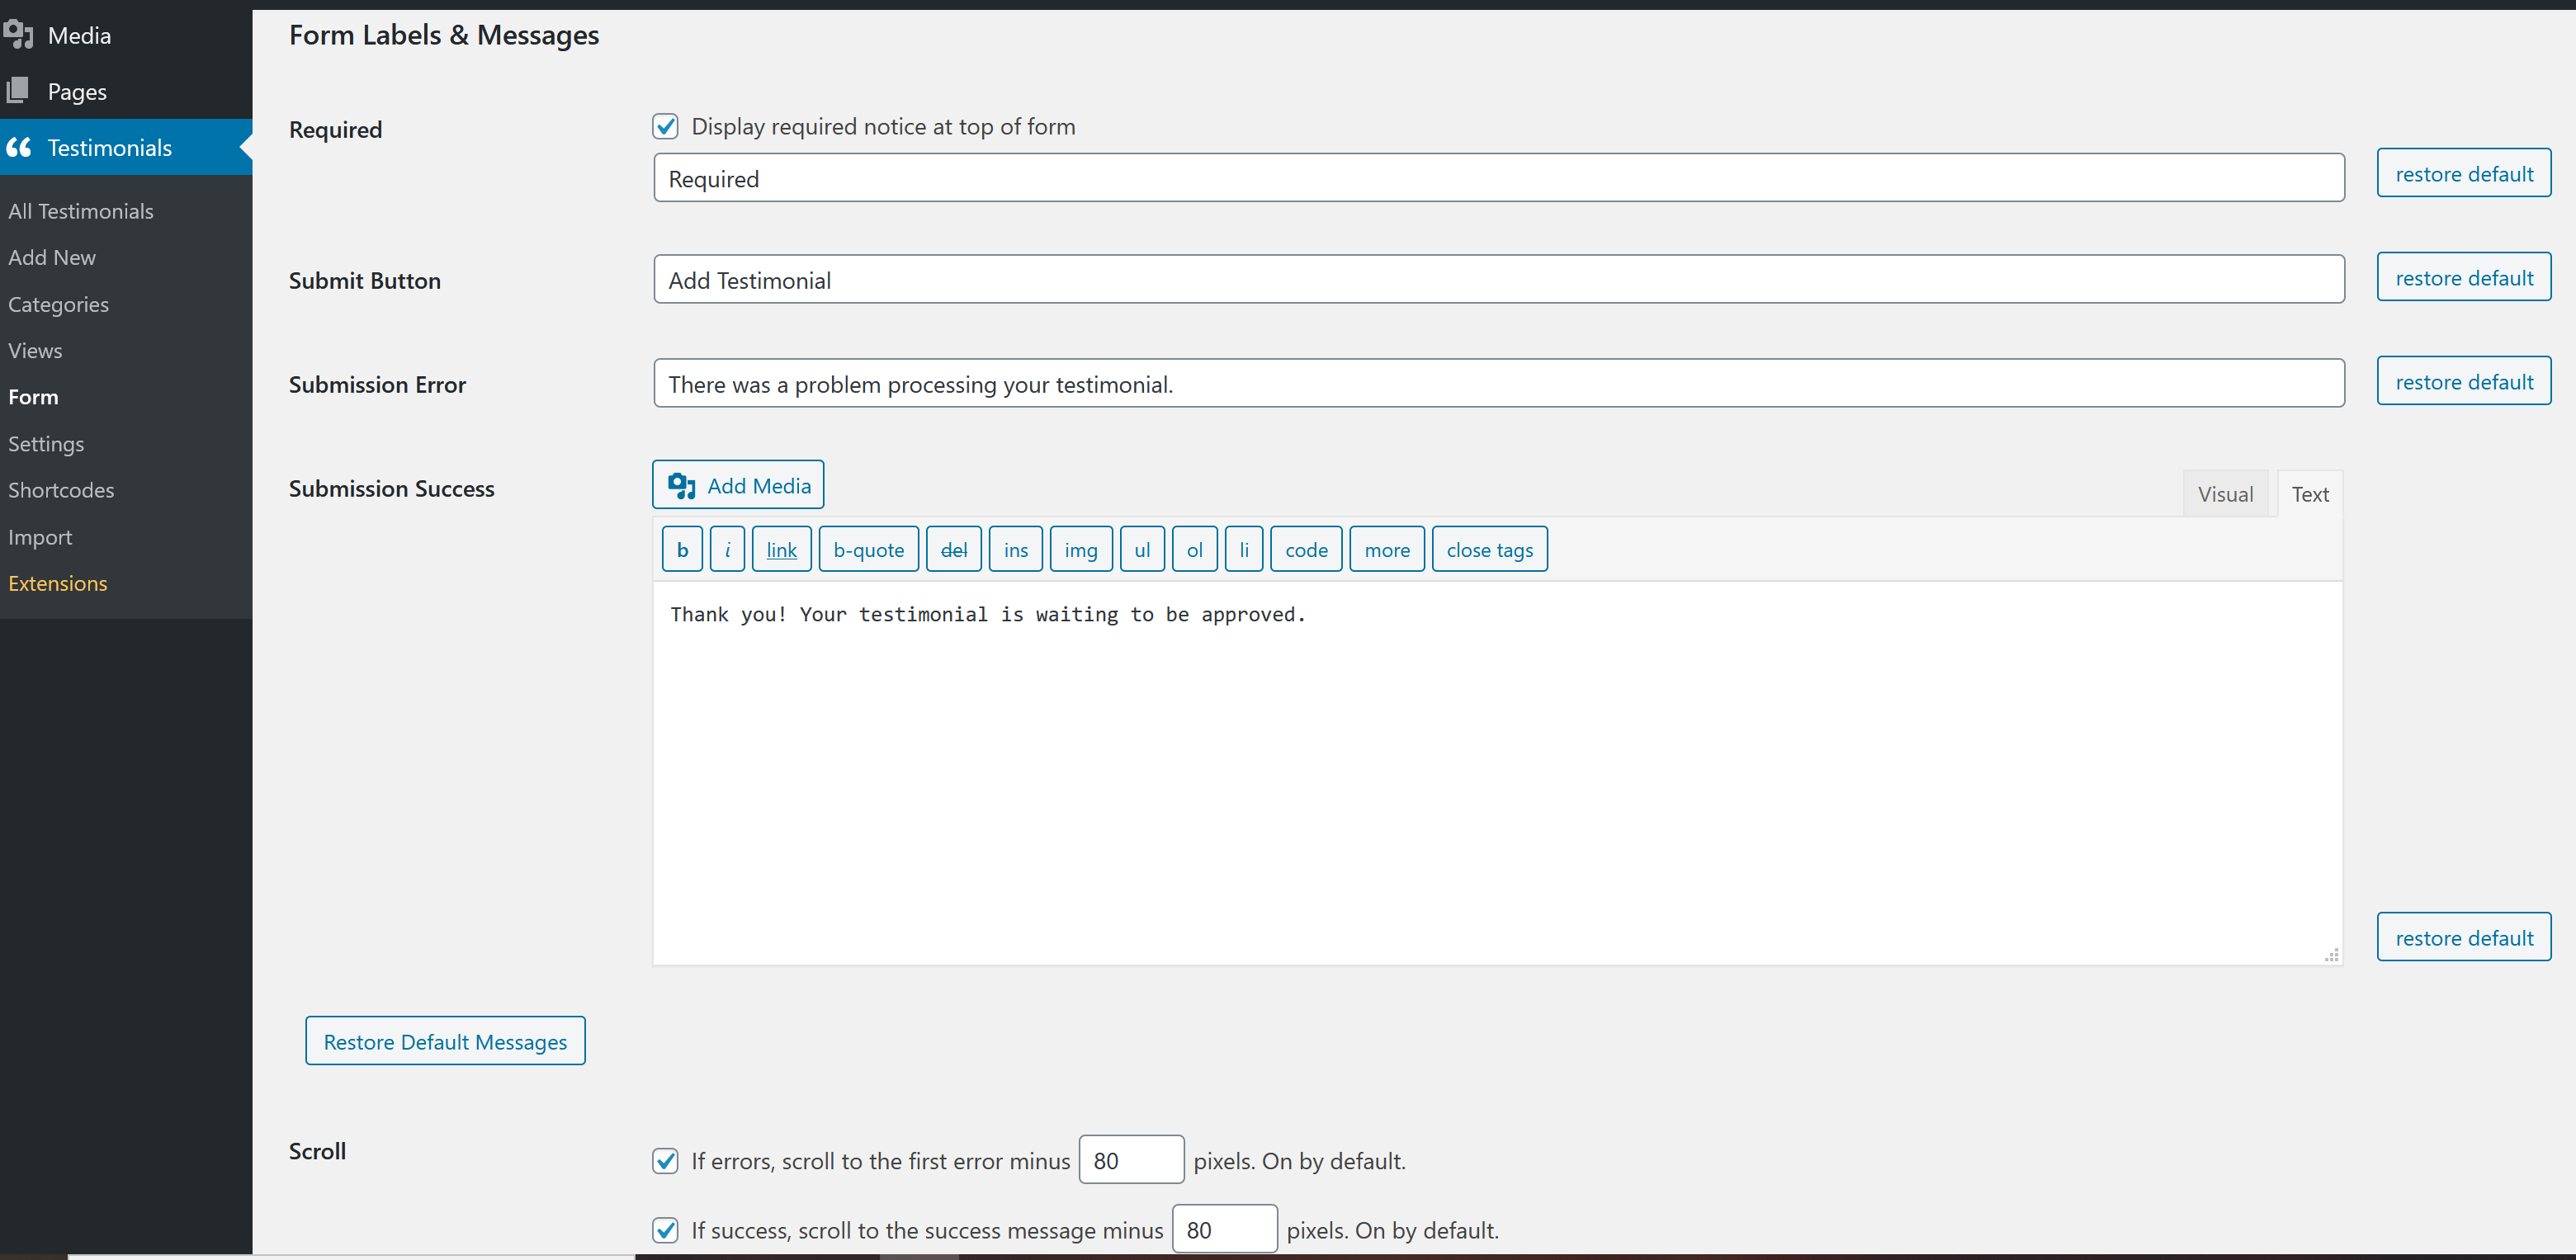
Required – if you check this option it will display a notice above your form explaining that fields with * are required. You can replace the ‘required’ text and enter your own.
Submit button – replace the default ‘Add Testimonial’ text with your own. This is displayed on the form’s submit button.
Submission Error – the error message that will be displayed if there is an error upon testimonial submission.
Submission Success – the message displayed when a testimonial is successfully submitted.
Scroll – scroll the window to the first error message or successful notice after testimonial submission.
Form Actions
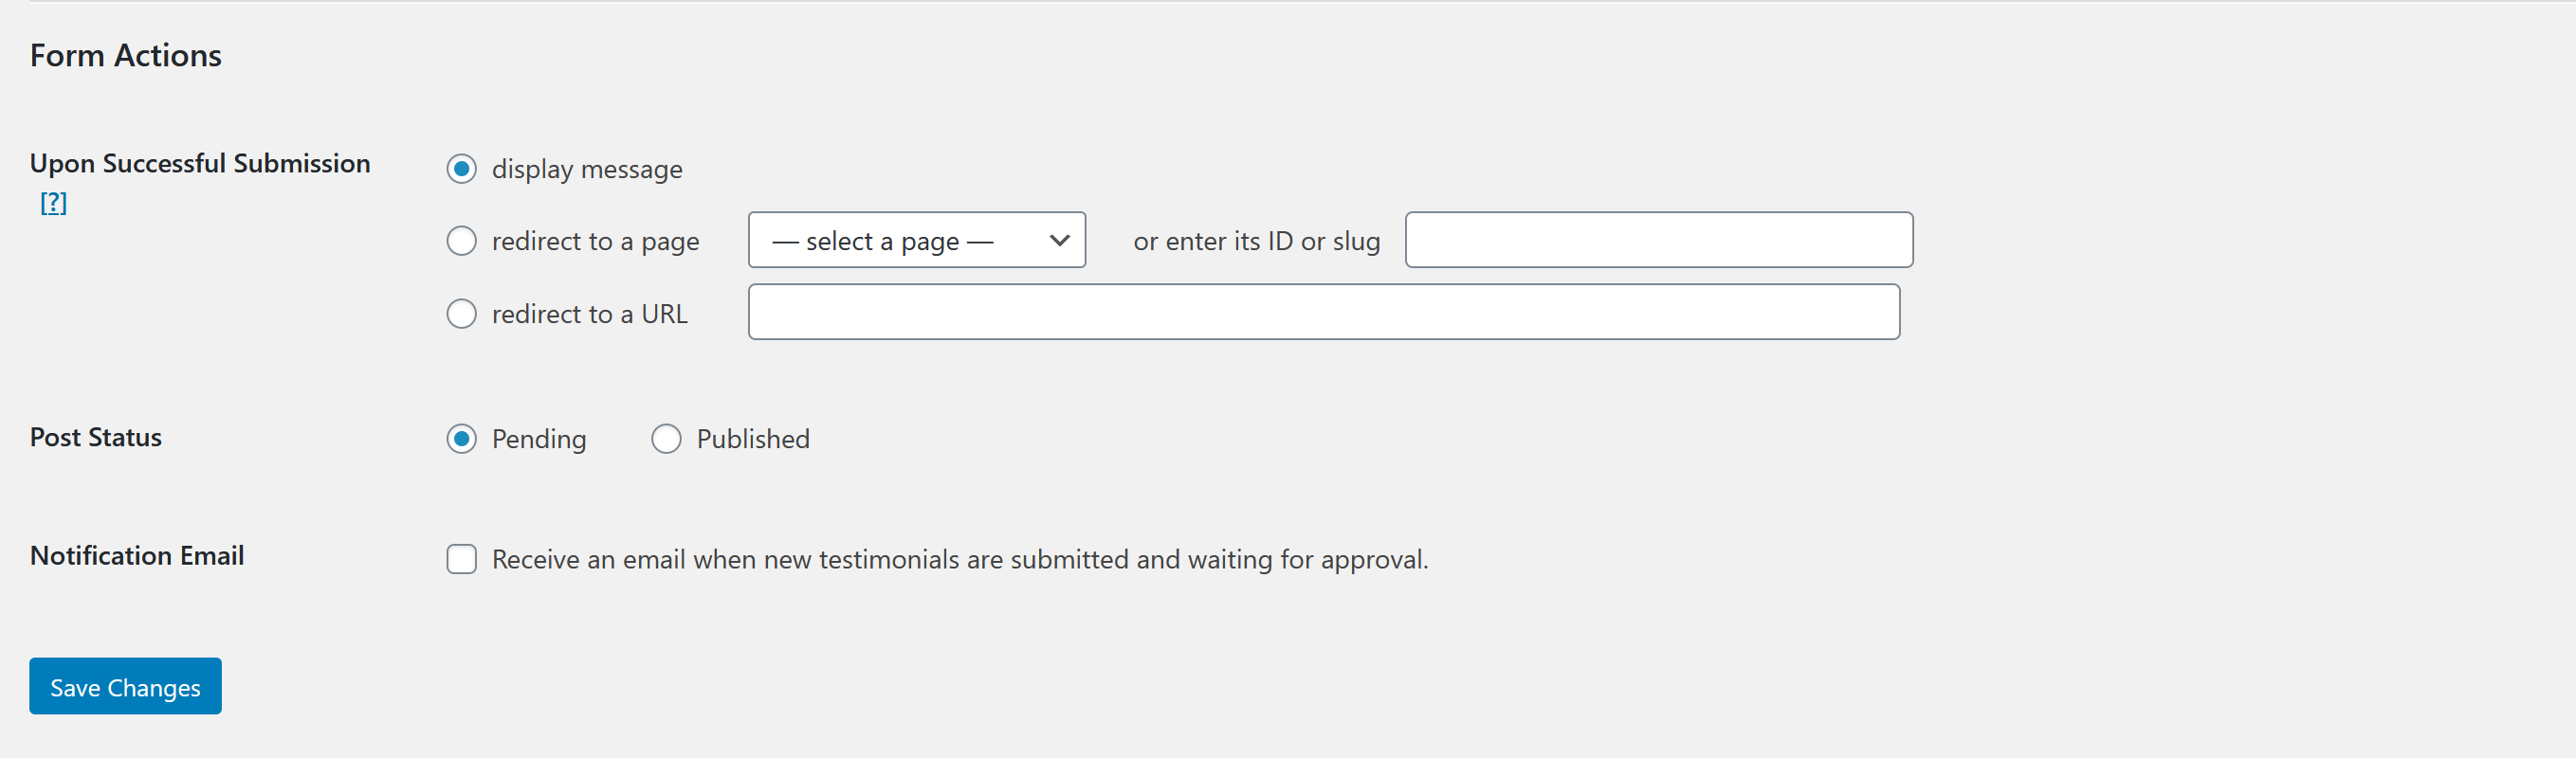
Upon Successful Submission – select what will happen after a testimonial is submitted. You can:
- display a message
- redirect to a page
- redirect to a URL
Post Status – select the status of the testimonial. If you select ‘pending‘ the testimonial won’t be published until you choose to. If you select ‘published‘ it will be published immediately after its submission.
Notification Email – if you check this option you will receive an email notification after each testimonial submission.