Every single article, page, or any other piece of content on your website that you see and use contains a permalink. Permalinks are an essential aspect of your site since they are used by both search engines and visitors to index and visit it. Sometimes it happens that you want to add one or even modify it.
The permalink’s structure
To set your permalink’s structure, go to WordPress Dashboard > Settings > Permalinks.
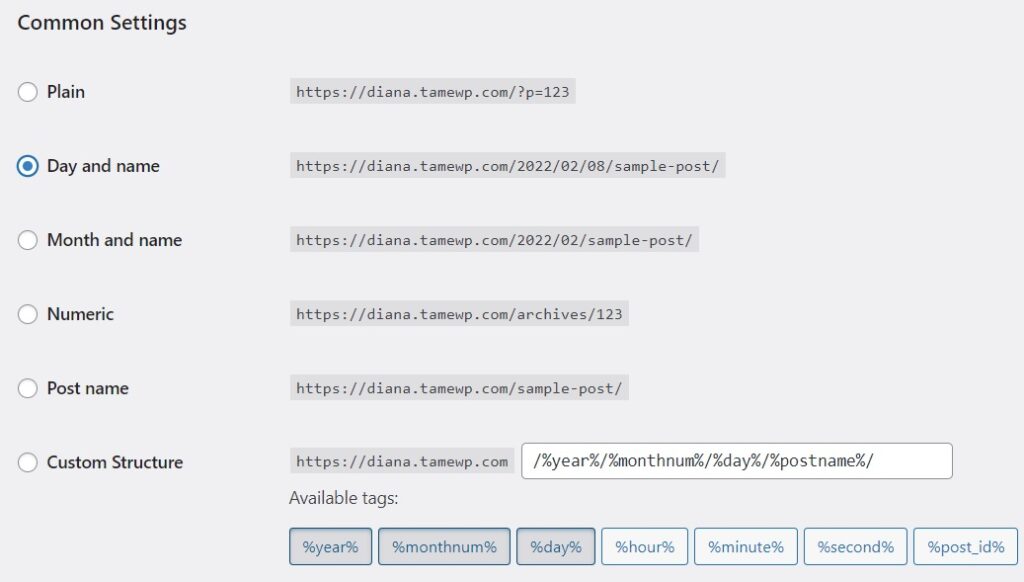
Why choose the Post name option? Because it has the smallest amount of unnecessary clutter. There are no seemingly random numbers, dates, or phrases. The title of the post is the only thing you have complete control over which saves you a lot of time in the long run.
After you select the right permalink structure — the post name — click Save changes.
Custom Permalinks
Using a custom structure is another fantastic method to set up permalinks. This is a list of permalinks that finish in .html or .php.
A user relocates his website using the .html extension in the post’s URL and wants to maintain everything almost the same. To make it easy for Google bots to crawl the material, for example, to make it SEO friendly.
In any case, here’s how to you do it:
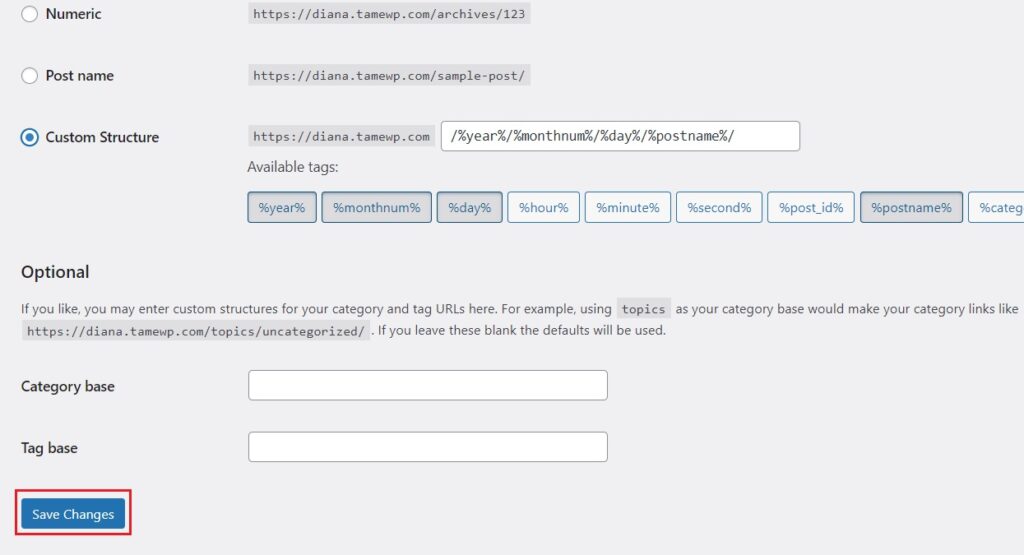
We’ll go through the same process as before, but we’ll use a custom structure this time.

Usually, the Custom Structure has the /%postname%/ code by default.
If you don’t have it, copy and paste the code above in the Custom Structure box.
After that, install the Strong Testimonials WordPress plugin that will help you rewrite the structure and permalink of a testimonial.
How to modify testimonial permalinks
Once you’ve established the general permalink structure and installed Strong Testimonials, you can modify the pages and posts the way you want.
Strong Testimonials anticipates being able to utilize URLs such as:
http://example.com/testimonial/great-service
If your permalink structure isn’t working correctly, try resetting the permalinks by navigating to wp-admin > Settings > Permalinks and clicking Save Changes.
Modifying the permalinks can be done on the editing screen of each individual post or page. To do so, open up any post in Edit mode or create a completely new one and click on Settings > Permalinks.
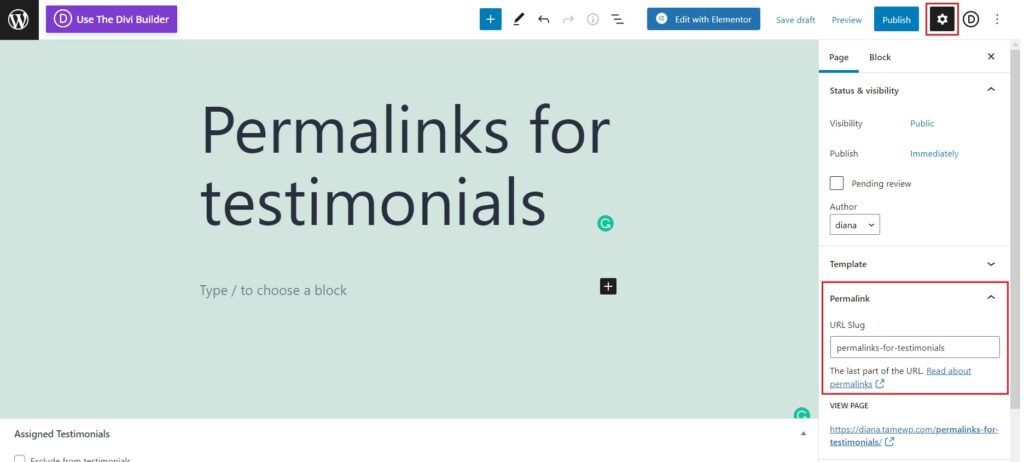
There you can set up any URL Slug but make sure it makes sense for the testimonial. Once you are finished, click on Update or Publish.
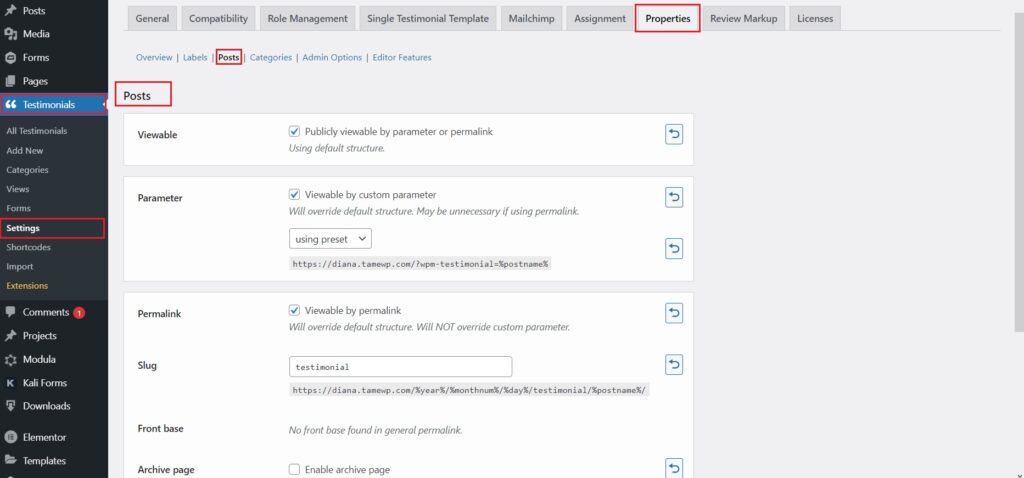
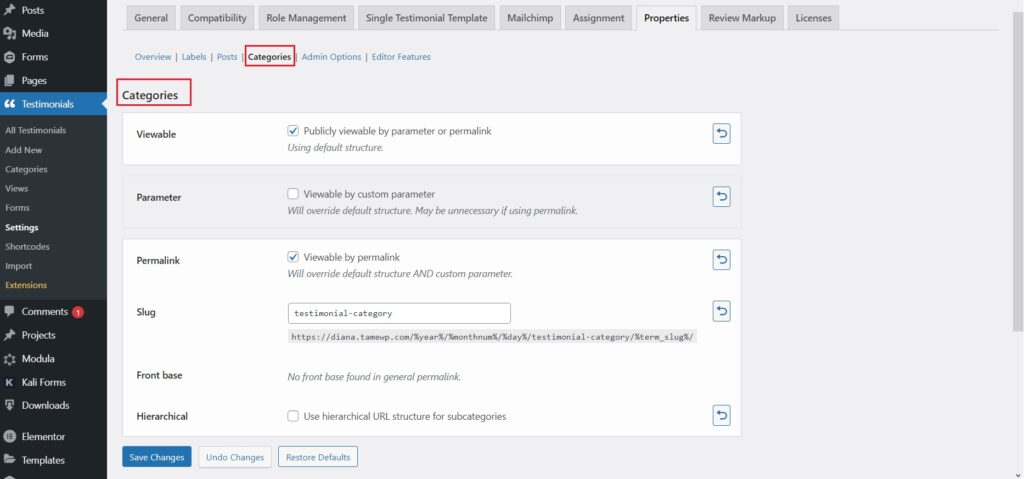
If you already have the Properties extension, there’s another way you can modify the permalinks in the default general settings of the website in Strong Testimonials’ settings. Head over to Testimonials > Settings > Posts and within the Permalinks section, you can modify the Slug.
Clicking on the Categories tab also opens another Permalinks settings section:
How to disable testimonial permalinks
Testimonials are custom posts, so a new page is created for that testimonial when you create and display a testimonial.
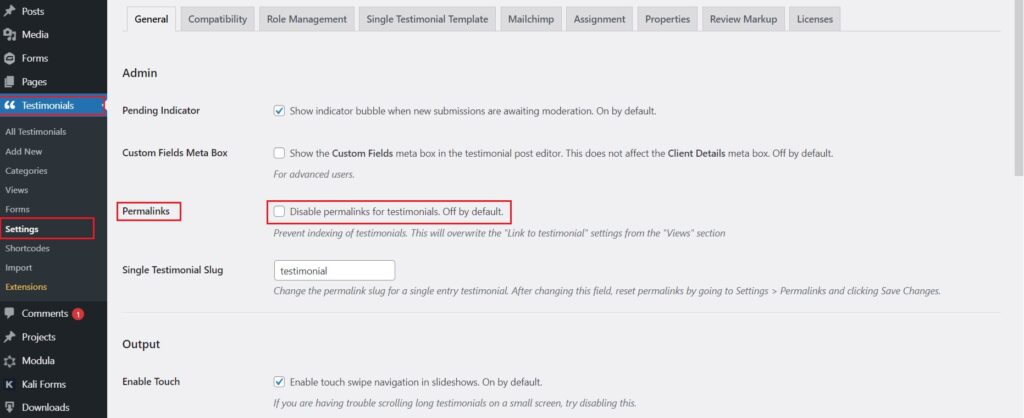
Disabling testimonial permalinks is a solution to stop the testimonials from appearing in search engine results.
If you don’t want that to happen, you can disable that permalink for that testimonial by going to Testimonials > Settings > Permalinks > Check the option > Save Changes.
To help the new extension operate properly, clear the permalinks by going again to Settings > Permalinks and click Save Changes without modifying anything.