Testimonials are a powerful way to showcase social proof and build trust with your audience. If you have collected valuable testimonials on one WordPress site and wish to transfer them to another WordPress site, the process is straightforward using the Strong Testimonials plugin. This article will guide you step by step on how to export testimonials from one site and import them into another site, both utilizing the Strong Testimonials plugin.
Prerequisites: Before proceeding with the export and import process, ensure the following requirements are met:
- WordPress sites on both ends are up and running.
- The Strong Testimonials plugin is installed and activated on both sites.
- For the import process, you need to install the WordPress Importer plugin, which can be downloaded from the WordPress plugin repository.
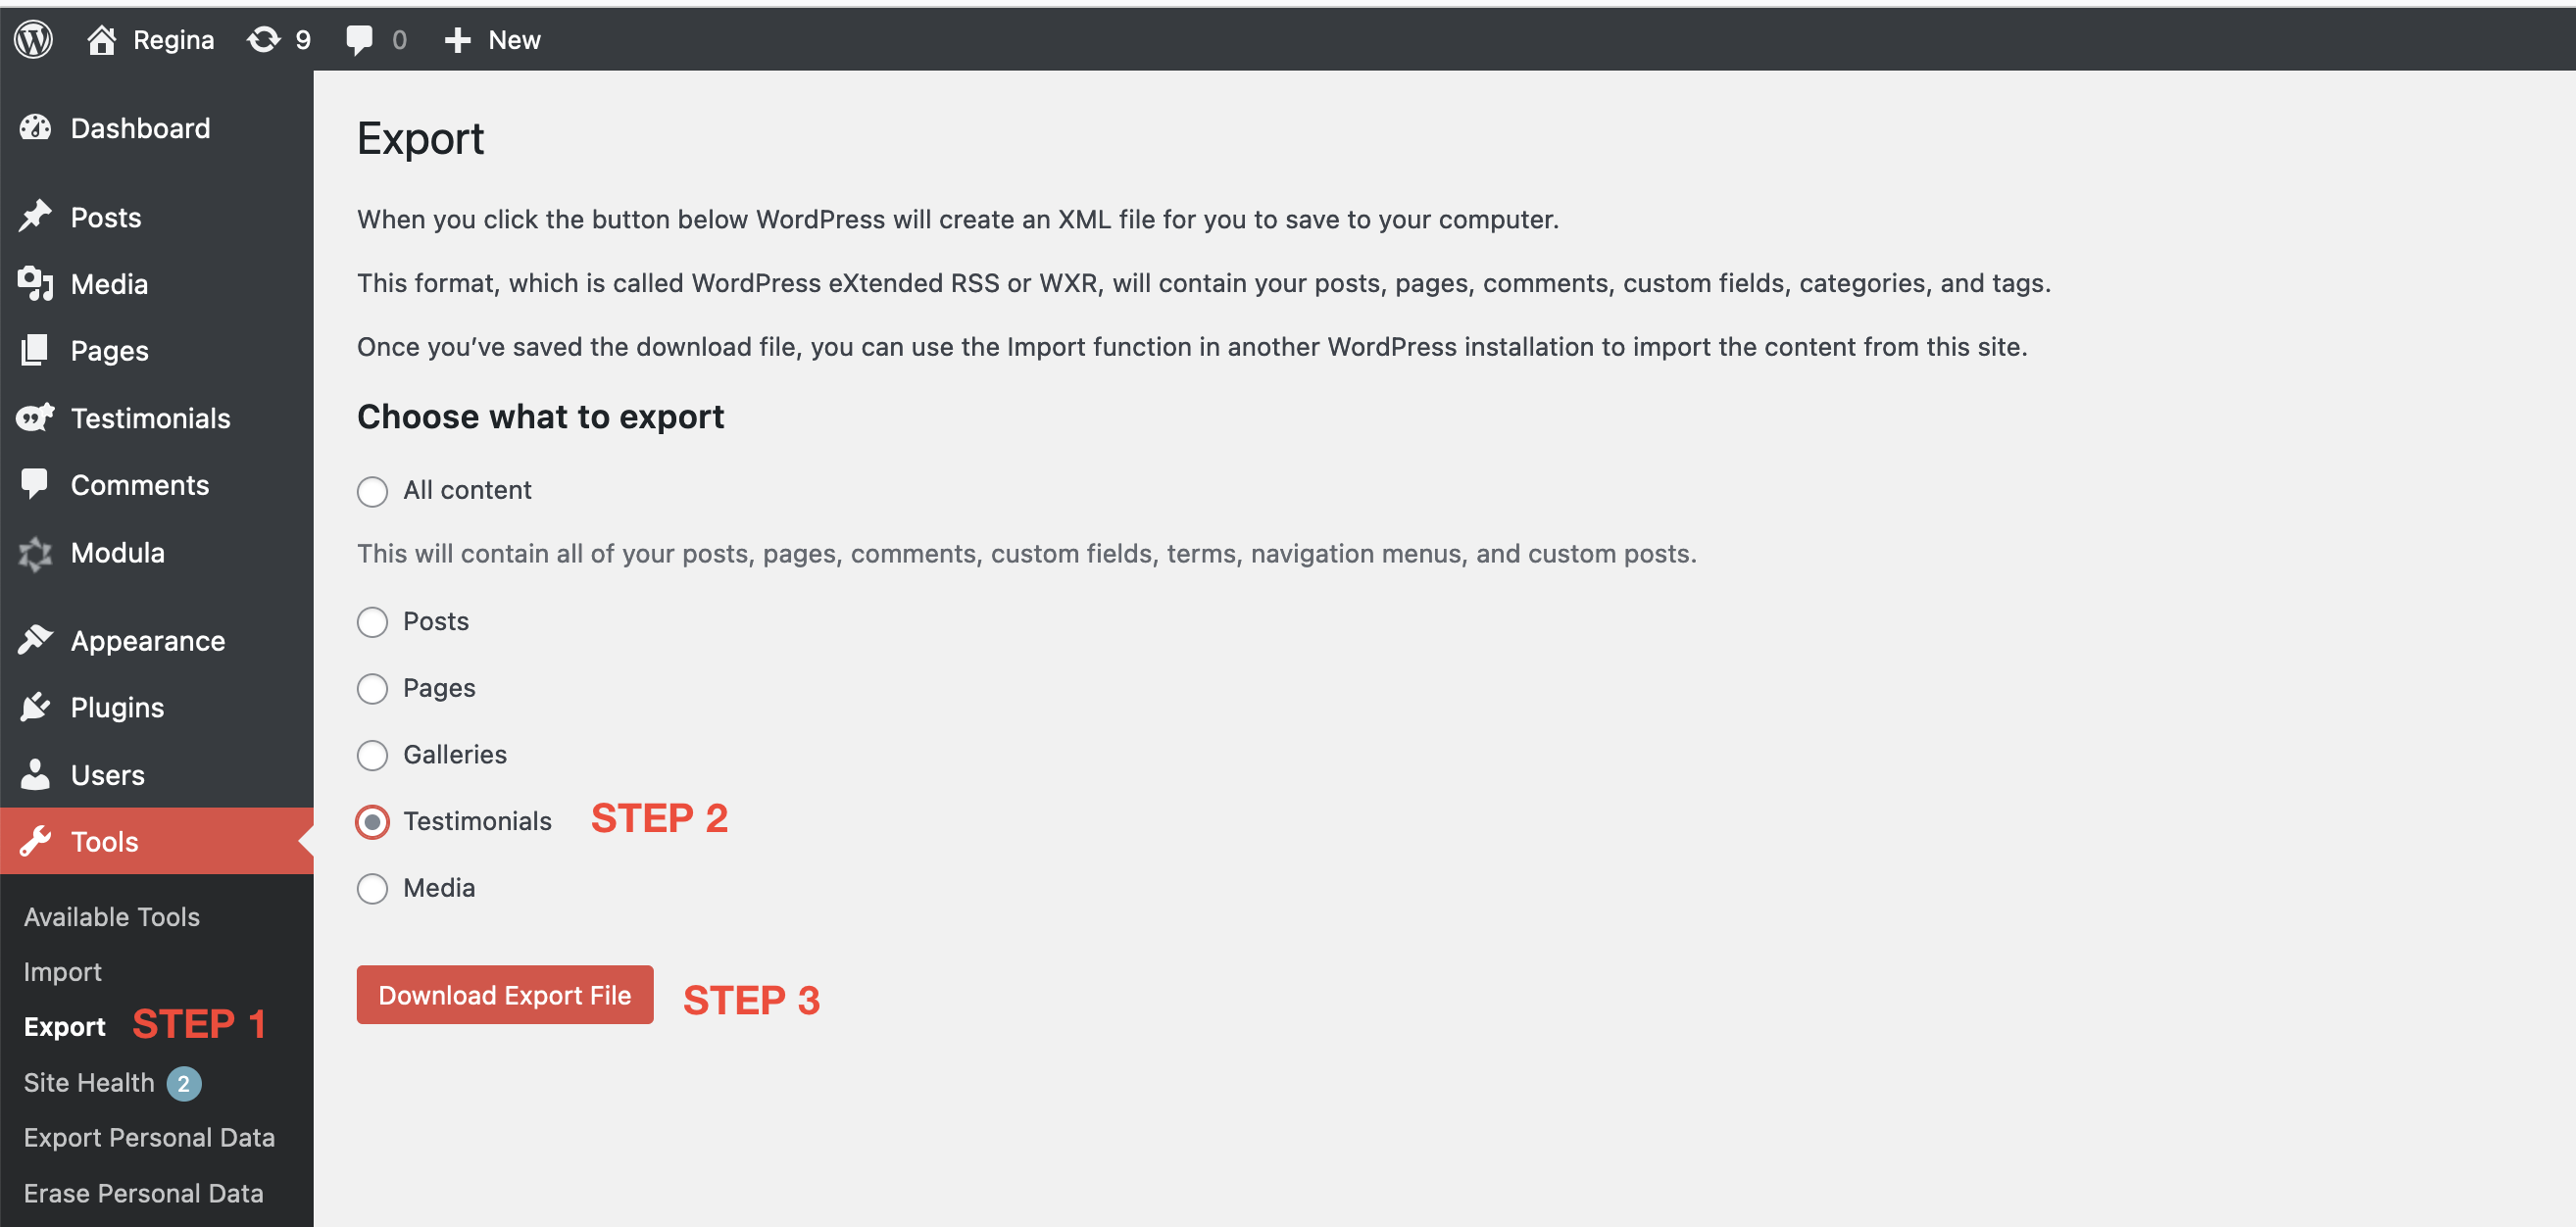
How to Export Testimonials:
Step 1: Log in to the site where you have the testimonials you want to export.
Step 2: Navigate to the WordPress Dashboard by clicking on “Dashboard” in the left sidebar.
Step 3: From the Dashboard, click on “Tools” in the left sidebar, then select “Export.”
Step 4: In the Export page, you will see different content types available for export. Look for “Testimonials” and select it.
Step 5: Click on the “Download Export File” button. The testimonials will be saved in an XML file on your computer.
How to Import Testimonials:
Step 1: Log in to the destination site where you want to import the testimonials.
Step 2: Ensure that the Strong Testimonials plugin is installed and activated on this site. If not, go to the Plugins section in the Dashboard and install/activate it.
Step 3: If you haven’t installed the WordPress Importer plugin yet, go to “Tools” in the left sidebar, select “Import,” and then scroll down to “WordPress” > click on “Install now” > Follow the on-screen instructions to install the WordPress Importer plugin.
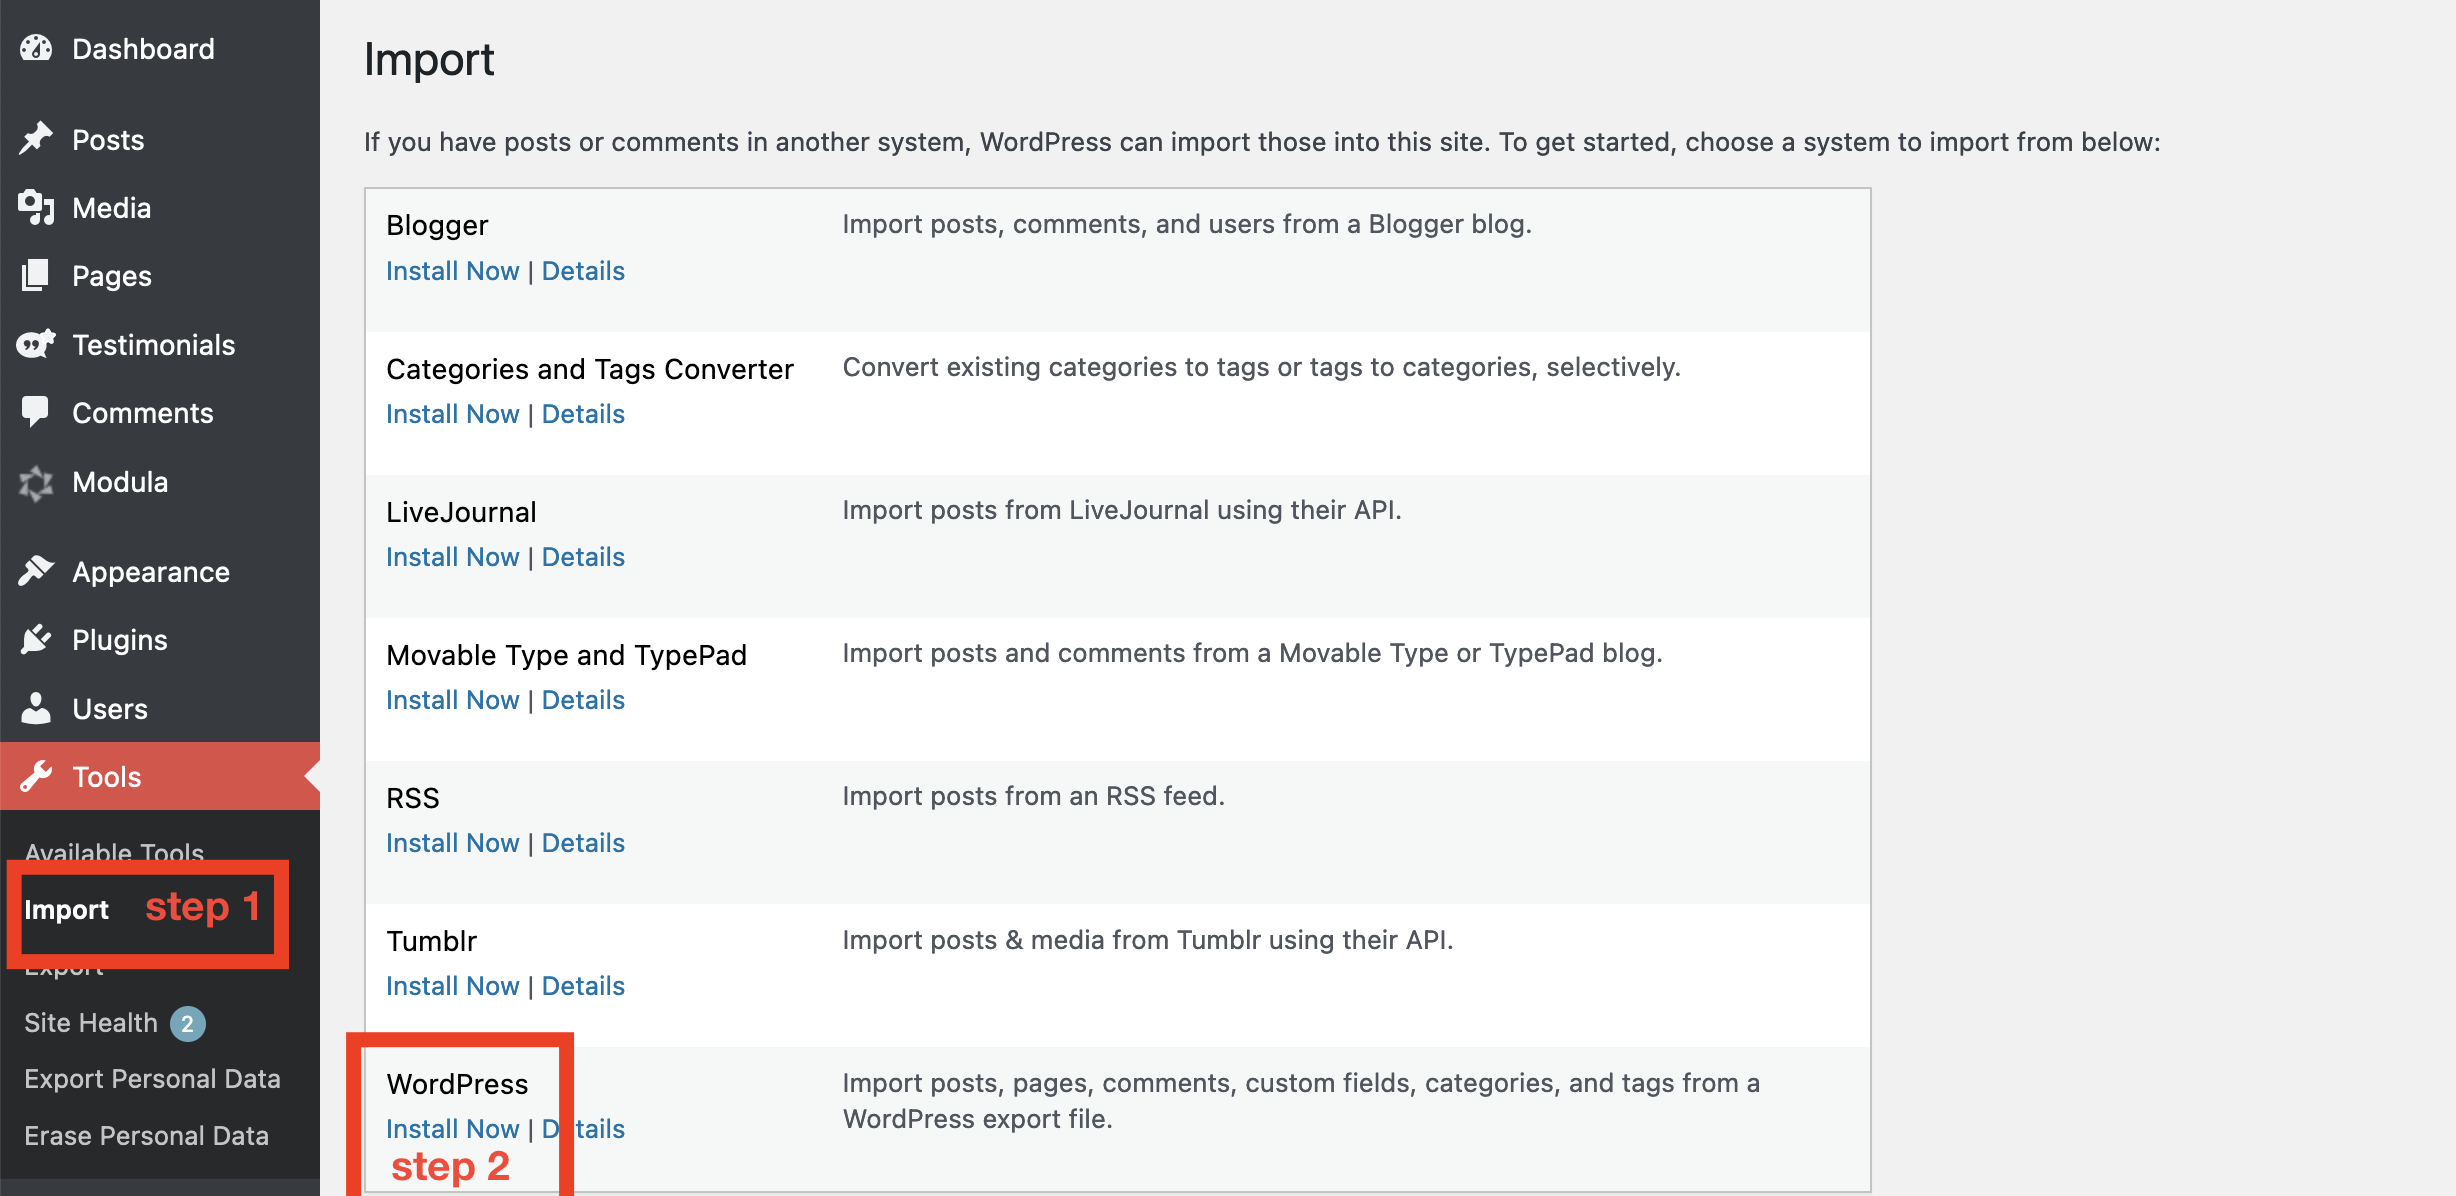
Step 4: After installing the WordPress Importer plugin, return to the “Tools” section > and click on “Import.”
Step 5: Select “WordPress” > “Run Importer” from the list of available importers.
Step 6: You will be prompted to upload the XML file containing the testimonials you exported earlier. Click on the “Choose File” button, locate the file on your computer, and then click “Upload file and import.”
Step 7: On the next page, you will be asked to map the authors of the testimonials. If the authors already exist on the destination site, select the appropriate user from the drop-down list. If not, you can create new users for the authors.
Step 8: Make sure to check the “Download and import file attachments” option if your testimonials contain images or other media that you want to import as well.
Step 10: Finally, click on the “Submit” button to start the import process and that is all.
Transferring testimonials between two WordPress sites using the Strong Testimonials plugin is a seamless process. By following the step-by-step guide provided above, you can successfully export testimonials from one site and import them into another site, showcasing testimonials to your audience and building trust in your products or services.