
Do you use testimonials on your website?
If not, you’re missing out on a huge opportunity to use social proof to help build brand awareness, boost conversions, and generate more revenue.
Getting testimonials may initially seem intimidating, but it’s not that bad. After all, if someone is happy with their purchase or the level of service you’ve provided, they should happily give you a positive testimonial to add to your website.
Today we’re going to look at why gathering testimonials is so vital to the success of your business and the easiest way to collect testimonials from clients using the Strong Testimonials plugin.
Table of contents
What are testimonials and why do you need them?
Before jumping into the best ways to start collecting testimonials from your clients, let’s look at what they are and what makes them valuable.
A testimonial is an honest endorsement whereby someone attests to the quality of a product, person, or service.
You’ll notice many examples of this on our website because we know how important they are. Here is a testimonials example that’s taken straight from our plugin’s homepage:

These act as a public endorsement that shows people that this is a safe, reliable, and trustworthy website.
Above all, it’s important to remember:
- Testimonials have to be truthful
I personally think making up testimonials is unethical, but it is also usually easy to spot and, therefore, makes your site less trustworthy. - Testimonials are endorsements
A testimonial must come from someone really willing to support your product or website. That means they should have used it. - Testimonials really should mention the qualities
It’s not really useful for that person to say they’ve used your product or service – they should also say what they liked and why.
Why are testimonials important?
Did you know that 84% of people trust online reviews as much as they do their friends and family?
Testimonials are the perfect way to convince site visitors to buy what you’re selling. After all, there’s a lot of competition going for the same target audience. You can’t expect people to hand over their hard-earned cash without a good reason. Luckily, testimonials give people a good reason to buy.
Here are some other reasons why you should add testimonials to your WordPress website:
- Bigger Email List: People who read your testimonials, but aren’t quite ready to buy, can subscribe to your email list and stay connected. This allows you to nurture your leads and convert them into paying customers.
- Unbiased Opinions: It’s easy to tell potential customers you’re the best in your industry. What company wouldn’t do that? But if you really want to convince someone you’re worth it, use testimonials. People are more likely to trust actual customers than the company boasting that they’re amazing.
- Establish Credibility: Growing an online business is tough. It’s so easy to launch an eCommerce shop these days, and consumers have more choices than they know what to do with. Using testimonials to establish yourself as a trustworthy brand is an effective marketing technique.
- Generate More Sales: The more ways you show potential customers how great your products, services, and customer support is, the more sales you’ll generate. People always seek high-quality products, stellar customer service, and great prices. The testimonials you collect can showcase all this and more, convincing people to buy from you.
Tips for Using Customer Testimonials
So now you know testimonials should be a part of your overall marketing plan. But besides knowing how to get testimonials from your customers (more on that later), you should also know how to use them to convert more leads.
Here are some of the best ways to use your customer testimonials to generate more sales:
- Pick and choose testimonials to display so only the best ones are read by prospective customers
- Put a face to the names and testimonials to make them more believable
- Display testimonials throughout your website – a testimonial page, on landing pages, on the homepage, and even in your subscribe boxes
- Only use real testimonials because if people realize you’re faking them, you’ll lose all credibility.
- Don’t forget to ask permission to use testimonials on your website.
Now let’s look at how to get customer testimonials by creating a client testimonial form. We’ll walk you through all the steps using the Strong Testimonials plugin.
What is Strong Testimonials?

Strong Testimonials is a WordPress plugin designed to help you easily collect and publish testimonials on your website. It gives you the power to create an online form asking people for testimonials and an intuitive way to display those testimonials on the front end of your site.
It comes with a whole host of user-friendly features, such as:
- A frontend form for customers to fill out;
- Custom drag & drop fields;
- A slider and carousel option;
- Grid and masonry layouts;
- Translation capability using Polylang, WPGlobus, or WPML;
- Easy embed option on YouTube, Instagram, Facebook, and Twitter;
- Featured image and Gravatar capability;
- Sorting ability based on oldest, newest, random, or menu order testimonials;
- Excerpt displays and “Read more” links;
- Pagination for easier navigation;
- Collect testimonials online by importing them from social platforms such as Google, Zomato, Yelp, WooCommerce, and Facebook.
The great thing about this plugin is that it has just enough features to get the job done without overwhelming you or slowing down your website.

Strong Testimonials Plugin
We’ve built the #1 WordPress plugin for collecting, managing, and displaying testimonials. Drive more sales by leveraging your existing user audience.
How to get testimonials using the Strong Testimonials plugin
There are plenty of ways to get testimonials from your customers. But using a testimonial collection tool like Strong Testimonials makes the process seamless. Moreover, the plugin will also help you display your praises on your WordPress website just as you want them.
Step 1: Install and Activate Strong Testimonials
The first thing you’ll need to do is install and activate the Strong Testimonials plugin. Go to Plugins > Add New and search for Strong Testimonials to do this.
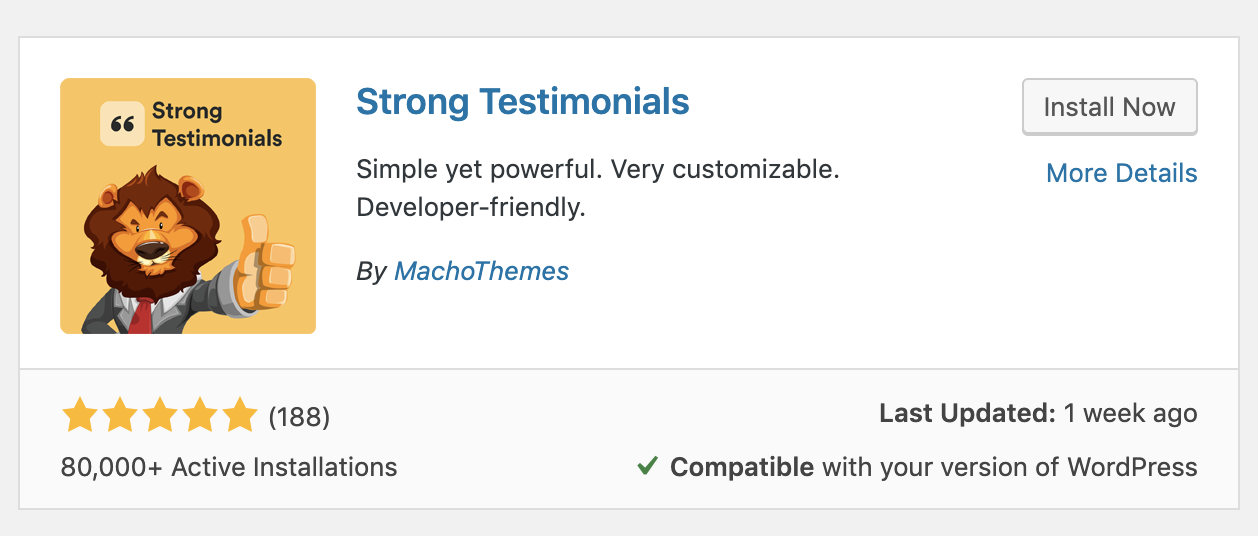
Click Install Now and then Activate. Strong Testimonials is now ready to use on your website.
Step 2: Learn About Strong Testimonials
Once Strong Testimonials is installed and activated on your site, you’ll be prompted with a welcome screen. It outlines the different things you can do with the plugin:
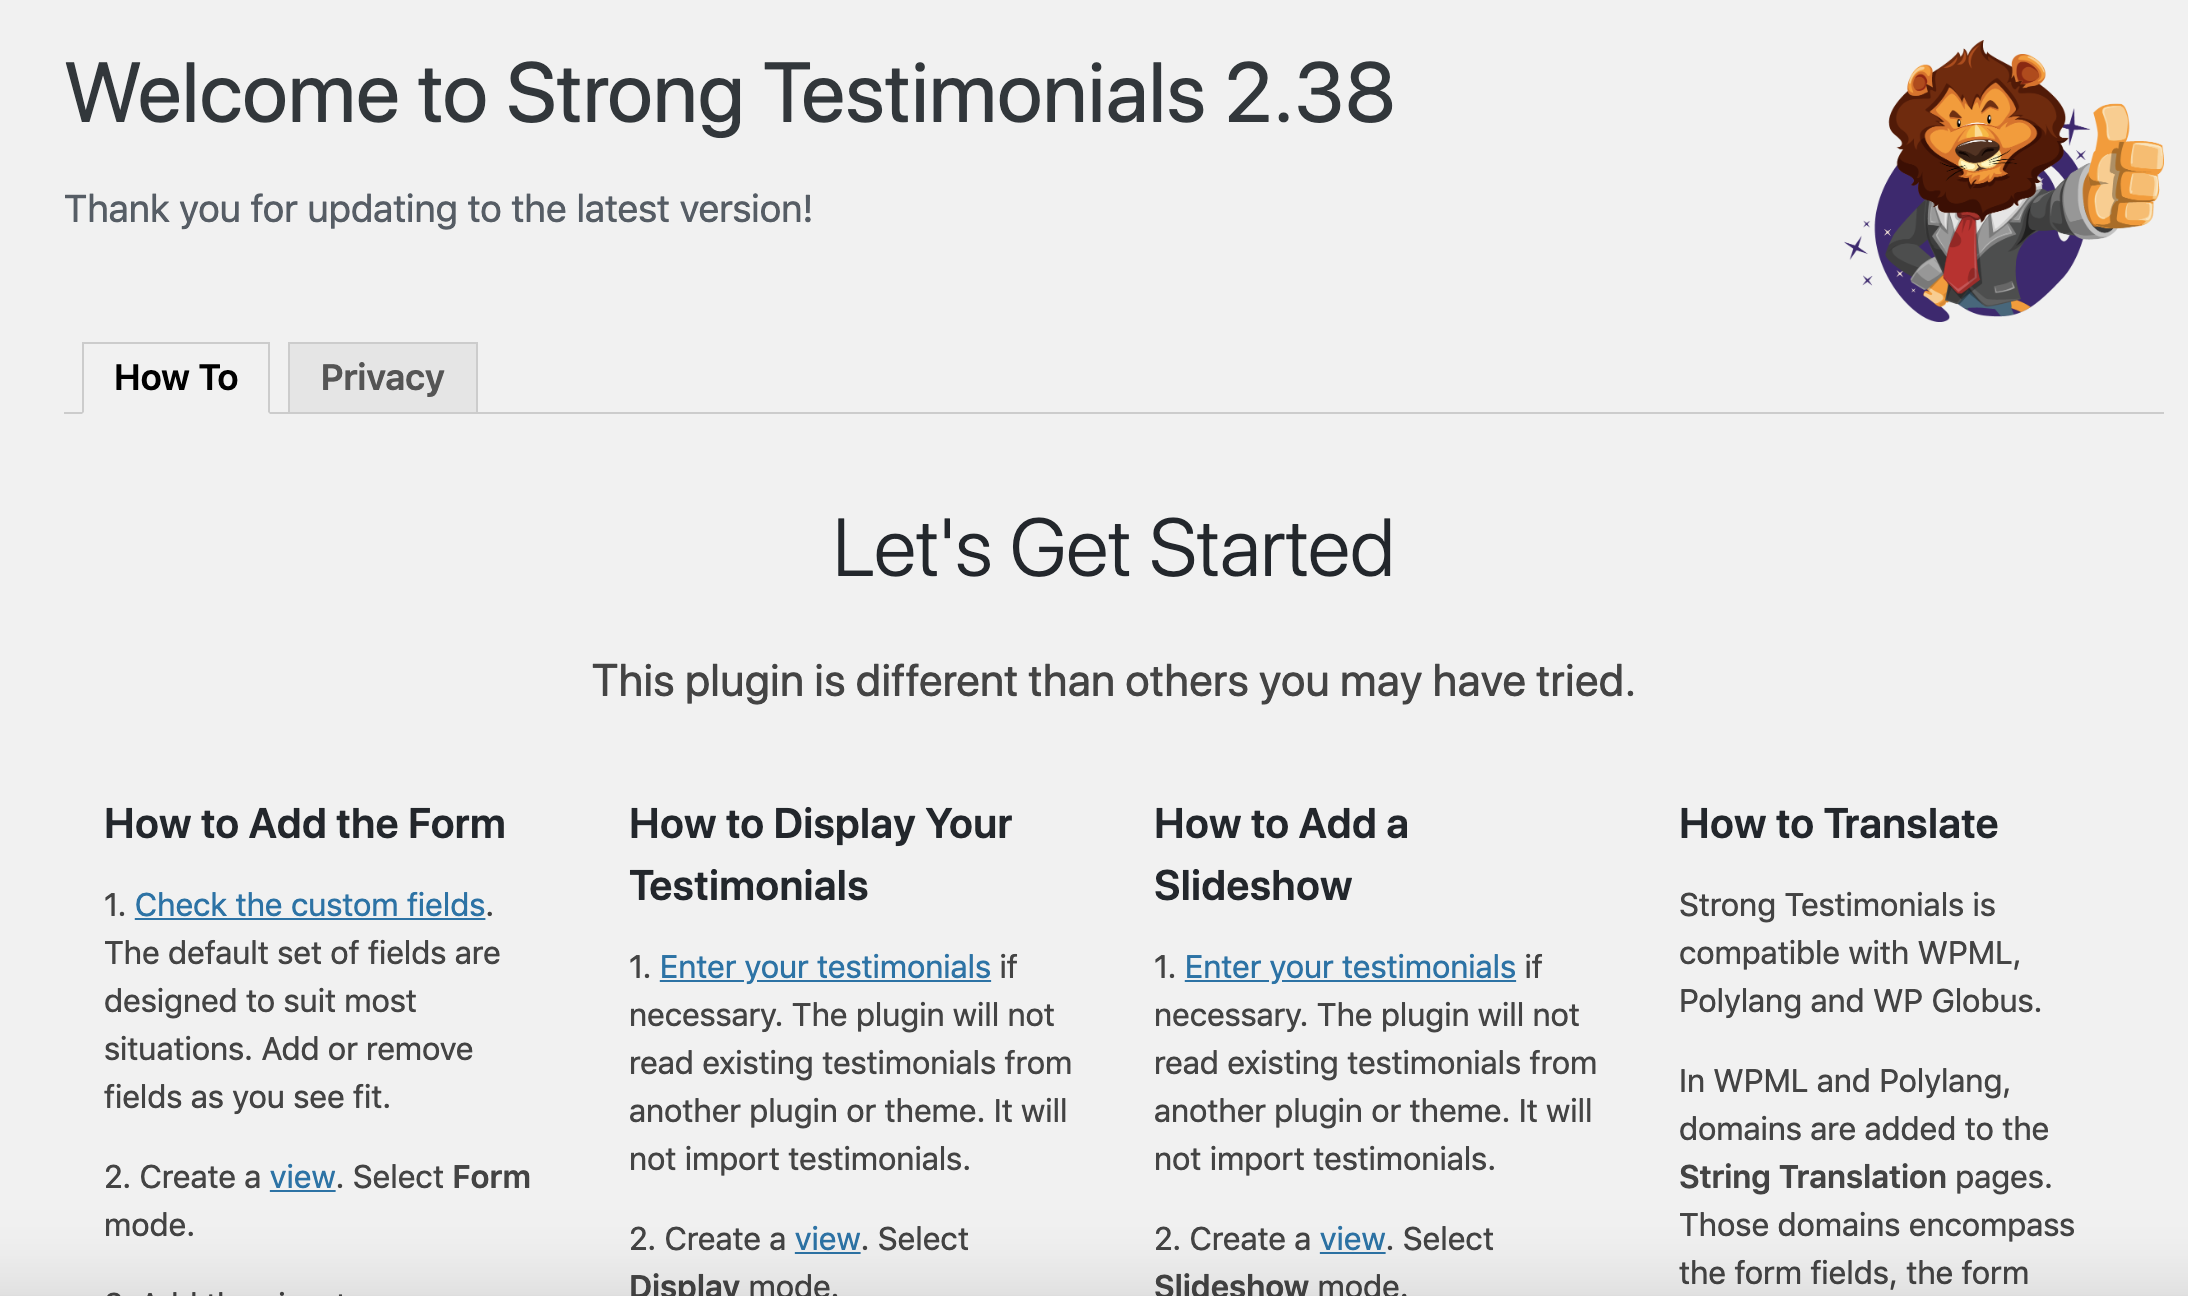
Notice the links under each section. When you click on them, you’ll be taken to the plugin section needed to complete a task, which is really helpful.
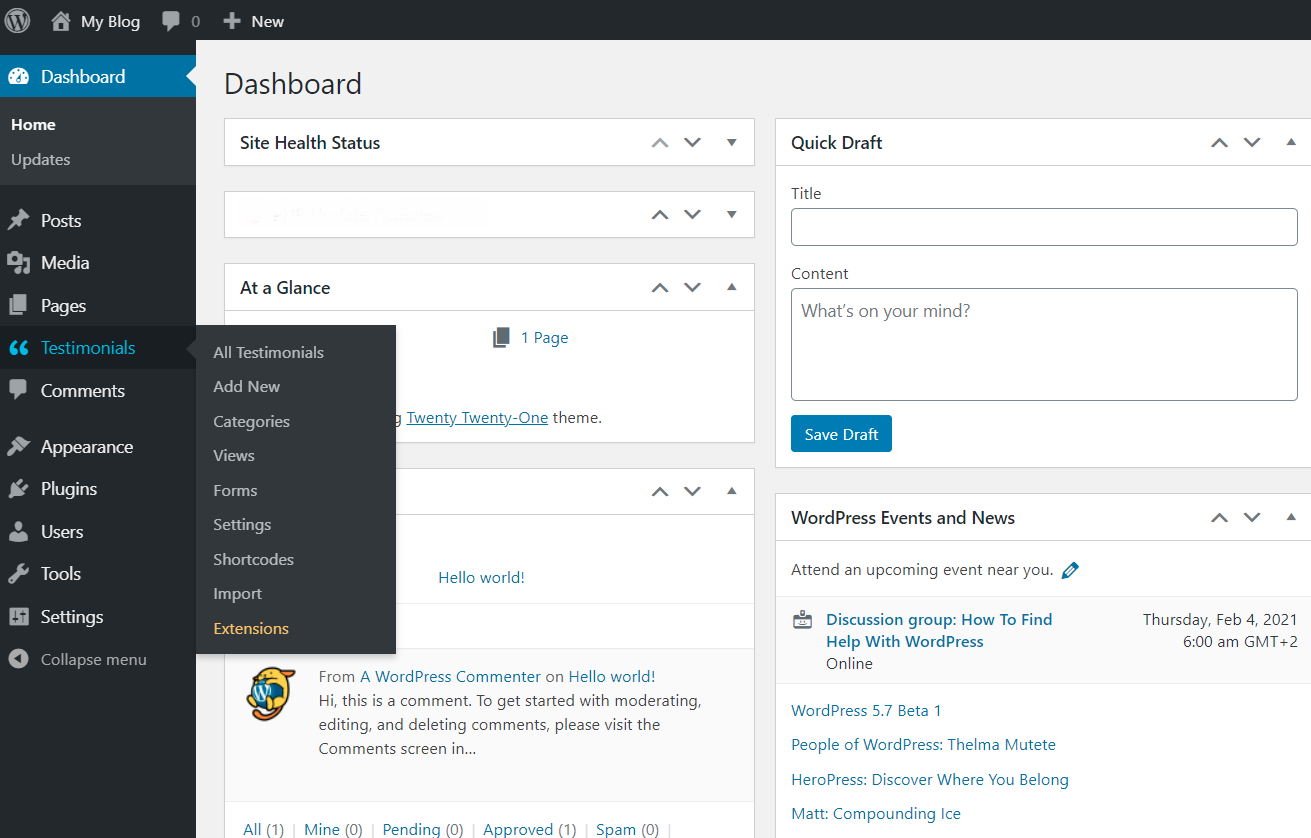
You’ll also notice that the WordPress dashboard has added a new menu section labeled Testimonials with the following sub-labels:
- All Testimonials: see a collection of all your customer testimonials.
- Add New: manually add a new testimonial to your website.
- Categories: assign your testimonial categories.
- Views: access everything in Views, such as testimonial forms and display options.
- Forms: customize your testimonial forms using the drag & drop interface.
- Settings: configure your plugin’s settings.
- Shortcodes: access common shortcodes.
- About: access the welcome screen and learn how to use Strong Testimonials.
Step 3: Create a Testimonials Form
The next step is to create a testimonial form that will be displayed on the frontend of your website for people to fill out. To do this, go to Testimonials > Forms
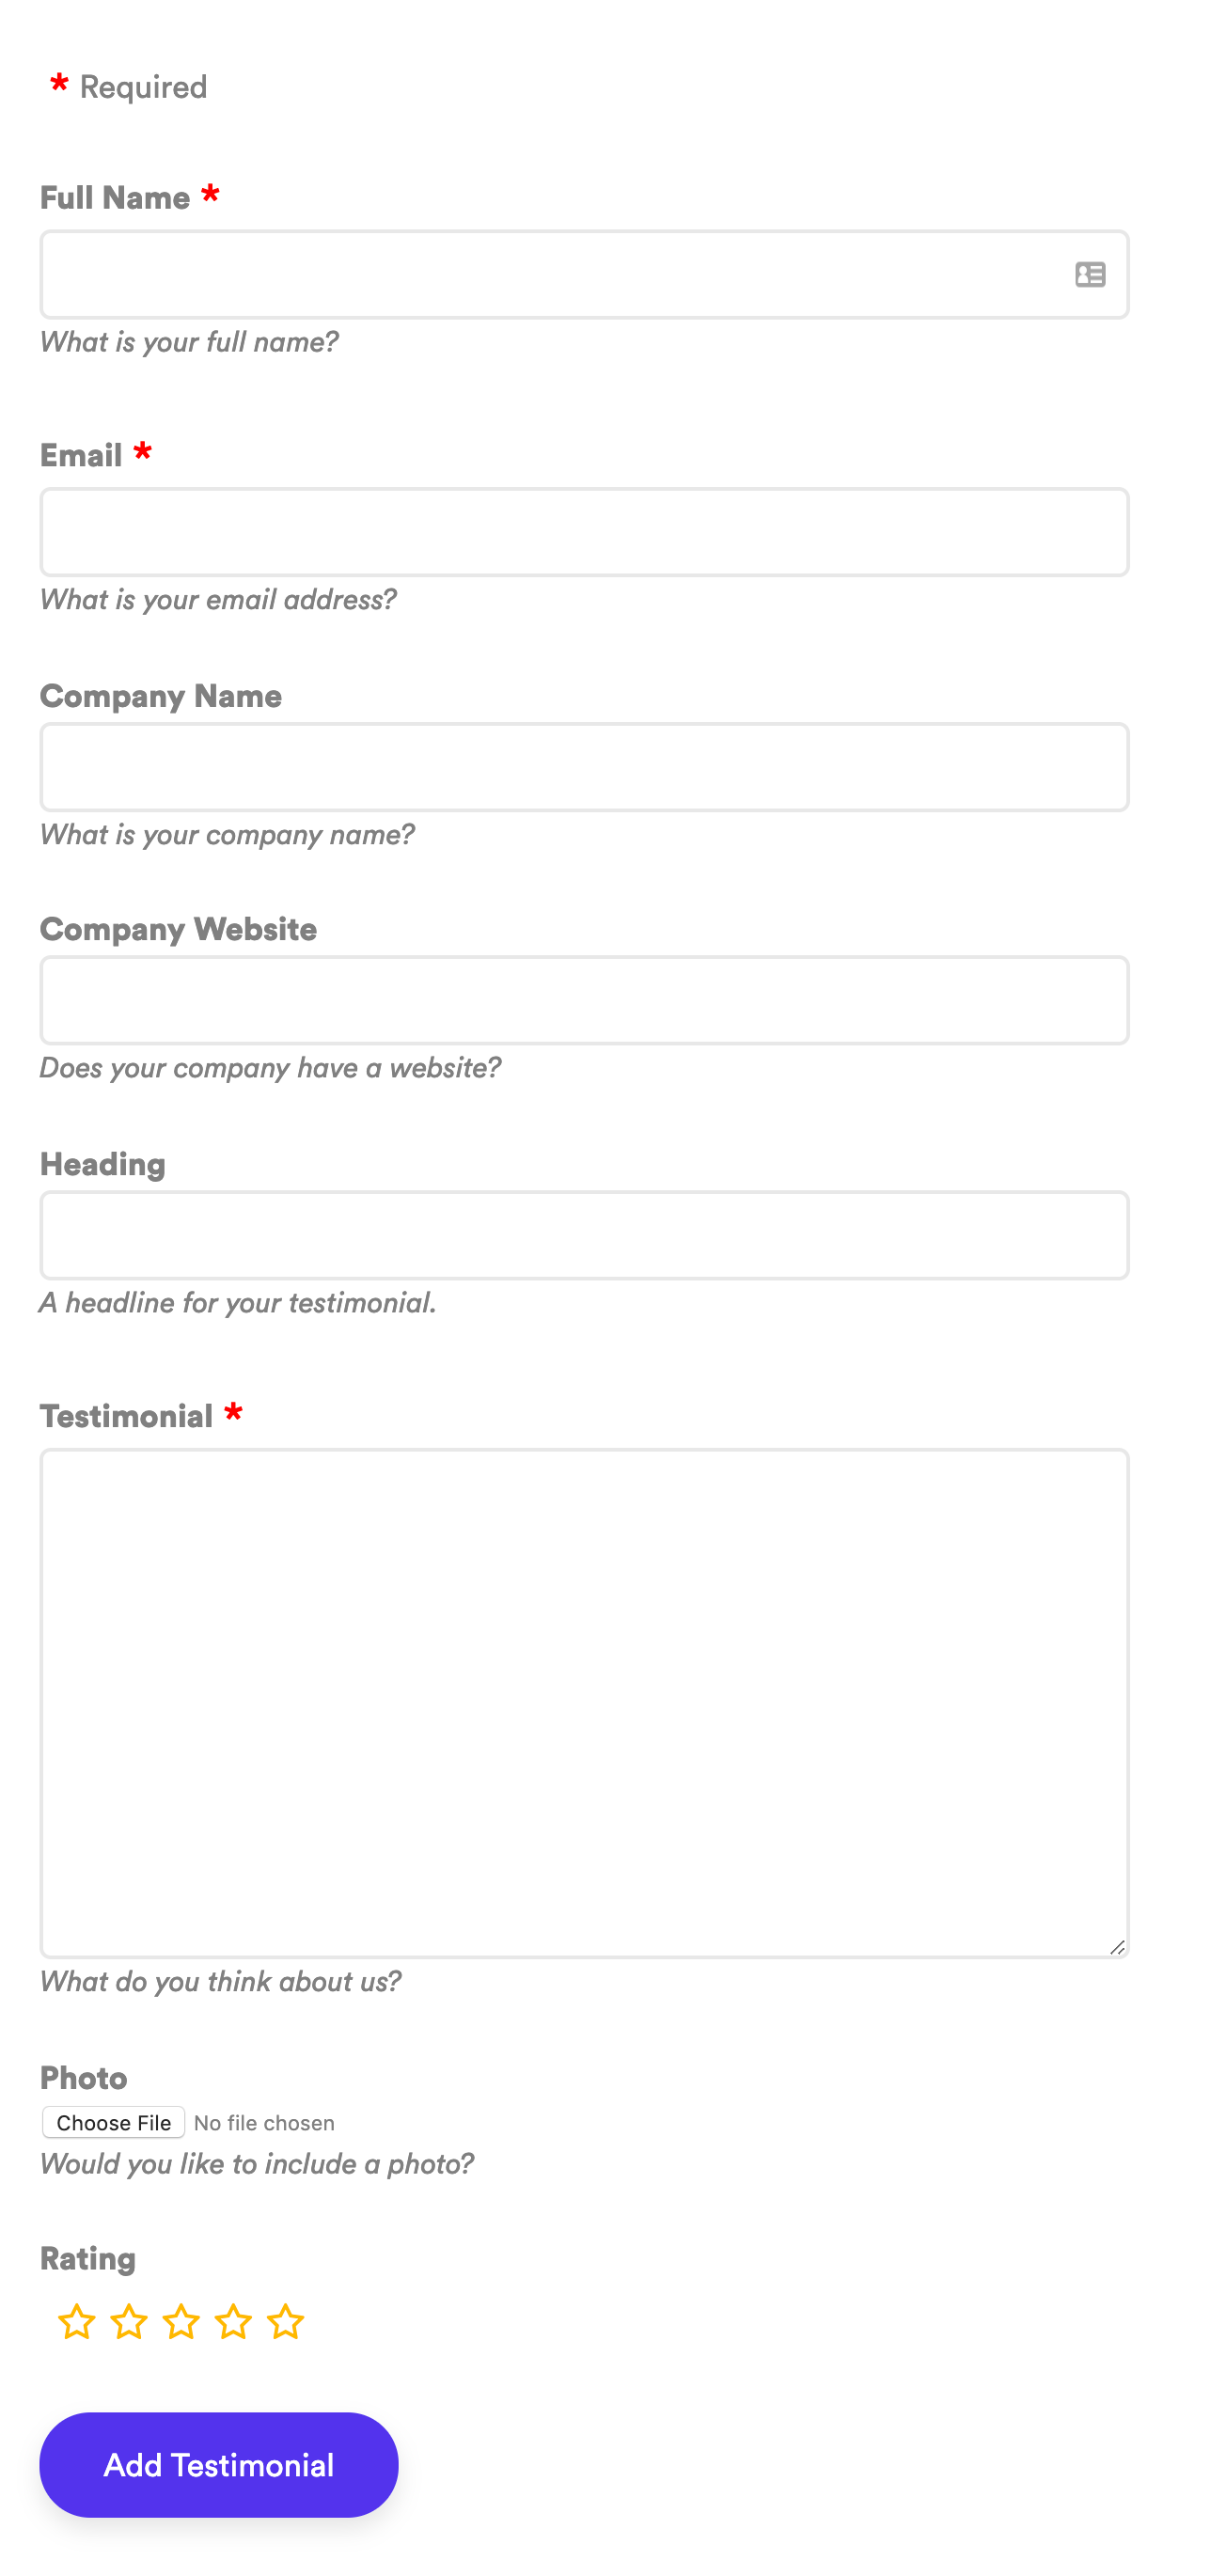
On the left side, you’ll see the available form fields; on the right side, you’ll see a preview of your testimonial form.
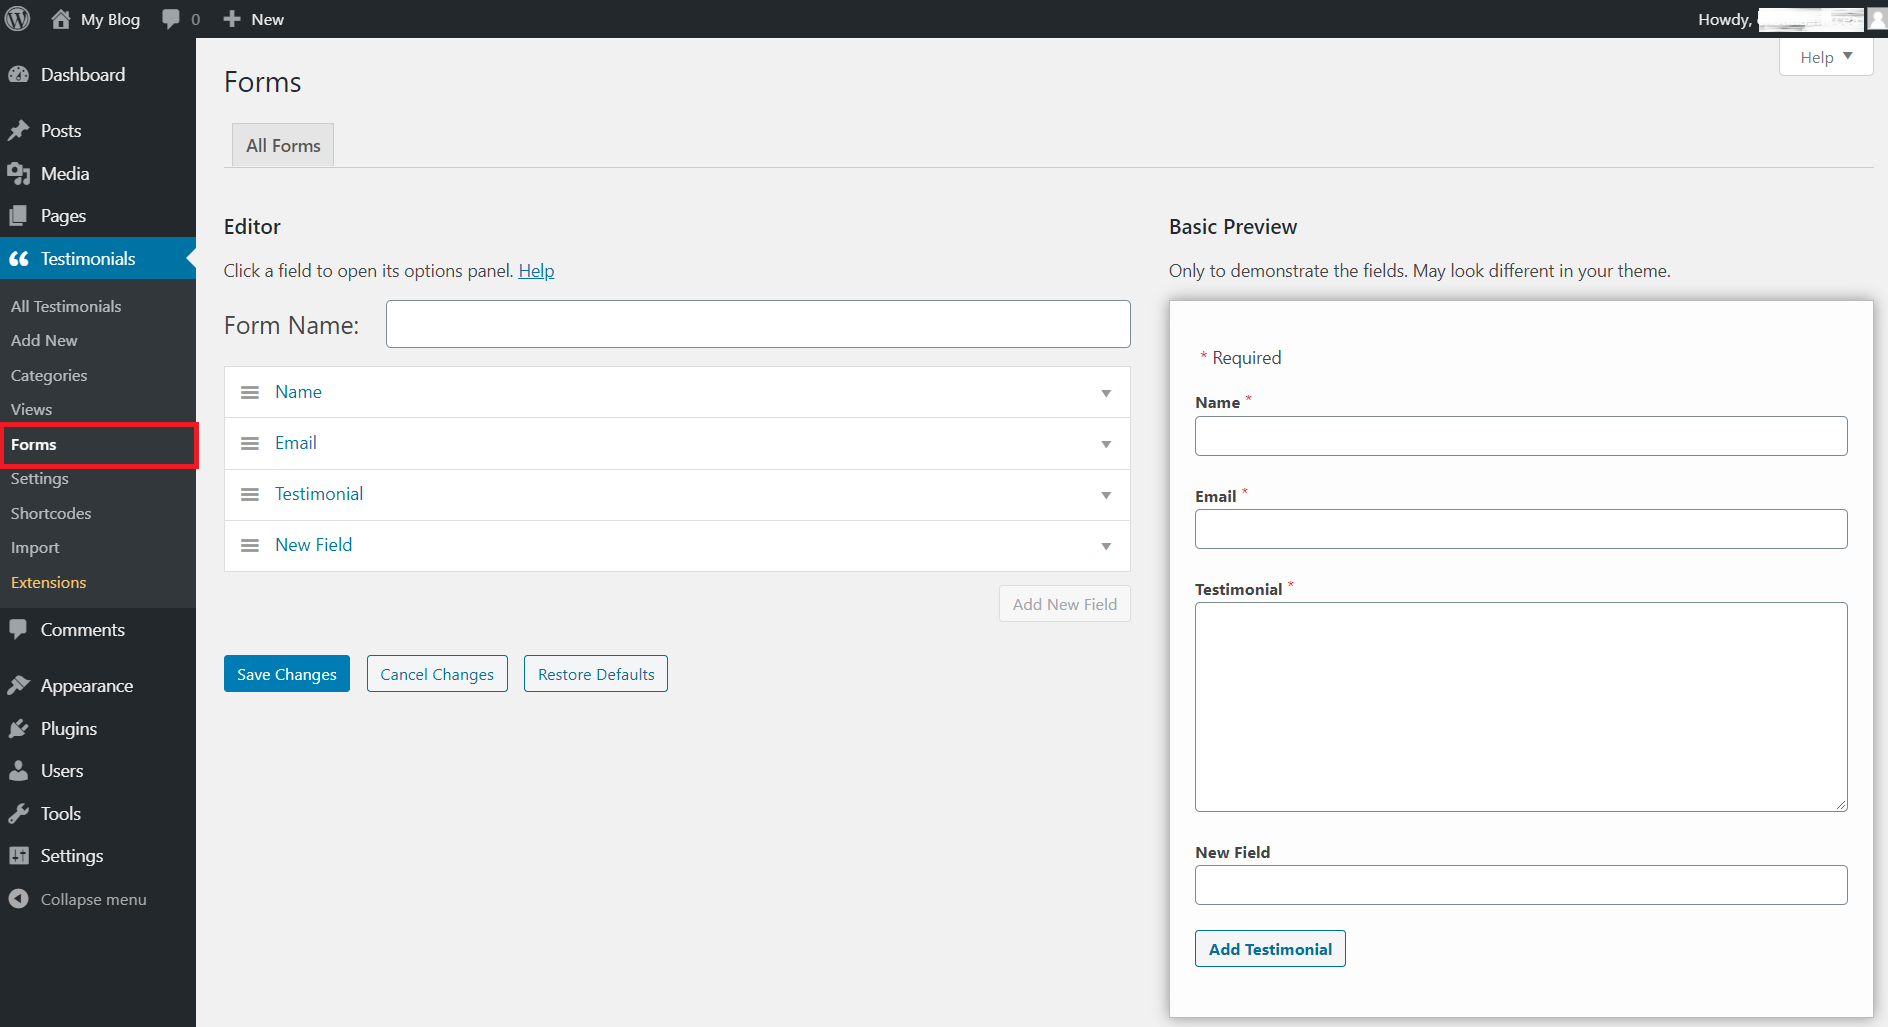
The default form will ask customers for their name, email, company name, and website, headline, and testimonial text. There will also be an upload field for those that want to include a photo. You can add or remove any form fields using the drag & drop interface.
When your form looks how you want it to, click Save Changes.
Note: The free version of Strong Testimonials allows you to create one testimonial collection form. If you need multiple, we have an extension that does this, available in the Business pro plan. The same plan will also allow you to create custom form fields.
Strong Testimonials Plugin
We’ve built the #1 WordPress plugin for collecting, managing, and displaying testimonials. Drive more sales by leveraging your existing user audience.
Step 4: Add a View
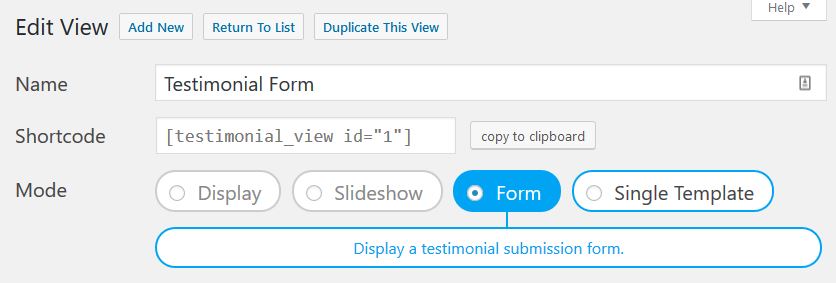
Go to Testimonials > Views and click Add New to add a View.
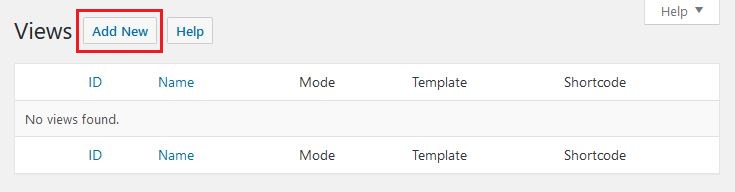
When you do this, you will see a bunch of settings to configure. Start by naming your View and selecting which type of View you want it to be.
Your choices include:
- Display: display your testimonials as a list or grid.
- Slideshow: create a slideshow of your testimonials.
- Form: create a testimonials form for people to fill out.
- Single Template: use the theme’s single post template.
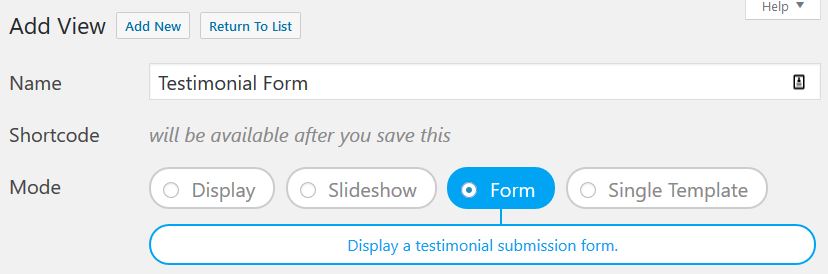
For now, we’ll choose Form as our View type because we want to create and display a testimonial form on our website for people to fill out.
If you have created categories for your testimonials, you can assign them to your form now. You can also decide to submit your form without reloading the page.
Now it’s time to customize your testimonials form. Start by choosing a form template: Default (choose light or dark theme from drop-down), Simple, or Unstyled.

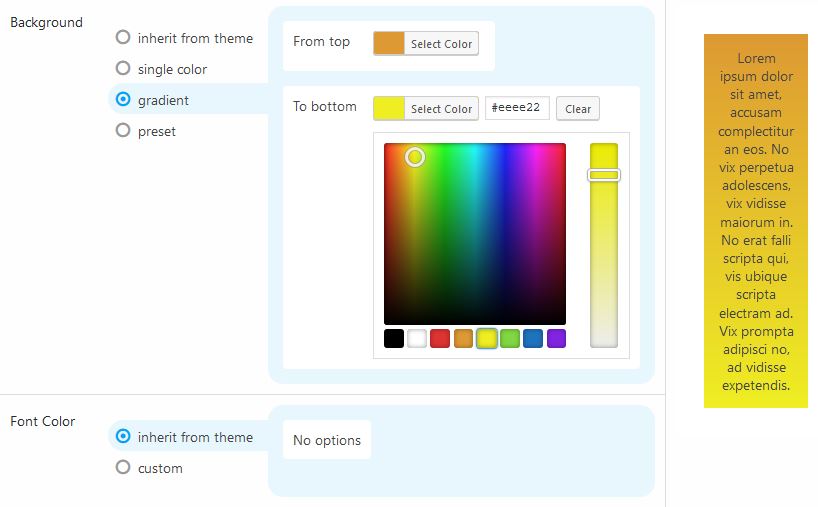
Next, choose a background. Strong Testimonials will adapt to your theme so the branding matches and the form blends in with your website.
You can also add a single color background, a gradient, or a preset gradient. Do the same with the font color. You can either let the form inherit the color from your theme or choose a custom color.
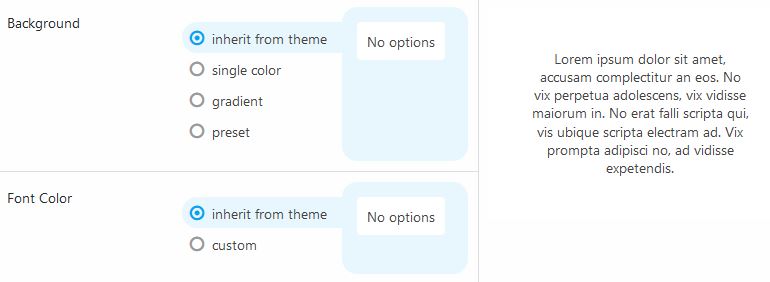
You’ll see a live preview in the box to the right when you make changes.
When your form looks how you want it to, click Save Changes.
Step 5: Add Testimonial Form to Your WordPress Website
Now that your form is saved as a View, you can add it to your website. To do this, copy the shortcode found underneath the form’s name or use the Strong Testimonials widget.
For our example, we’ll use the shortcode.
You can also see your testimonial form shortcode under Testimonials > Views.
Once you’ve copied the shortcode, go to the post or page on your website to which you want to add the form and paste it there.

You can preview your post or page to ensure the form displays how you want it to. Here’s a look at ours:
Now happy customers can fill out your form with their testimonials. Need help with how to get customers to fill out your form? Check out the next step for some helpful tips.
Step 6: Get Testimonials from Your Customers
Creating a form to collect testimonials and hoping people will fill it out isn’t the most effective method.
Check out these great ways to get testimonials from your customers so you can add them to your website right away:
- Send personalized email campaigns to current customers asking them to fill out your form (include a link to the post or page)
- Add an incentive to your emails to encourage people to complete the form (e.g., an entry to win a gift card to your online shop)
- Scroll through social media and collect positive comments about your business
- Ask people on social media to leave a testimonial in the comments that will later be used on your website
- On the checkout page, remind people to check back and leave a testimonial after receiving their items
- Conduct a survey and ask for feedback
We want this to be the last guide about testimonials you ever read, so we will keep it up-to-date with accurate information. To do this, we reached out to see how other business owners go about collecting testimonials – here’s what they had to say:
Great question! Here is a tip for getting testimonials – Offer a small gift – such as a $5 Starbucks gift card. And, if you have a large number of customers to ask, use a tool such as Rybbon.net to automate the rewarding process and make it easier to manage. You also get 100% money back on any unclaimed rewards. This makes the process easy and scalable and increases the likelihood of getting the testimonial!
Brenda Stoltz | Rybbon.net
In my early days as a freelance writer, I asked my new clients if they were comfortable with giving me a testimonial after working with me. After a couple of months of delivering high-quality work, even my ghostwriting clients didn’t mind giving me a quote. If you get a couple of big names up there on your testimonials page, then your credibility shoots up. To the extent that I have had a client reach out to me with a testimonial about my work and told me to put it on my site.
Chintan Zalani | Content Marketer, EliteContentMarketer.com
Testimonials play an essential role in a potential customer’s journey. At ContentKing, we’re using them as social proof to get people to try ContentKing, as well as convince them to sign up for our service after their trial has ended.
Steven van Vessum | VP of Community, ContentKing
You need to know your users to effectively leverage testimonials though. You should be showing users testimonials from people with the same profile. So for instance, if you’re targeting agencies, show them a testimonial of an agency customer instead of an eCommerce business.
That may sound basic, but I see it go wrong all the time.
We capture the NPS score of our users while they are browsing our app. Then we manually reach out to the NPS promoters and ask them to leave us a review. We then take these reviews and use them as testimonials with our customers’ permission. We’ve collected hundreds so far.
NPS or Net Promoter Score is a management tool used to gauge the loyalty of a customer. It asks the customer if they would be willing to recommend your product/service to a friend or colleague. The score is taken on a 0-10 basis with promoters being 9-10.
Will Cannon | Founder, UpLead
Many companies use testimonials on their website. However, many companies do not use testimonials on pages other than their website. For example, welcome emails, lead magnet, opt-in emails, sign-up page, in-app and pricing emails/pages. All of these testimonials really help. I’d highly recommend to start using these testimonials and social proof on those places because the user or reader wants validation of your services.
Aazar Ali Shad | Head of Growth, Userpilot.com.
Collecting testimonials is an essential part of your strategy to build trust online and increase sales. The good news is, according to BrightLocal’s 2016 Local Consumer Review Survey around 70% of customers will leave a review when asked. One approach is to ask every customer if there’s anything you can do to improve their experience. If they respond that their experience was good then ask them if they would be okay leaving a positive review on your social media account or one of your online business listings.
Keller Tiemann | Founder, leadsurance.com
At Direct Online Marketing, we collect testimonials on our site for each case study we produce. But you can’t just say “hey, can you give us a testimonial please” for every campaign. Because of that, we encourage account leaders to ask questions that help us understand the impact our campaigns are having for our clients. Combined with active listening, we are able to discover WHY our campaigns are valuable and important, outside of just performance metrics. Then when we ask for testimonials, they are tailored to client pain points we solve, not a confirmation of performance and results.
Jonathan Bentz | Senior Digital Marketing Strategist, Direct Online Marketing
Now that you’ve collected some testimonials, it’s time to add them to your website.
Note: for more tips and strategies on how to gather testimonials from your customers, check this article.
Step 7: Add Testimonials to Your WordPress Website
Strong Testimonials give you several ways to add customer testimonials to your website for people to see. But first, if you have collected testimonials from anywhere other than your testimonials form and social media platforms, you will have to manually add them to the plugin before it will recognize them.
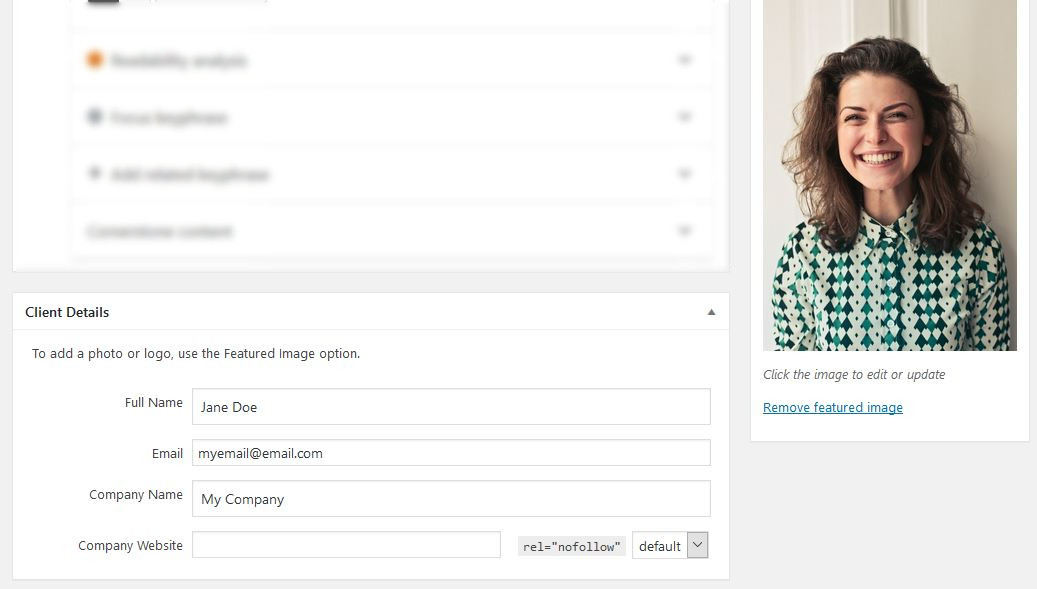
To do this, go to Testimonials > Add New. You will add a title (or headline) and content (the testimonial) just like you would a post or page. Then near the bottom, you’ll fill out the customer’s details, such as name, email, company name, etc.
Once you manually add your testimonials, you’ll see them under Testimonials > All Testimonials.
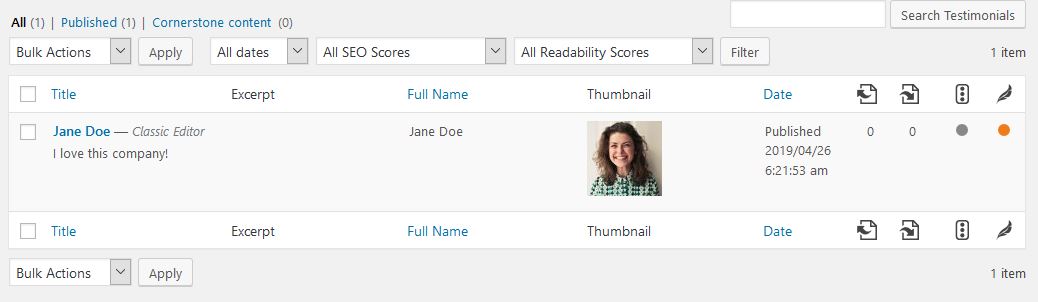
In addition, anytime someone fills out your testimonial form, you’ll see a notification for approval.

To approve a testimonial, view it and click Publish just like you would a typical post or page.
To display your testimonials, go to Testimonials > Views and click Add New. Name your View and choose to display your testimonials as a list or grid, as a slideshow (slider), or as a single template. For our example, we’ll choose the Display option.
Configure the settings so your testimonials display the way you want them to:
- Choose the testimonial order
- Include images
- Configure pagination or “Read more” links
- Style your testimonials (default, modern, bold, small widget, simple, or unstyled)
- Choose a layout (normal, masonry, columns, grid)
- Select a background and font color
Then, click Save Changes.
Copy the shortcode generated after you click Save Changes, and paste it on the post or page of your website you want the testimonials to display. Here’s what our testimonial page looks like:

Conclusion
And there you have it! You now know why testimonials are so important to the success of your business, how to collect testimonials from your customers, and the best way to display them on your WordPress website using Strong Testimonials.
Strong Testimonials make adding social proof to your website a cinch. You can keep things as basic or customized as you want, display testimonials in various ways, and make sure that your site visitors see how happy your existing customers are no matter where they are on your site.
Have you ever used Strong Testimonials to showcase how satisfied your customers are? If so, we would love to hear all about it in the comments below.