Picture this: You’ve got an amazing product or service, but how do you convince potential customers that you’re the real deal? With testimonials, of course!💪 These little nuggets of social proof pack a powerful punch, showing the world that you’re not just blowing hot air.
In this article, we’re diving deep into the world of testimonials. We’ll uncover why they’re crucial for building trust and credibility, reveal the benefits of using a grid layout, and show you how to work magic with the Strong Testimonials plugin.
✨ Disclaimer: No testimonials were harmed in the making of this article. They were just too busy being awesome.
Table of contents
Testimonials: The Jedi Mind Tricks of Customer Convincers
Let’s talk about the unsung heroes of the business world: testimonials. These bad boys have more power than you might think. They’re like the wise, old sages who can sway the minds of potential customers with a single endorsement.
Why are testimonials crucial? Well, here is why:
- Building Trust: You’re a potential buyer unsure about taking the plunge. Suddenly, testimonials swoop in, capes fluttering in the wind, and whisper, “Hey, buddy, you can trust these guys!” It’s like having a squad of satisfied customers vouching for your business.
- Authenticating Your Claims: Testimonials say, “Yeah, those claims they’re making? Legit stuff!” It’s like having a secret agent that validates all your bold statements.
- Addressing Customer Concerns: Testimonials tackle objections and doubts head-on, like a superhero tackling a supervillain. Worried about that pesky doubt creeping in? Bam! Testimonials swoop in and say, “Hey, we’ve been there, and it’s all good!” Doubt? Begone.
When it comes to testimonials, they’re awesome on their own. Things get even better when you gather them up and put them in a grid layout! And here is why:
- Easy Peasy Navigation: With a grid layout, visitors can breeze through multiple testimonials like they’re strolling through a testimonial gallery. It’s like having a convenient navigation system that lets people quickly scan through all the good vibes.
- Variety, Variety, Variety: When you’ve got a bunch of testimonials in a grid, you can showcase different voices and experiences all at once. It’s like having a testimonial party with a diverse guest list. Customers from all walks of life can share their love for your product or service, creating a vibrant tapestry of awesomeness.
- More Testimonials, More Trust: Let’s face it, the more testimonials you have, the more trust you build. With a grid layout, you can pack a whole bunch of them together, creating a visual testament to your reliability. It’s like an army of happy customers joining forces to conquer doubt or hesitation.
I’ll introduce you to the Strong Testimonials plugin to simplify creating and managing a compelling testimonial grid.
This powerful tool, designed specifically for WordPress, offers a range of features and customization options to help you showcase testimonials effectively.
Introducing the Strong Testimonials Plugin
The Strong Testimonials plugin provides an effective solution for enhancing your website with an engaging grid of testimonials. This versatile tool offers plenty of valuable features, such as:
- Gathering testimonials directly from your website visitors.
- Customizing the appearance and design of your testimonial grid.
- Seamlessly integrating testimonials from various review platforms.
- And many other beneficial functionalities to explore.
The Strong Testimonials plugin is easy to install and use. The plugin is compatible with all major WordPress themes and plugins.
For this article, you will only need the Strong Testimonials Lite version. We recommend upgrading to the pro version if you want to unlock more customization options and features.

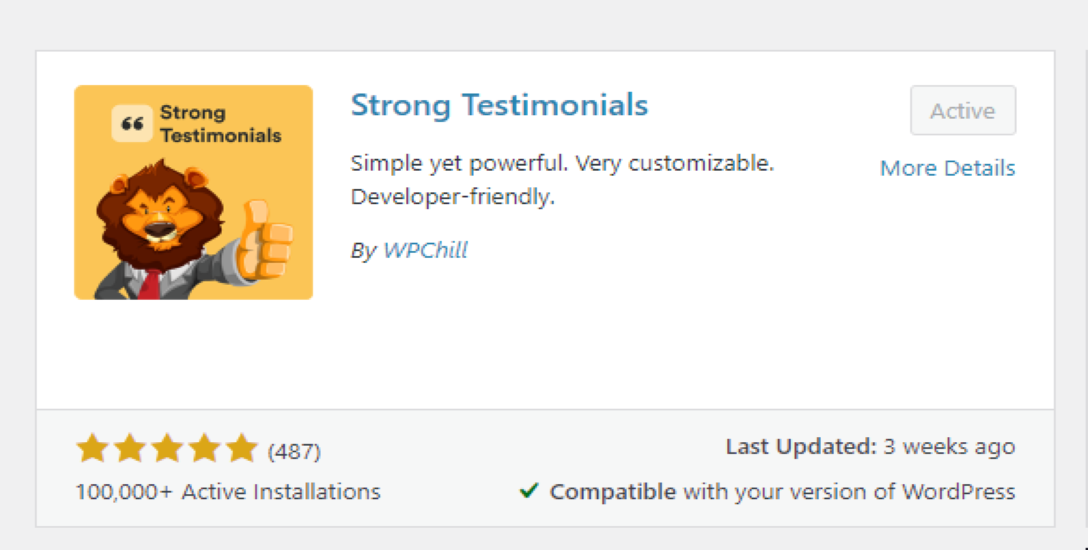
Strong Testimonials Plugin
We’ve built the #1 WordPress plugin for collecting, managing, and displaying testimonials. Drive more sales by leveraging your existing user audience.
Installing Strong Testimonials Lite
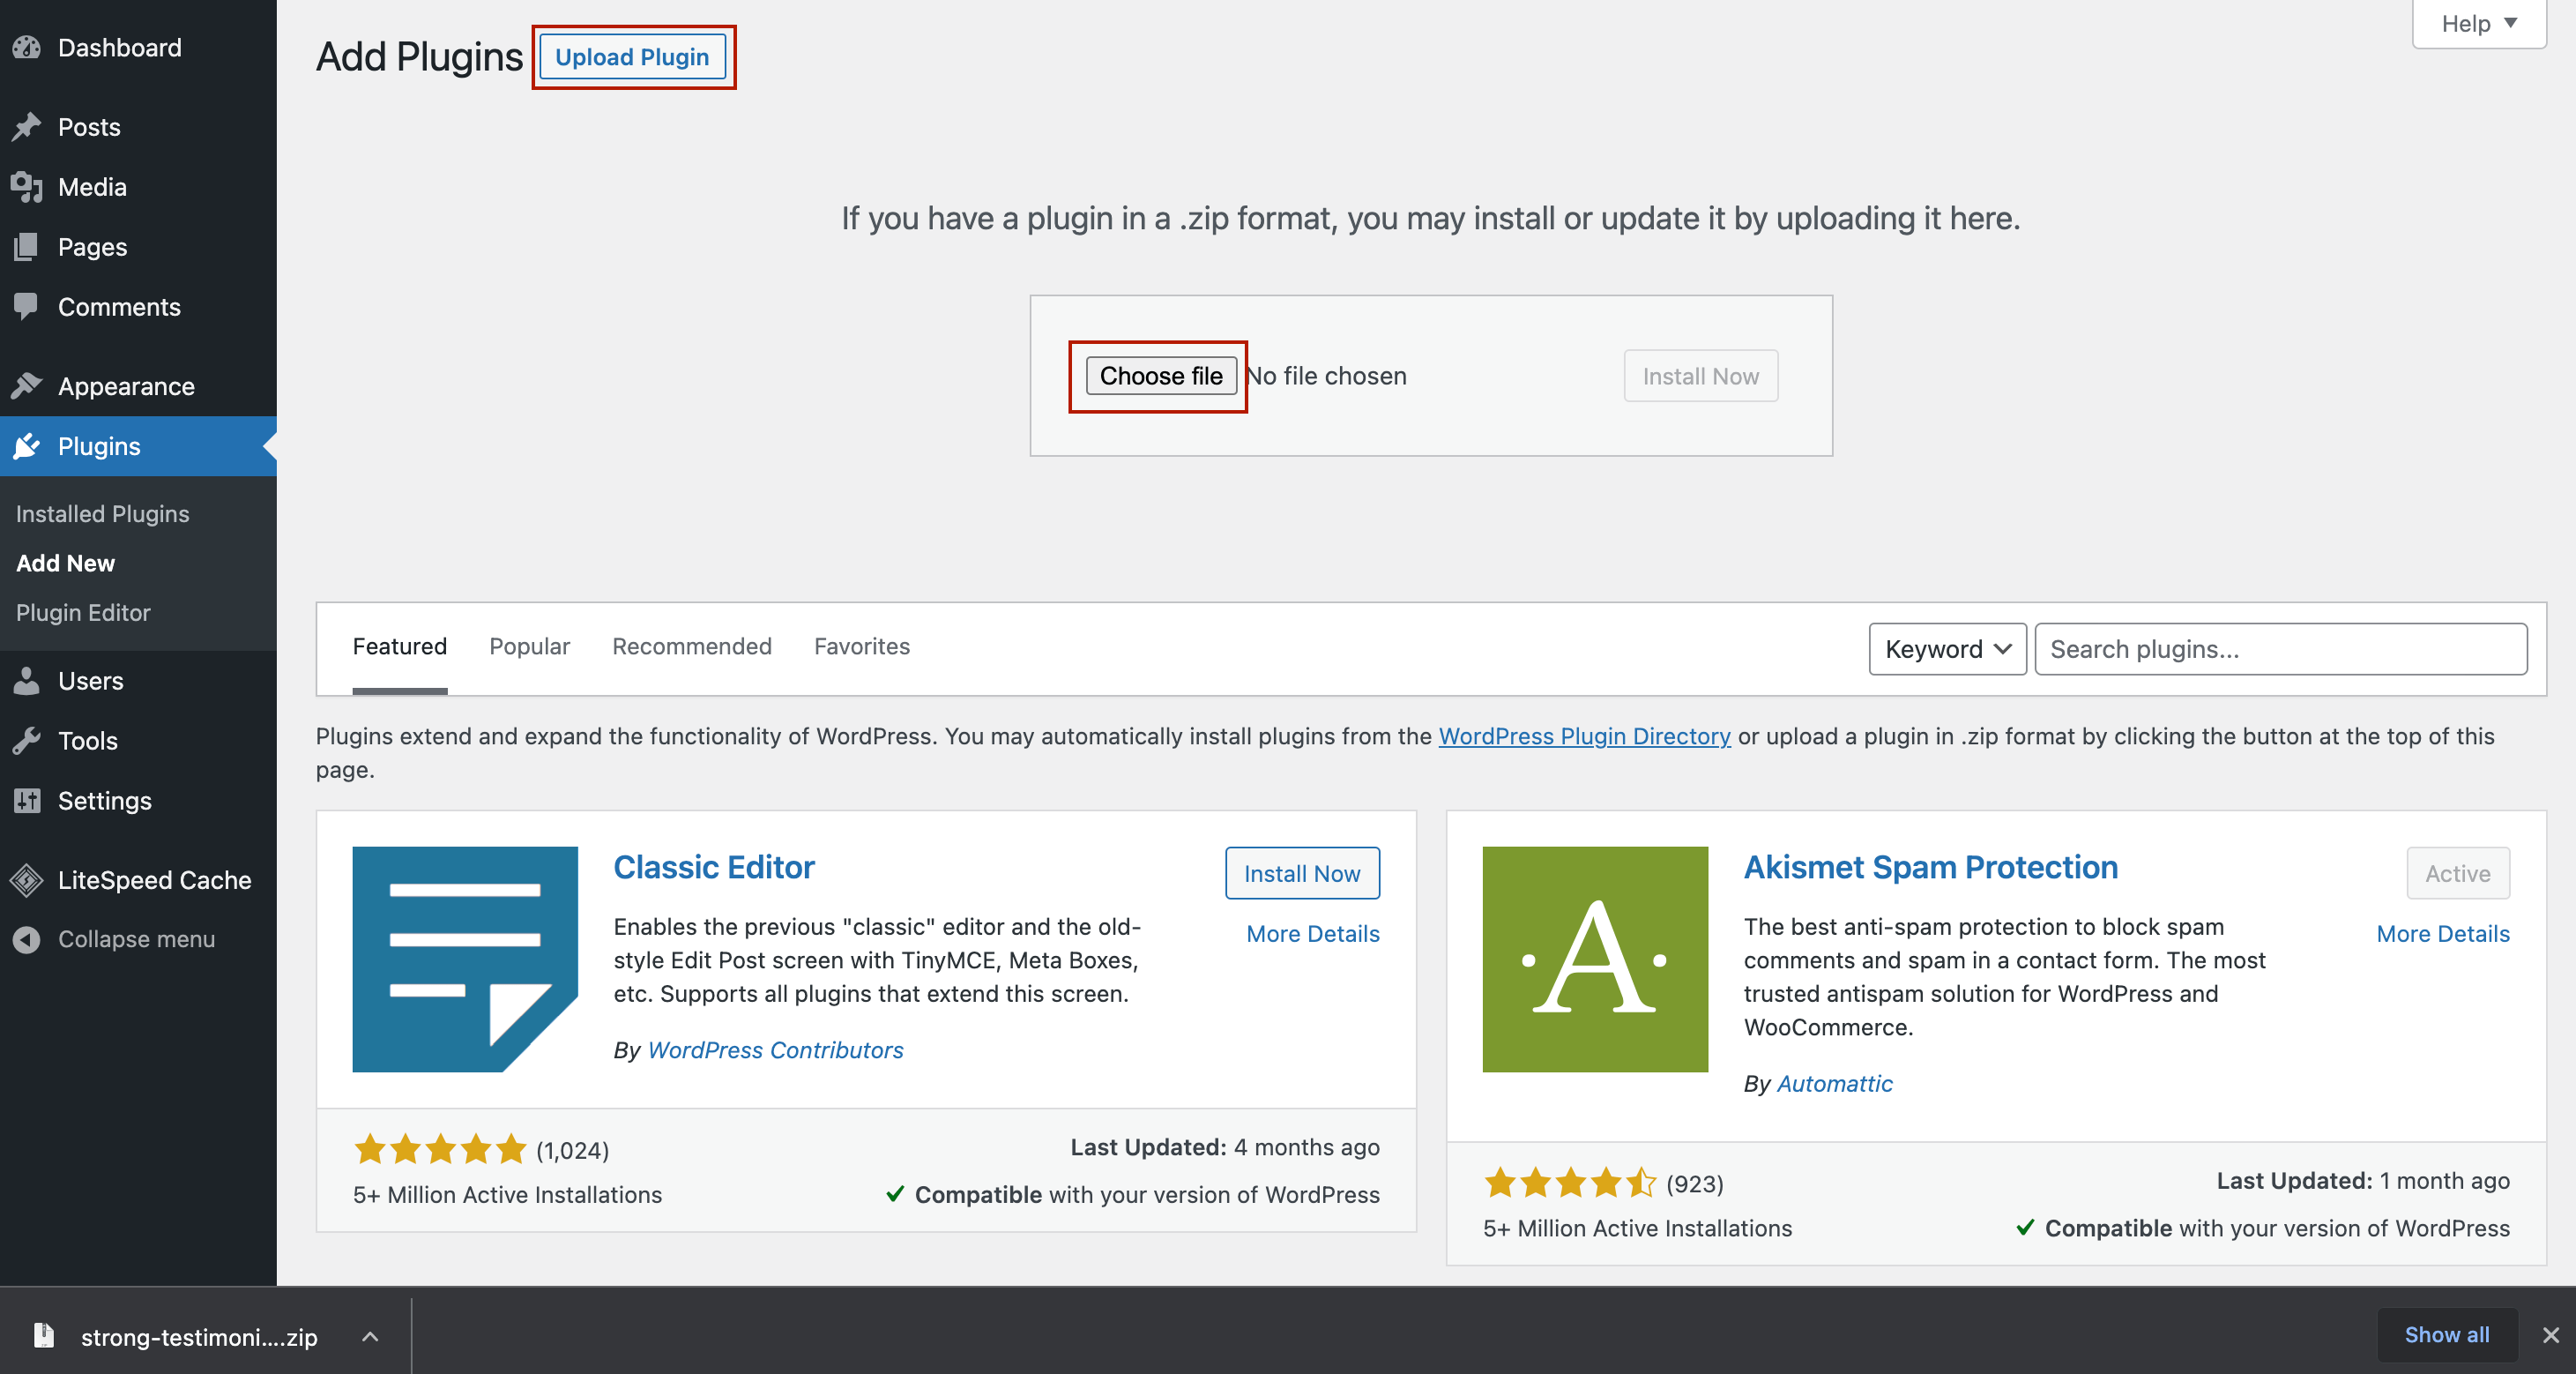
The Lite version is super easy to install and activate. Go to your WordPress Dashboard and click on Plugins > Add New.
Search for “Strong Testimonials” in the top right search bar. Once you locate the plugin, click on the Install Now button. Wait until it installs, then click on Activate.
Alternatively, you can download the ZIP file from the WordPress Repository, then go to Plugins > Add New > Upload and select the ZIP.
Let’s assume you already have a few testimonials in your bag. If you don’t, fear not, I came prepared 😄 Here is a useful guide on collecting testimonials and how to use them.
Now let’s not keep your testimonials waiting!
Designing an Effective Grid of Testimonials
When designing a grid of testimonials, there are a few things you should keep in mind:
- Choose impactful testimonials: Select positive, specific, and relevant testimonials for your target audience. Look for testimonials that highlight your product or service’s unique benefits and experiences.
- Appeal to visual psychology: The presentation of your testimonials plays a significant role in how visitors perceive them. Use clear and concise language, and ensure that your testimonials’ design and visual elements are appealing. This includes using attractive fonts, colors, and formatting.
- Optimize the structure and format: The organization of your testimonial grid determines how easily visitors can scan and read through the content. Use a grid layout that is user-friendly and intuitive. Arrange testimonials in a logical order, such as by category or date. Format the text in a way that is easy to read, with appropriate spacing and font size.
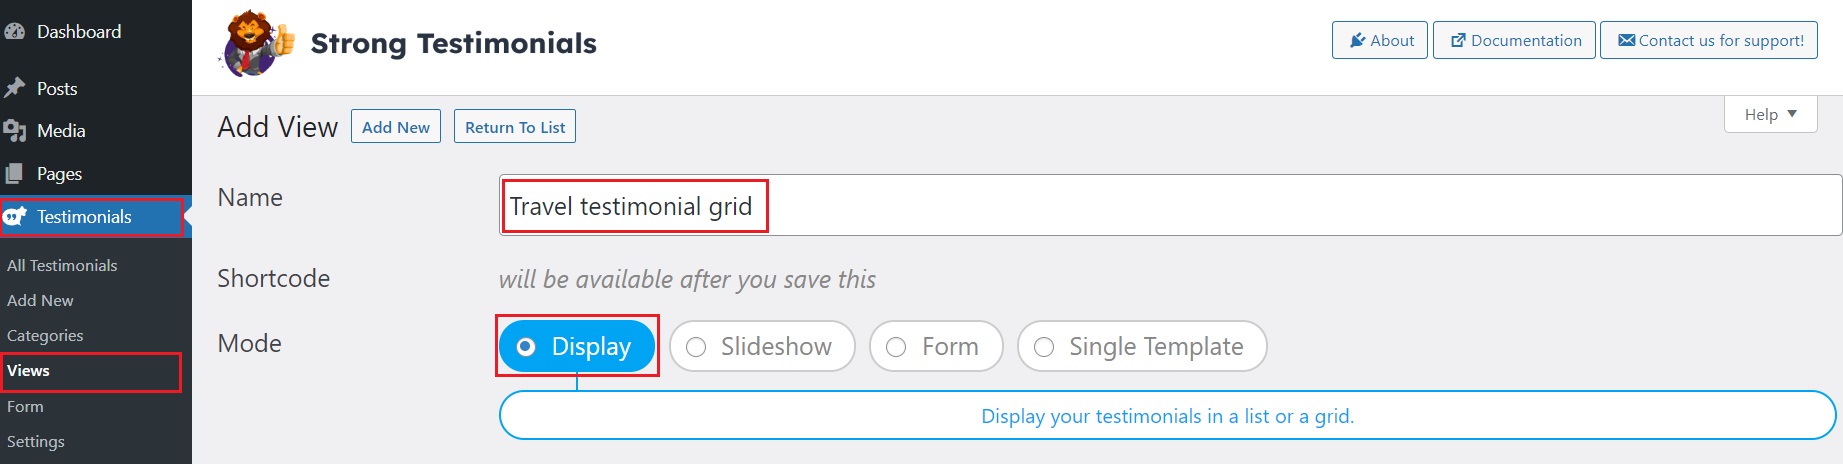
Head to Dashboard > Testimonials > Views > Add New. Give the view a suggestive name and select the Display mode.
If you scroll down to the Query section, you can decide what category of testimonials to display or even display all testimonials if you feel like it. You can also choose how the testimonials will be displayed: random, menu order, newest first, oldest first.
On top of that, you can decide how many you want to be displayed: all of them or specify the quantity.
Moving on to the Fields section:
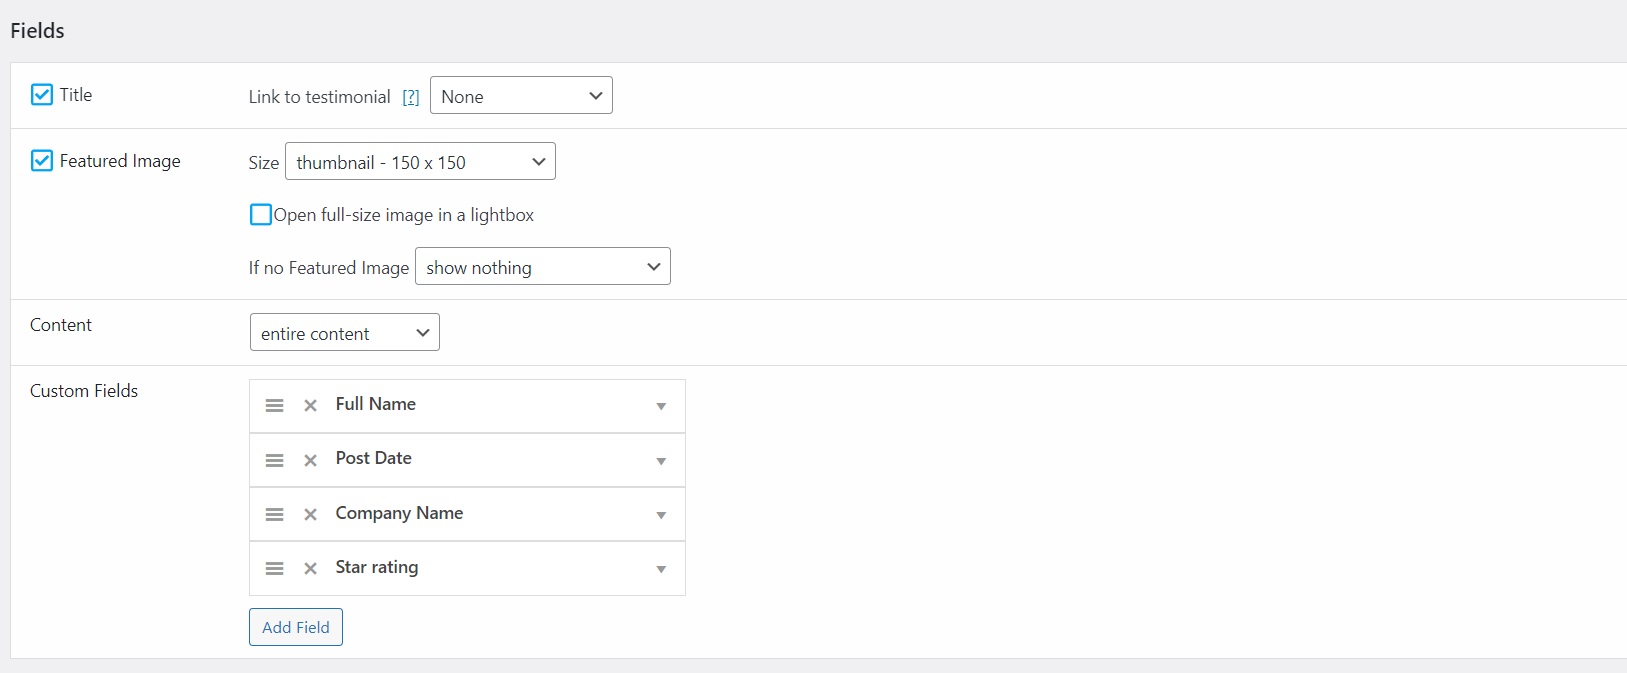
You can play around with the title, featured image, content, and fields here.
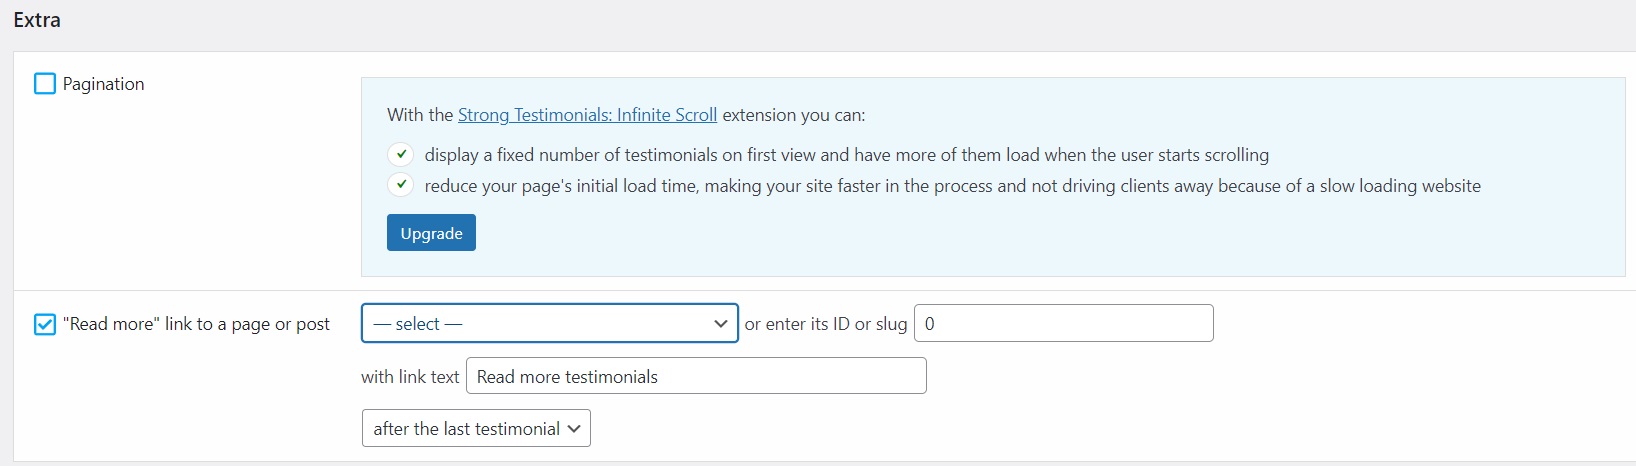
Next comes the Extra field. It’s important not to select the pagination if you want the Masonry grid to work. For the other types of grids, they are compatible with pagination.
When it comes to the “Read more” link to a page or post option, you can make use of it. There’s more explanation on how it works or how to set it up in this other article if you want to check it out. It’s not mandatory to have, but it’s a cool feature.
And last but not least, the Style section. In the first part, we have the Template area:
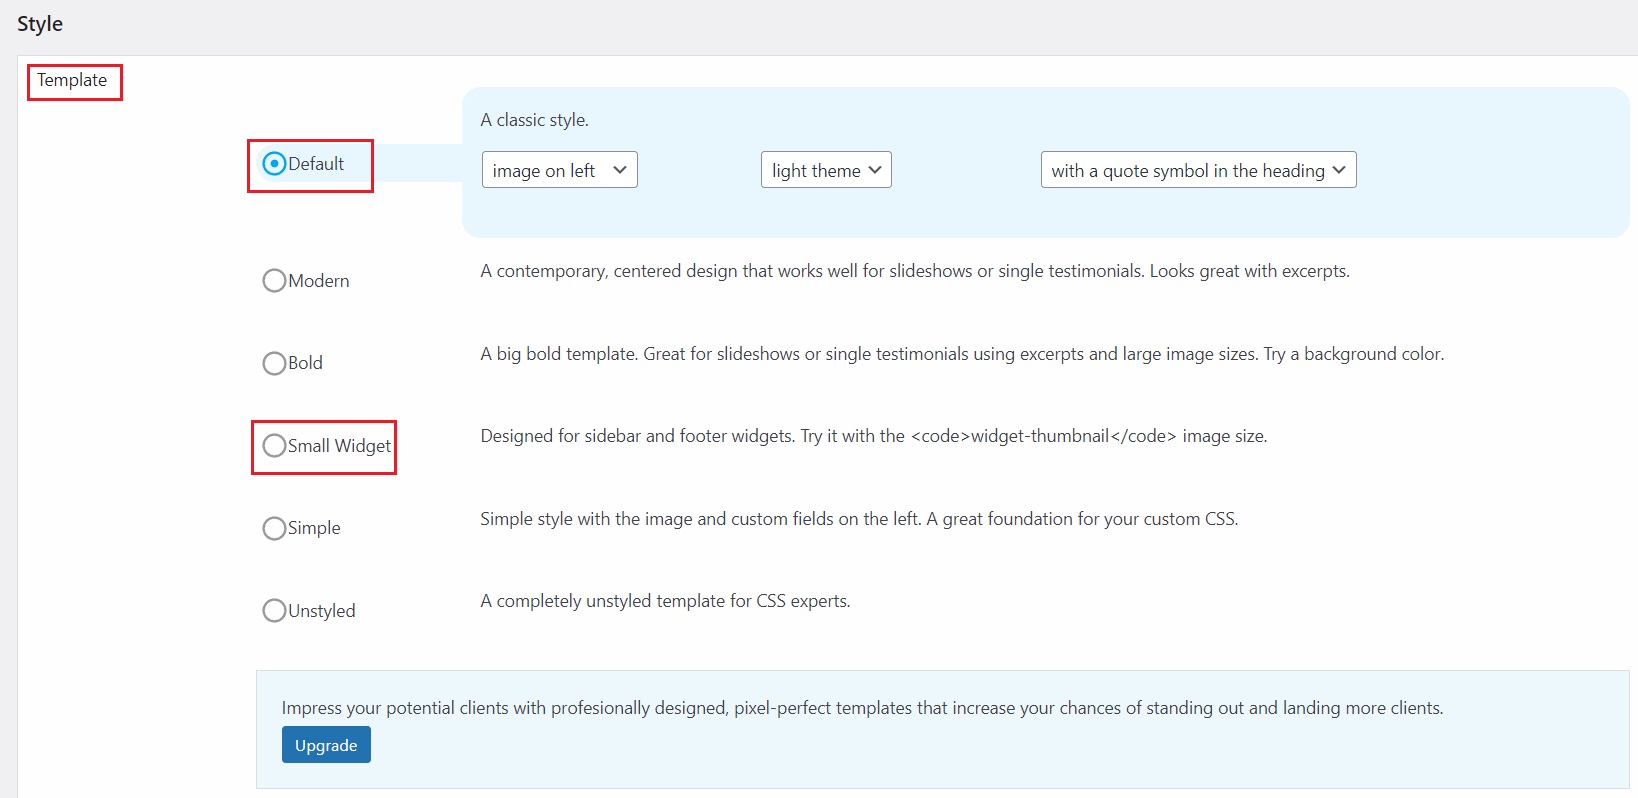
The Lite version of Strong Testimonials allows you to play around with the Default template and the Small Widget settings.
To activate the grid “superpowers,” scroll to the Layout part.
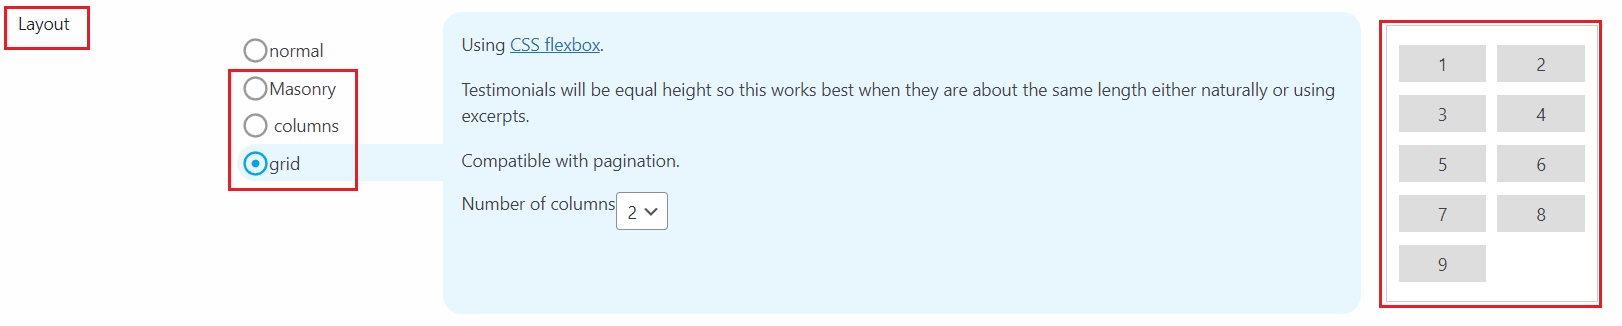
You can use three options to showcase your testimonials as a grid.
- Masonry – The universal solution that works well regardless of testimonial lengths. You can specify how many columns you need, up to 4 columns. Not compatible with the pagination option.
- Columns – Works well with both long and short testimonials. You can specify how many columns you need, up to 4 columns.
- Grid – Testimonials will be equal in height, so this works best when they are about the same length, either naturally or using excerpts. You can specify how many columns you need, up to 4 columns.
While cycling through them, you will see a preview of how they would look on the right side of the section.
For more advanced users you also have the option to add custom CSS Classes.
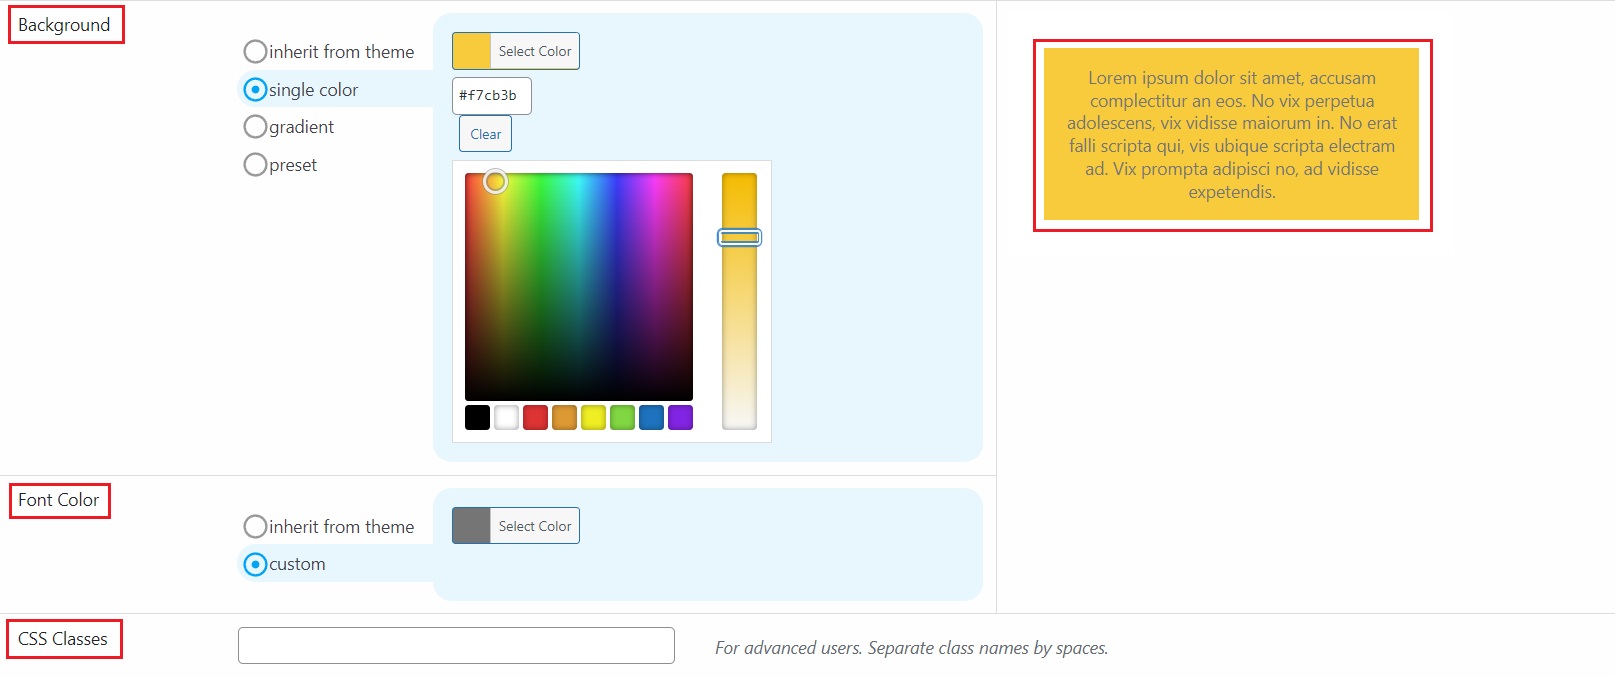
Next, you can choose a custom testimonial background color and font with the preview on the right.
For more advanced users, you also have the option to add custom CSS Classes.
Showcasing Testimonials with Strong Testimonials
Once you have finalized your testimonials’ desired appearance, scroll down to the bottom of the View customization section. There, you will find a “Save Changes” button. Click on this button to save your modifications.
After saving your work, scroll back to the top of the page. Below the view title, you will find the automatically generated Shortcode.
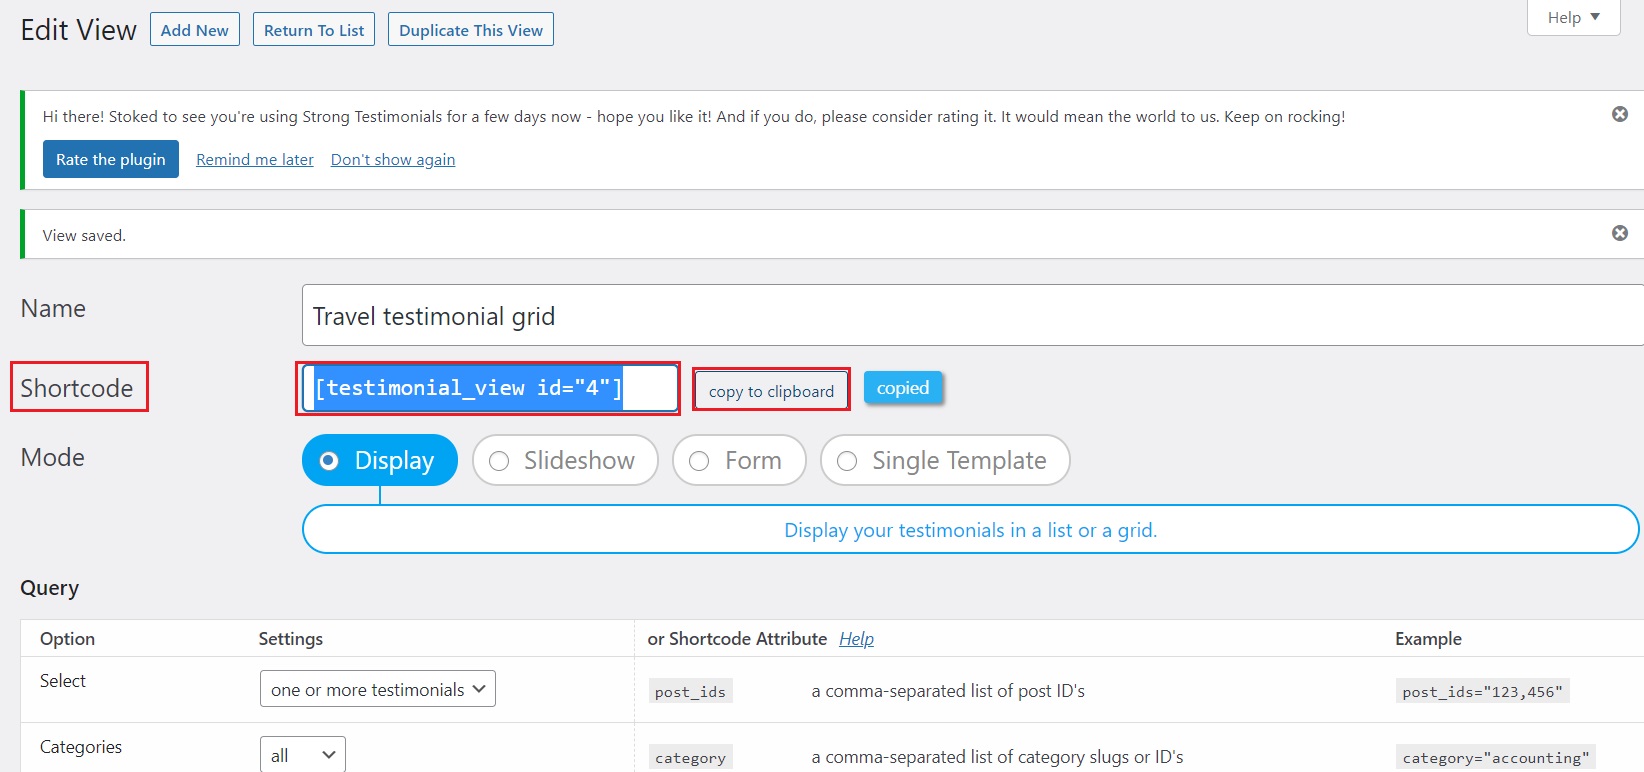
Copy the Shortcode and head to the page or post where you want to display your testimonial grid.
Click on the “+” and look for the Shortcode block or directly paste the Shortcode in the editor.
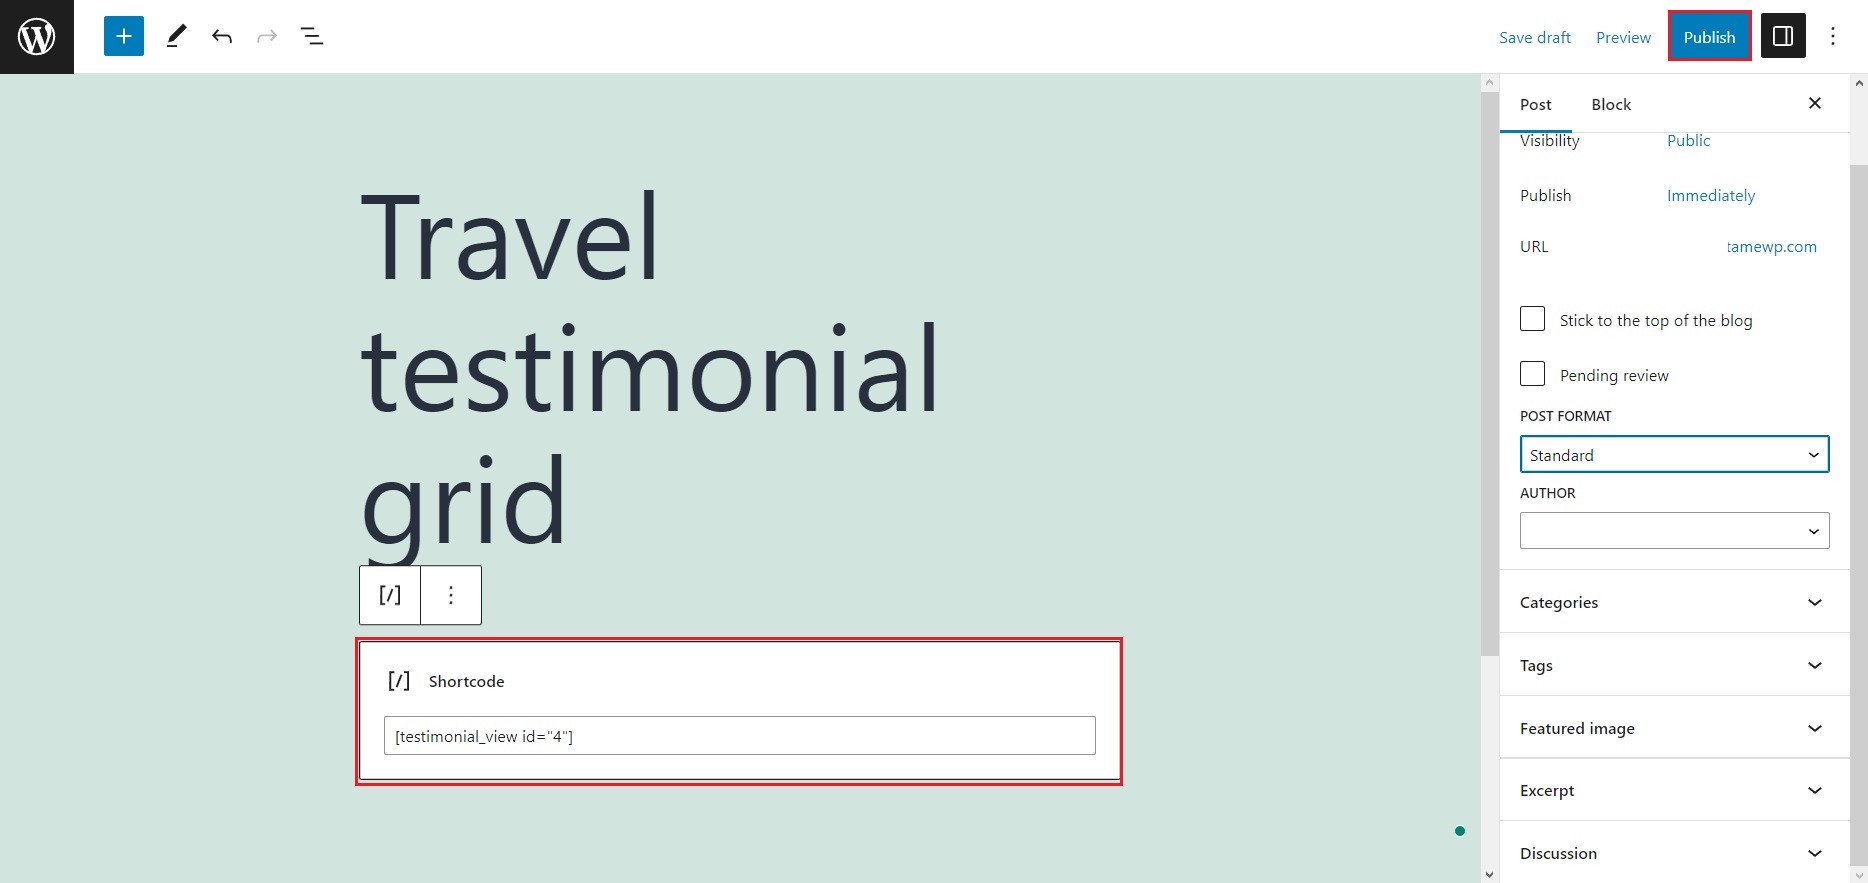
Click on the Publish or Update button.
Final Tips
- Ask specific questions to get the best feedback.
- Mix it up with video, text, and photo testimonials, and even spice them up with humor.
- Strategically place your testimonial grid on your homepage, product pages, blog posts, and testimonial pages.
- Keep your grid fresh by regularly adding new testimonials.
Wrapping up…
If you want to enhance your website with a captivating grid of testimonials, I strongly encourage you to try Strong Testimonials. This bad boy has powerful features and a user-friendly interface, making it a no-brainer for showing off your customers’ rave reviews.
Seriously, why procrastinate? Seize the opportunity, embrace Strong Testimonials, and unleash the full potential of your testimonials. Dive in headfirst and prepare to be amazed by the mind-blowing impact it’ll have on your business growth. Trust me; your website will be thanking you for this upgrade!
Strong Testimonials Plugin
We’ve built the #1 WordPress plugin for collecting, managing, and displaying testimonials. Drive more sales by leveraging your existing user audience.