
Do you want to learn how to add testimonials in Beaver Builder? We can teach you how to do it in a blink of an eye, so keep on reading!
This guide will show you one of the easiest ways to add customer testimonials in Beaver Builder.
Table of contents
Why use the WordPress Beaver Builder plugin?
Why would you add client testimonials to your website, you ask? Because they help you get more customers and generate more sales. Testimonials are a form of social proof and that means they have the power to influence other people’s buying decisions.
Beaver Builder is a user-friendly page builder. The plugin is module-based, meaning there are built-in modules for pretty much anything you want to create on your site: photo, audio, video, HTML, buttons, and so on.
You can install the Beaver Builder page builder from the WordPress repository. The plugin comes with a free version and a pro one. If you opt for the paid version, plans start at $99 per year.
Here are some of the core features included with this page and website builder:
- user-friendly drag-and-drop editor;
- real-time preview of your changes;
- more than 40 templates;
- 100 prebuilt rows;
- multi-site support;
- generous free version with modules for photo, audio, video, HTML, text editor;
Beaver Builder also has an integrated module for testimonials. You can check their documentation here.
How to add testimonials in Beaver Builder?
Okay, so you are a fan of Beaver Builder. You’ve already created beautiful pages with it and a testimonial page is next.
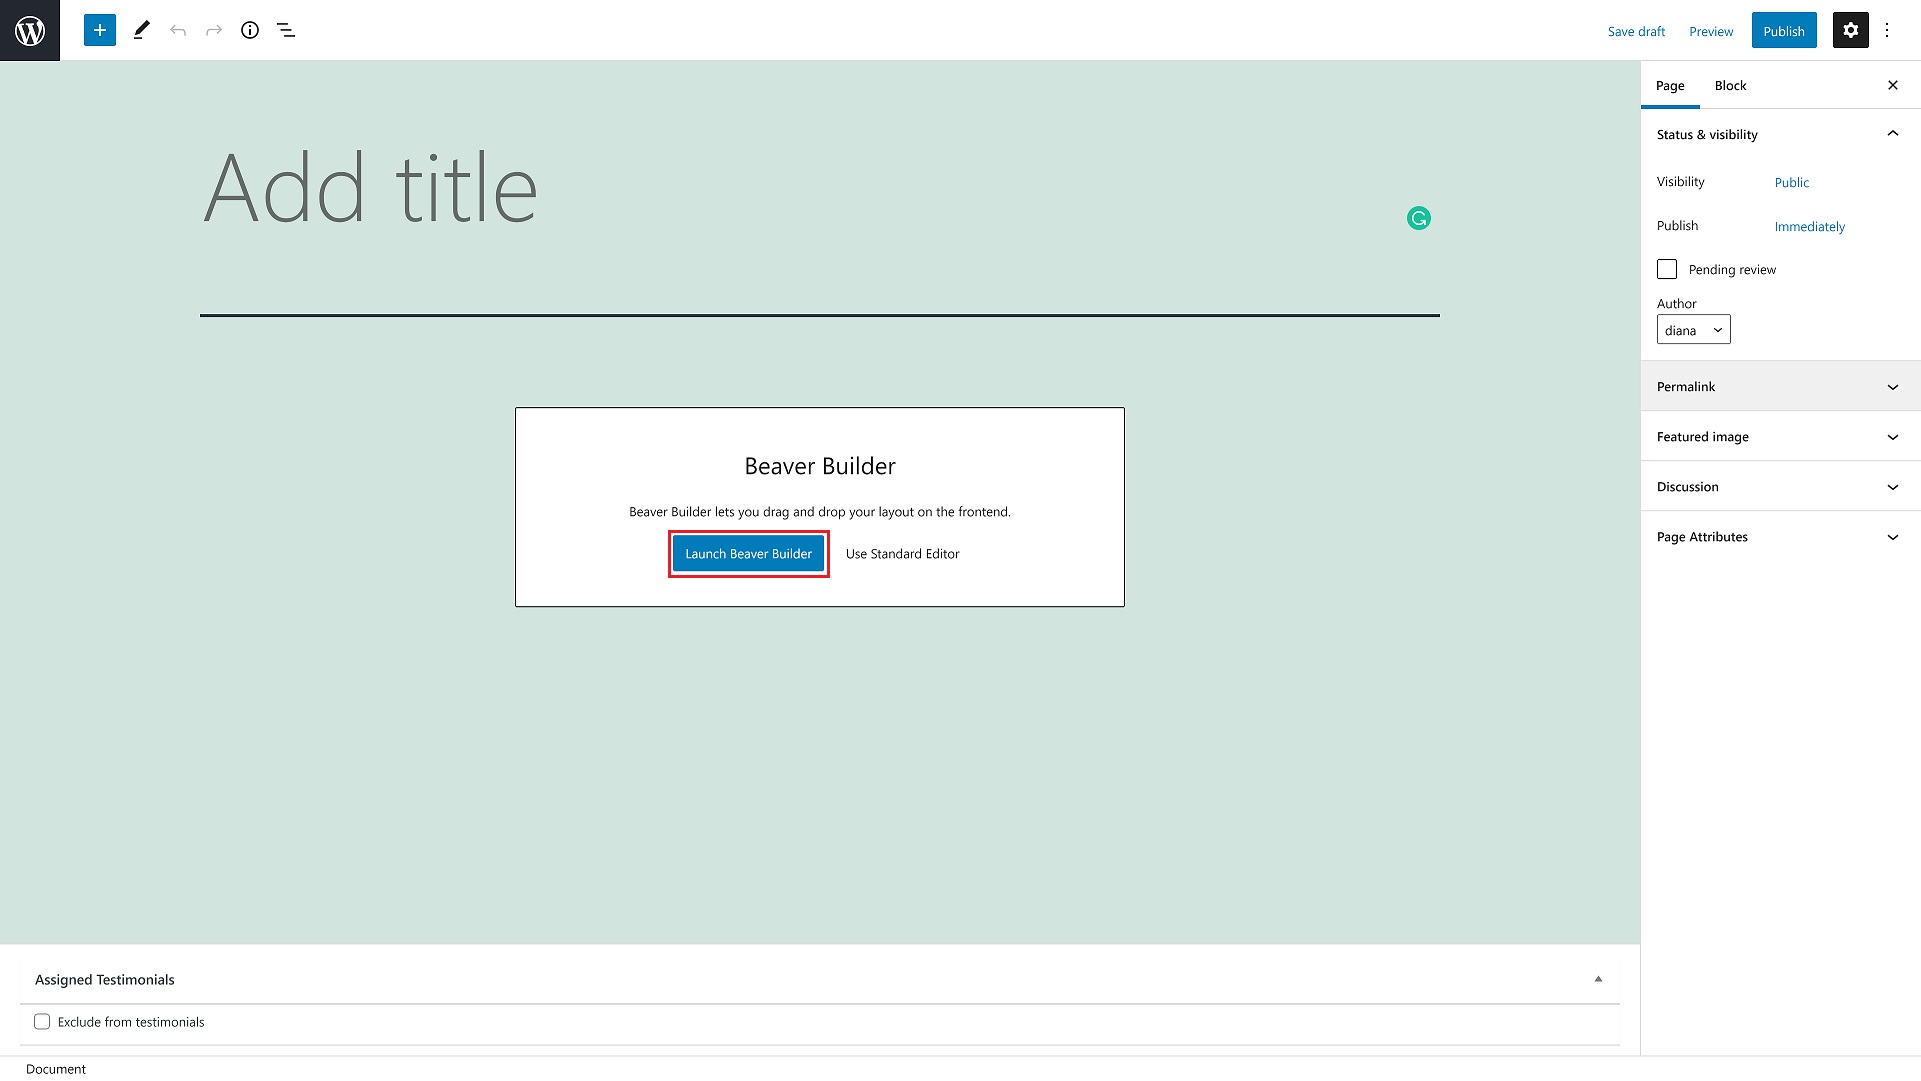
Once you go to your Dashboard and select Pages > Add New you will be prompted to click the Launch Beaver Builder button.
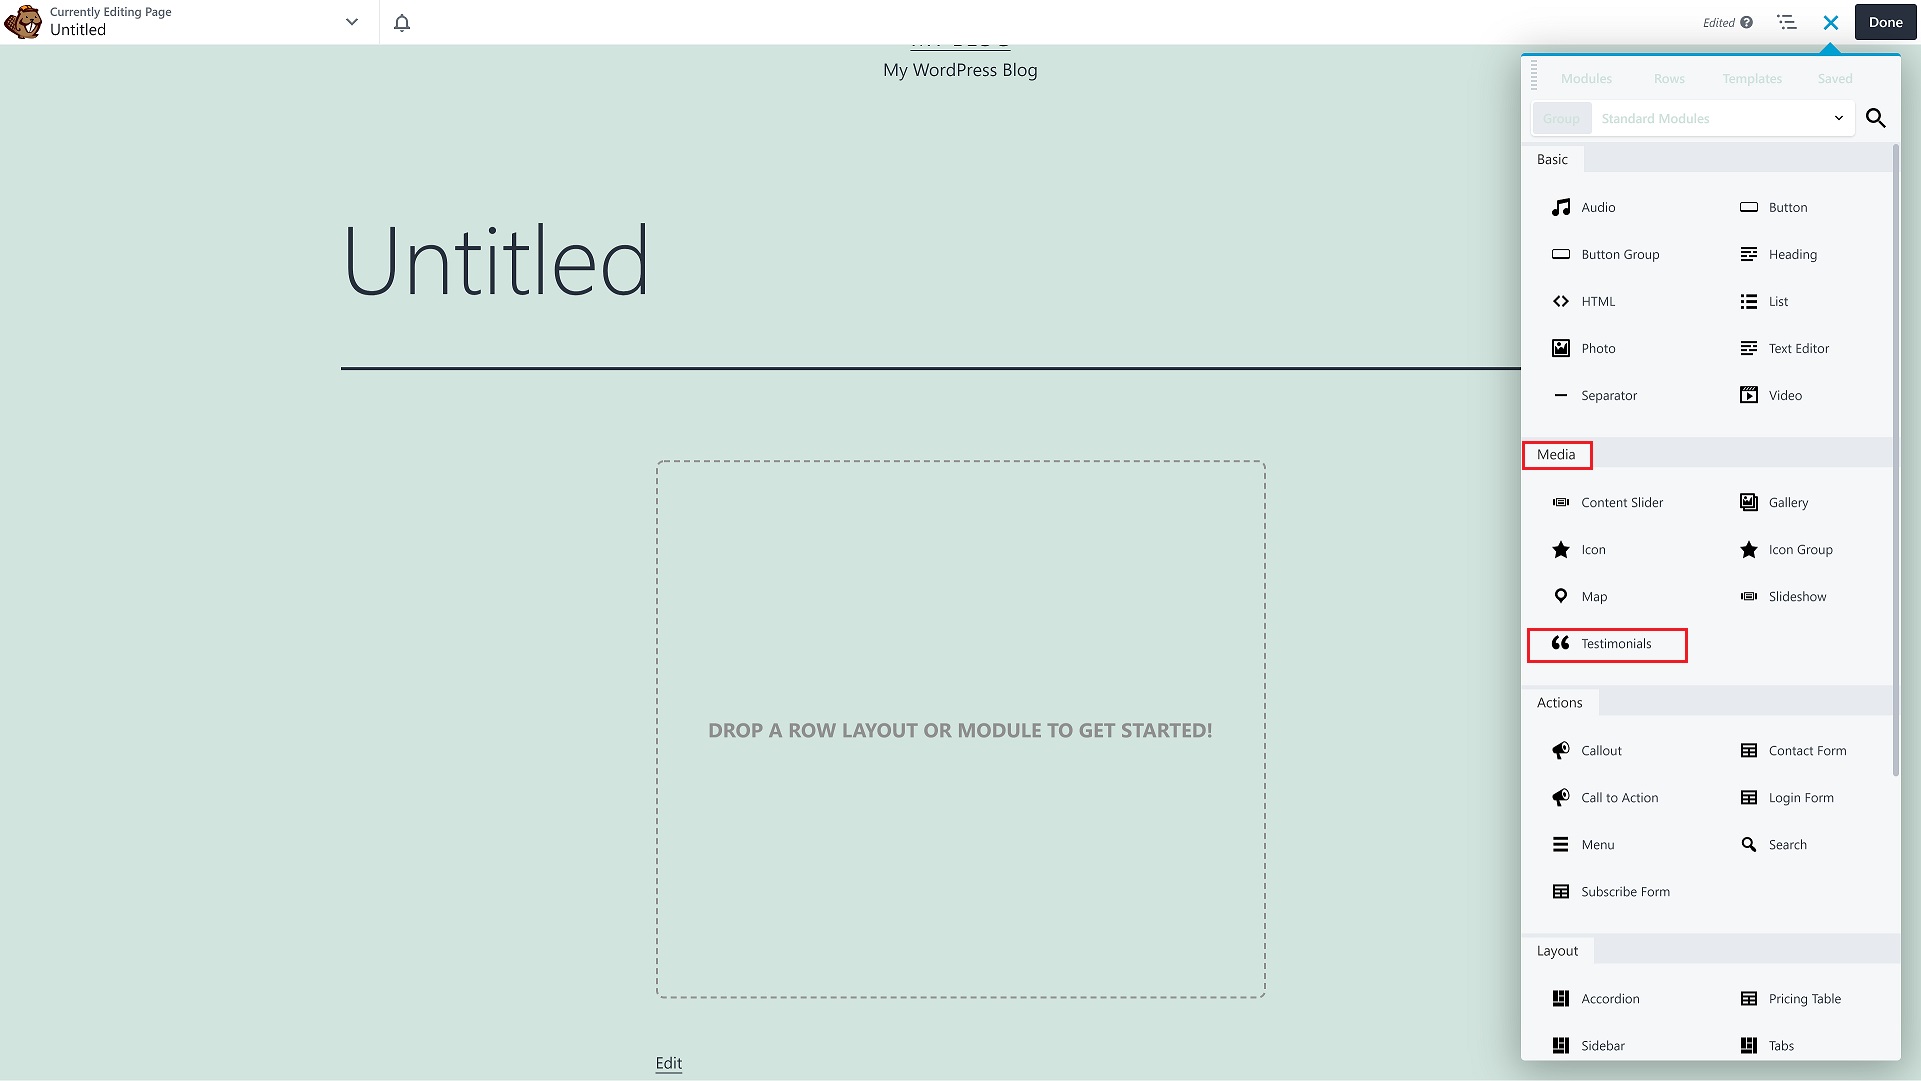
Beaver Builder allows you to easily drag and drop items to build your page. You will find the testimonials widget under Modules > Media.
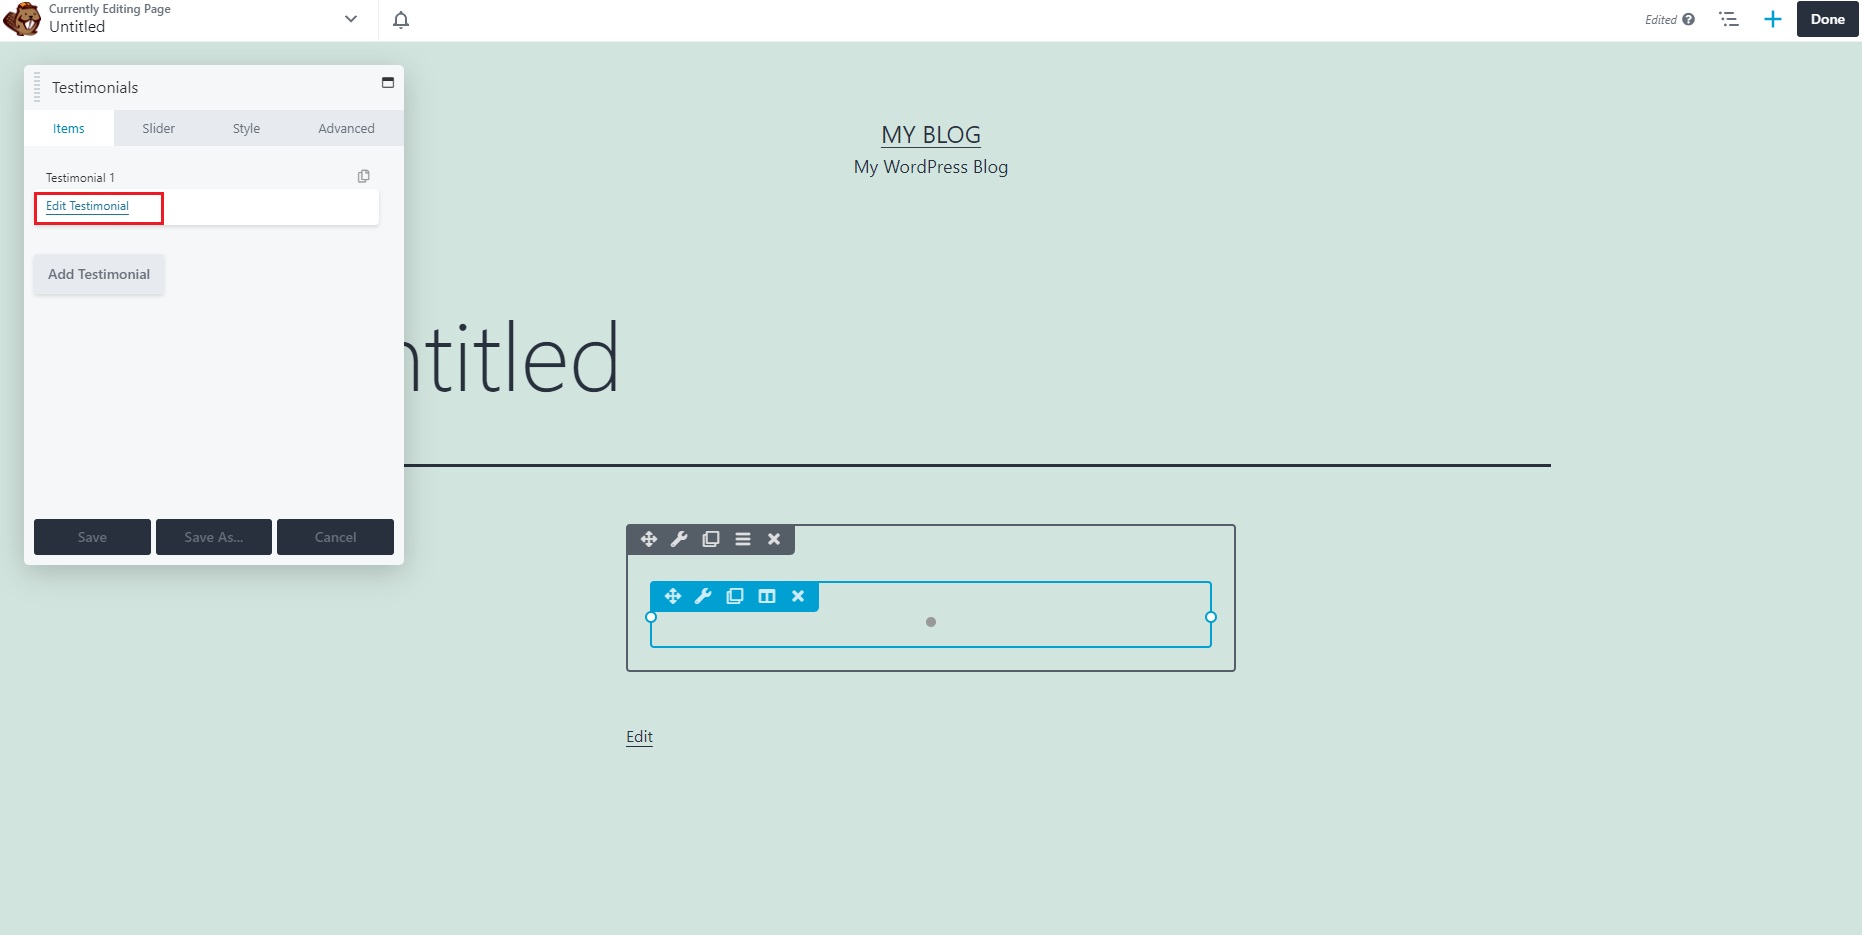
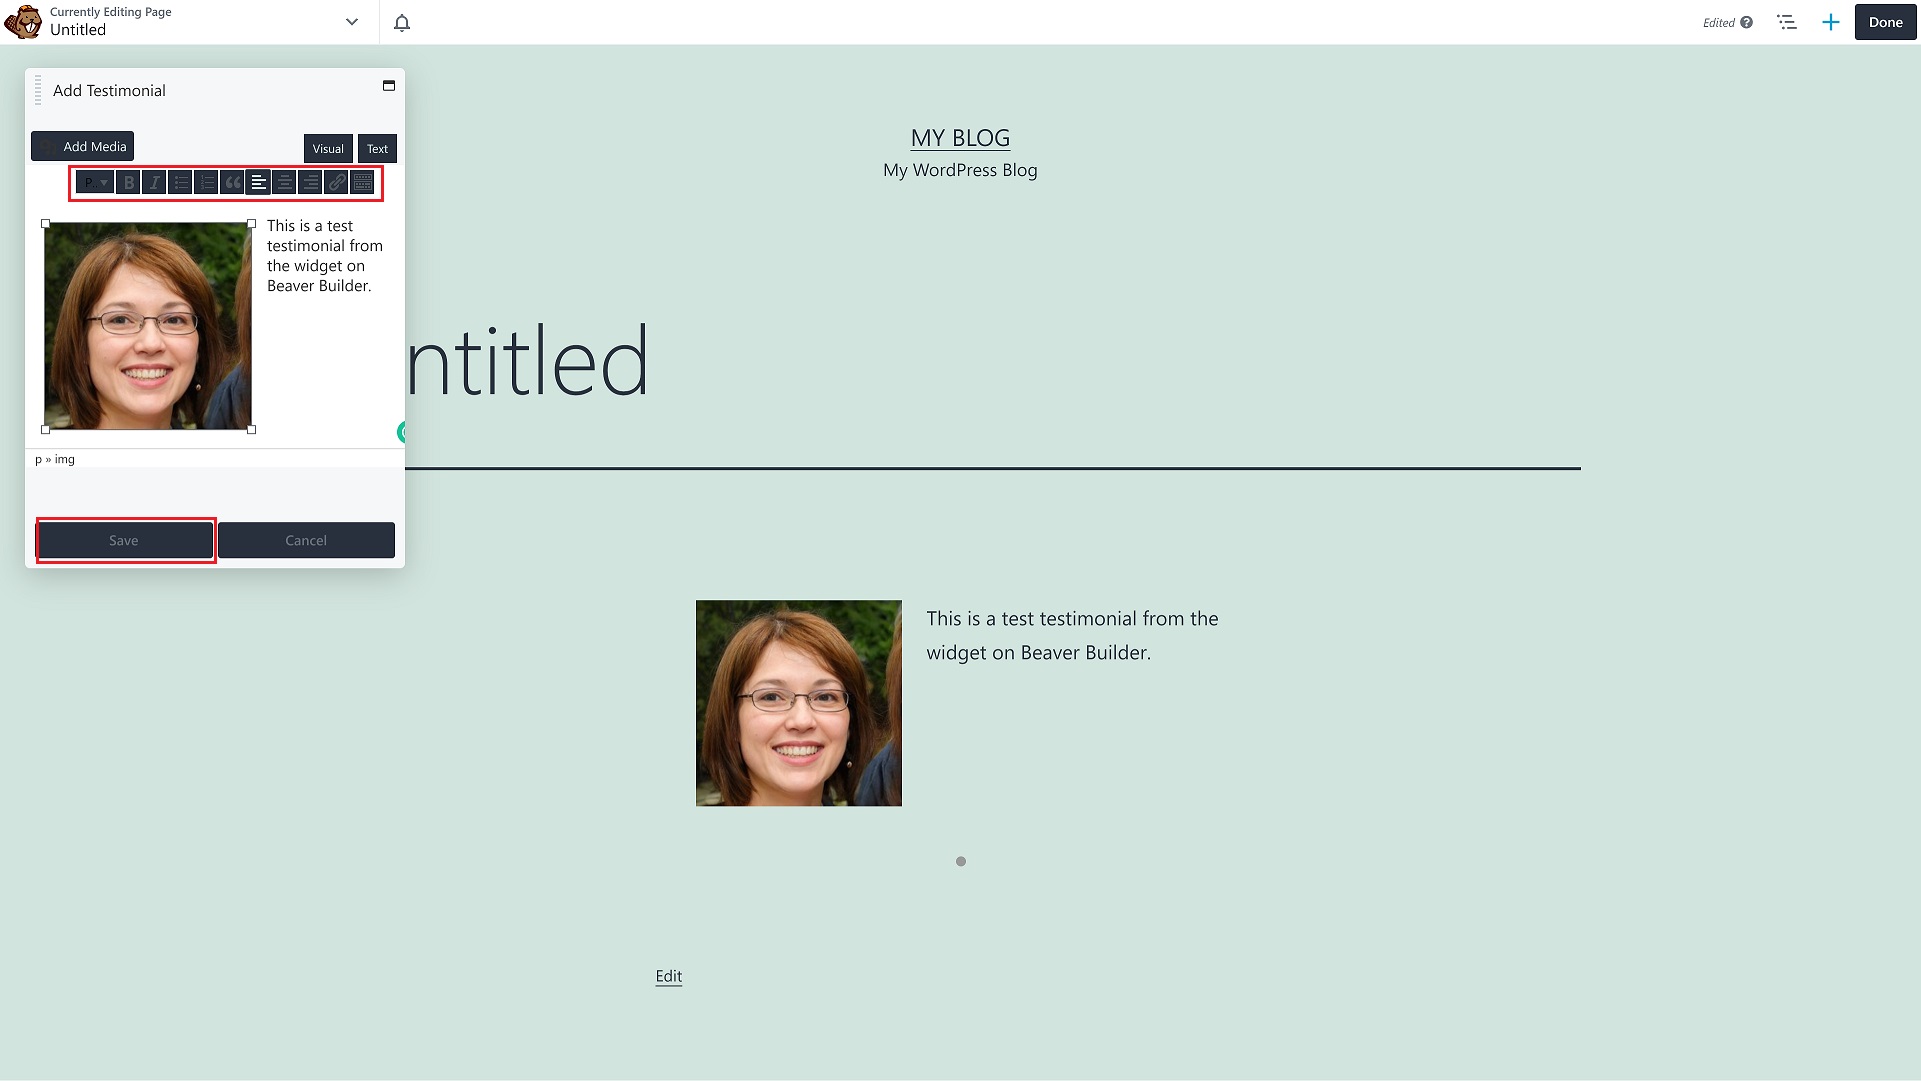
Once you drag and drop the widget, a new window will pop up so you can customize it. You may add anything that a WordPress editing box accepts, such as headers, text, and pictures, to each individual testimonial’s Text Editor box.
If you click on Edit testimonial you will have several options available. You can insert an image and align it with the text, align the text itself, turn the text into a bullet list or numbered list, insert a link in the text, and more.
The downside to it is that you have the icons but no description of what each button does if you mouseover it. It will take a bit of time to play around with it until you edit the testimonial to what you originally wanted.
After you finished the editing, make sure to click the Save button.
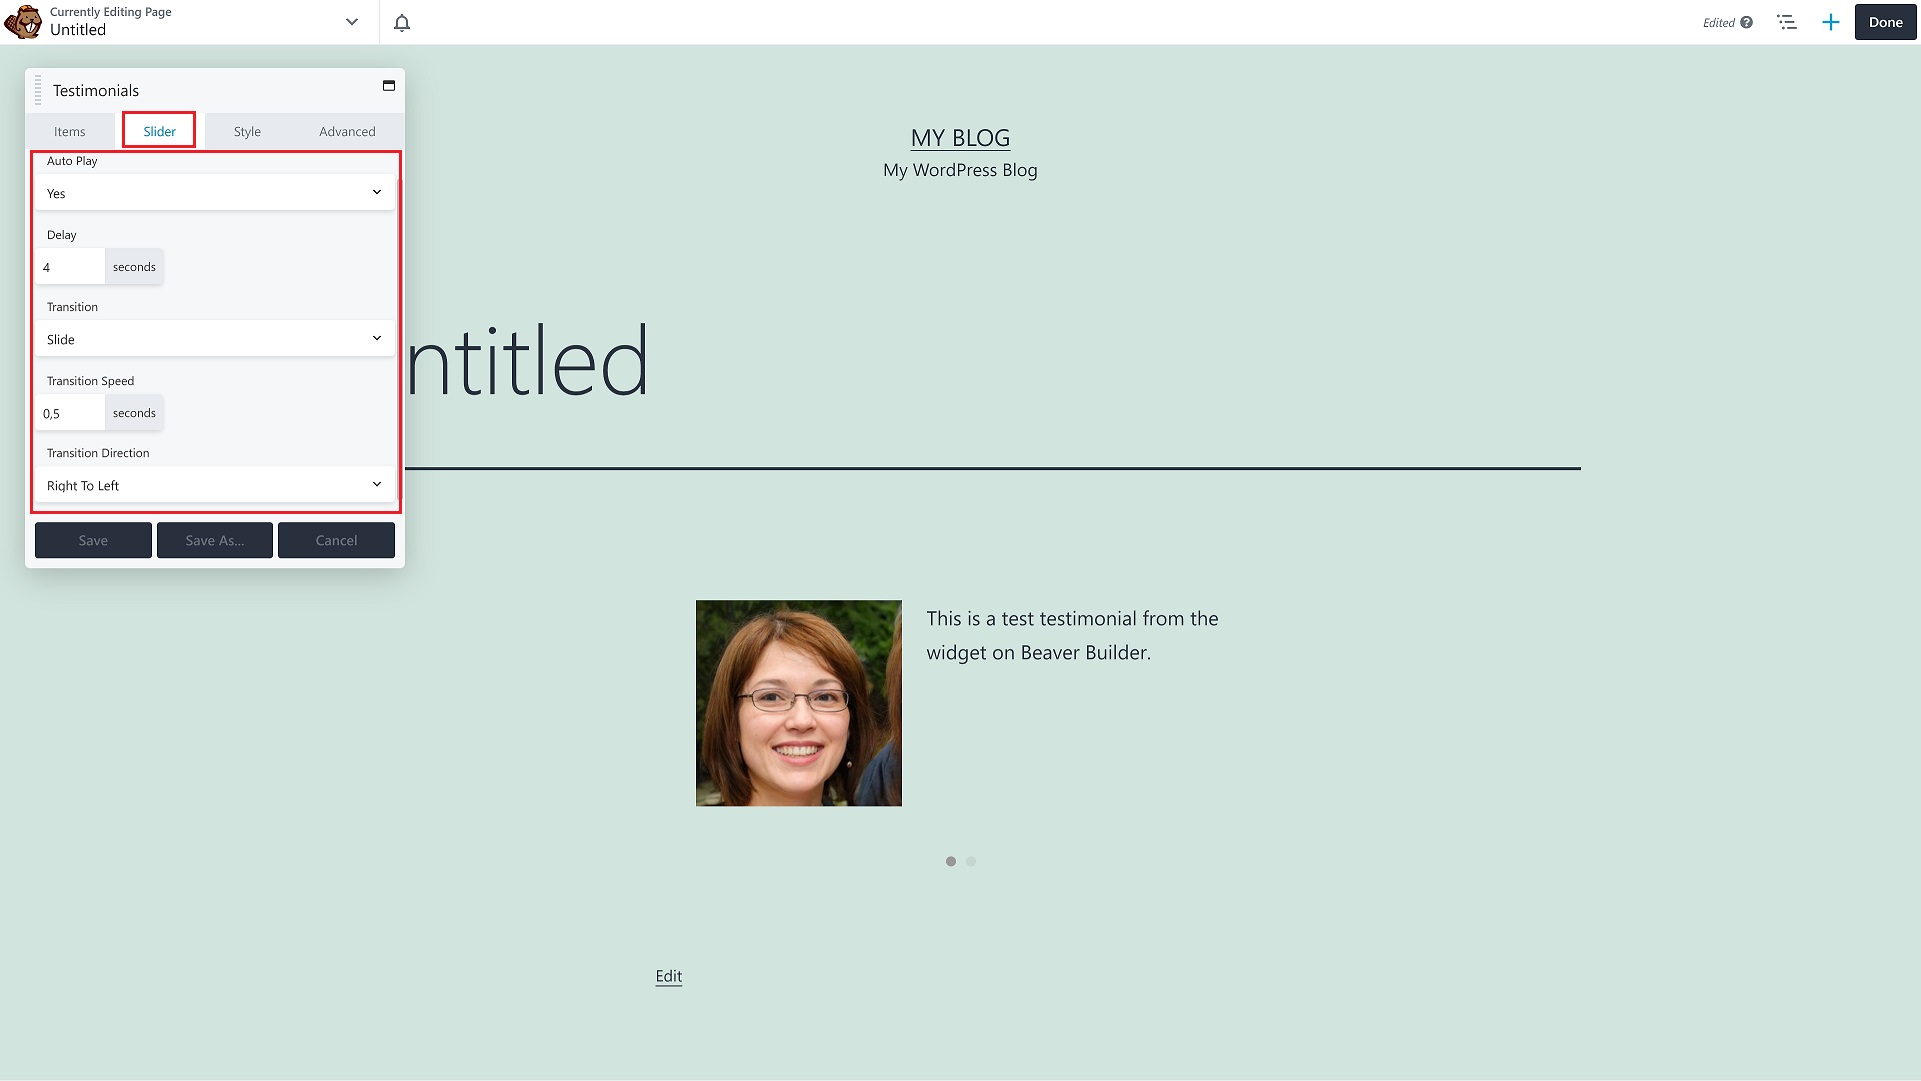
Next, you have the Slider tab where you can make adjustments to the testimonial slider. You have options for Auto Play, Delay, Transition, Transition Speed, and Transition Direction.
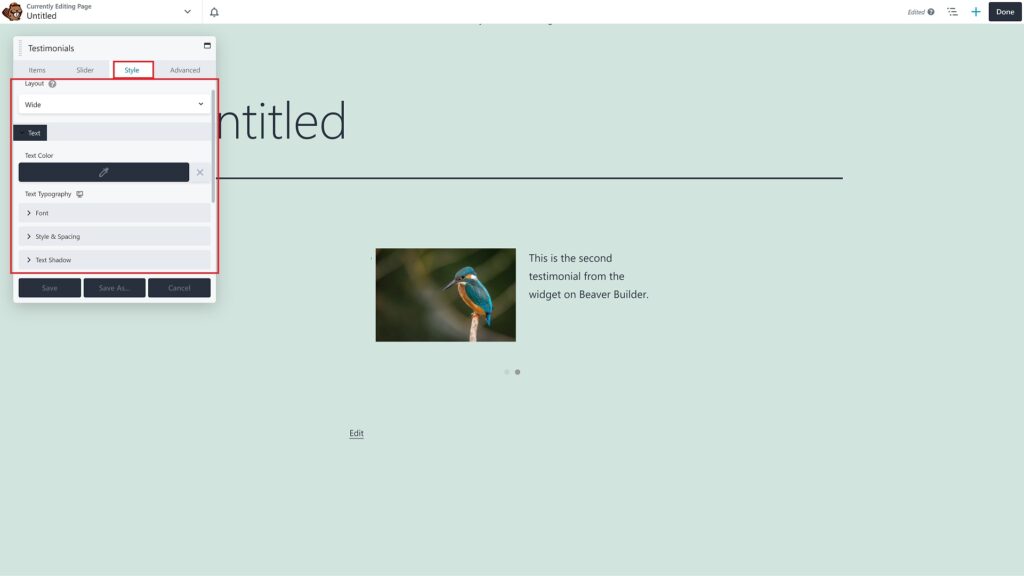
Furthermore, you have extra editing options in the Style tab. You can modify the Layout, the Heading, and the size of it. You also have a few text customization options such as color, spacing, font, and shadow.
The Advanced tab is for more technical things such as spacing, visibility, animations, and advanced HTML settings.
Although it’s named a Testimonials module, you may use it for anything because it’s simply a slider for any headers, text, or media.
This module, for example, can be used on an About Us page to introduce each of your team members. Not only individuals — you might create something like a portfolio of your work, with each image having an explanation that is too extensive to include in a caption. Alternatively, you may have a list of your favorite quotes shown one by one.
But this is about it when it comes to functionalities. It’s still basic and lacks other functionalities that users might need such as a star rating system, filtering options, pre-built in templates for saving time, customizable fields, and more.
Despite all of the features Beaver Builder has to offer, it’s very limited in customization when it comes to testimonials. Here are some of the key features it misses:
1. ❌ It lacks a star rating system – Nowadays people expect every business to have a star rating system. If you don’t have one, the customers might think you’re not being honest with them and might assume you’re trying to hide something.
2.❌ It doesn’t have an importer addon – You waste time if you manually want to add testimonials from Google, Yelp, Facebook, or other review platforms.
3.❌ It’s deprived of filters – Customers don’t want to go through every single testimonial to look for what they want. You might lose them early on if you can’t have them filter by rating or other criteria.
Step 1: Adding testimonials with Strong Testimonials
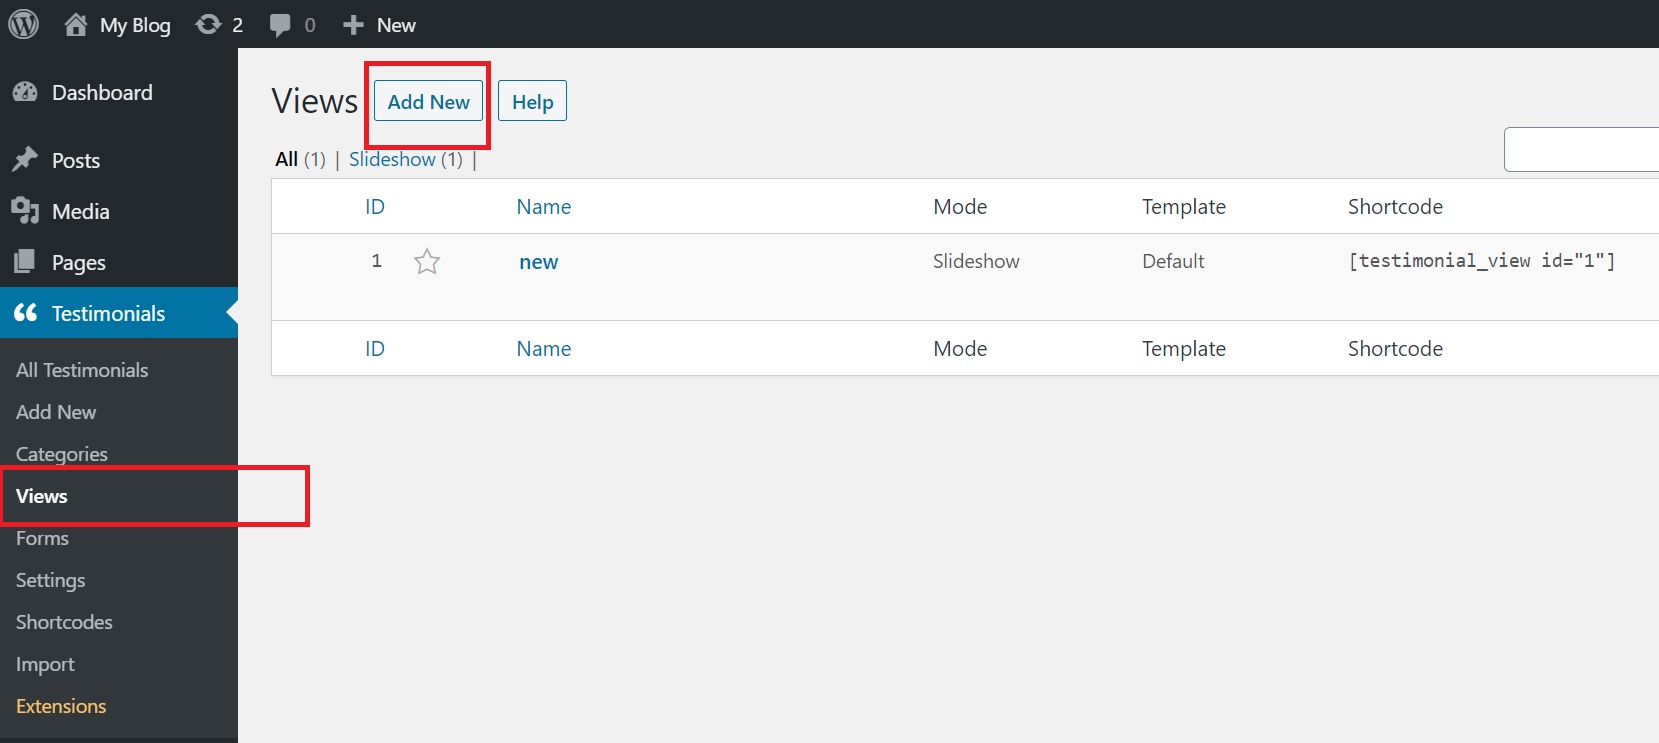
You must first create a view. A view is merely a collection of settings with a simple editor. You may make as many views as you like.
You can have one view for your testimonials, another for the testimonial submission form, and even another for a slideshow widget.
In your Dashboard click on Testimonials > Views > Add New. Give the view a name, such as “form” or “home page testimonials,” to help you remember it later. Display, Slideshow, Form, and Single Template are the four modes available in the view.
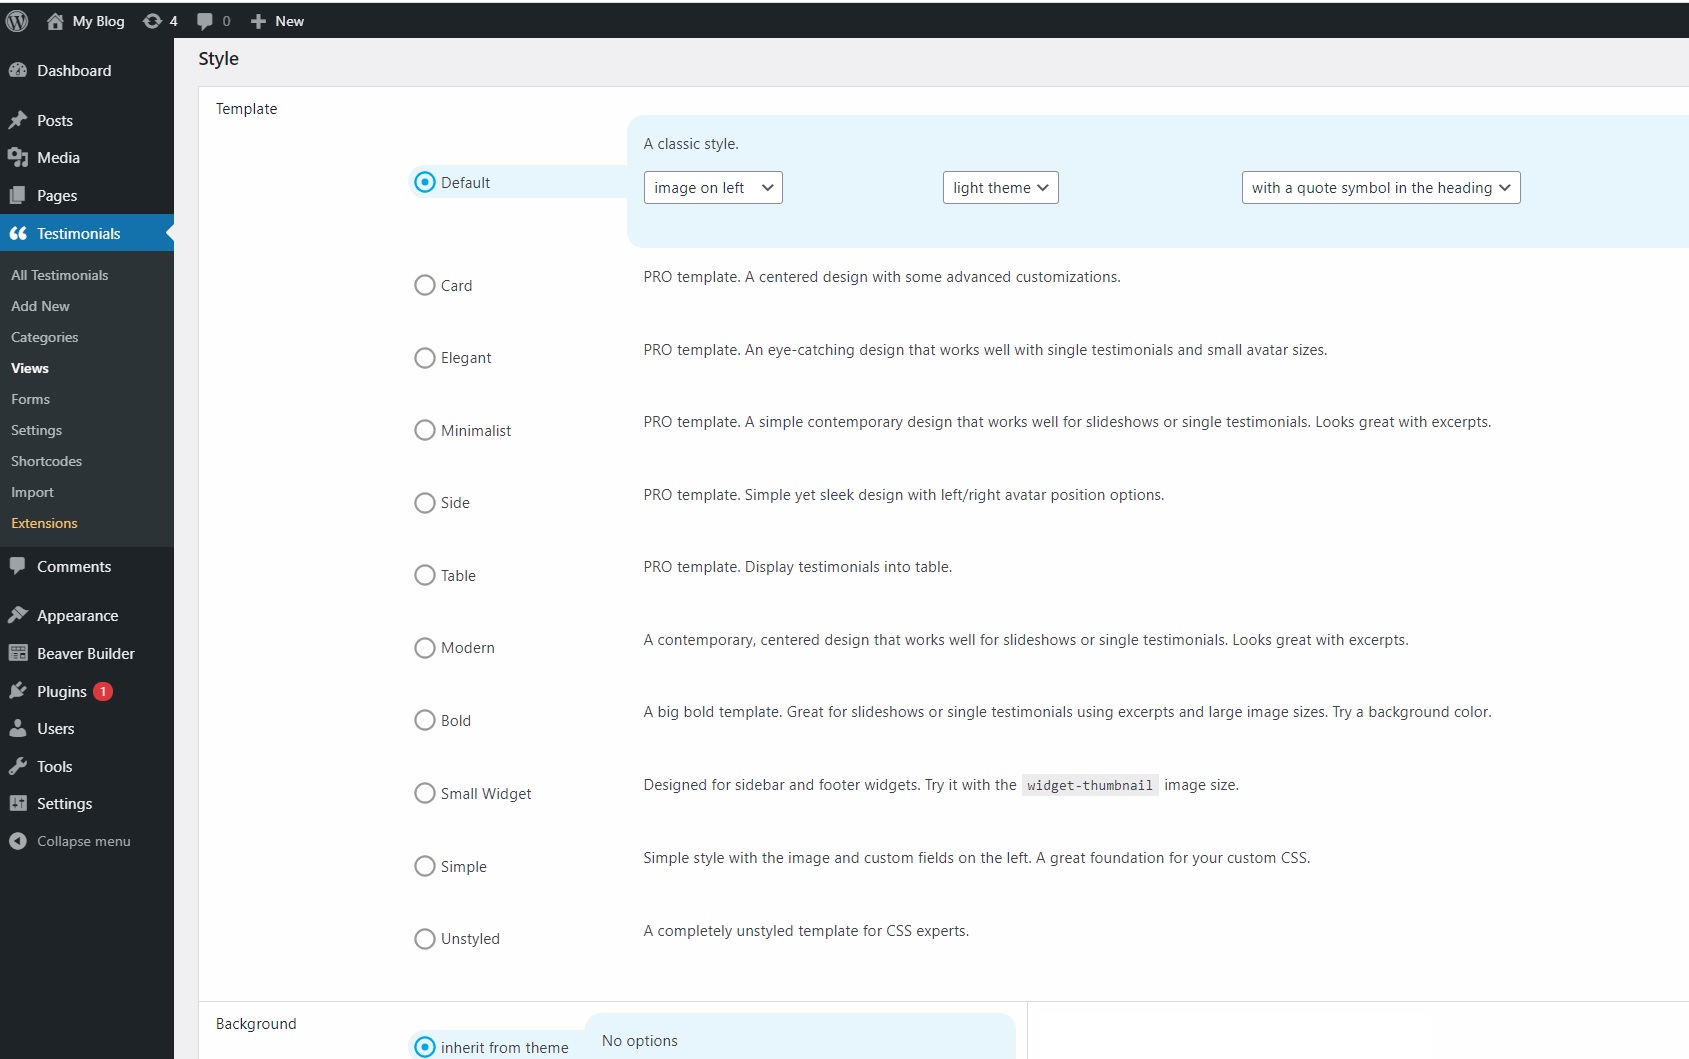
This is the point in which you can benefit from all those cool customization features we mentioned: choose your display mode, template, background and so on:
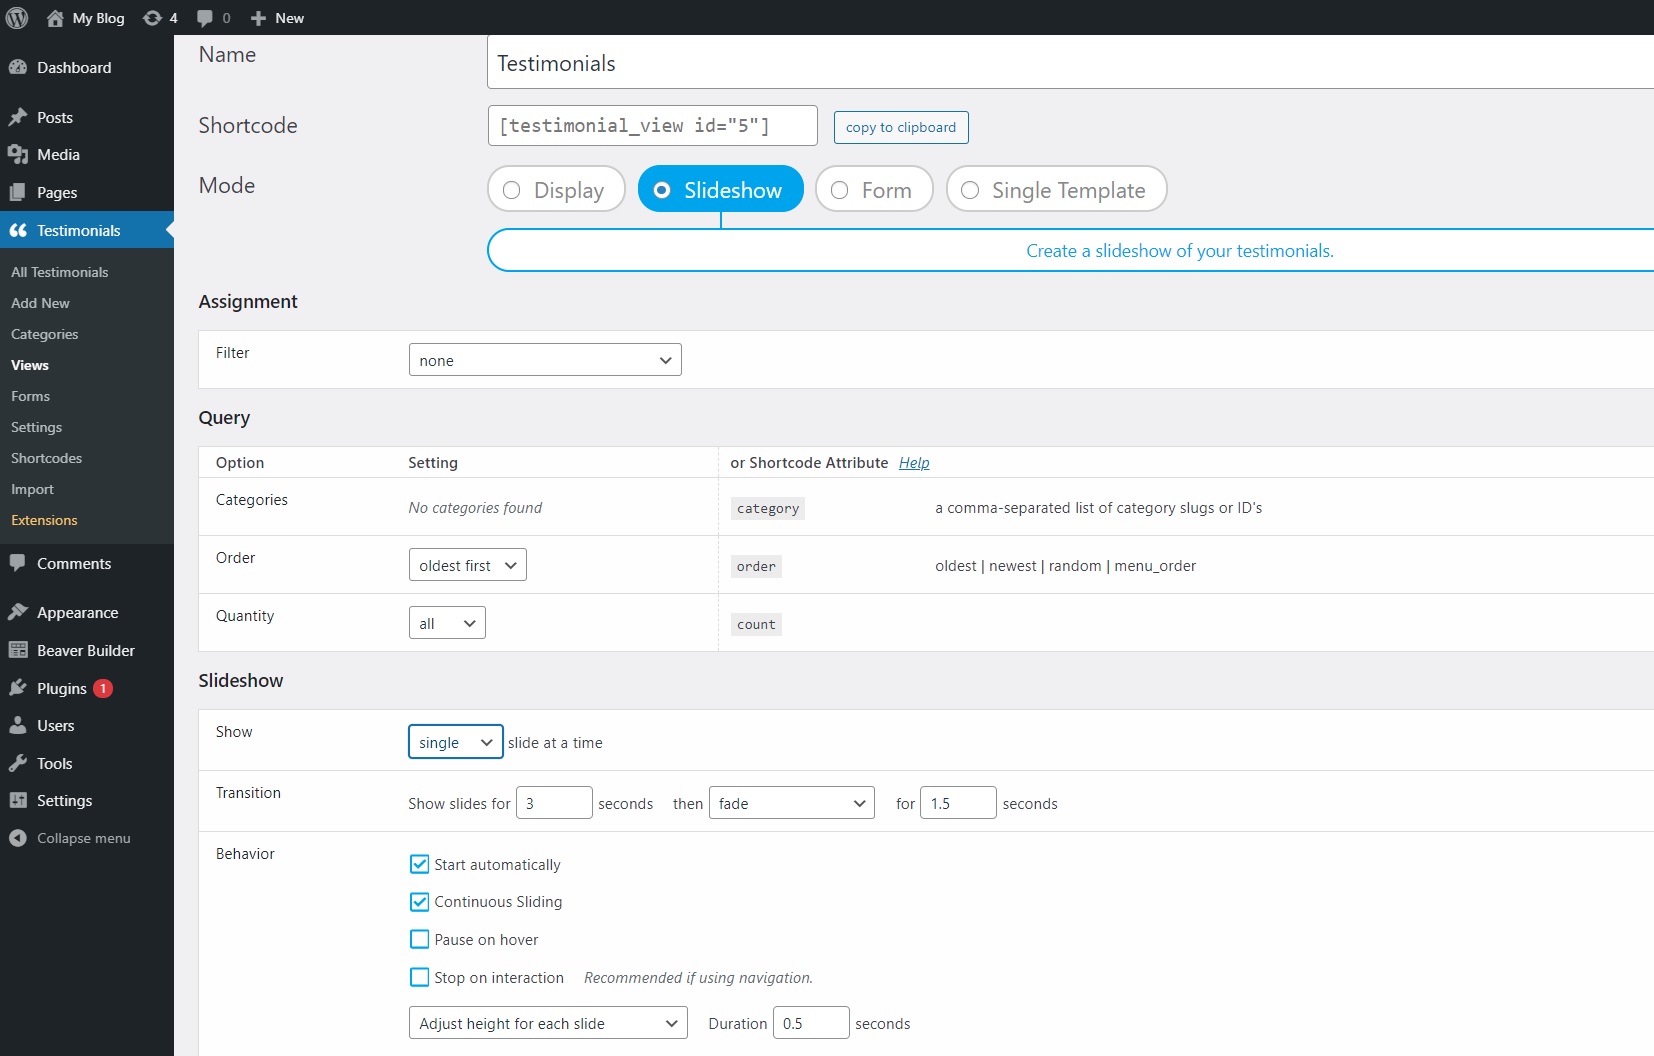
Choose the template you want:
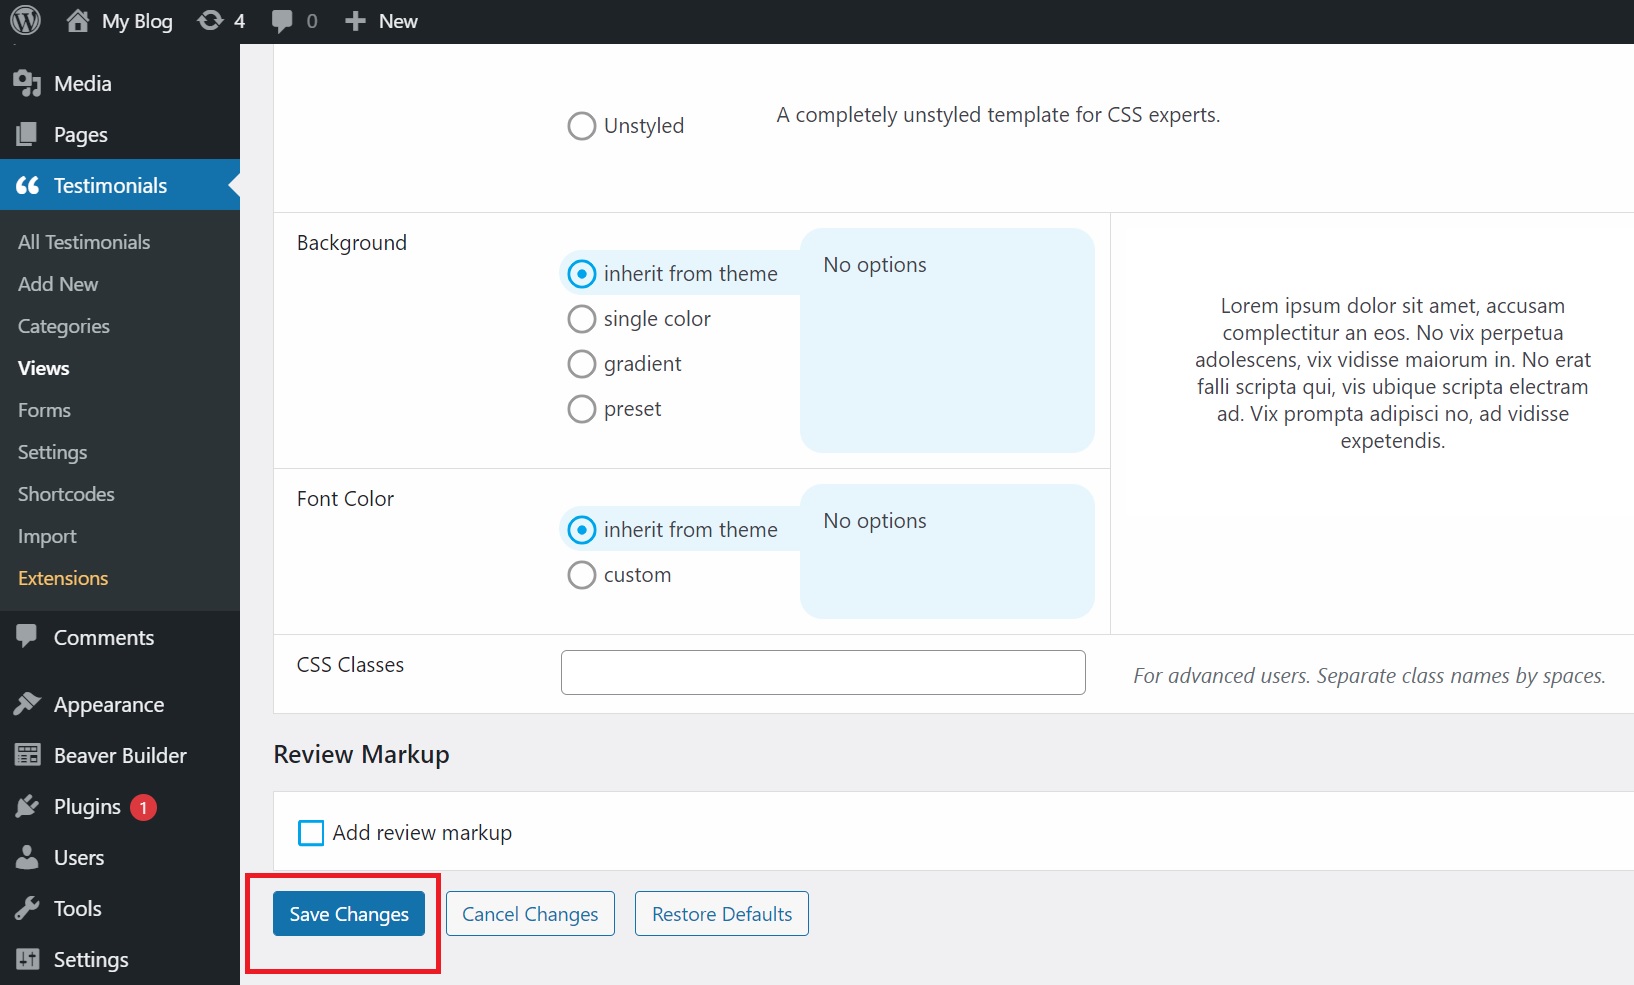
Once you are done with your customizations, click on the Save Changes button at the bottom of the page:
🔎 Did you know? Strong Testimonials is not only compatible with Beaver Builder, but with all the main page builders, like Elementor.
Step 2: Bonus Strong Testimonials functionalities
Strong Testimonials offers a wide variety of add-ons and extensions. However, let’s take a look at three of the most used and more important ones:
Star Rating
This is one of the many features Strong Testimonials has to offer. Star rating is a custom field type available in the fields editor. Make sure to check our guide on how to display the star rating system next to your testimonials.
We also have a few templates that support the star rating system that will help you design beautiful-looking testimonials. These templates are Card, Elegant, Minimalist, Side, and Table. On top of that, you can even customize the star rating’s colors.
Importer
Another essential addon that Strong Testimonial can offer is the Importer extension. With a few clicks, you can easily import testimonials from Google, Yelp, Facebook, Zomato. It saves you a lot of time that you would have wasted manually adding each testimonial. We have helpful guides on how to import testimonials from all the platforms mentioned above.
Filters
This new extension will enable you to construct AJAX-powered testimonial filters. This means you can now divide your testimonials into categories and have your customers read feedback organized by service/product type.
Our guide on why and how to filter testimonials will teach you in detail about our filter options and what they do.
Step 3: Using Strong Testimonials inside Beaver Builder
So, now that you know how to add your testimonials in Strong Testimonials, you have to know how to use the plugin with Beaver Builder.
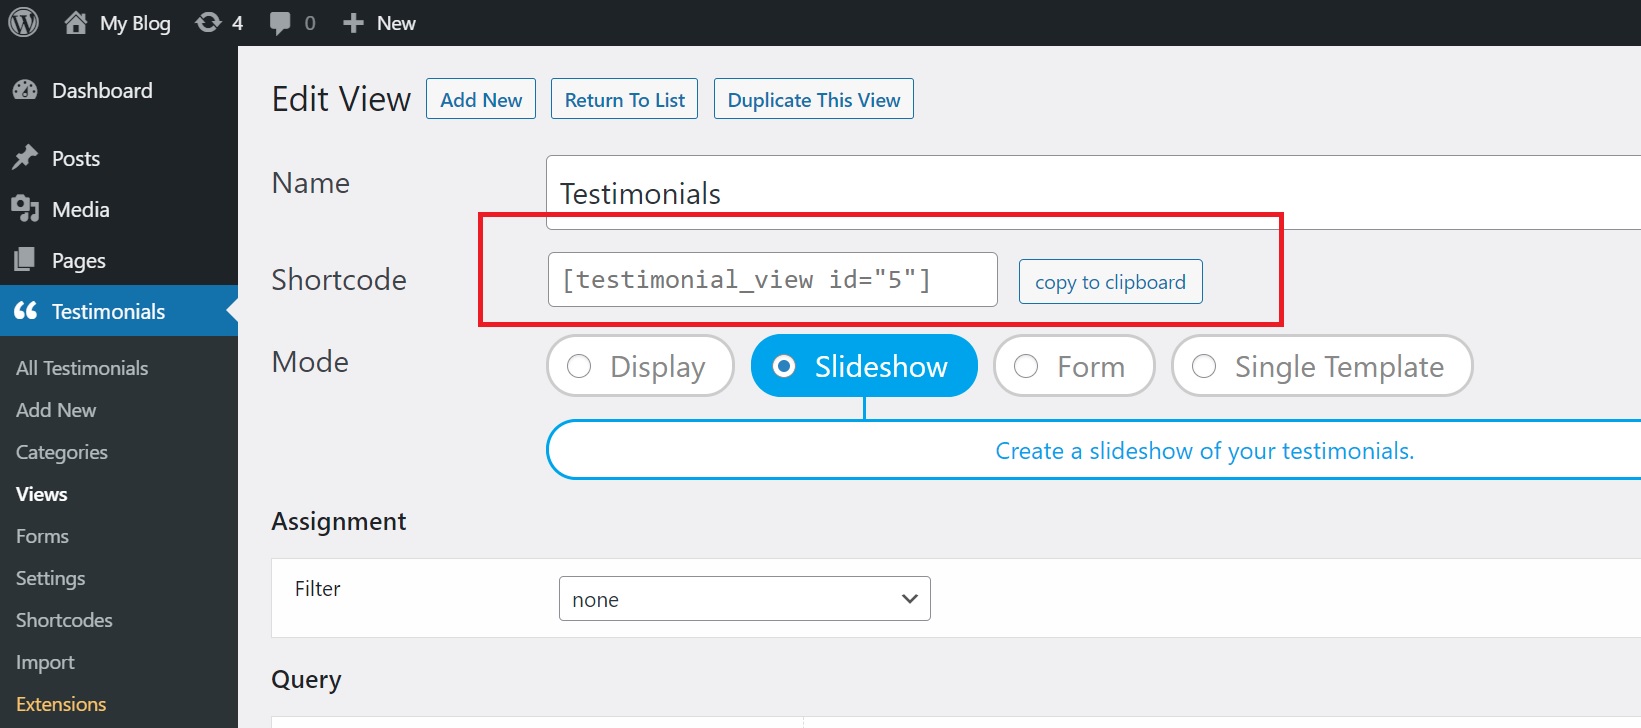
The process is really simple. All you have to do is use the shortcode generated in Strong Testimonials. Here’s how you get that shortcode.
After you saved your work, scroll back to the top of the page and you’ll see a shortcode that has been generated. Copy it:
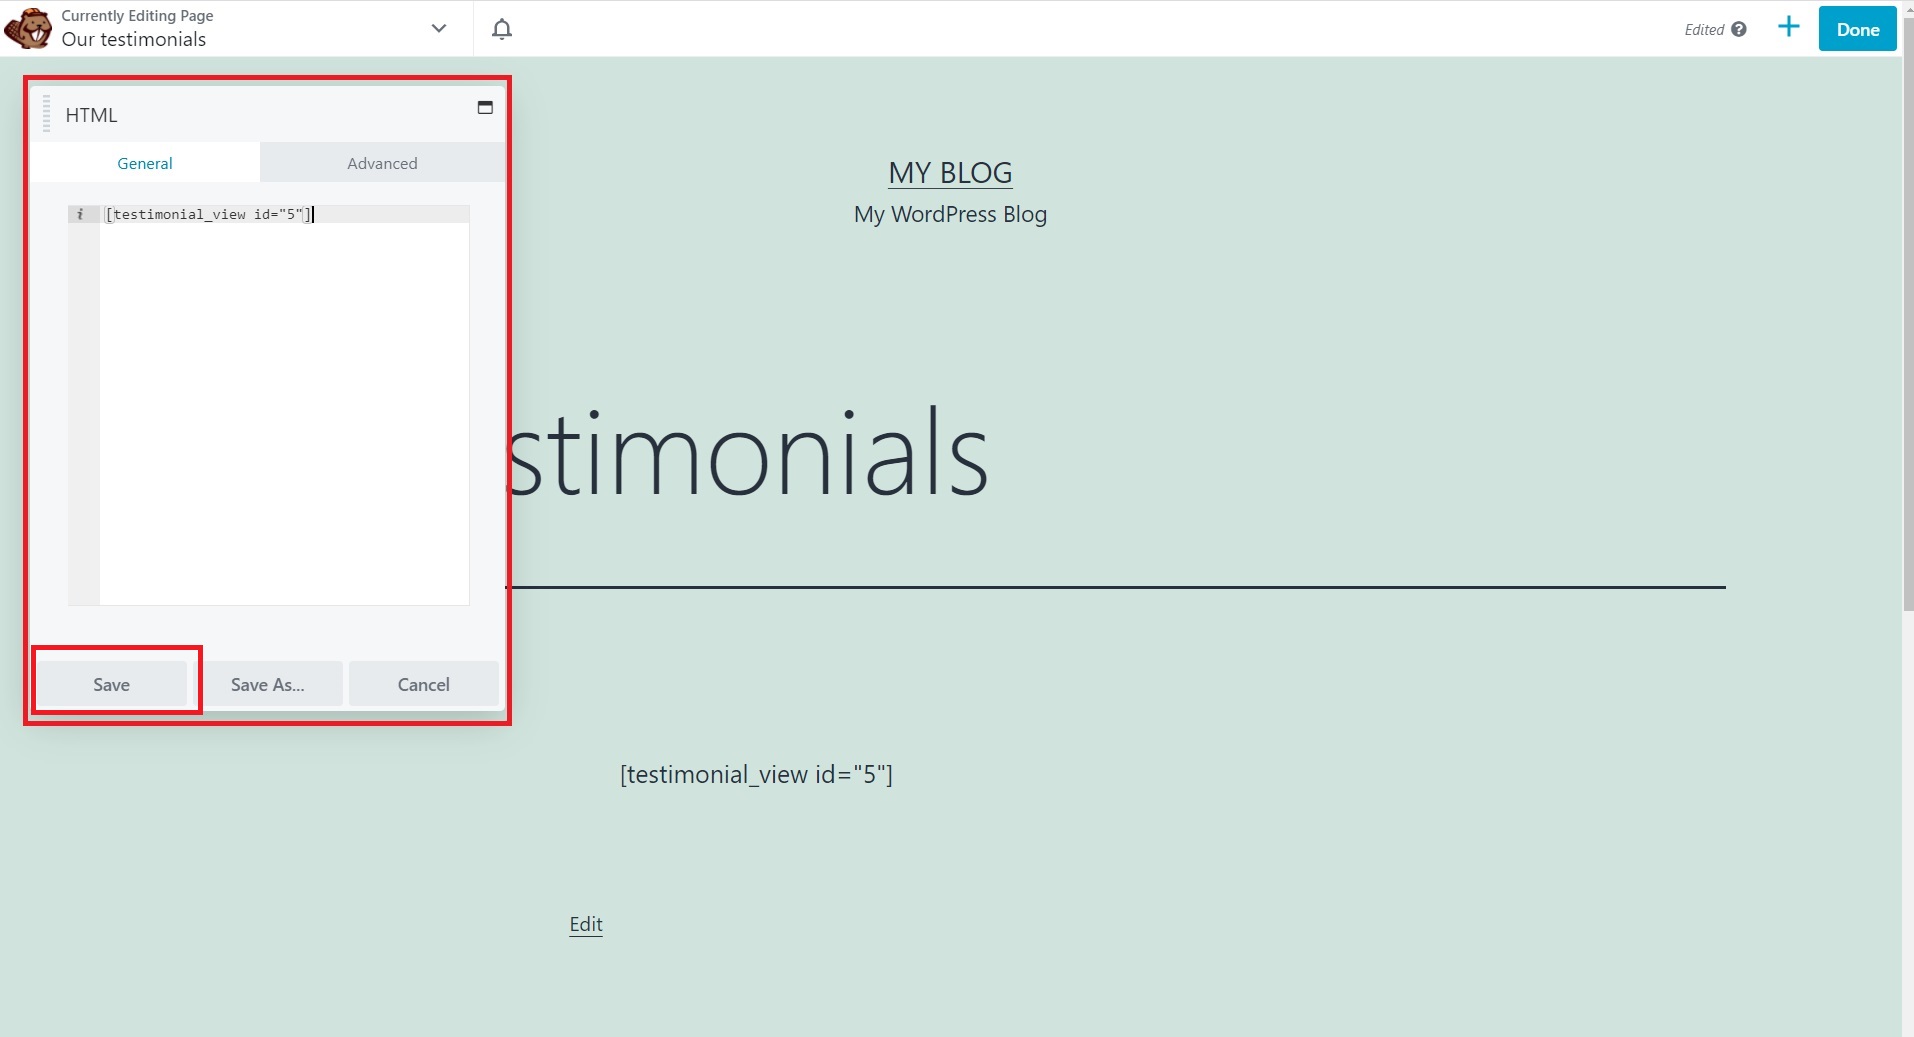
Next, go to the page you created in Beaver Builder, the page where you want to display the testimonials. Click on the + sign on the top-right, to open the window with Beaver Builder’s modules and templates. Choose the HTML module and drag it on the page, in the square:
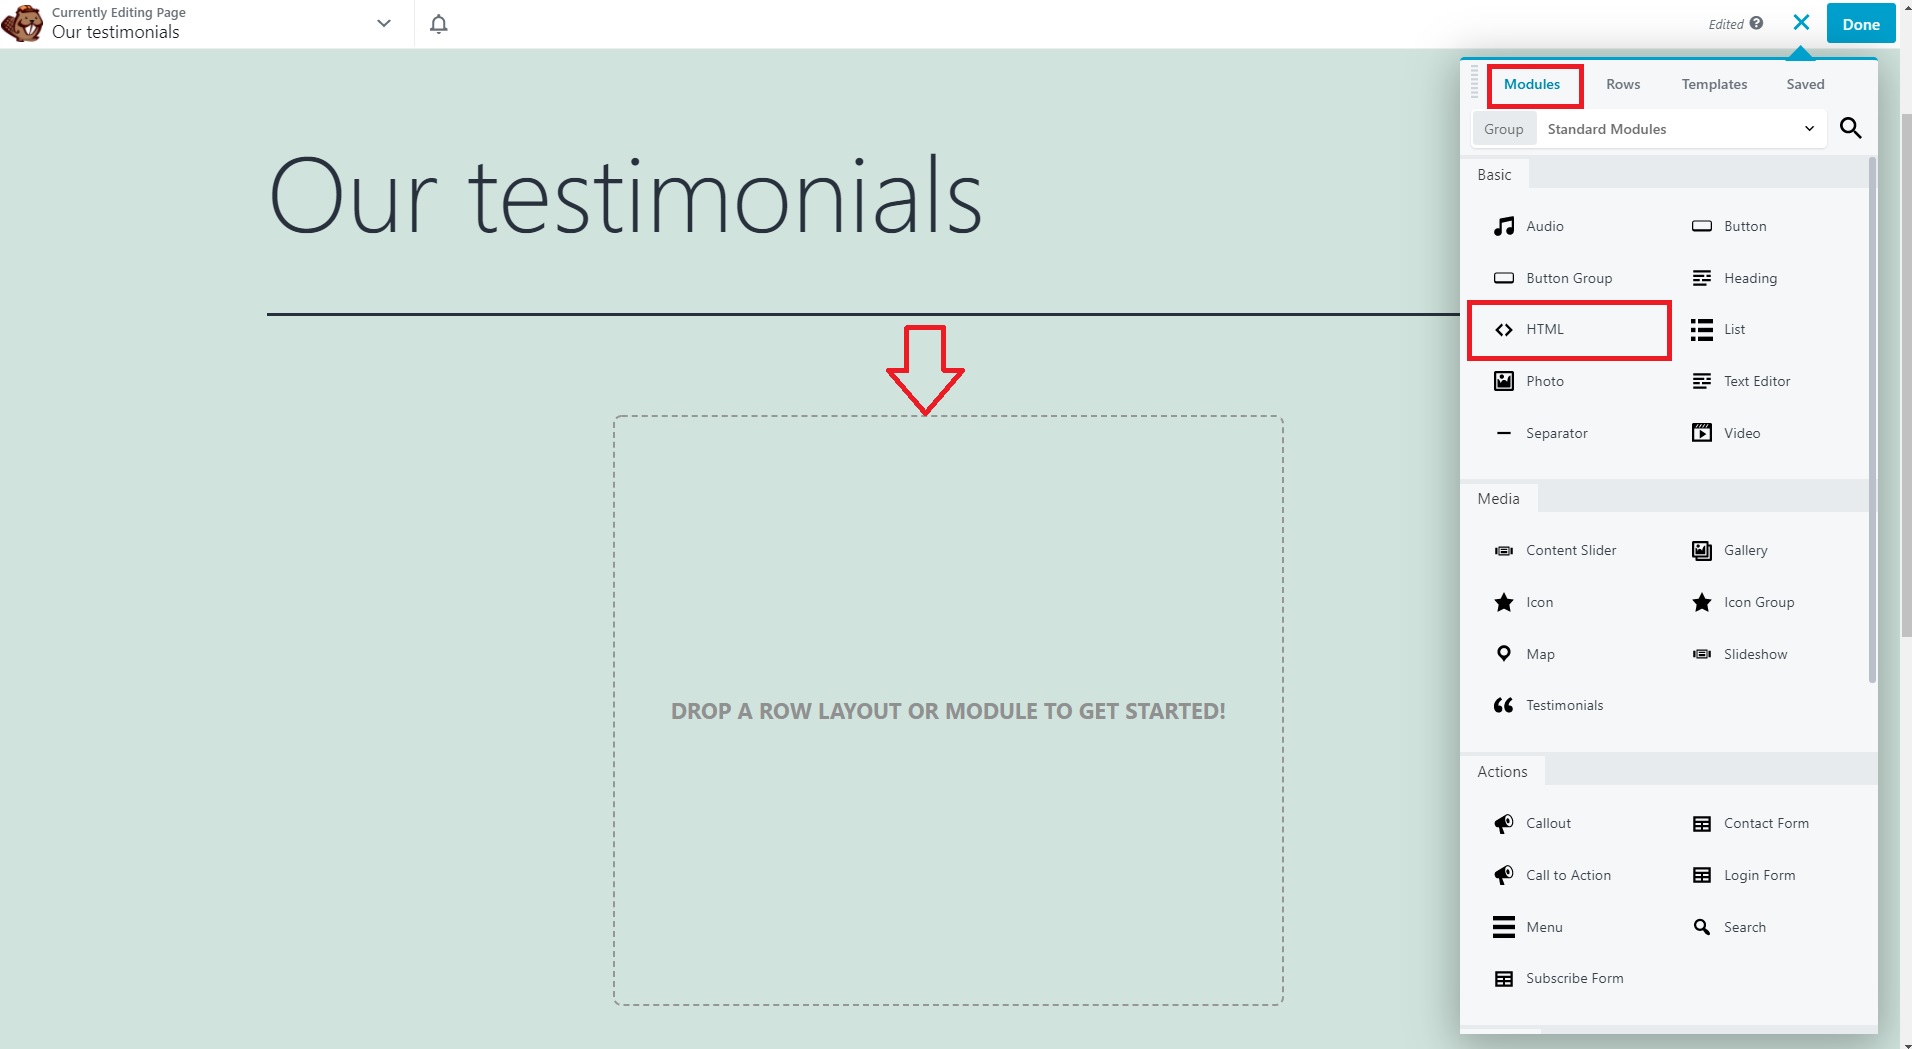
After you drop it, a new window will open to the left. You simply paste the Strong Testimonials shortcode there and hit the Save button:
Next, all there’s left for you to do is to hit the Done button in the top-right of the page and then the Publish button.
Your testimonials page is now live. Furthermore, here’s a simple testimonial slider we created in Beaver Builder, with the help of Strong Testimonials:
You can also paste the shortcode into another Beaver Builder module: the Text Editor module. The process is the same: you drag and drop the module on the page and then paste the shortcode in the window that opens on the left:
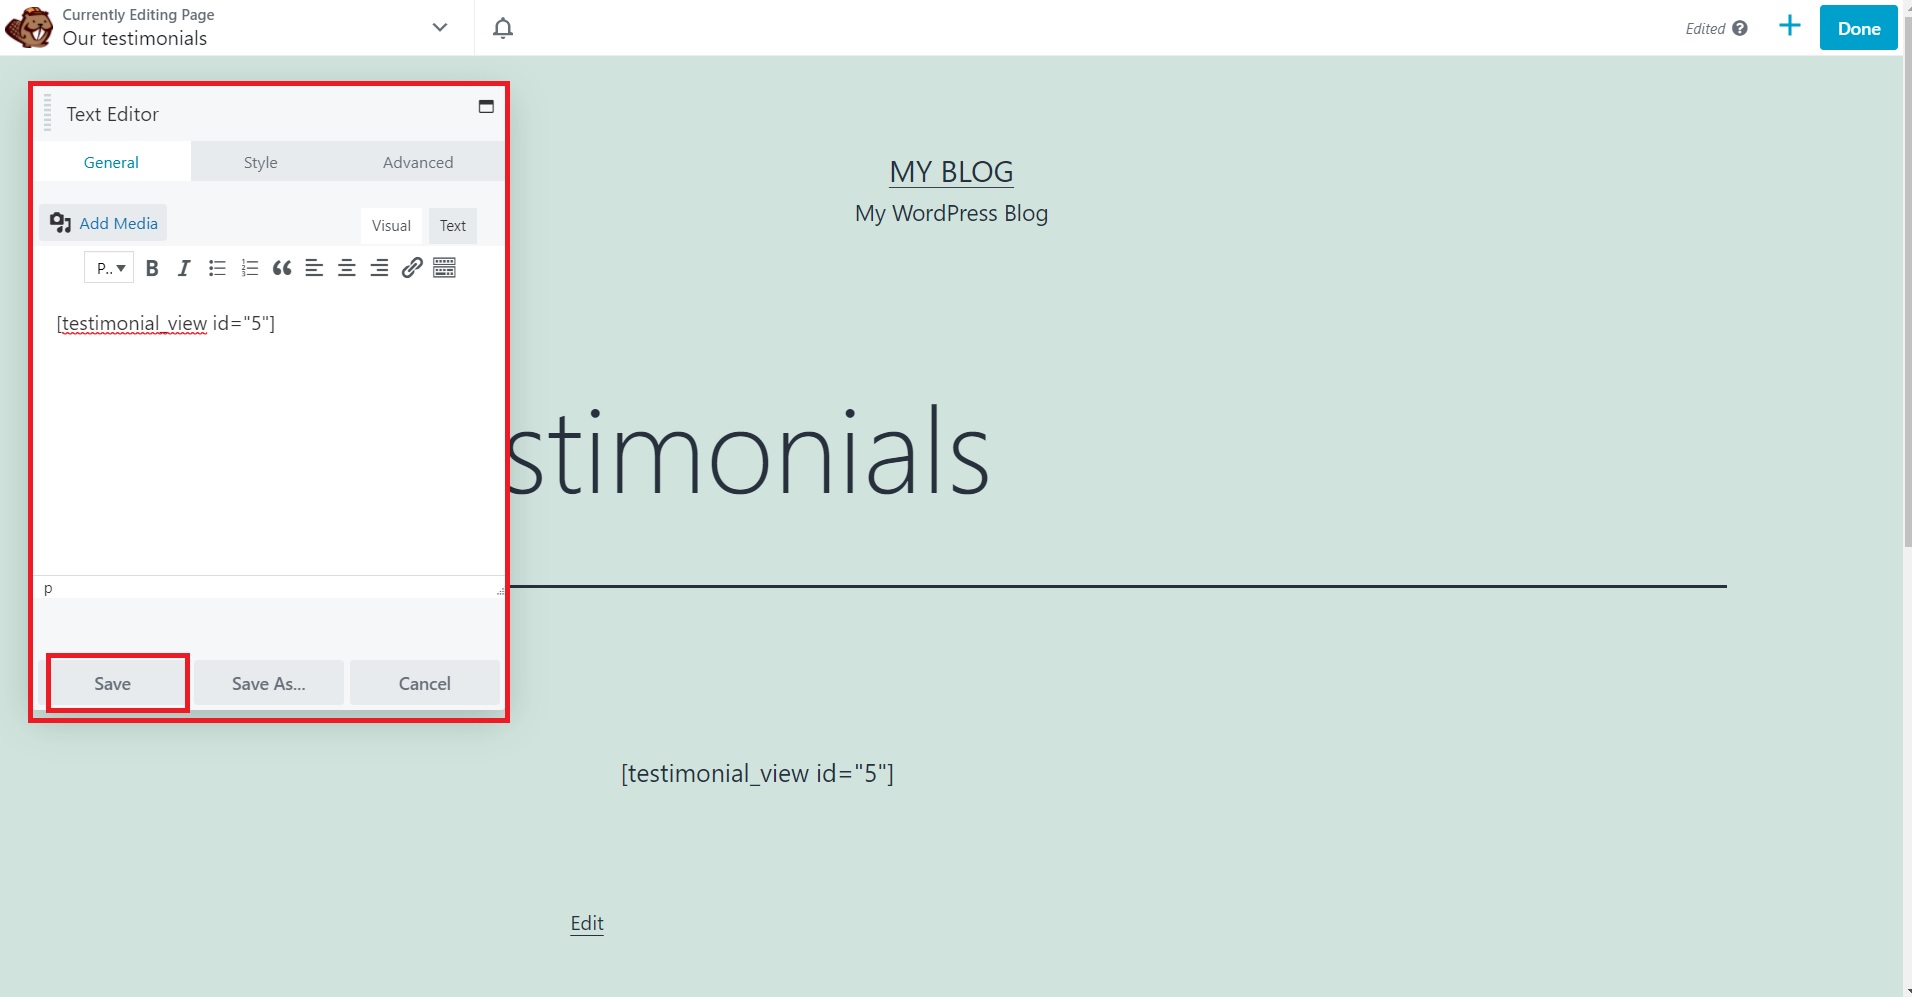
Similarly, once you paste it, you click the Save button, then Done and Publish. You’ll obtain the same result as with the HTML module.
Conclusion
To wrap up, Beaver Builder is good but it still lacks some functionalities. Strong Testimonials is more complex when it comes to displaying testimonials due to its many features: importer, filters, star rating, creating testimonial form, etc.
So take the first step towards boosting your conversion rate now. Install Strong Testimonials and attract more clients with beautiful testimonial pages that are fun and easy to create.

Strong Testimonials Plugin
We’ve built the #1 WordPress plugin for collecting, managing, and displaying testimonials. Drive more sales by leveraging your existing user audience.