
One of the most efficient ways to gain new consumers, promote your products, and develop your brand is to use a testimonial slider. They help you appear more genuine and give credibility to whatever statements you make to your target audiences. Tune in and learn how to create a testimonial slider in WordPress.
Table of contents
It’s known that a lot of businesses utilize testimonials to display business quality and to increase sales. Here are just some of the few common mistakes we’ve seen from a multitude of businesses:
1. ❌ Waste of vertical space – People enjoy talking about what they like and don’t like, so that testimonials may take up a lot of vertical space. As a result, your potential customer will have to waste time scrolling through an extensive list of content.
2.❌ No effort in the customization – People won’t believe testimonials if they just come in a slider with no name, photo, company logo, or even a URL to the client’s website. Most businesses don’t put much work into personalizing testimonials.
3.❌ Their websites are chaotic – Most businesses show testimonials in a disorganized manner, which can negatively impact your website’s user experience and, as a result, push customers away.
Where to use testimonial sliders on your website?
If you’re wondering where to place testimonials on your website, there are various ways to use sliders on your pages, and you can see them on various types of websites. However, businesses and more professional sites tend to use them more frequently.
As far as their placement goes, a testimonial slider can go anywhere you see fit: homepage, a product page, a dedicated testimonial page, and so on. But how do you know they’re in the right place?
A little bit of advice: create multiple testimonial sliders that match the pages or sections of your website! For example, on the homepage can be placed general testimonials about the business, while on categories, product pages, checkout pages (and so on), it is recommended to display only testimonials related to the product.
What are the benefits of sliders?
Here are the most important benefits of testimonial sliders:
- they are attractive and visually appealing;
- they are interactive;
- sliders are versatile/flexible: you can use them to display any type of content, including images, video, etc.;
- they take up less space and help you maximize the space on your site;
- you can make your slideshows run automatically by using a timer, so the user doesn’t have to do anything;
There is no doubt that having a testimonial slider boosts your chances to land more sales. So let’s take a look further and see how you can create one with Strong Testimonials within a few minutes.
Step 1: Add a new testimonial
If you want to learn how to show testimonials in WordPress, this tutorial is specially made for you.
The first step is to add your testimonials, and that is as simple as creating a post.
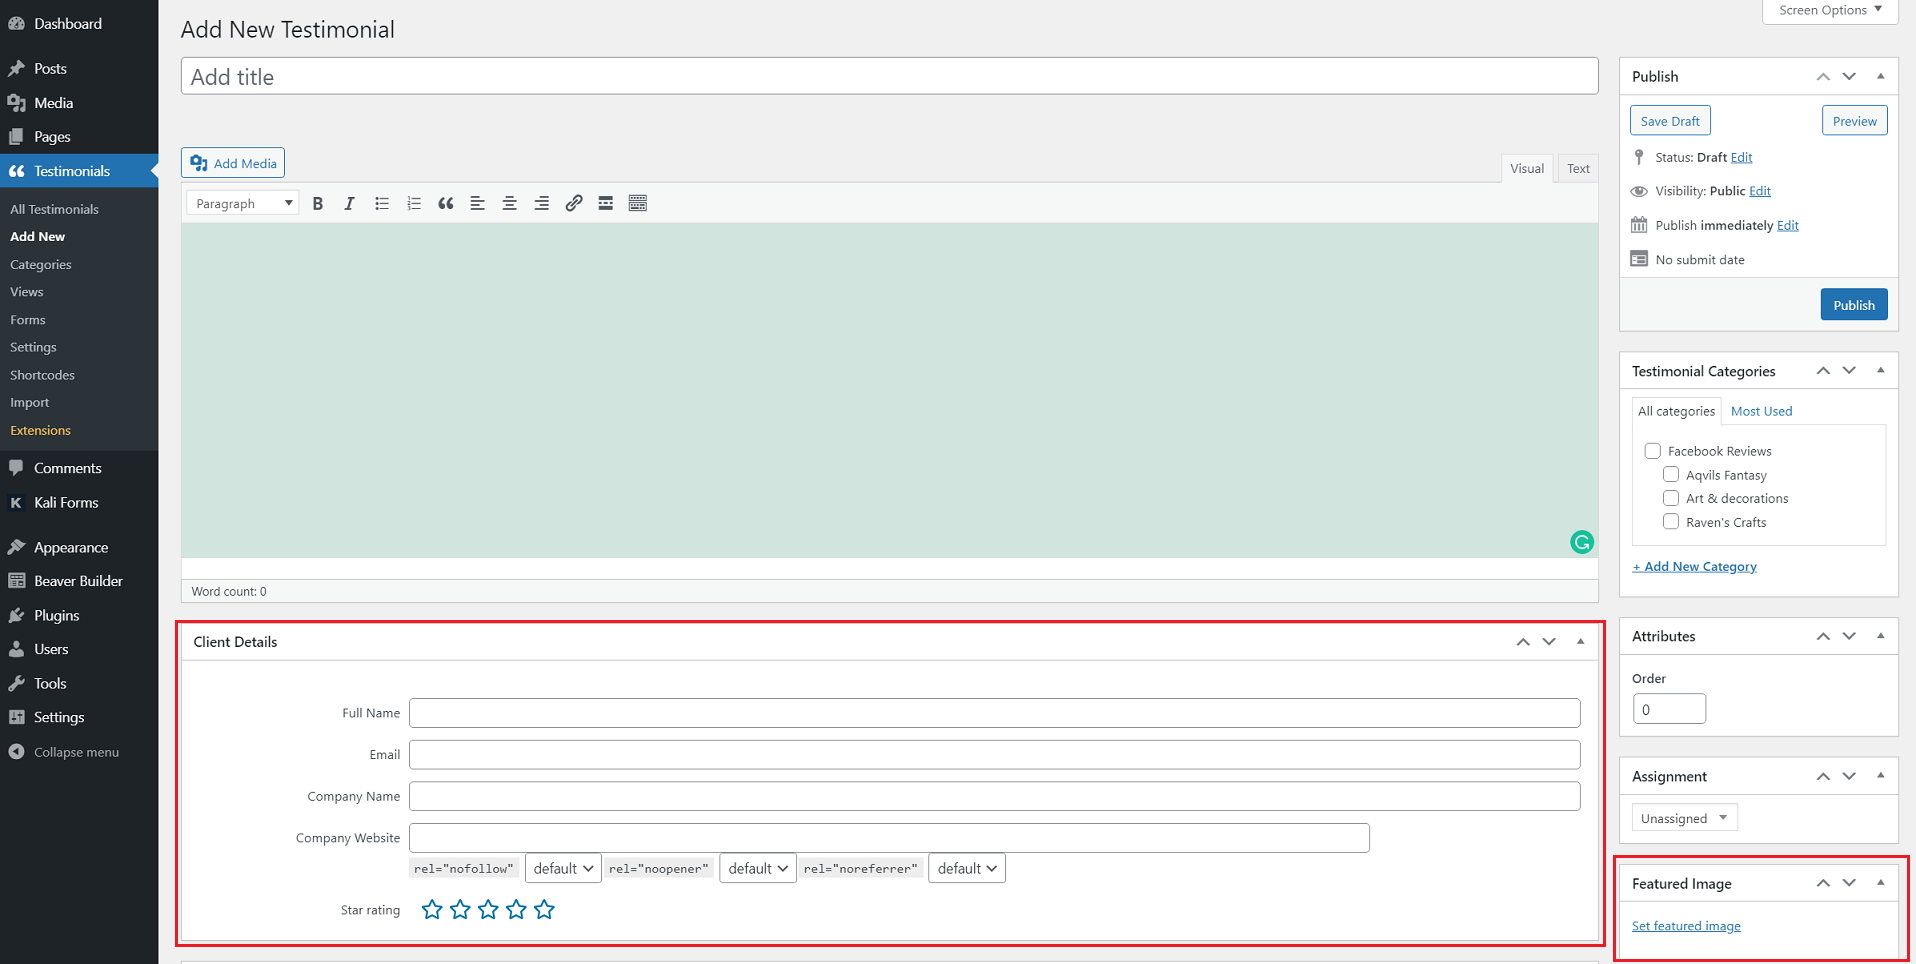
After you install and activate the plugin, go to Add New and create your testimonials:
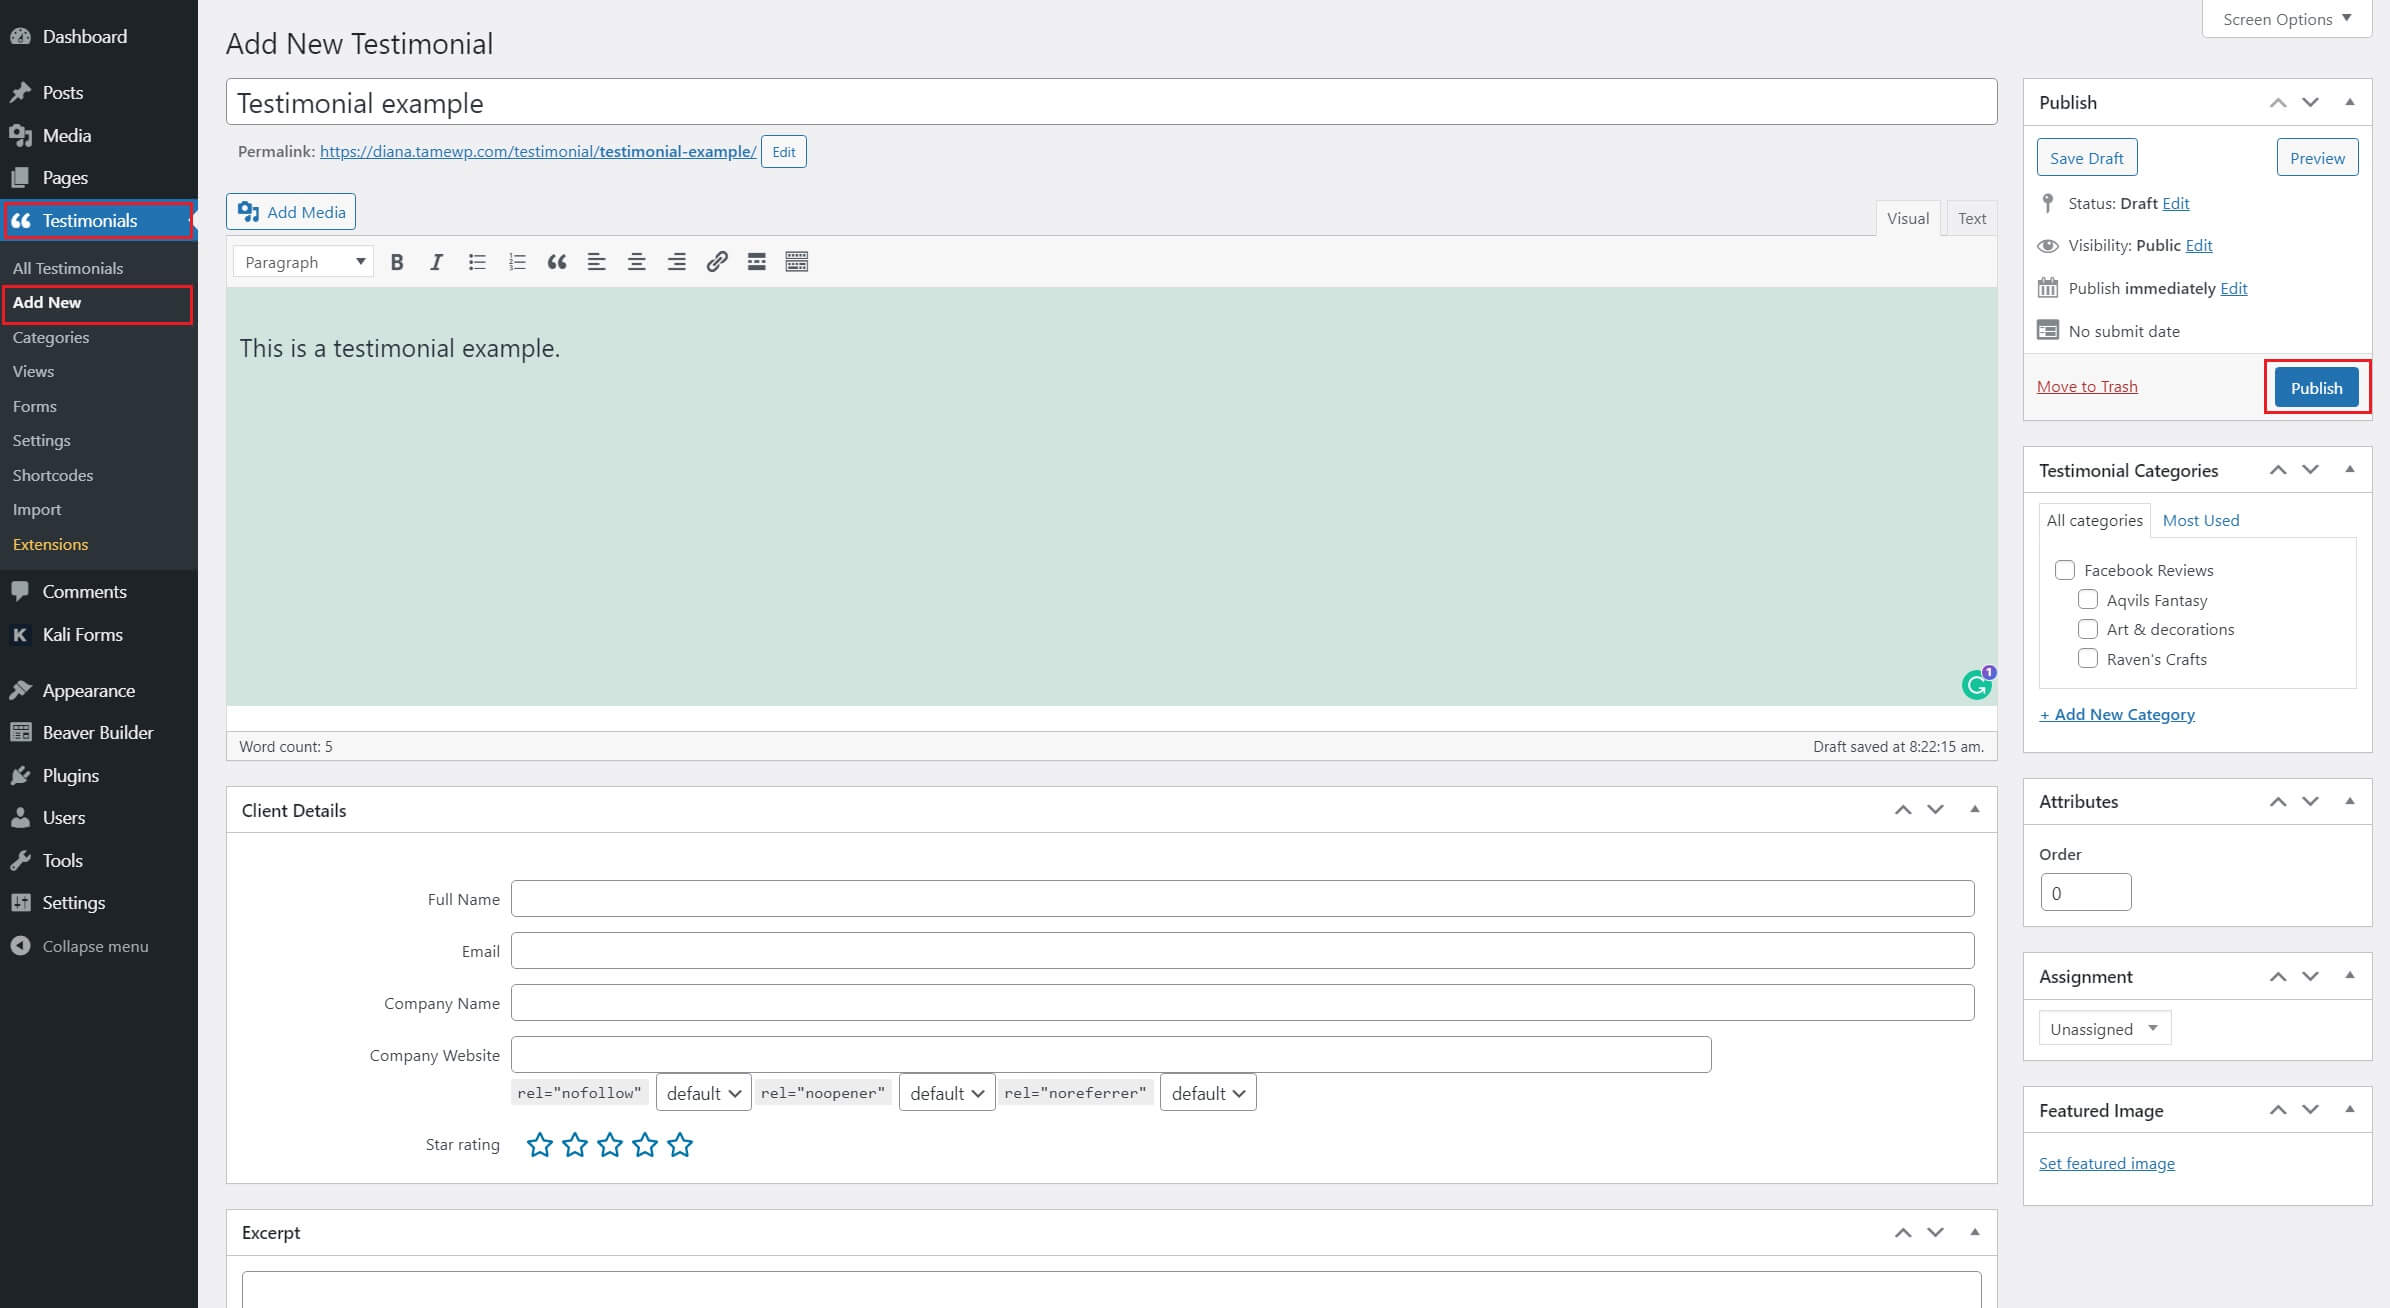
You have several fields to fill in such as the customer’s full name, email address, company name and website, an excerpt (optional). You can even configure custom fields.
If the customer agrees, you can also add a featured image from the right sidebar, just like you would with a regular post.
Once you have the testimonial ready, you hit Publish to add it.
If you have testimonials from review sites such as Google, Yelp, Facebook, etc, you can directly import them with Strong Testimonials without having to manually add them yourself.
Step 2: Create a view
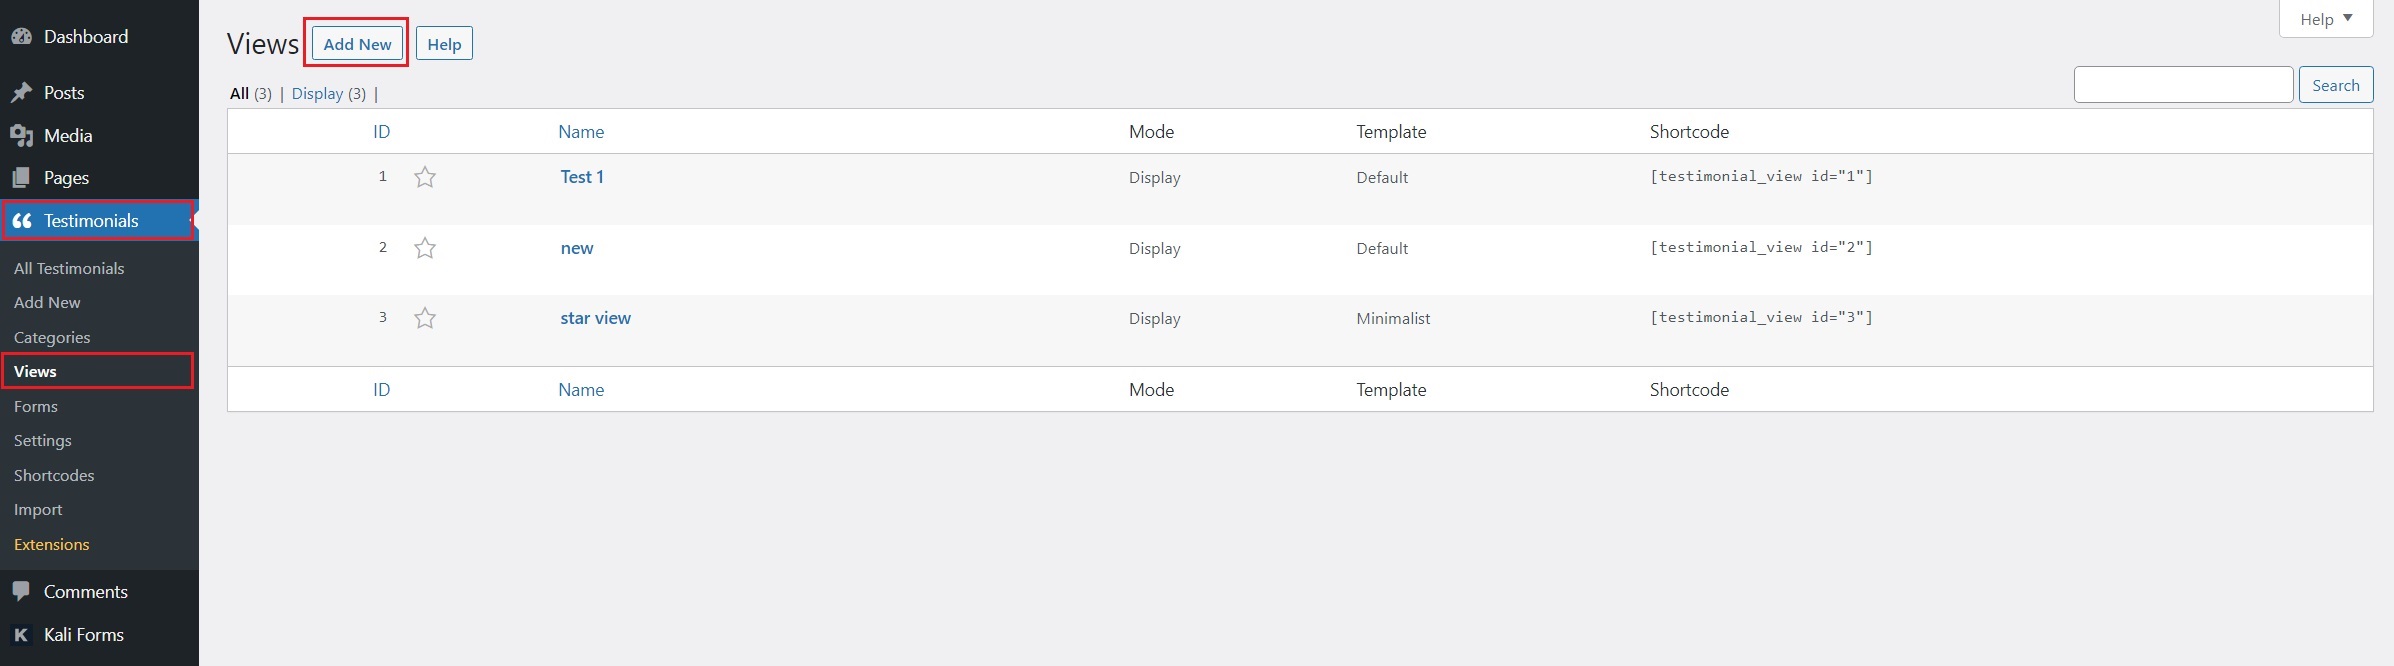
Next, in order to create the slider, go to the left sidebar in the Dashboard and choose Views. Hit the Add New button, just like in the image below:
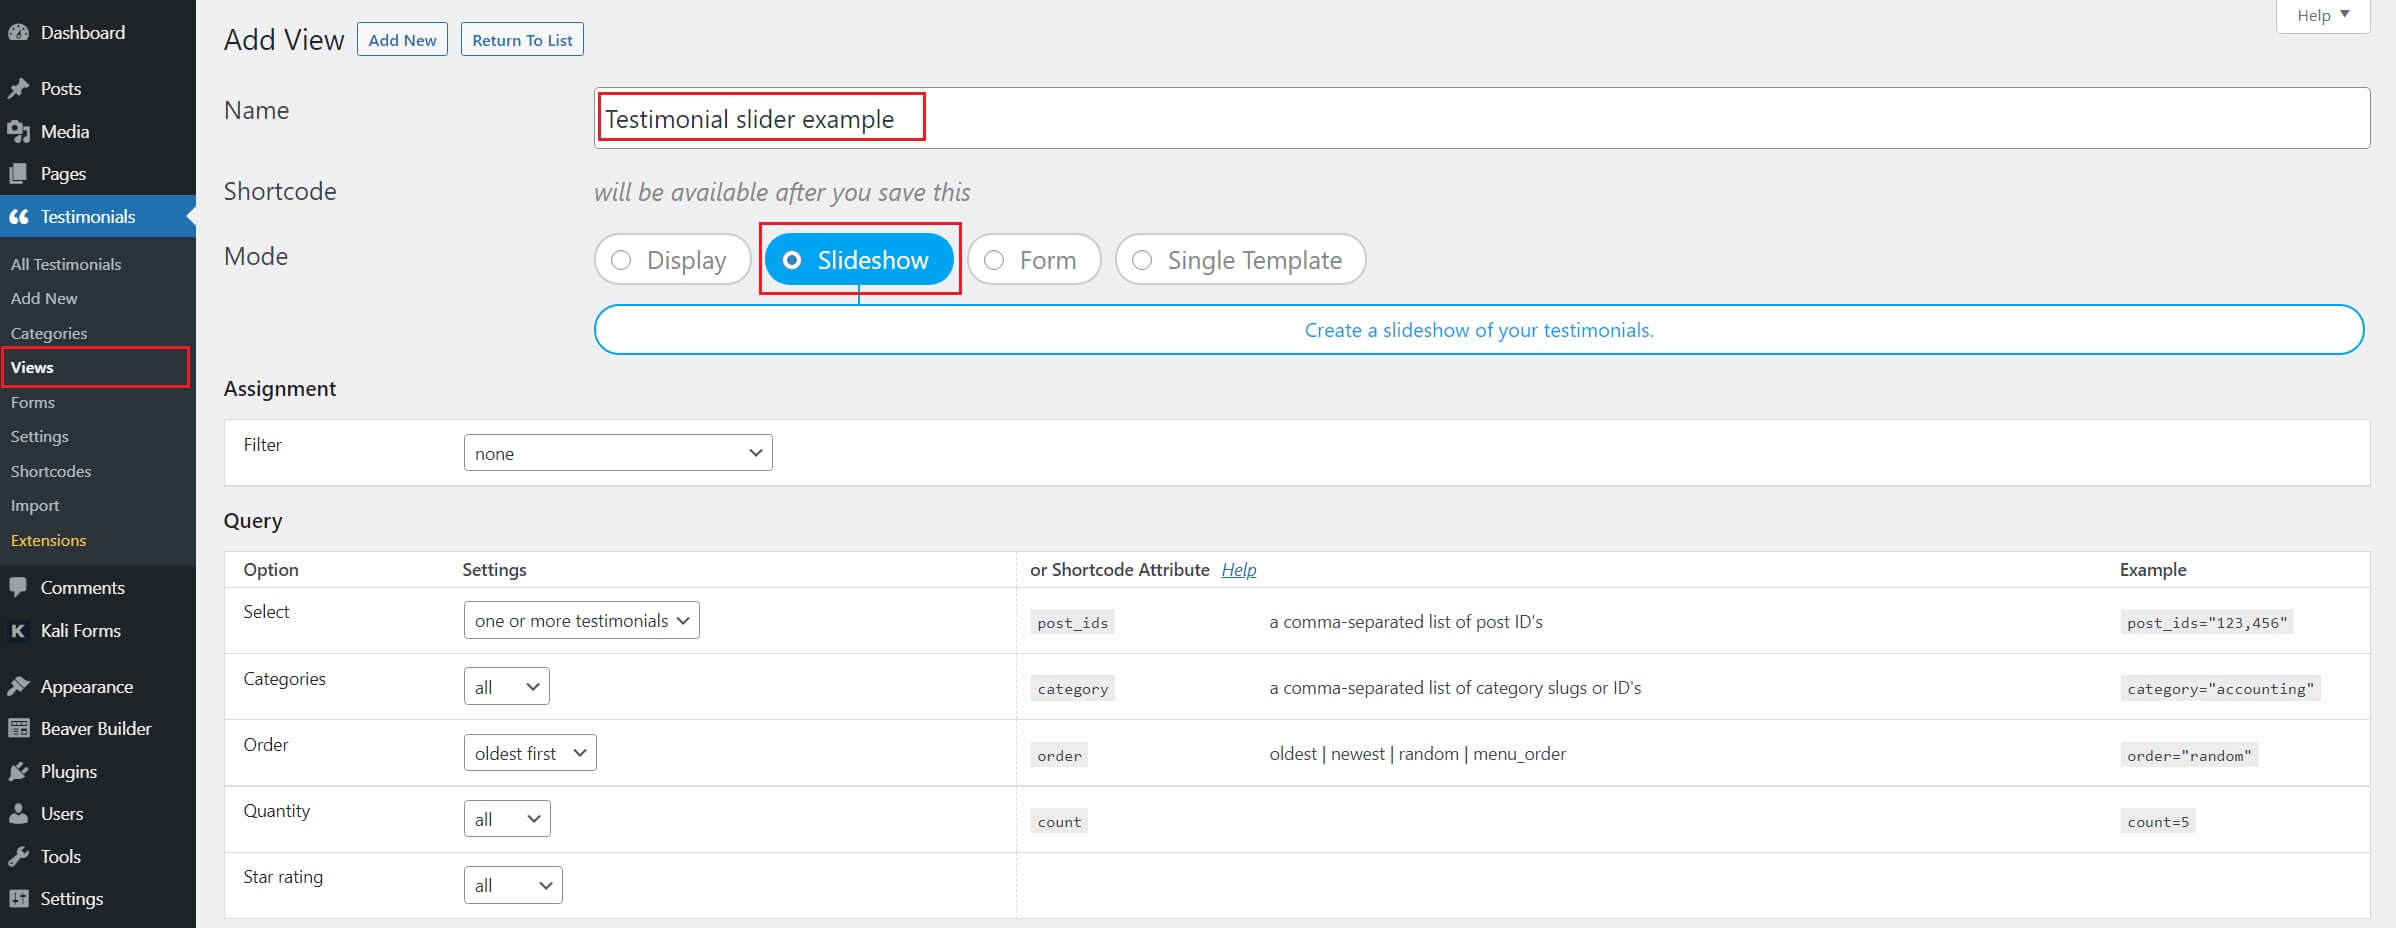
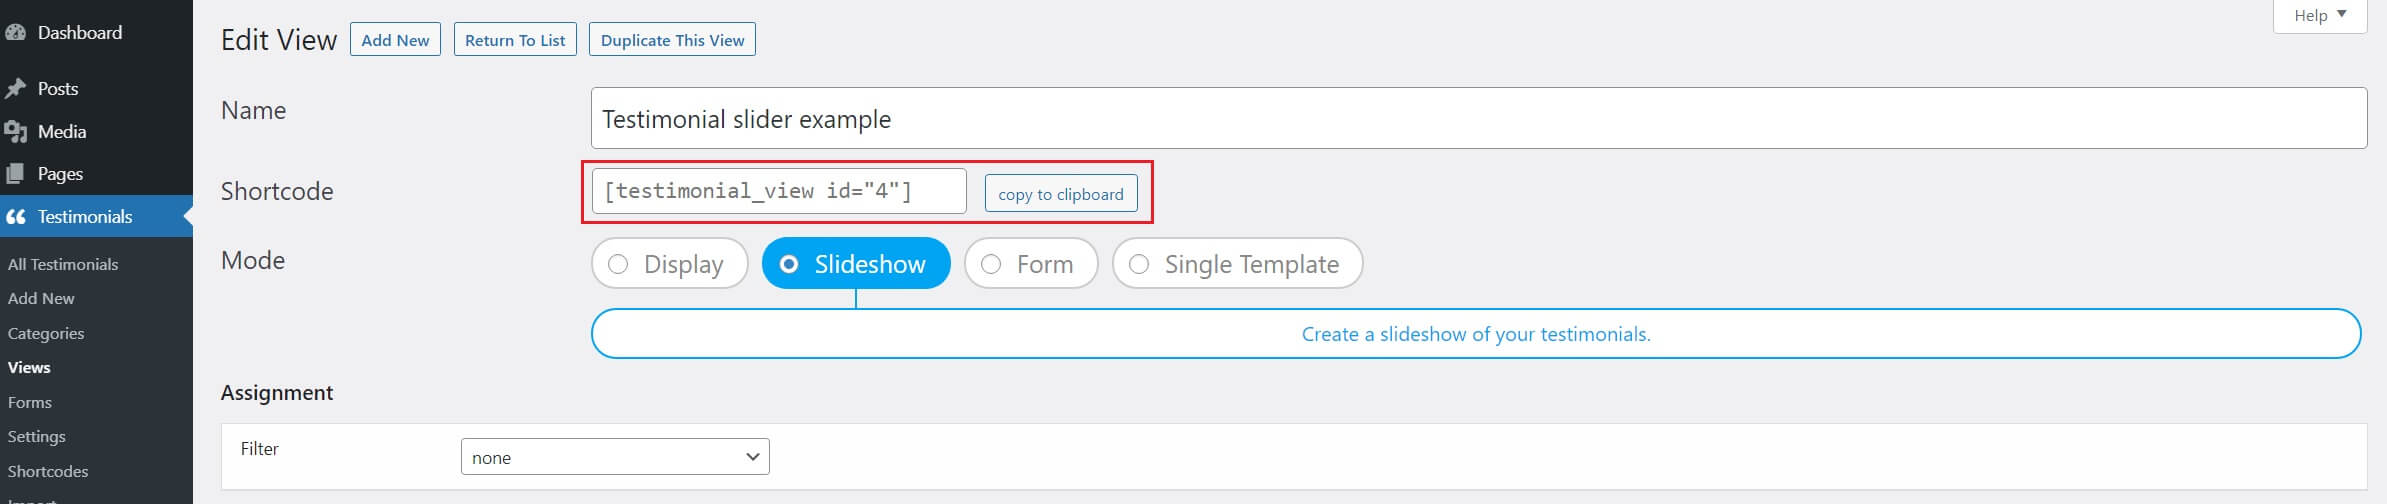
A new window will open with all the configurations. Now, let’s create a custom testimonial slider! First, choose the Slideshow mode:
In this section, you can design your testimonial slider. Configure the slideshow to your liking. You can adjust transition times, behavior, navigation, and much more.
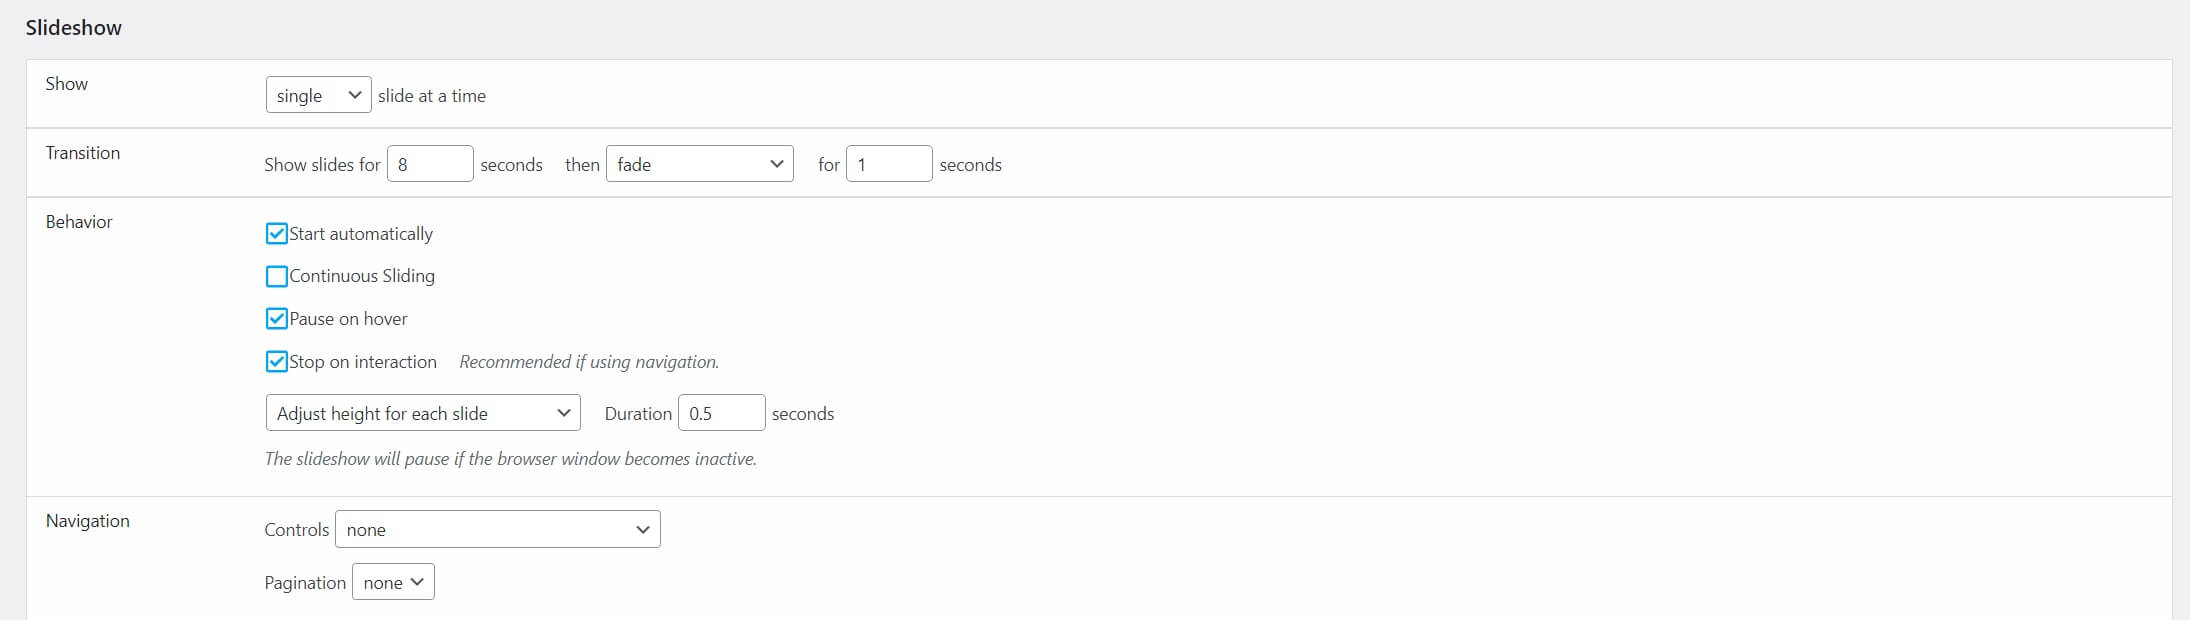
Strong Testimonials has a lot of settings you can choose and adjust based on your needs.
Other plugins only allow you to build a basic slider and some companies don’t even bother to customize it with a name, a featured image, company logo, or client’s website. Strong Testimonials gives you the option to add these things effortlessly with just a few clicks.
To add the name of the person, a featured image, or any other details, simply have them filled in when you are adding the testimonial. Once you have them in place you don’t have to worry about it later on.
Once you are happy with your testimonial slider, hit the Save Changes button at the bottom of the page.
Step 3: Display your testimonial slider
Once you finished customizing it based on your needs it’s very easy to display the slider on your page. All you need is a simple shortcode that you will copy and paste.
A shortcode will be generated after you click on Save Changes.
You can find it if you scroll back up at the top of your Edit View page:
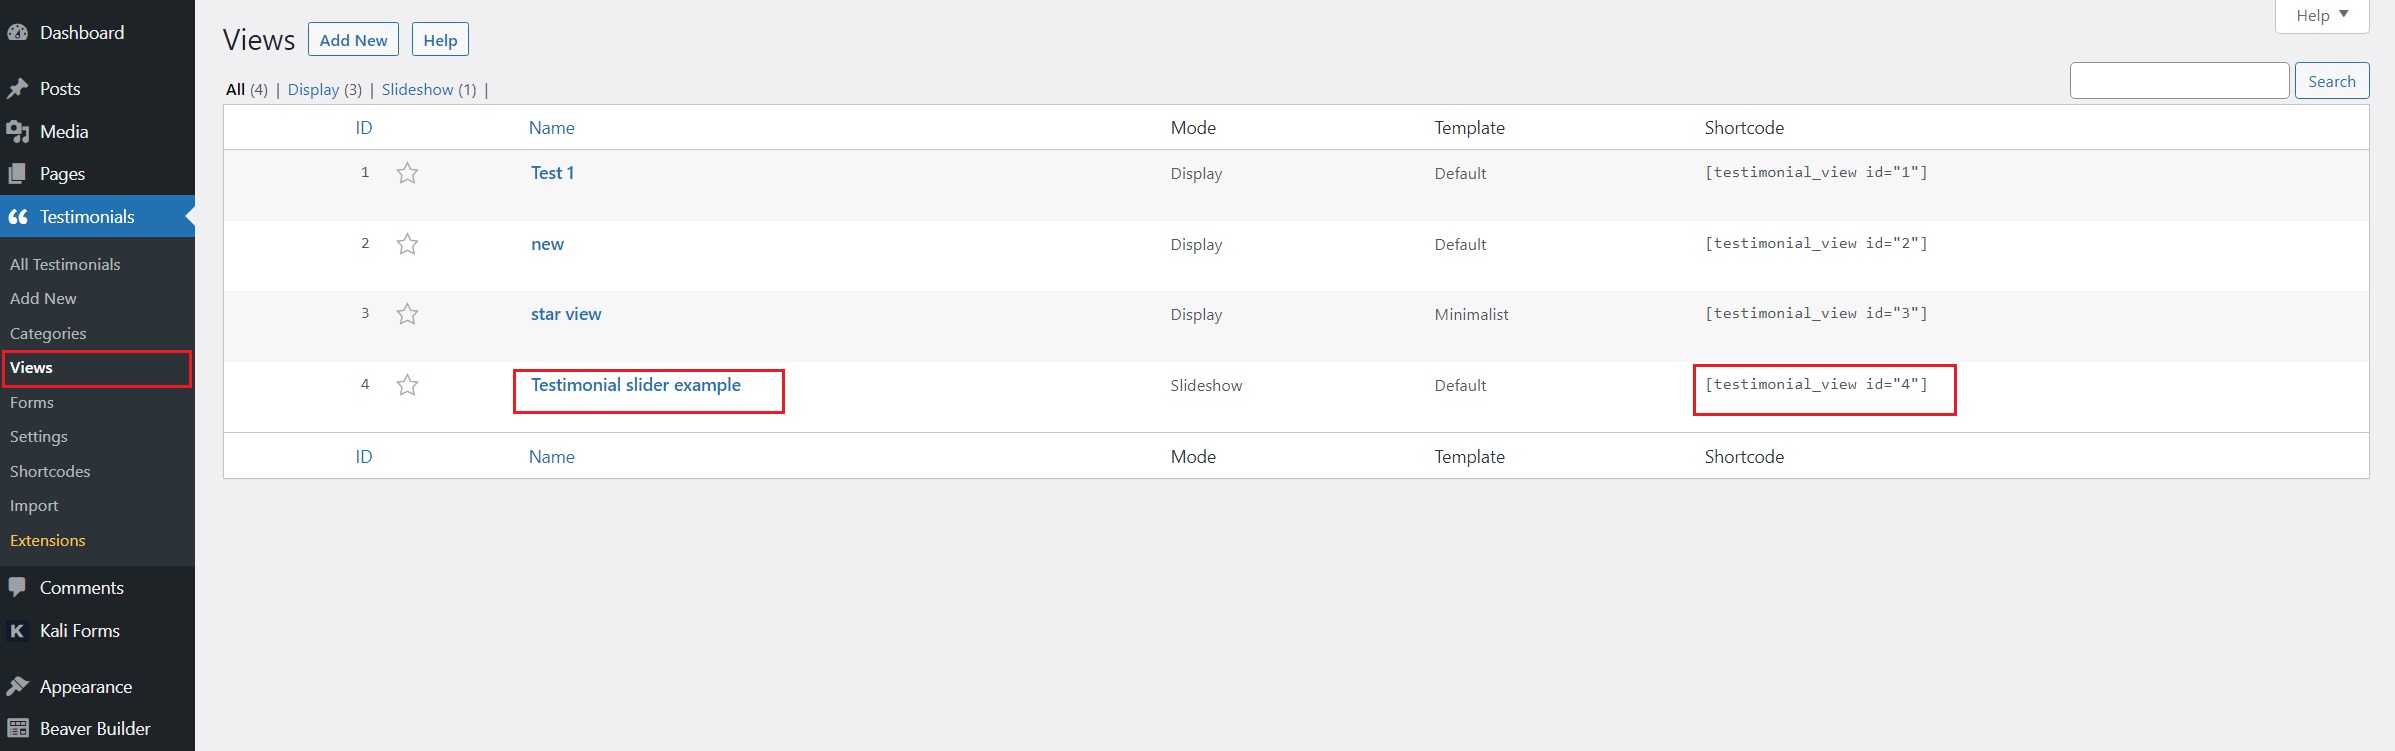
You can also find it if you go back to Views and look for the view name you want in the list. The shortcode is the one on the right:
All you have to do is to copy the shortcode and simply paste it in the body of the page or post you want to display the slider on. Here’s an example:
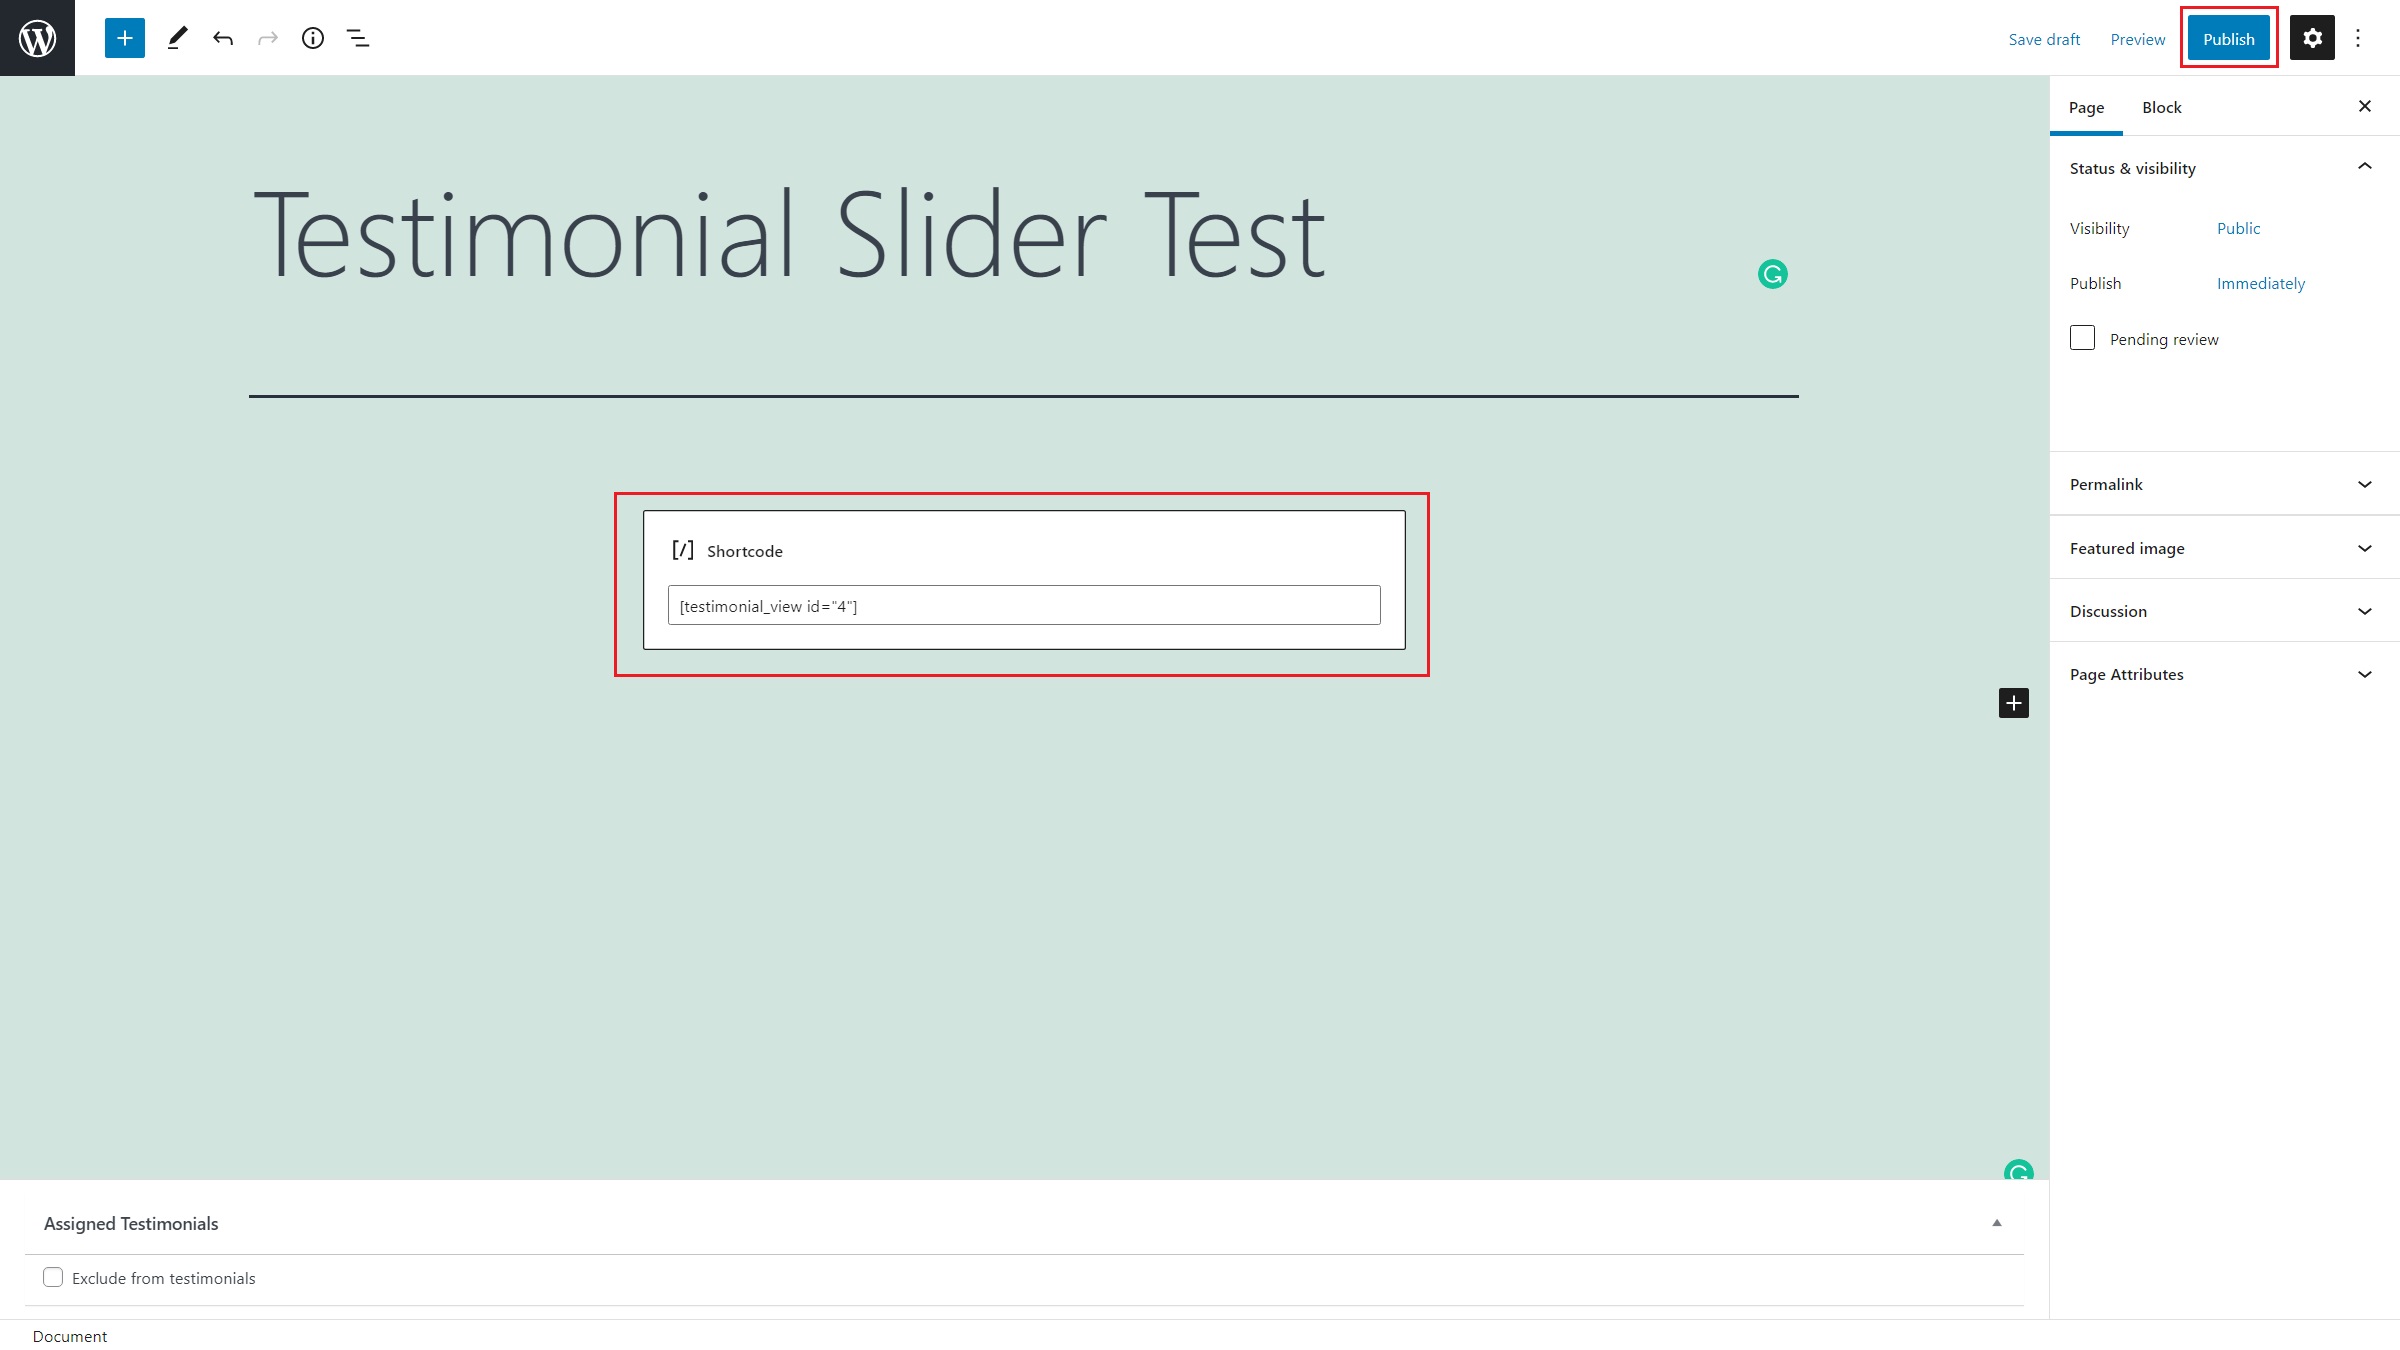
Once you pasted the shortcode in the body, go to the top-right of the page and hit the Update button.
And there you have it, your first testimonial slider!

We just scratched the surface in terms of features and possibilities offered by Strong Testimonials. There is so much more you can do with this plugin.
Make sure you check all its features, including the Forms, Testimonial Categories, and all other available extensions.
So, what can I do using Strong Testimonials?
1. Create a testimonial slider – You can have your customers scroll through a carousel instead of going all the way down a page. You can take advantage of this by also having plenty of space around it for call-to-action buttons.
2. Allows you to customize the slider – Make everything neat by taking advantage of all the customization options Strong Testimonials has to offer. If it looks pretty and clean, your customers will stay longer on your website.
3. Have it in one place – You can significantly improve the user experience by having everything organized and presented in one single place on the page. A clean user experience means happy customers.
Conclusion
Testimonials can help you build your relationship with your consumers or clients. A testimonial slider is an ideal method to display testimonials from your satisfied customers. The process is easy to follow and it requires only a few minutes of work. The great thing is that you don’t need any coding skills, so you can do it by yourself, without hiring a professional.
Furthermore, you can make use of this feature if you subscribe to our Plus Plan. Get Strong Testimonials and all of its features right now at an amazing price! 😁