Do you know how to add a customer testimonial request form to your website? Testimonials are valuable marketing tools that can boost your conversion rate without a doubt. You either have to ask for your clients to fill in the form (because not all clients offer testimonials at their own initiative) or they can do it by themselves anytime (thus being a huge plus for your business).
If you decide to hire a developer to create a testimonial collection system from scratch, it will take a lot of time and resources. Not to mention the costs involving its maintenance.
In this guide, you will learn one of the easiest ways you can add testimonial request forms to your WordPress website with both free and pro versions of Strong Testimonials.
Table of contents
Business owners utilize testimonials to demonstrate the quality of their products or services and increase sales, and there is no doubt that they actually work.
Many businesses that start off with WordPress quickly notice that by default, WordPress does not offer them a testimonials tool. Here are a few of the most common mistakes we’ve encountered in a variety of testimonial solutions:
1.❌You pay a lot just to get a simple feature – Some testimonial solutions offer you a huge and expensive package that may or may not contain a testimonial form option. You pay a lot just to use that feature and there’s a chance you might not need the rest of the package options thus you losing money.
2.❌ It can be time-consuming – Some businesses don’t make use of testimonial collection tools and decide to manually introduce all of their testimonials. Other tools don’t offer you a testimonial collection without you sitting and asking the clients to send you the testimonials. In the end, it’s very time-consuming where you could’ve invested the time and energy into something more productive. On top of that, sometimes you are facing customers that stopped replying to you and you lost a testimonial opportunity.
3.❌ No control over what it’s posted – Even if some businesses have a testimonial collection tool, they have no means of regulating what gets posted and what doesn’t from the backend. Fake or malicious testimonials can easily pass through and end up on their page.
Why add a customer testimonial request form
Customer testimonials are the shared buying experiences of happy customers. Other words for client testimonials are positive reviews and social proof.
People are easily influenced by the opinion of others. When someone says good things about a product or service and shares their pleasant experience with the item, others will start to desire it and believe in its quality. That means new customers for you! Just think about your process when you want to purchase something. Don’t you read the reviews for that product before you buy it?
However, people don’t always think to leave you a testimonial. Sometimes you have to ask them to do so. How to ask for a testimonial, you say? There are plenty of ways. Here are some of the most common approaches.

One of the most commonly used ways to ask for a client testimonial is to use your own website. You can add a customer testimonial request form to your WordPress site in a few easy steps.
This way, customers who visit your site, will see the request form and might be more eager to leave a testimonial. Not only that but you can send a link to your testimonial form page in an email to kindly ask them to leave feedback.
There are plenty of testimonial request form templates you can go with. They can include only basic fields such as name and the customer’s testimonial or you can add fields for:
- featured image;
- the customer’s age;
- occupation;
- customer’s website;
- a star rating and more;
By doing it yourself you save a lot of money. Why is that? Because if you decide to hire a freelance developer or an IT company, they will charge you a lot for a custom testimonial submission system and it can even take up to a whole month with constant back and forth communication. Not to mention the fact that you have to pay them for maintenance in case something breaks. So why not do it yourself then in 3 easy steps, using a trustworthy tool?
On top of that, this is a quick way to get testimonials and not waste time by manually adding them one by one.
This article will mainly focus on creating a testimonial form using the Strong Testimonials pro version as well as having the Multiple Forms extension installed.
But fear not, I also have a section prepared for the Strong Testimonials free version!
How to add a testimonial request form to your WordPress site using Strong Testimonials pro version
The easiest way to add a testimonial form to your WordPress site is to use a plugin. Most of them are easy to use and require no coding skills on your part.
Firstly, you need to install the plugin to be able to use all of its features. To do so, you can follow our simple step-by-step guide on how to install Strong Testimonials.

As we’ve already mentioned, Strong Testimonials makes it very easy to add a customer testimonial form on your site. There are three easy-to-follow steps you need to take.
To use the Multiple Forms extension, you will need the Strong Testimonials Pro version. To install and activate it make sure to check our guide on that.
Also I will be showing you how to create one form but creating multiple forms is just as easy. You can check our documentation on creating multiple forms to get a better understanding of the process.

Strong Testimonials Plugin
We’ve built the #1 WordPress plugin for collecting, managing, and displaying testimonials. Drive more sales by leveraging your existing user audience.
Step 1: Create a form
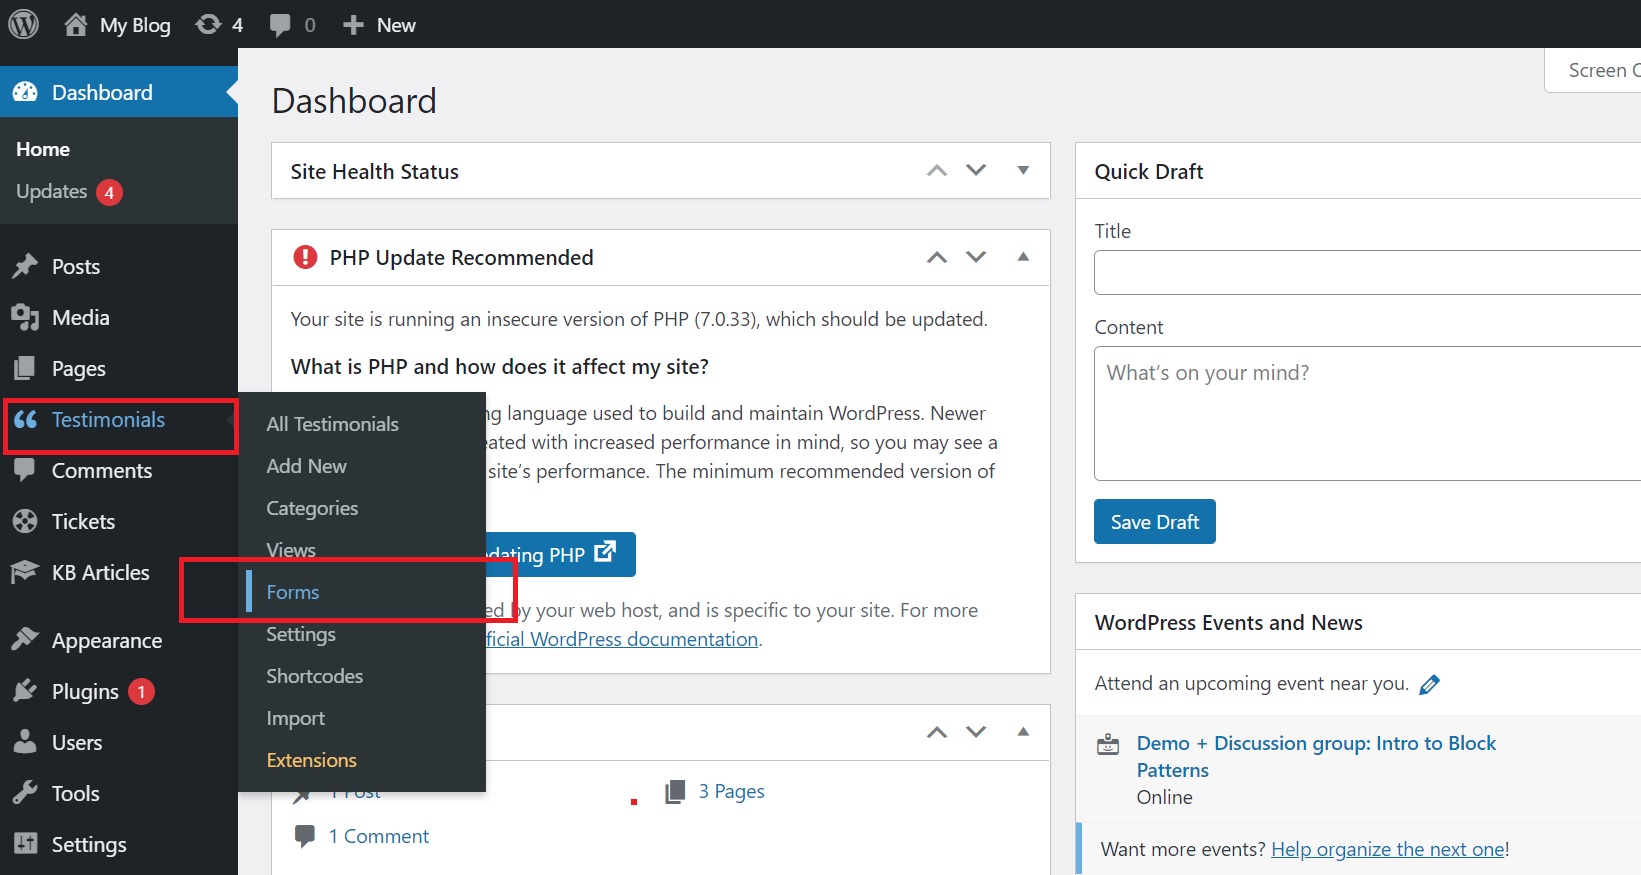
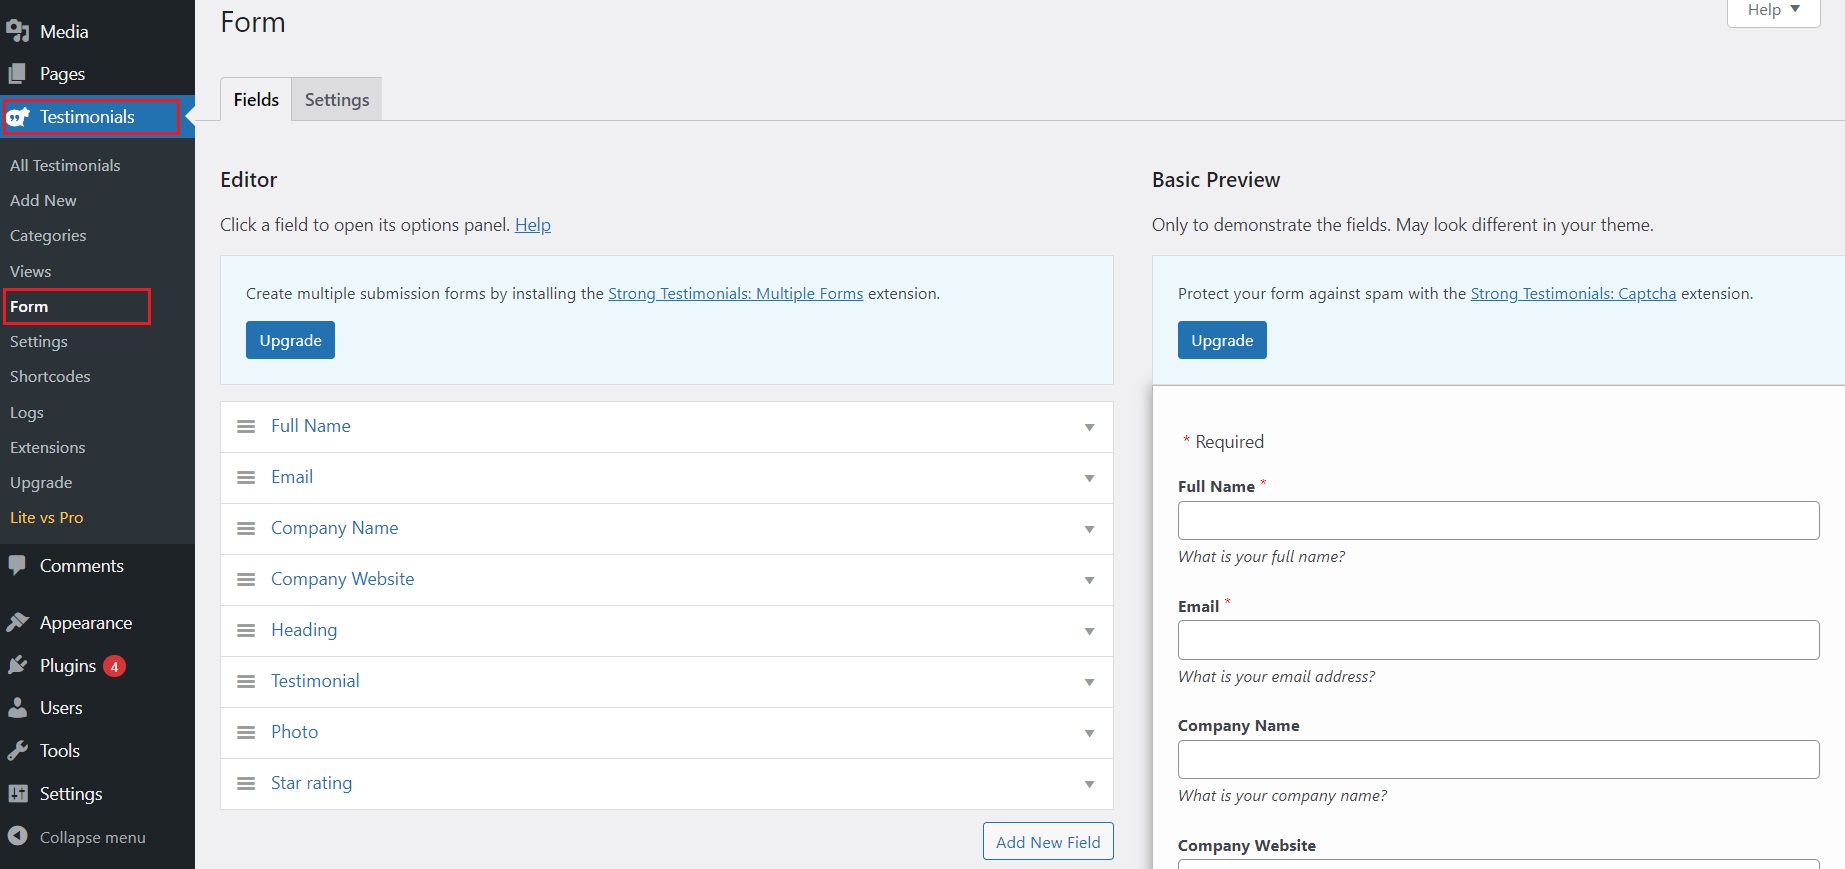
After you install and activate the plugin, you’ll see it in the left sidebar of your dashboard, under the name of “Testimonials”.The first step is to go to Testimonials – Forms:
You’ll see 3 types of forms displayed: default, minimal, custom form. These are testimonial request form templates. You can choose either of them, as all 3 can be further edited. You can add or remove fields, rearrange fields, and more. Click on Duplicate on the form type you want:
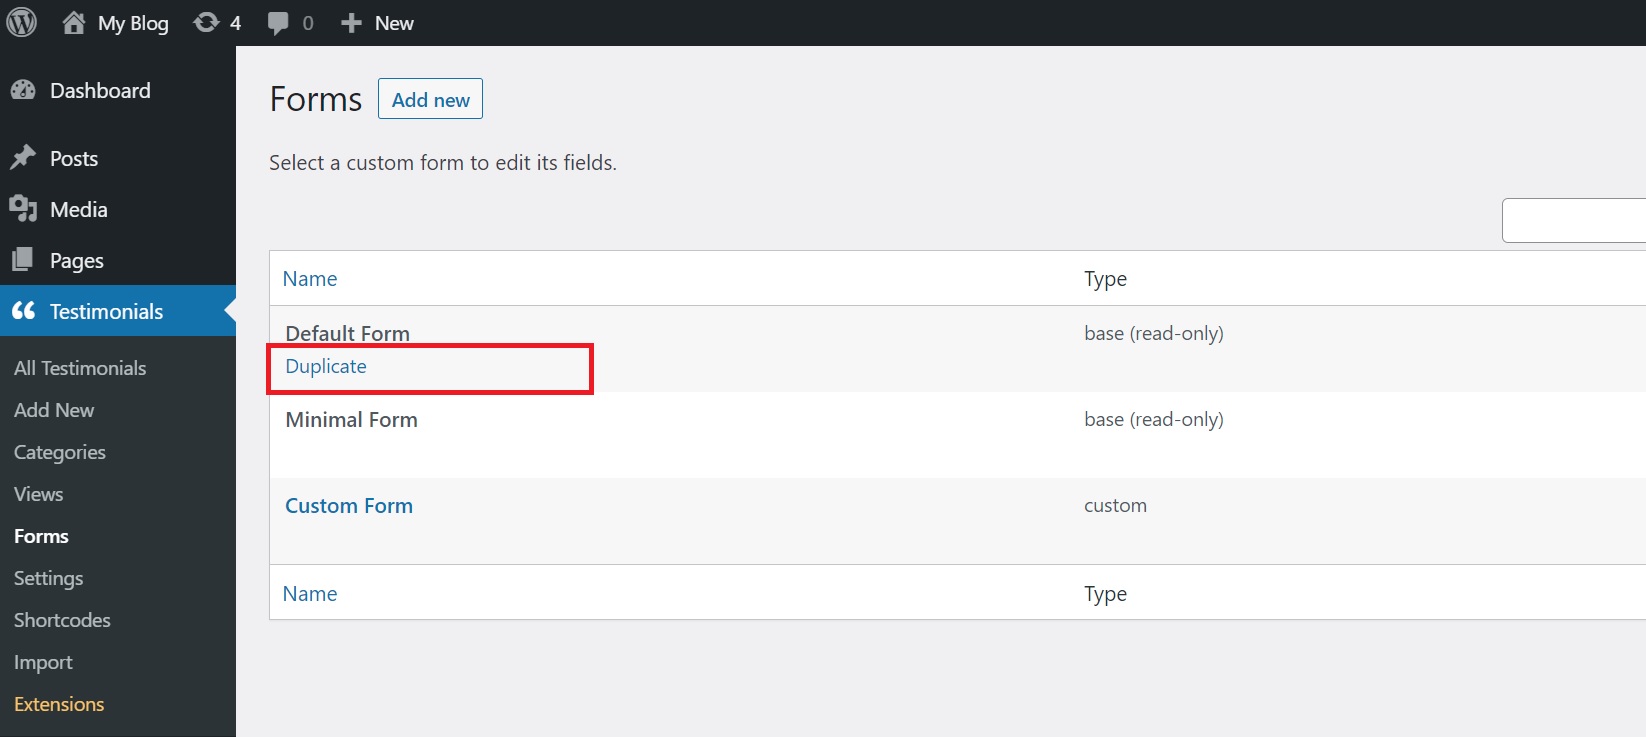
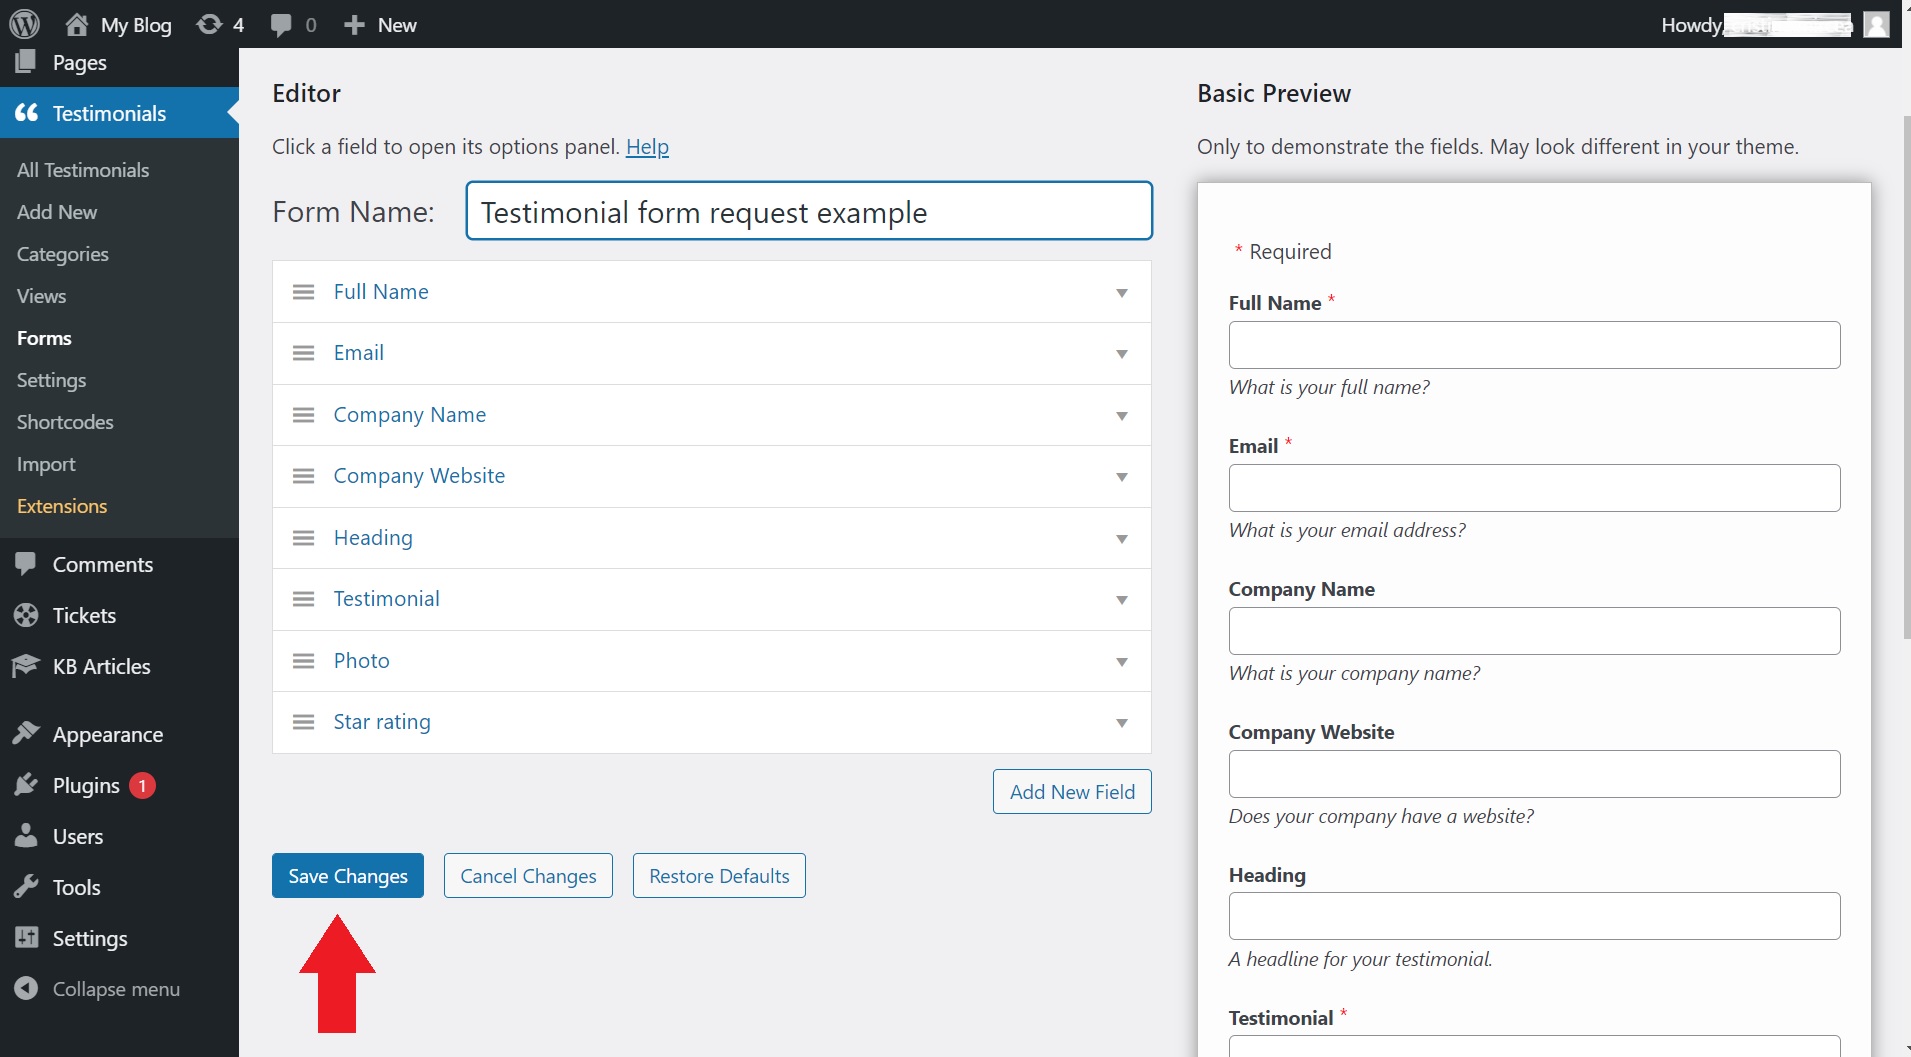
After you click on “duplicate”, a window will open with all the fields of the form. You can customize everything the way you want. Delete or add new fields, give them the name you want, rearrange fields, etc.
Once you are done with your testimonial form template, make sure you click on Save Changes:
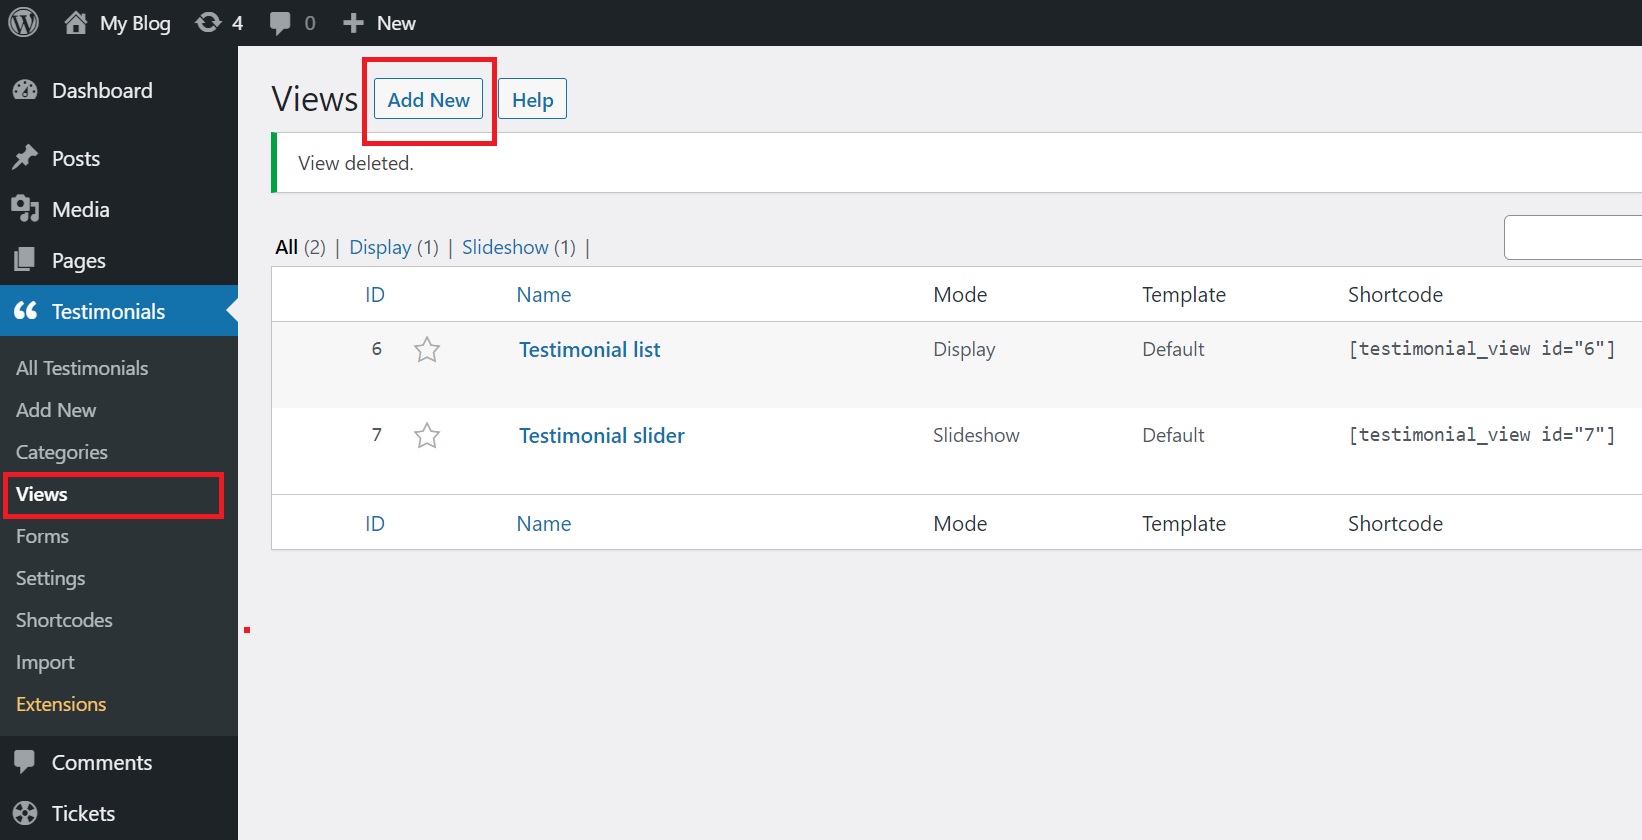
Step 2: Create a view
Now that you are pleased with your testimonial form design, it is time to create a View for it so it can be displayed on your website.
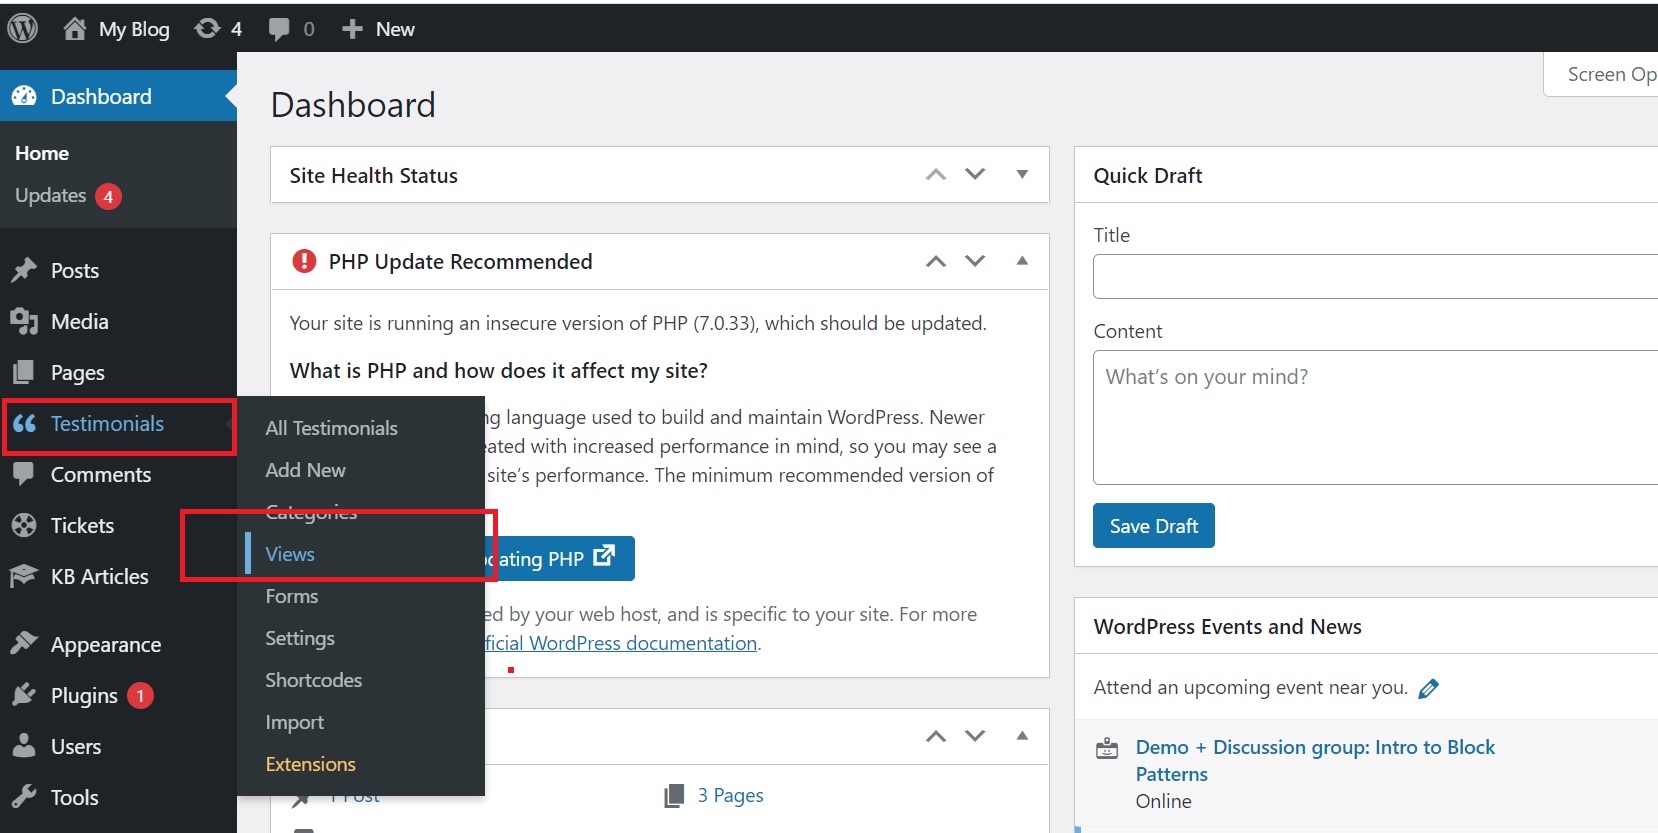
To create one, head over to the dashboard, and from Testimonials, you click on Views:
Next, in Views, click on the Add New button:
In the window that opens, click on the Form mode:
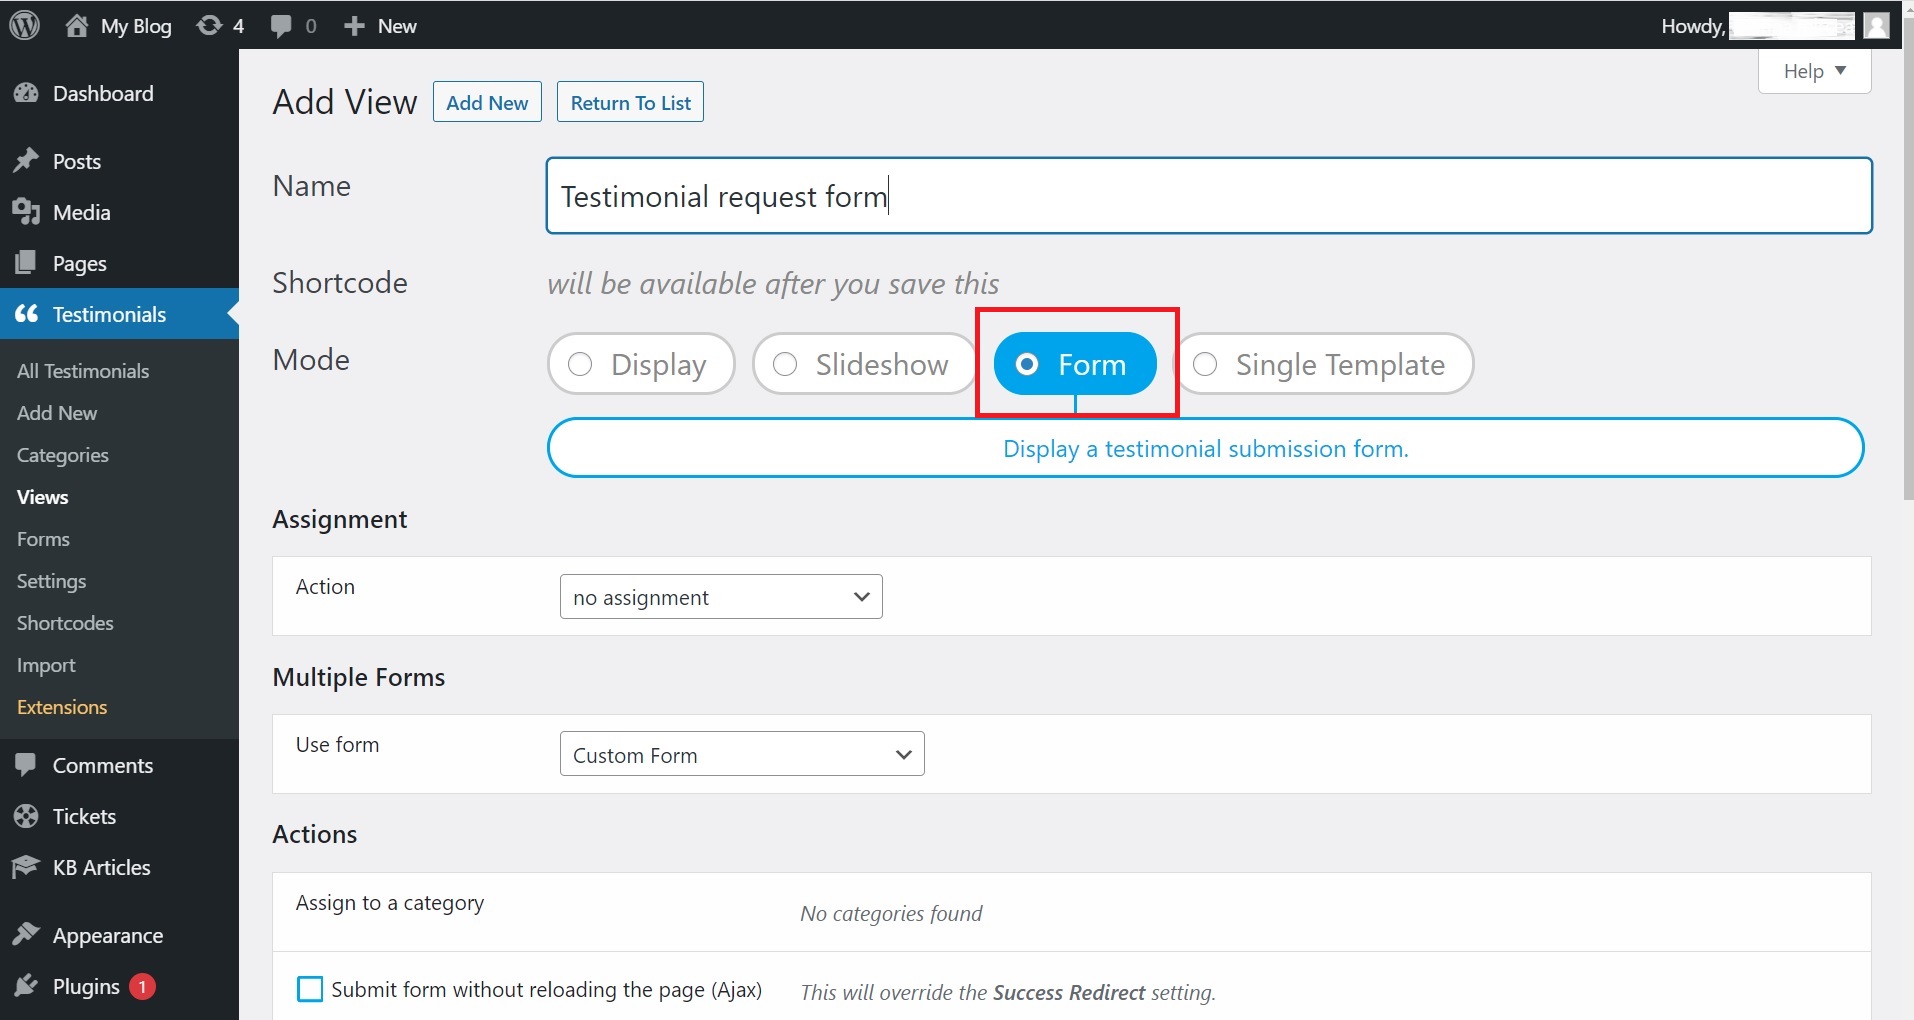
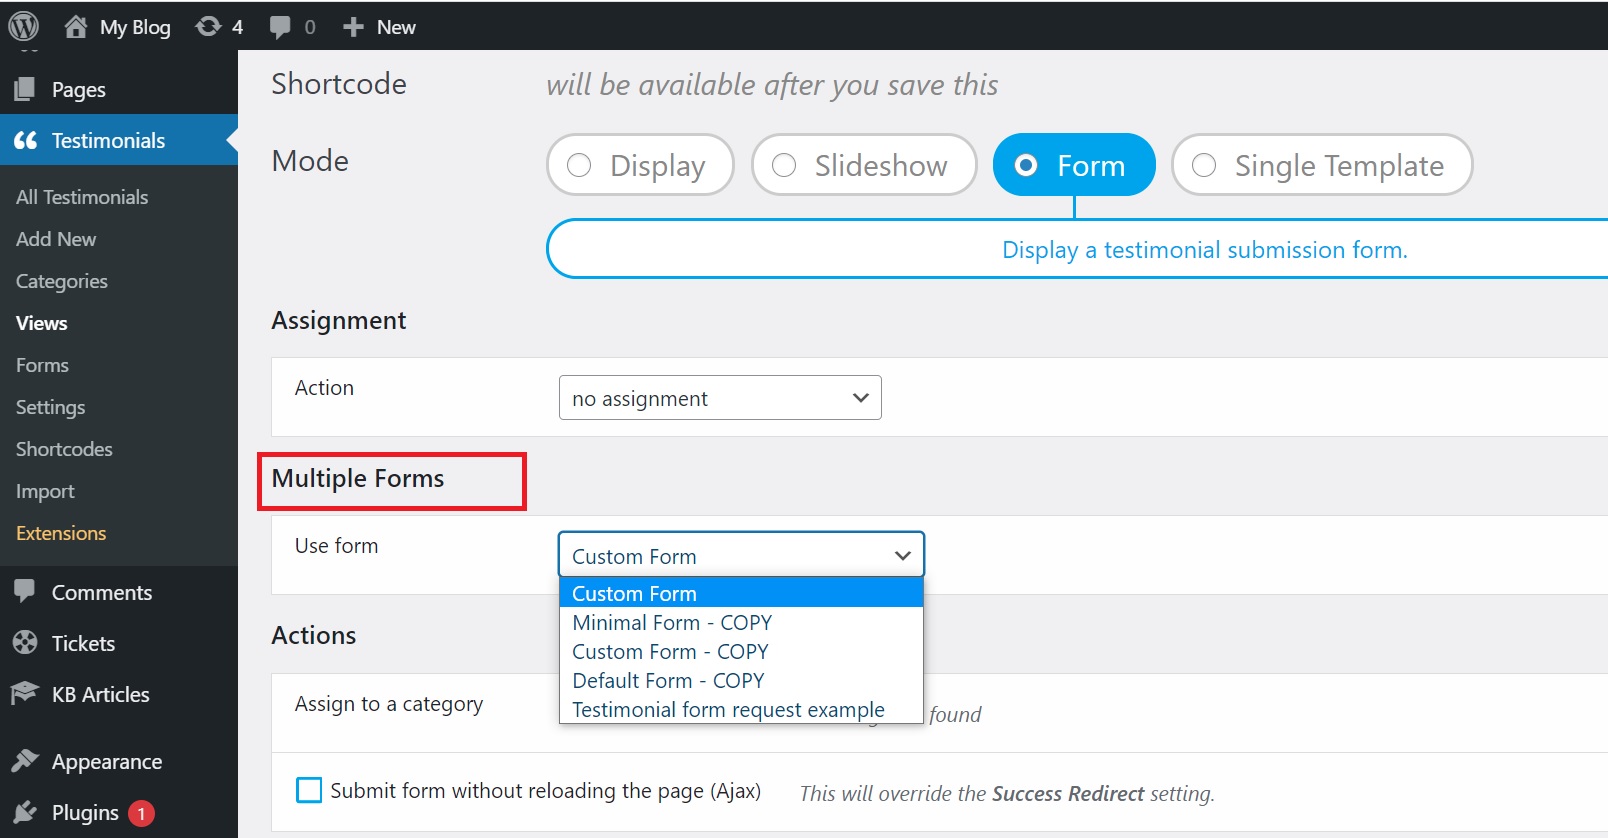
Go to “Multiple Forms” and select from the drop-down the form template you created in Step 1:
Next, if you scroll down, you’ll also see other available settings: for the template, background, font of the form and more. Customize the form the way you want and then scroll all the way down and hit the Save Changes button.
Step 3: Display the form
Once you’ve saved your work, scroll back up and you’ll see a shortcode that has been generated right under the name of the view. Copy it to clipboard:
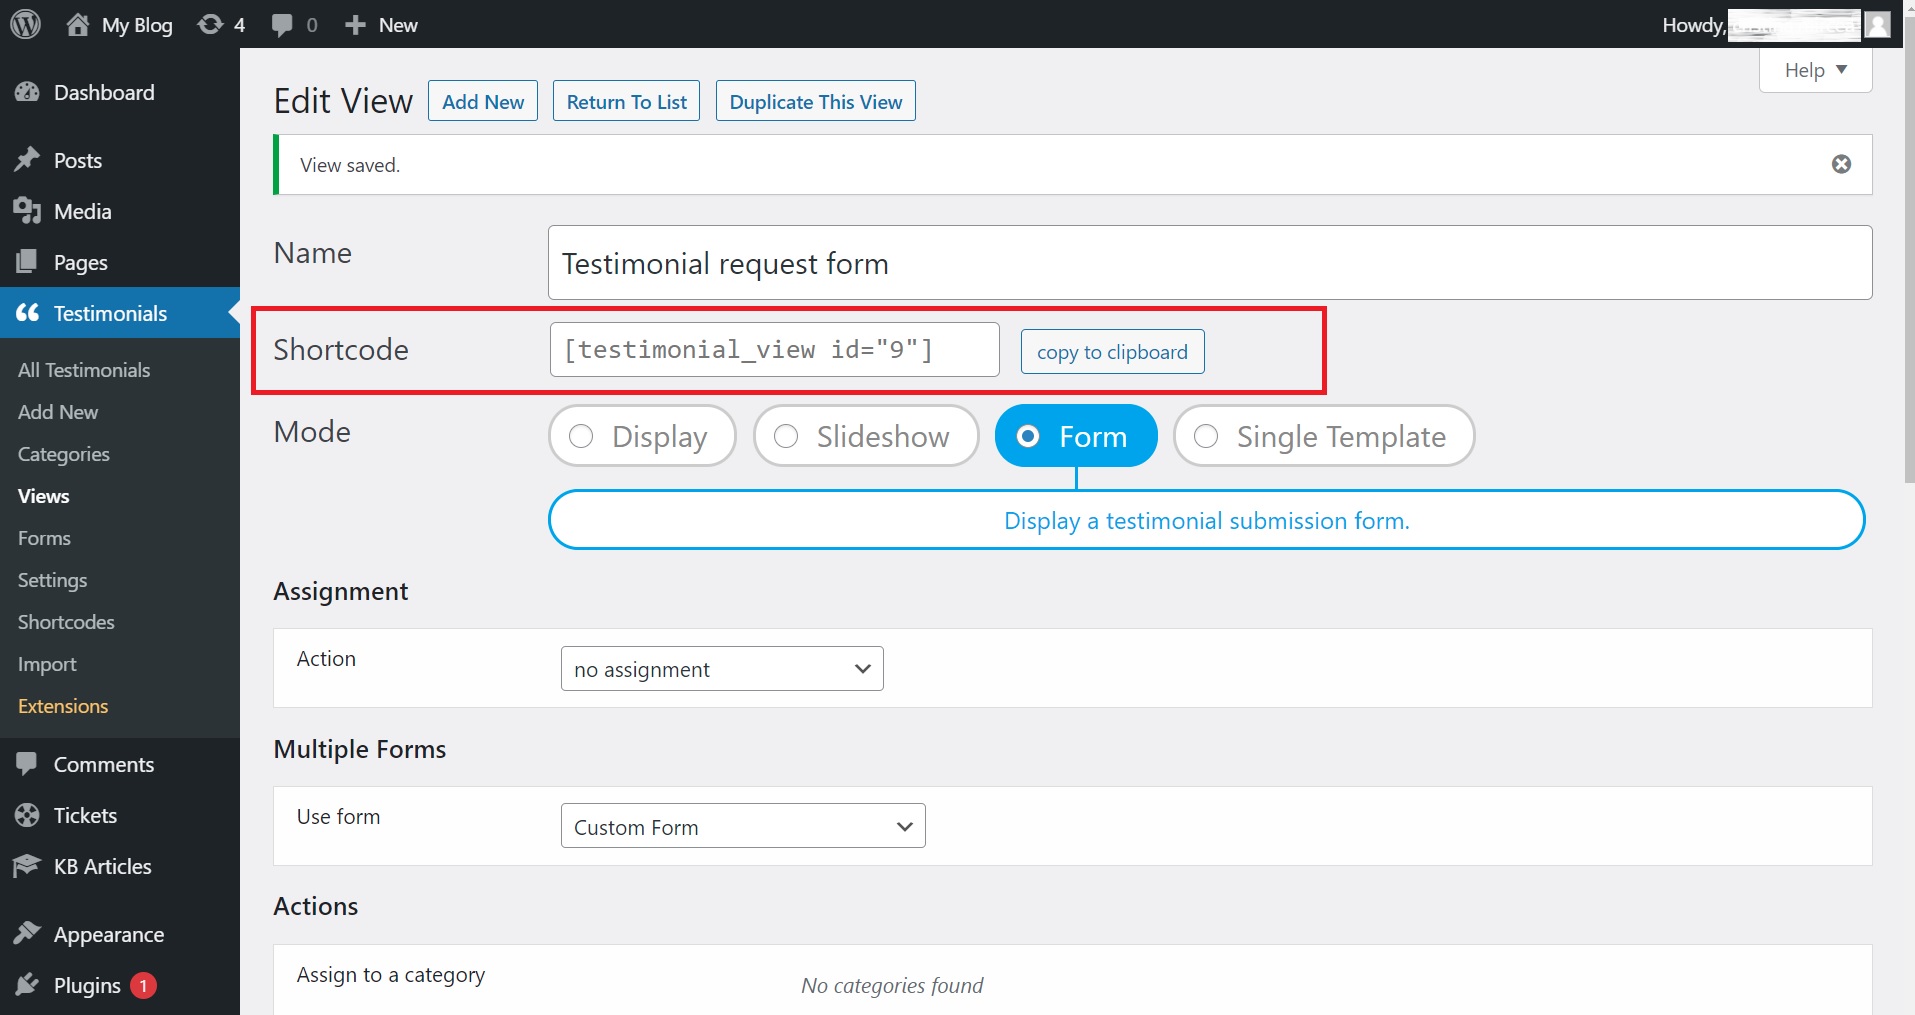
The last thing you need to do is go to the page where you want to display the testimonial form and paste the shortcode in the body of the page.
After that, if you want to Preview the page, you can select Preview > Preview in a new tab, or hit the Publish button from the top-right if you are ready with everything.
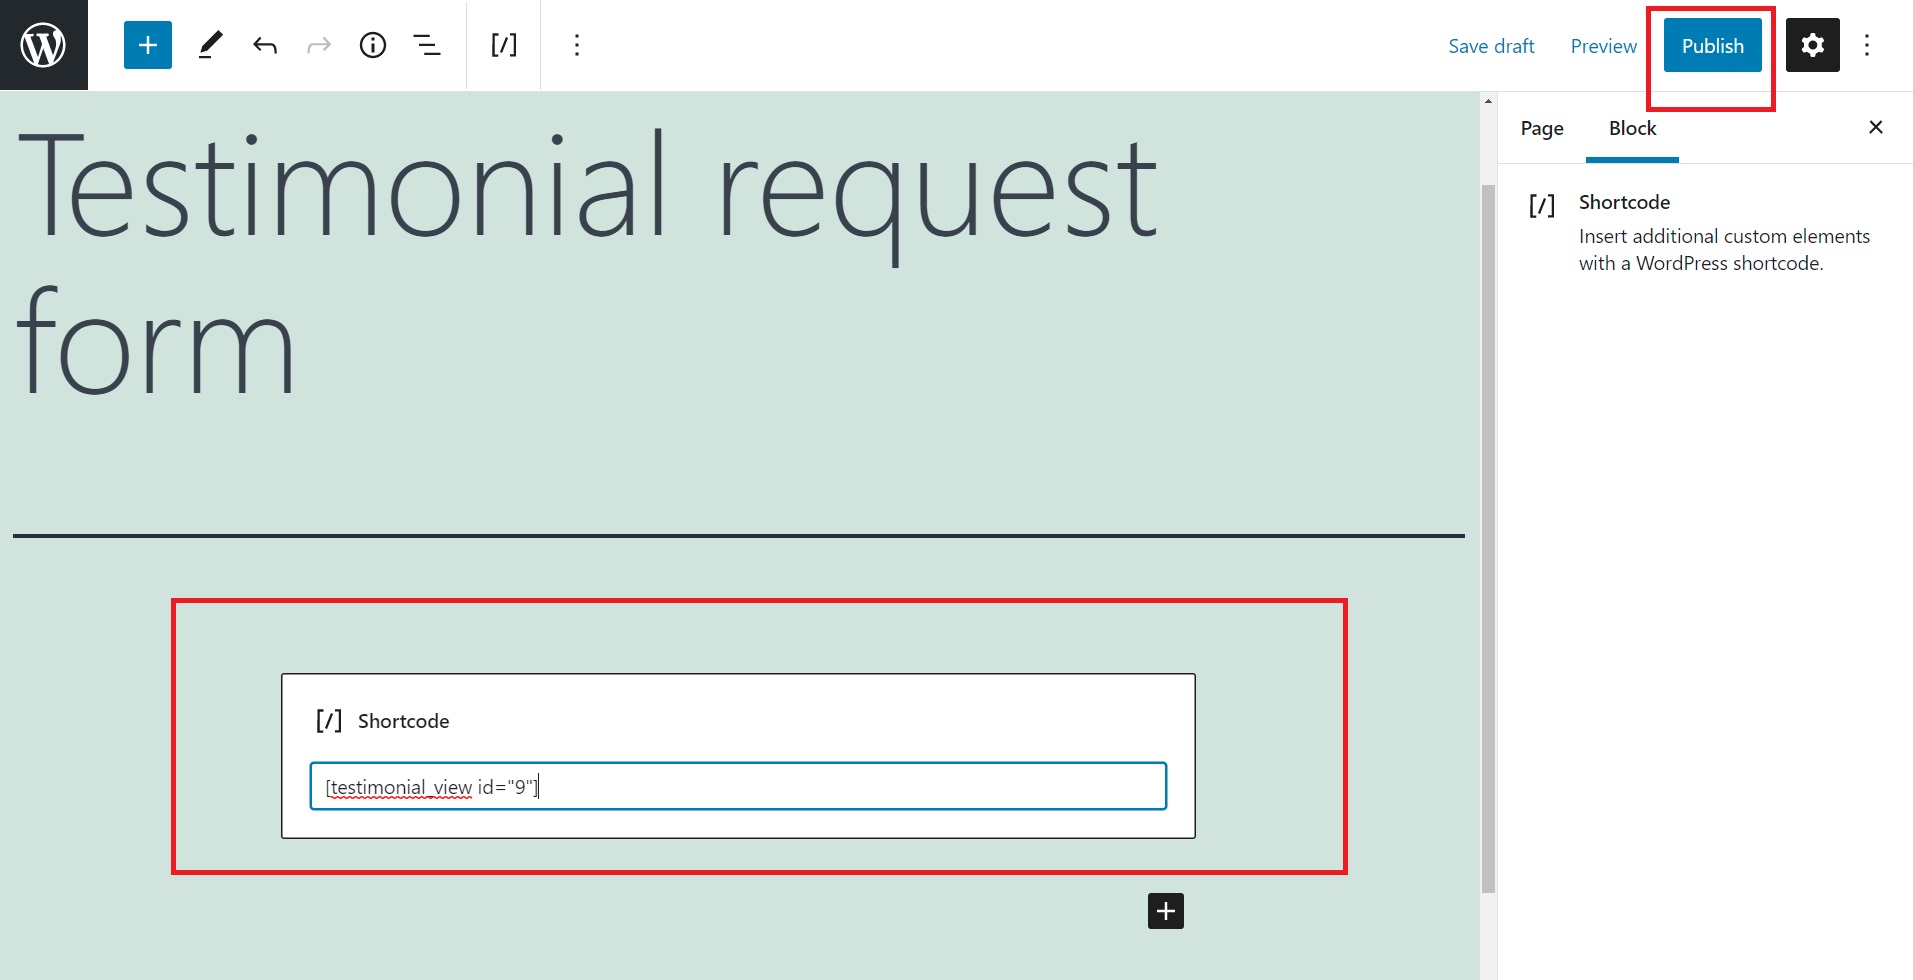
It’s as easy as that! If you managed to follow all the instructions correctly, you’ll have to end up with a testimonial form like this (depending on your theme, customizations, etc.):
It’s safe to add that review management is critical because 82 percent of consumers read online evaluations for local businesses. It helps you monitor what is being written about your company online and intervene to correct issues as needed.
With Strong Testimonials, all of your submitted feedback appears for you in the backend. From there you can decide if you activate the auto-approve feature or manually approve. This helps you catch malicious fake testimonials or correct the genuine ones before approving them.
Creating a testimonial form using Strong Testimonials free version
For this part, you will only need to install Strong Testimonials Lite version.
This method works more or less the same, the main difference is that you can only create one single testimonial form, but in some cases, one is more than enough.😁
When you head over to your Dashboard, then after selecting Testimonials > Forms you will be greeted with this screen:
Here you already have a pre-defined template (see the preview on the right side) but if you want you can also delete certain fields, reorder them and add limited fields. It’s clean, simple, and powerful even for a Lite version!
Once you are happy with how it looks, scroll down and click on the Save Changes button. If you feel like you messed something up there is a button that restores this form to its default state by clicking the Restore Defaults button.
After this, it’s time to move to the Views part. Select Testimonials > Views from your Dashboard.
Give it a suggestive title and select Form from the Mode type.

Now considering it’s the Lite version of Strong Testimonials, there’s only a few options available for this View. If you scroll down you can assign it to a category, the option to enable submitting a form without reloading the page (Ajax) and in the Style section, the option to pick from a light theme or dark theme template.
Once you are done, scroll down and at the bottom of the page you have the Save Changes button. When you click on it, the plugin will generate a Shortcode for you.

You have to copy this shortcode and paste it into your desired page or post.
So, what can I do using Strong Testimonials?
1. Save money – By utilizing Strong Testimonials, you can create a customer testimonial form yourself in 3 easy steps without the need to spend a lot of resources to create a system from scratch. On top of that, it’s very user-friendly.
2. Save time – You can save a lot of time by directing your customers to a dedicated testimonial submission page. They can add all of the details themselves (including the actual testimonial). No matter the length you don’t have to manually add it yourself. Let the customer do it for you!
3. Full control over submissions – You have full control over what the customers get to submit. You can catch testimonials that are full of grammatical errors as well as malicious ones before they appear on your website.
Conclusion
Creating and displaying a testimonial request form on your website is the most convenient approach to request a customer testimonial. And the most awesome plugin to help you do that is Strong Testimonials!
It’s a job that can be completed with a few mouse clicks and requires no particular abilities. The plugin comes with everything you’ll need to make and display personalized testimonial forms on your WordPress site.
So what are you waiting for? Boost your conversions using compelling testimonials created and displayed using all available features you can unlock by subscribing to our PLUS plan. 😁
Strong Testimonials Plugin
We’ve built the #1 WordPress plugin for collecting, managing, and displaying testimonials. Drive more sales by leveraging your existing user audience.