The process of installing and activating a WordPress plugin is pretty simple – you can follow the same steps for every free WordPress plugin.
There are two ways you can install Strong Testimonials.
1. From your WordPress Dashboard
To install Strong Testimonials, go to your WordPress dashboard > Plugins > Add New.

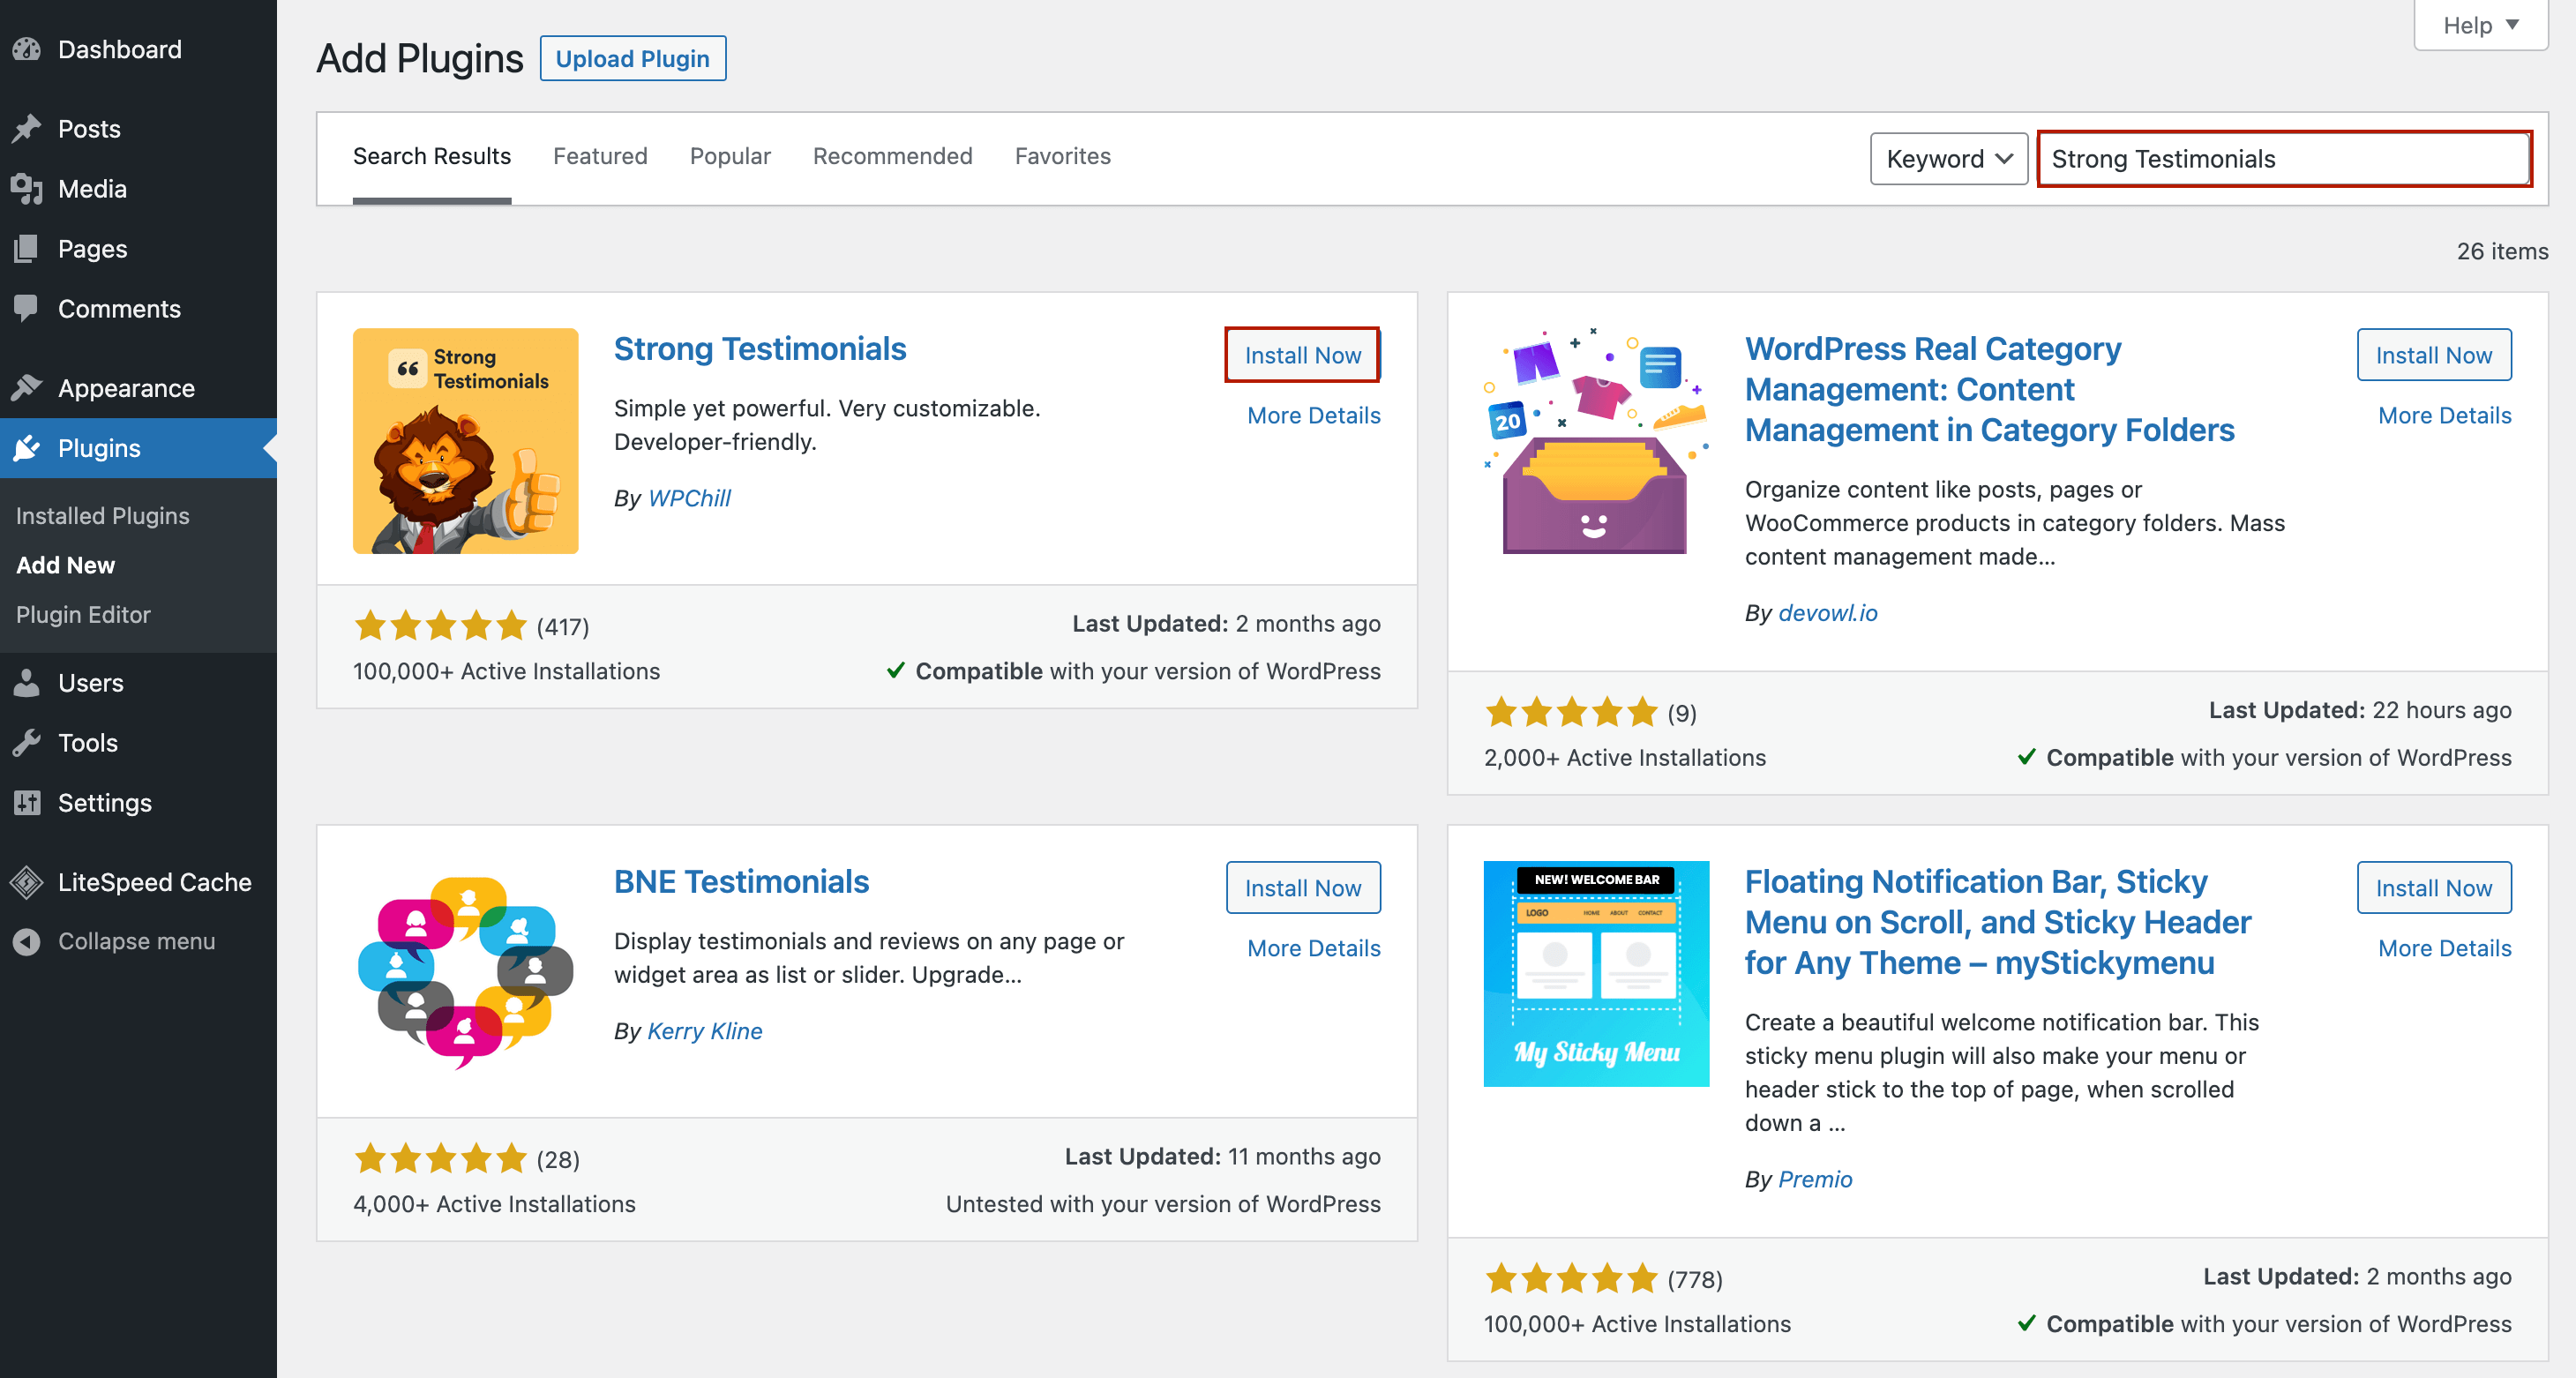
You’ll be redirected to a page with all free plugins. In the search bar on the upper right corner, type Strong Testimonials. Once you see it, click Install Now.
Wait a couple of seconds and then click Activate.
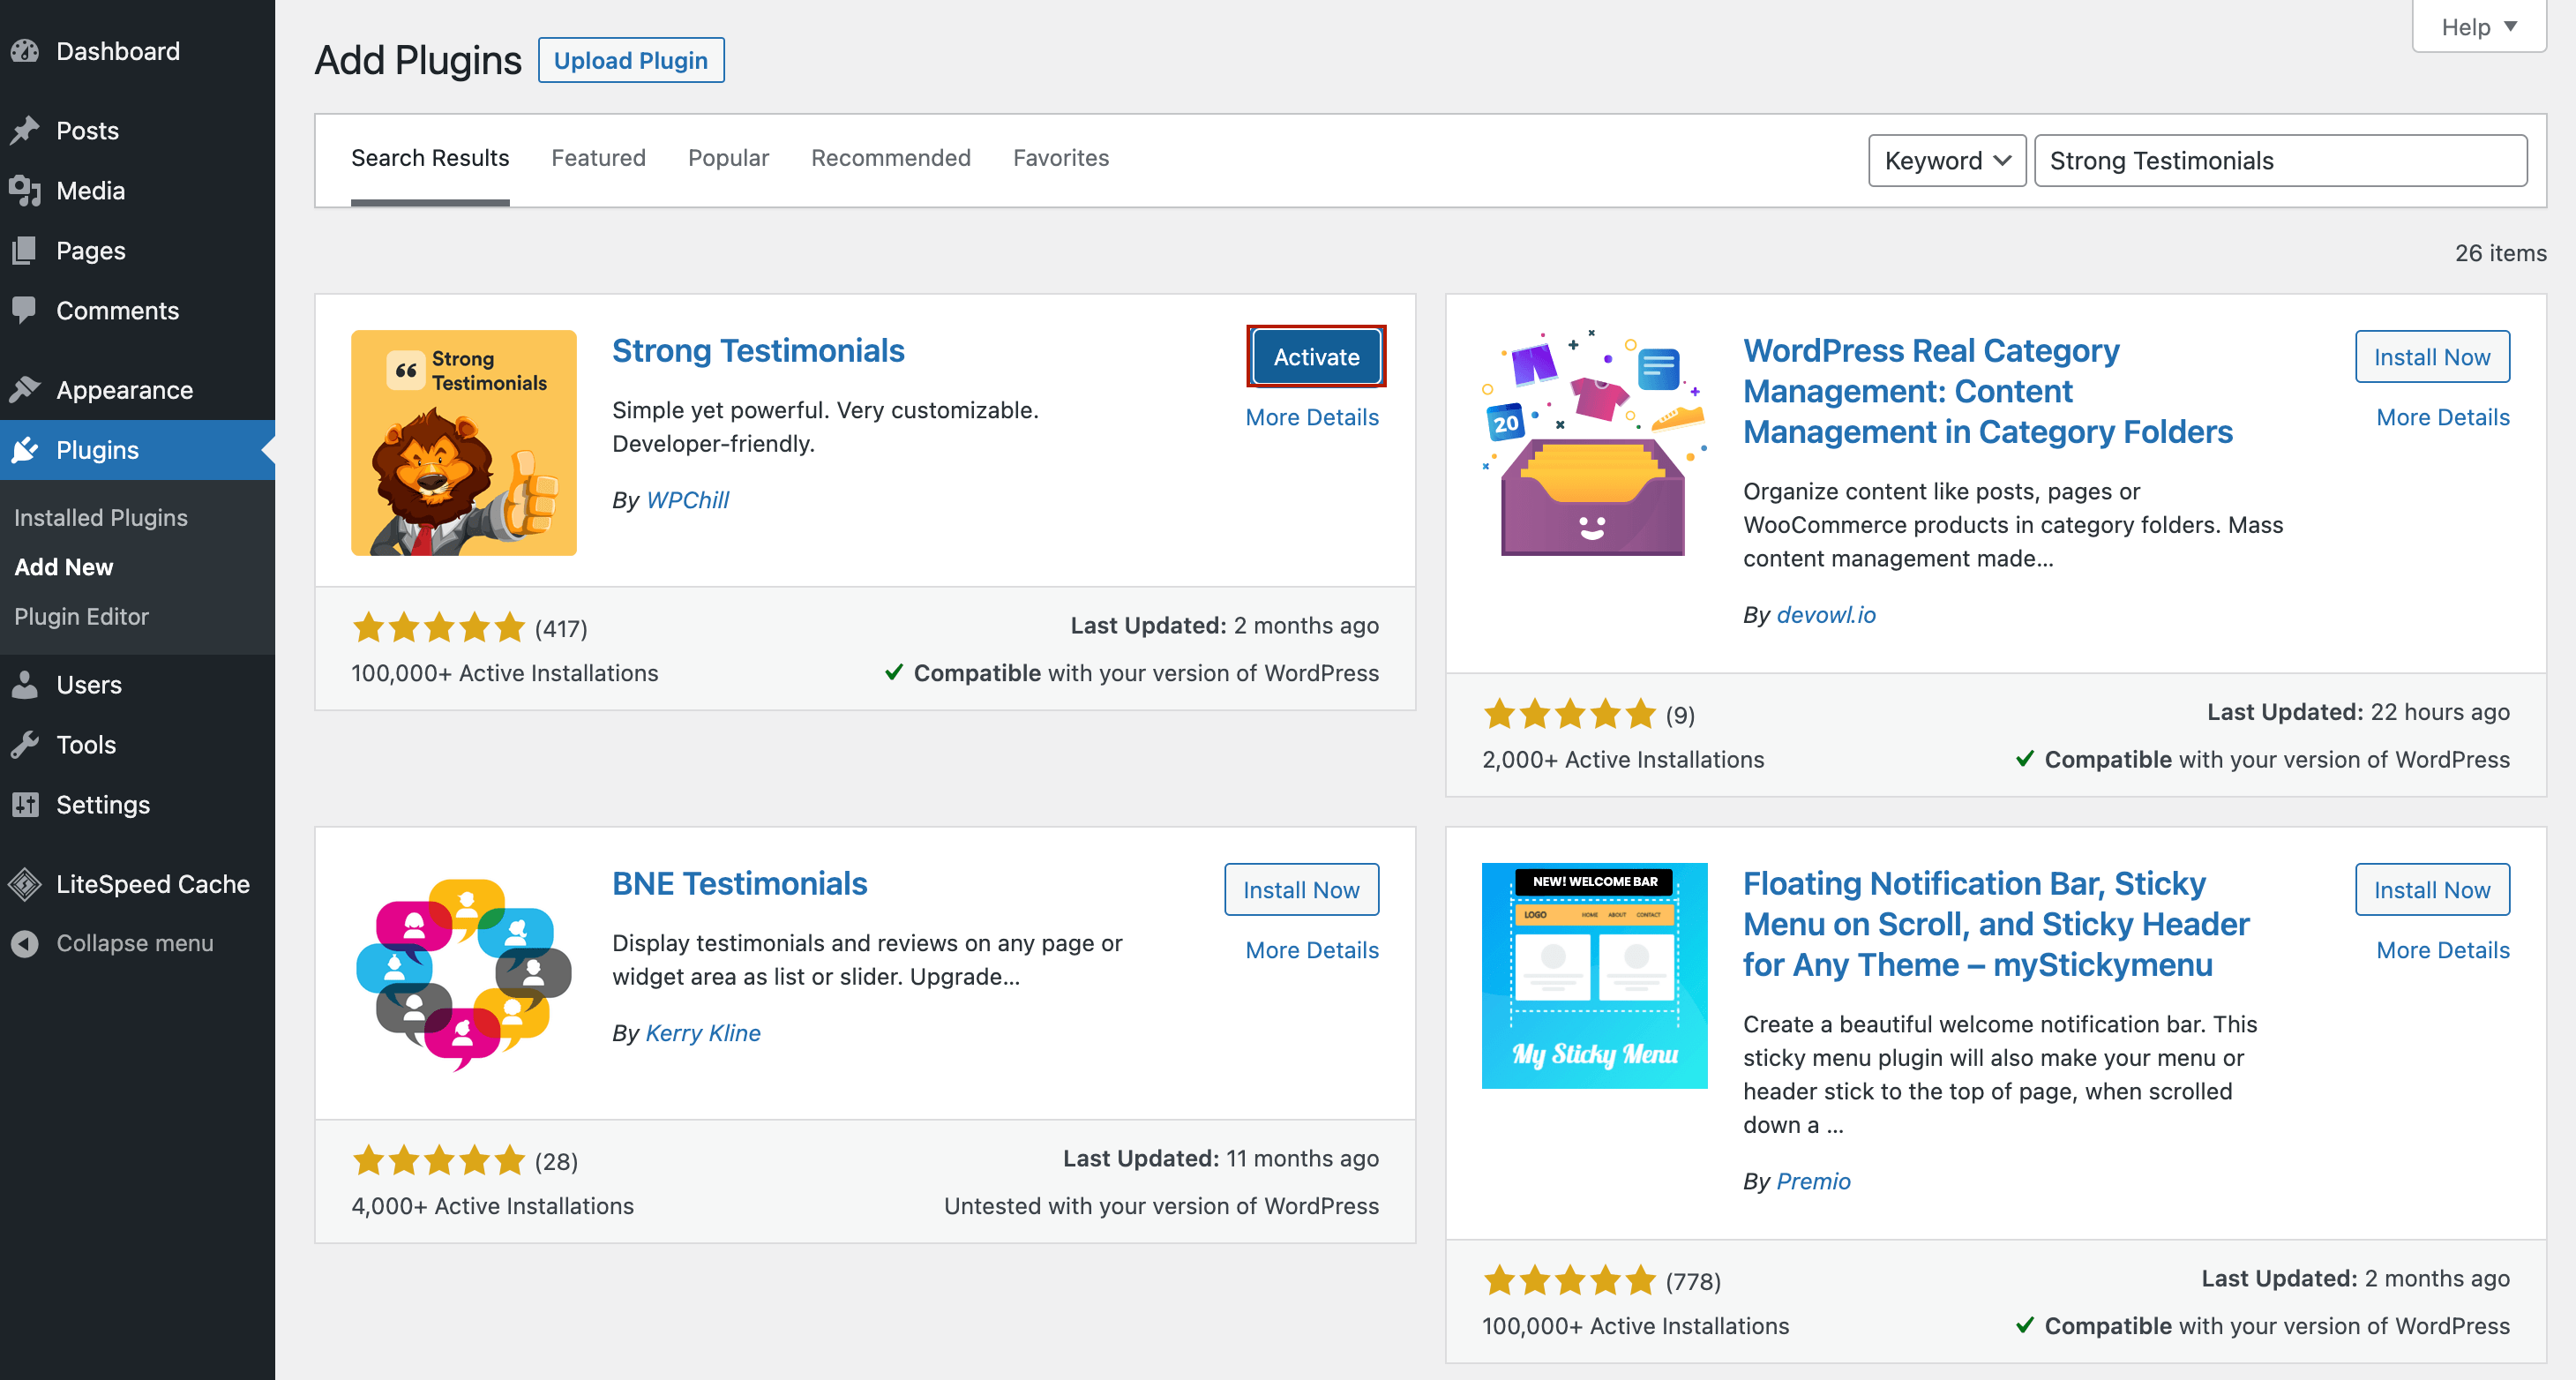
From now on, you can find the Strong Testimonials plugin in your WordPress menu.

2. From WordPress.org
Go to WordPress.org > Plugins and type Strong Testimonials in the search bar.
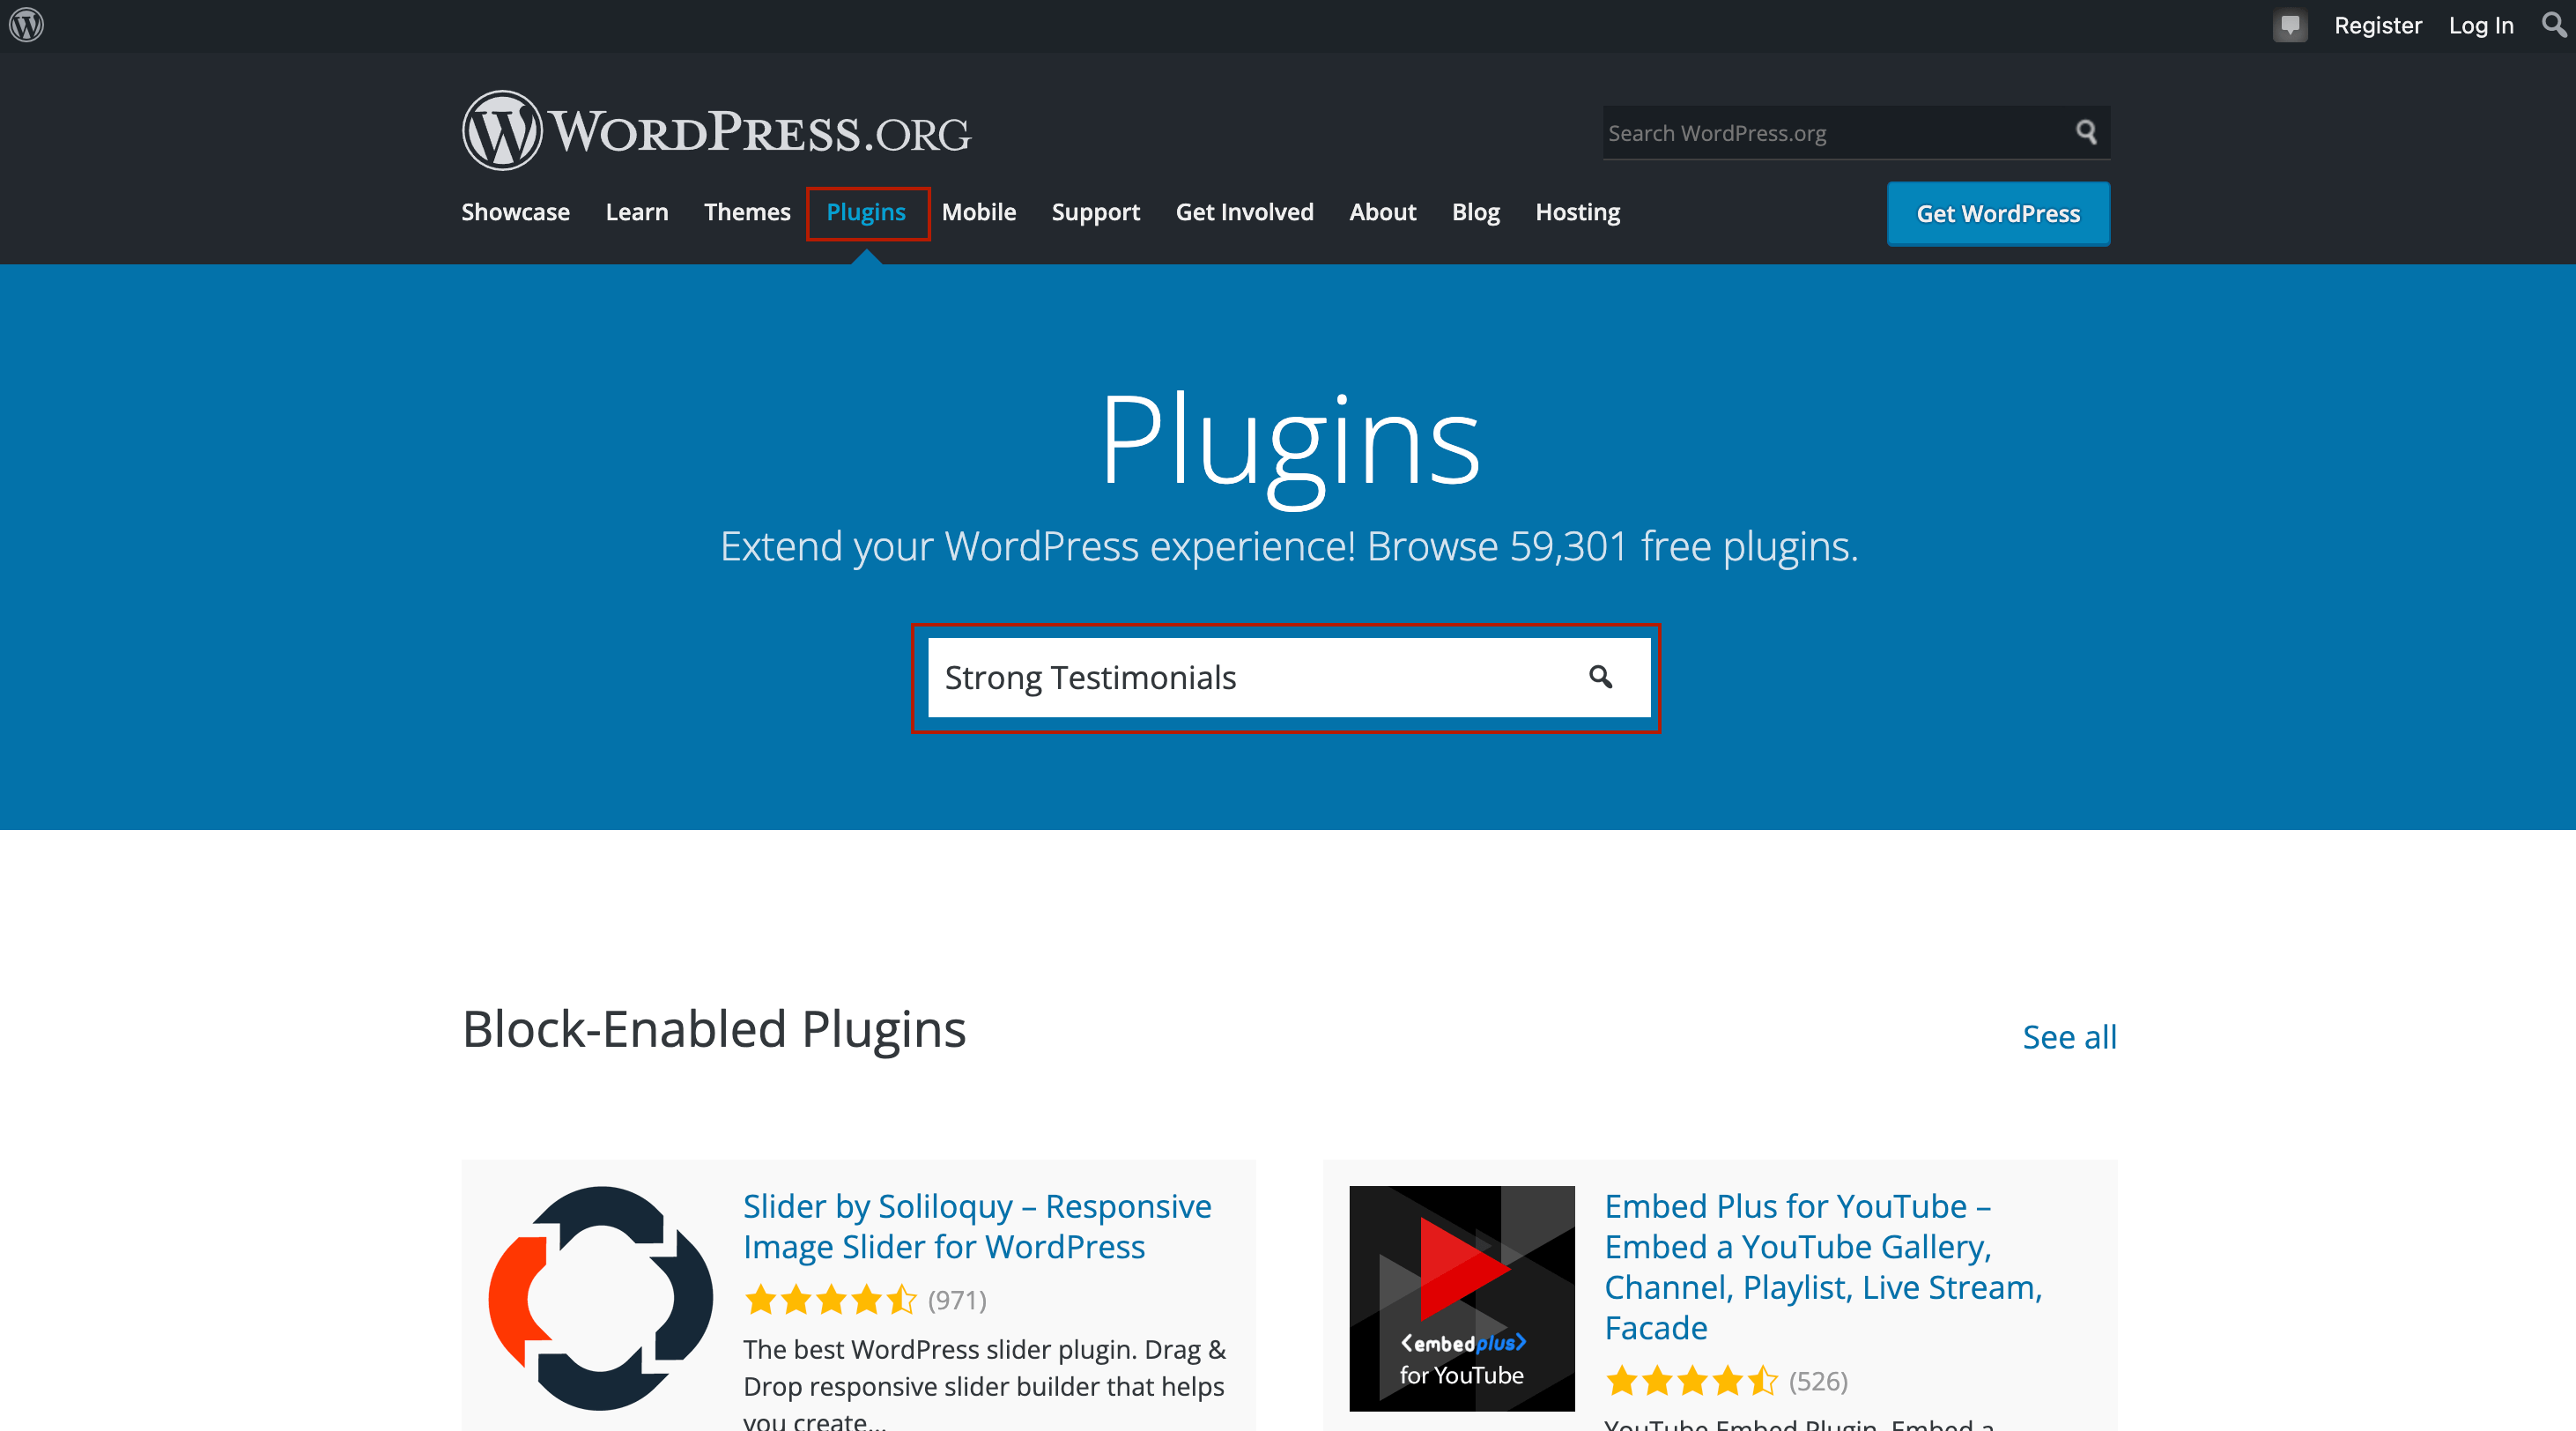
When you find it, click on it. On this page, you will find information about Strong Testimonials and its features, as well as a download button – click on it.

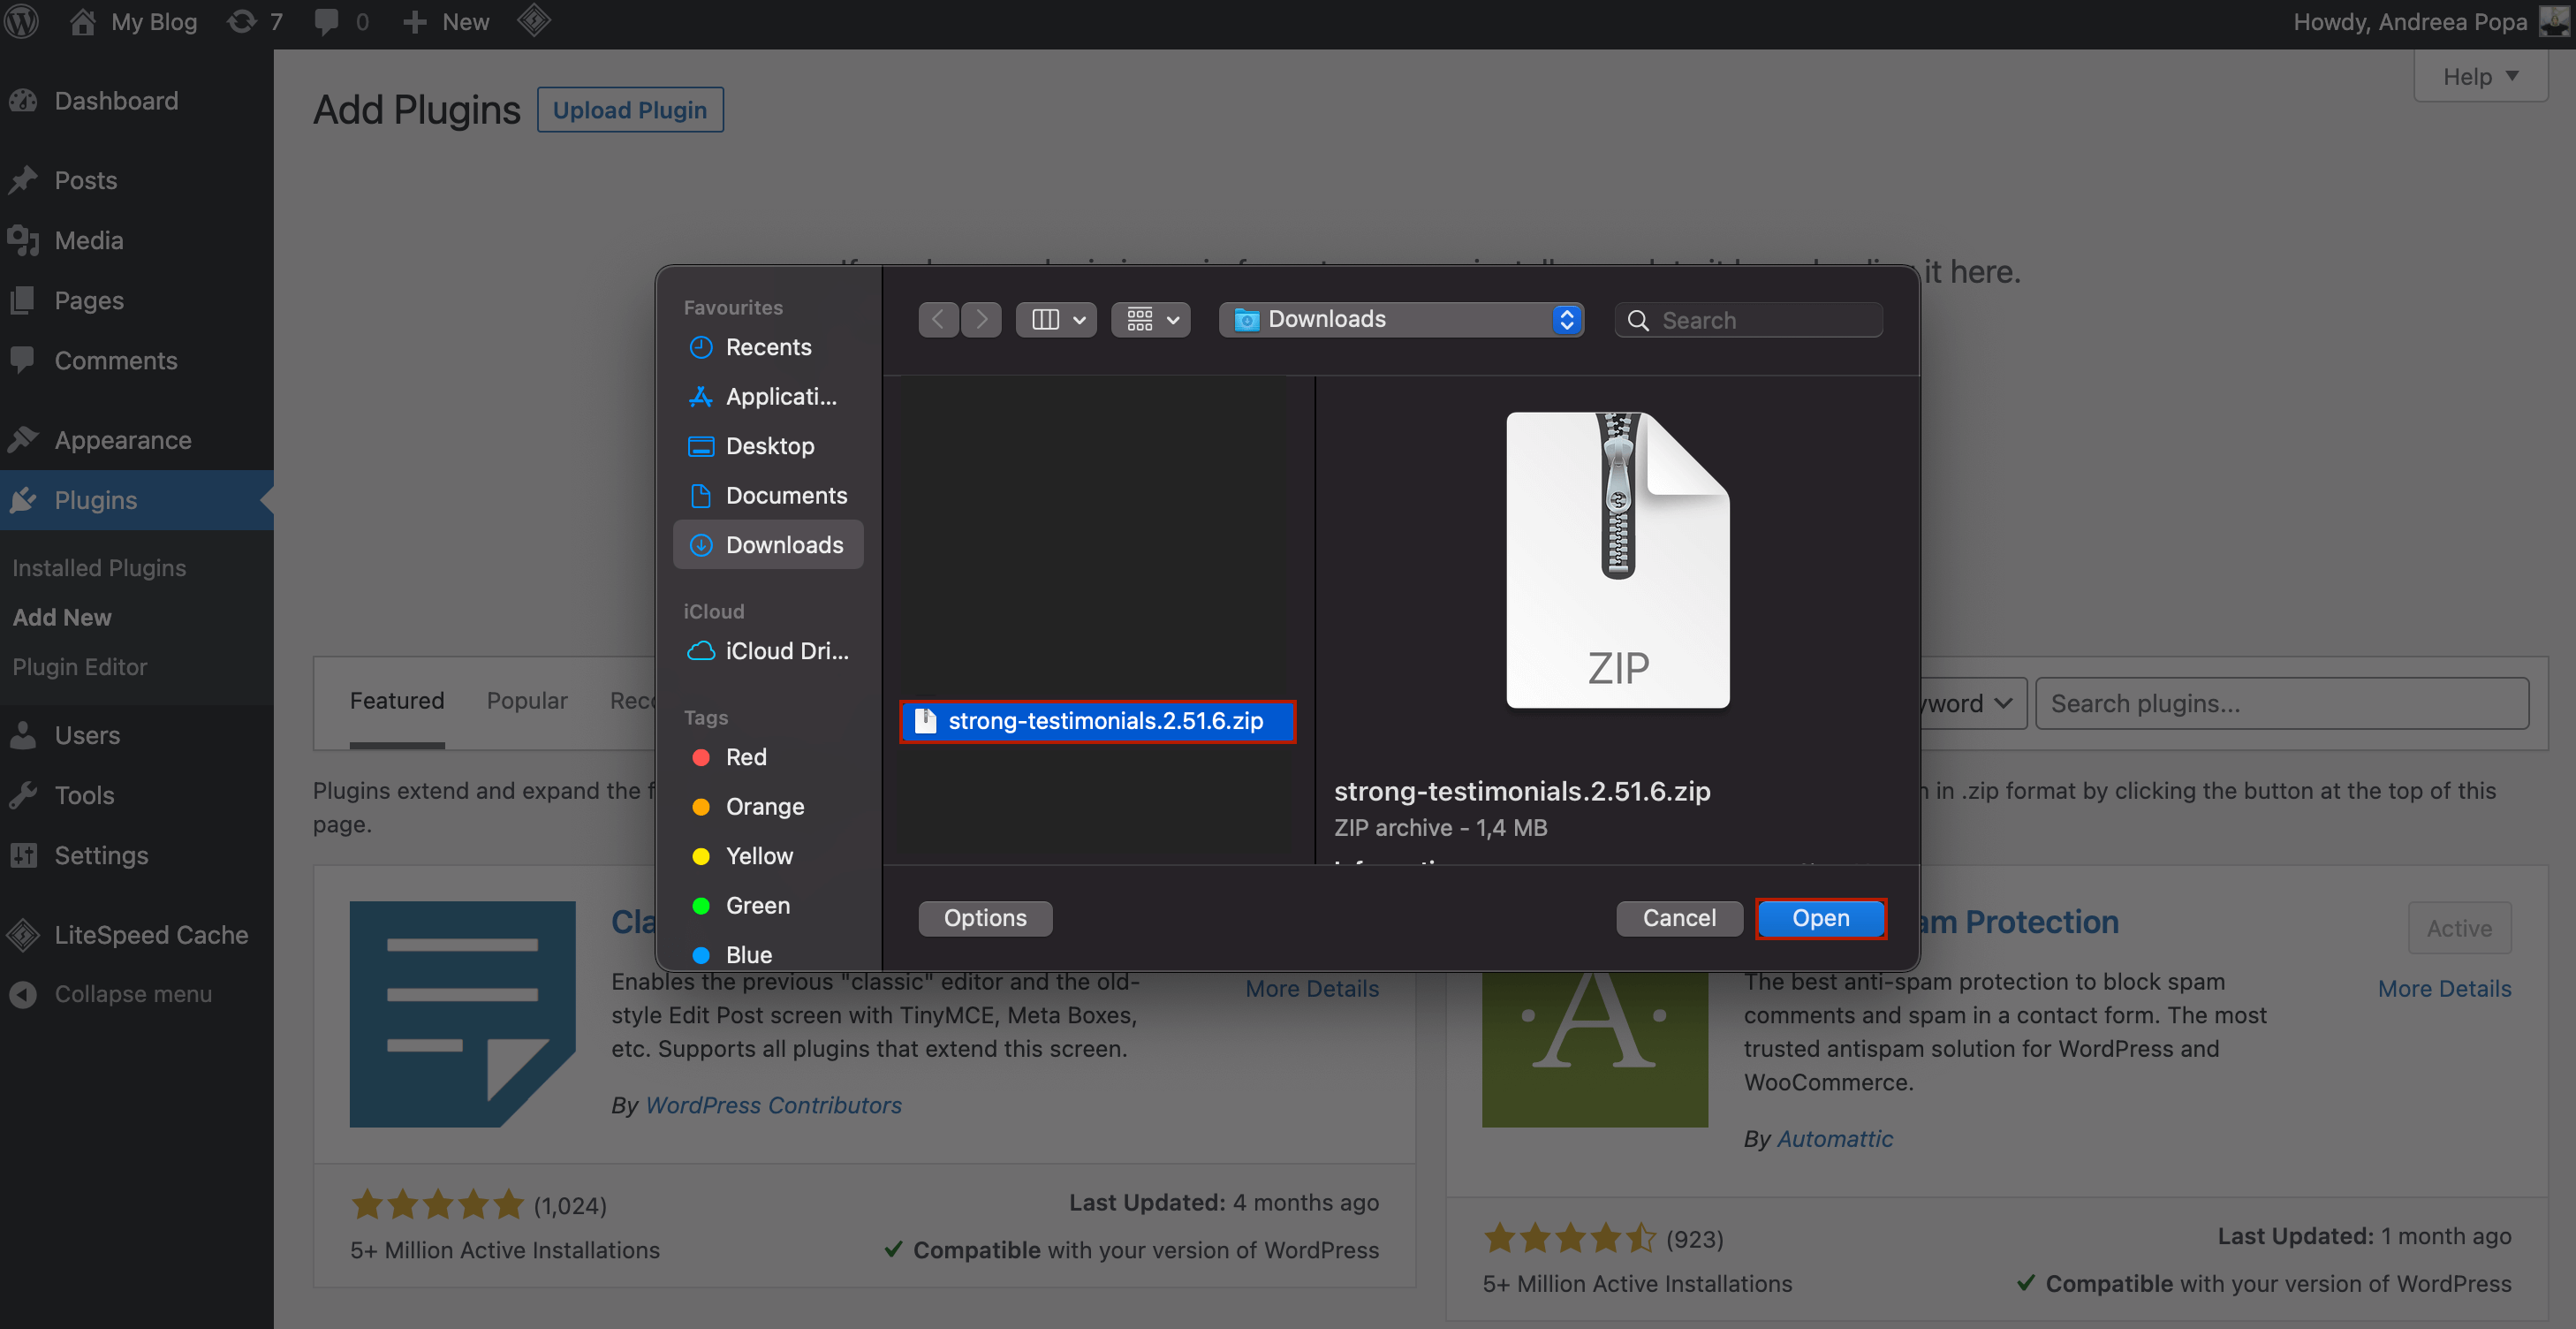
A zip file will download to your computer. Next, go to your WordPress dashboard > Plugins > Add New. In the upper left corner, you can also see an Upload Plugin button. If you click on it, you’ll be asked to add a file.
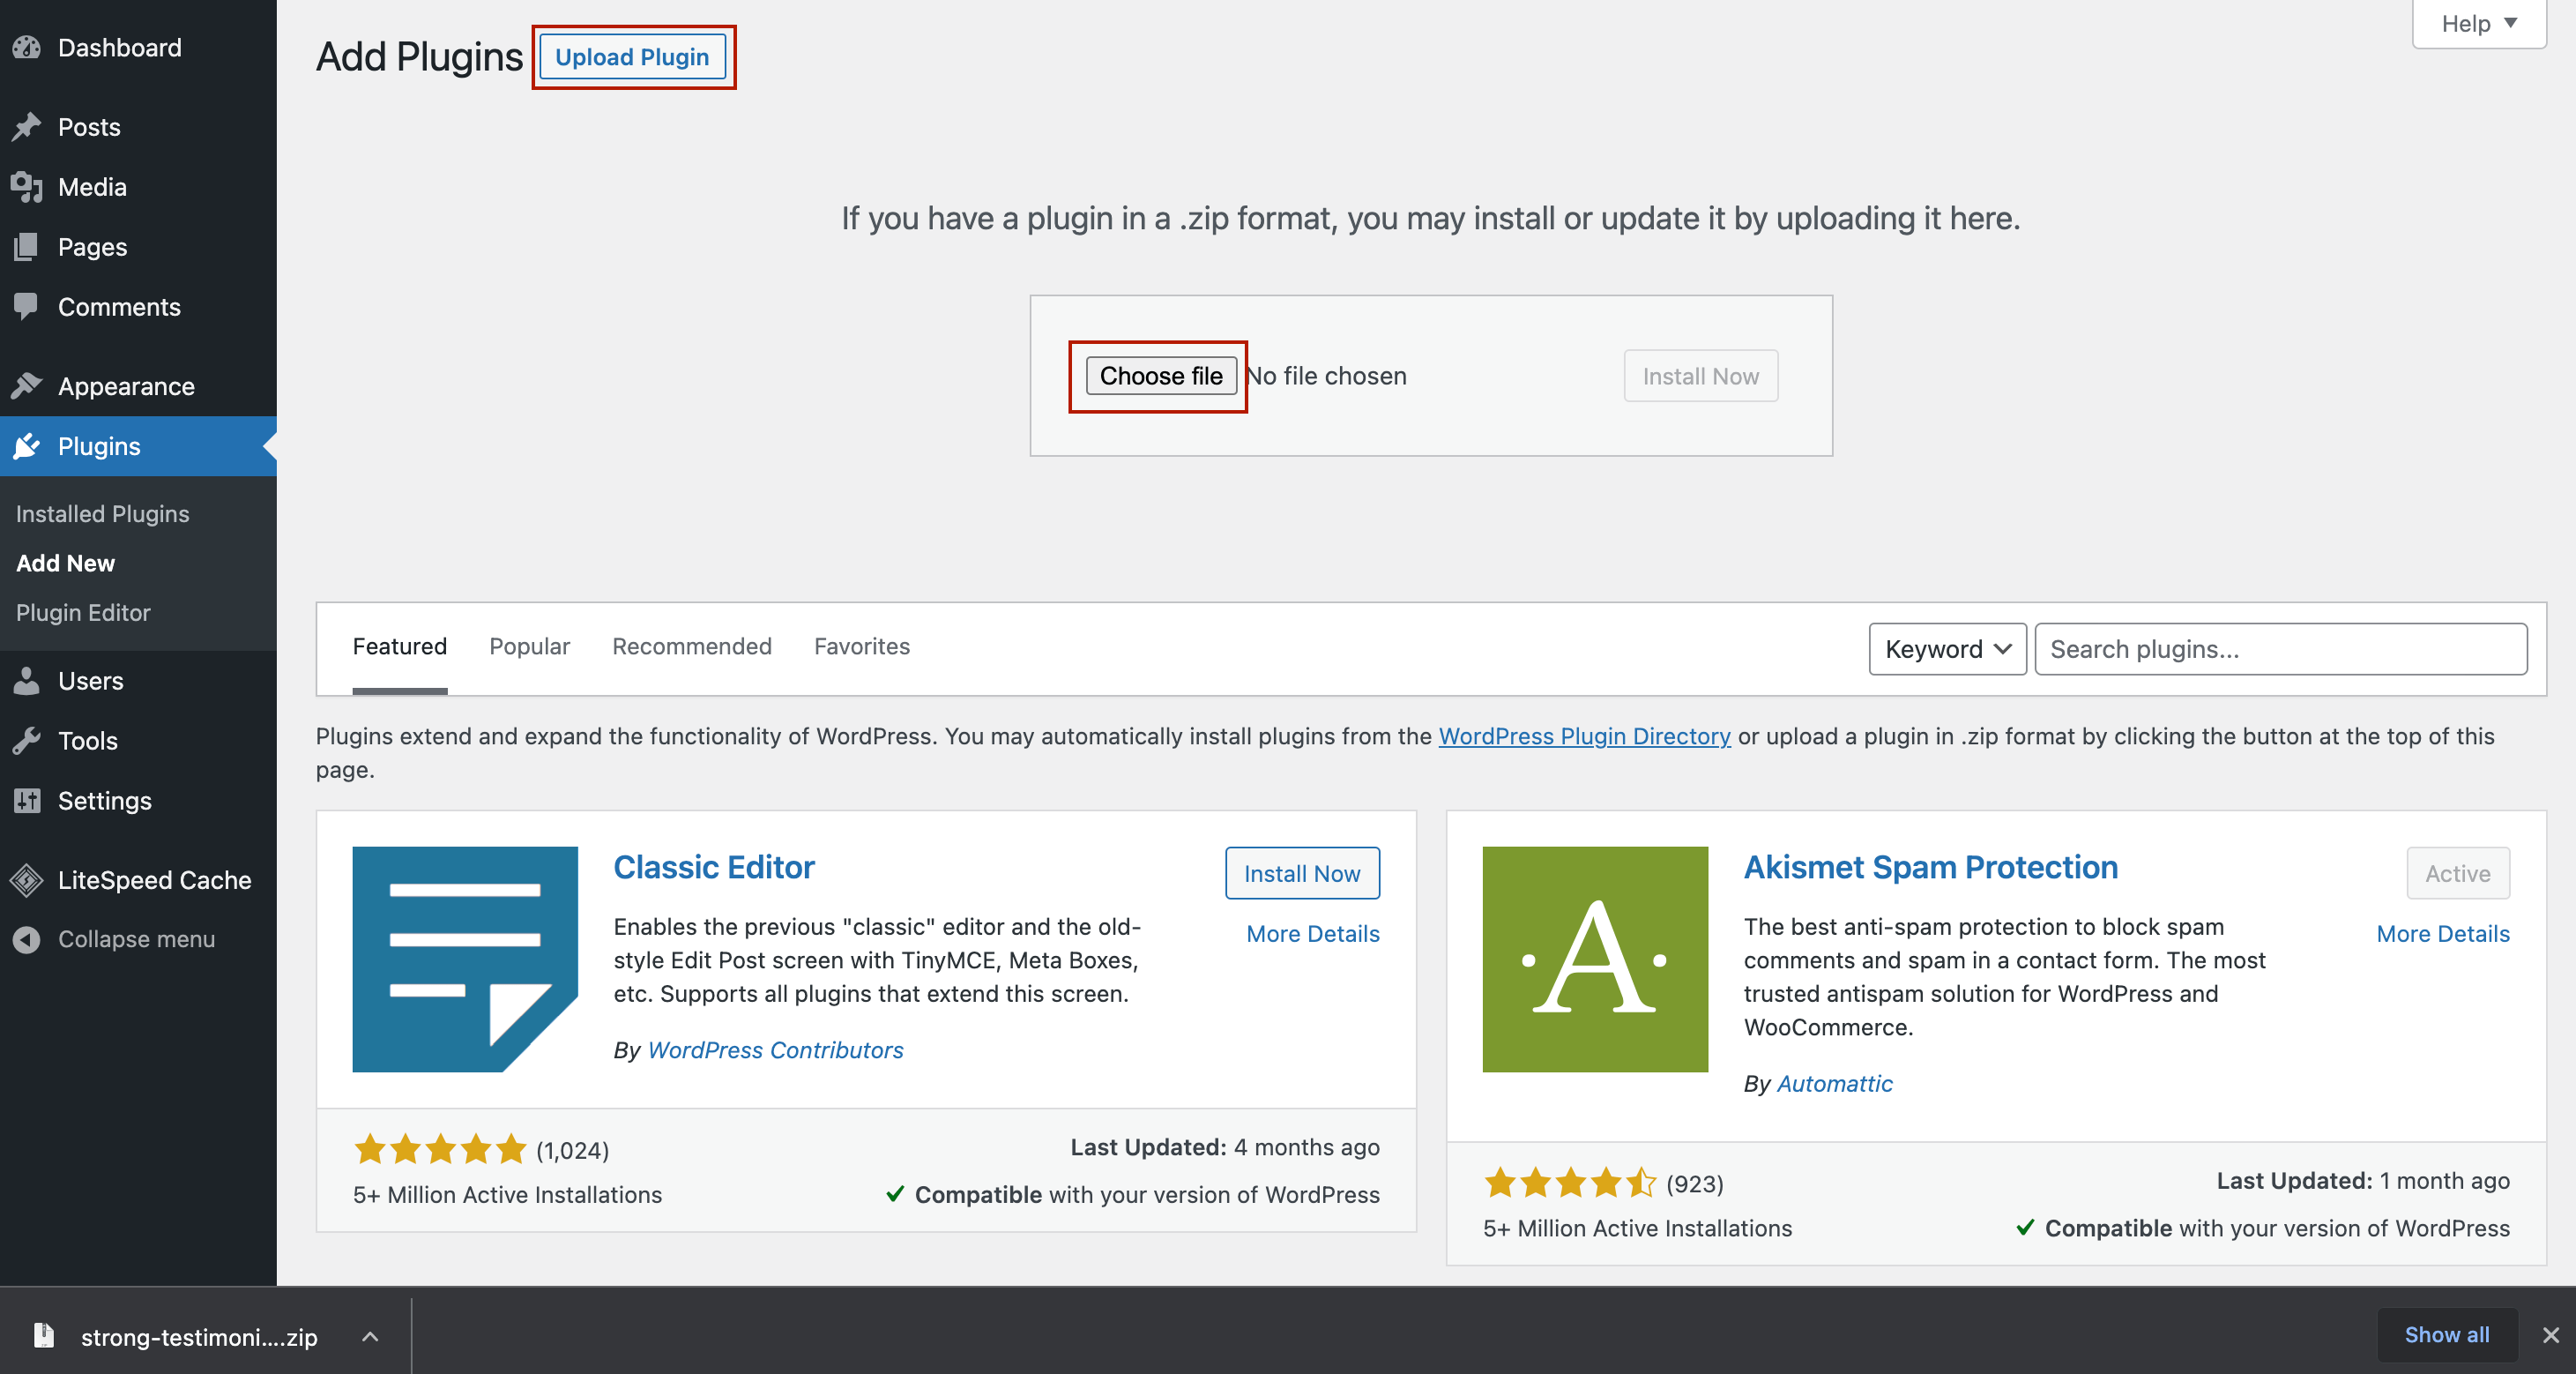
After you click on Choose file, look for the zip file and upload it here.
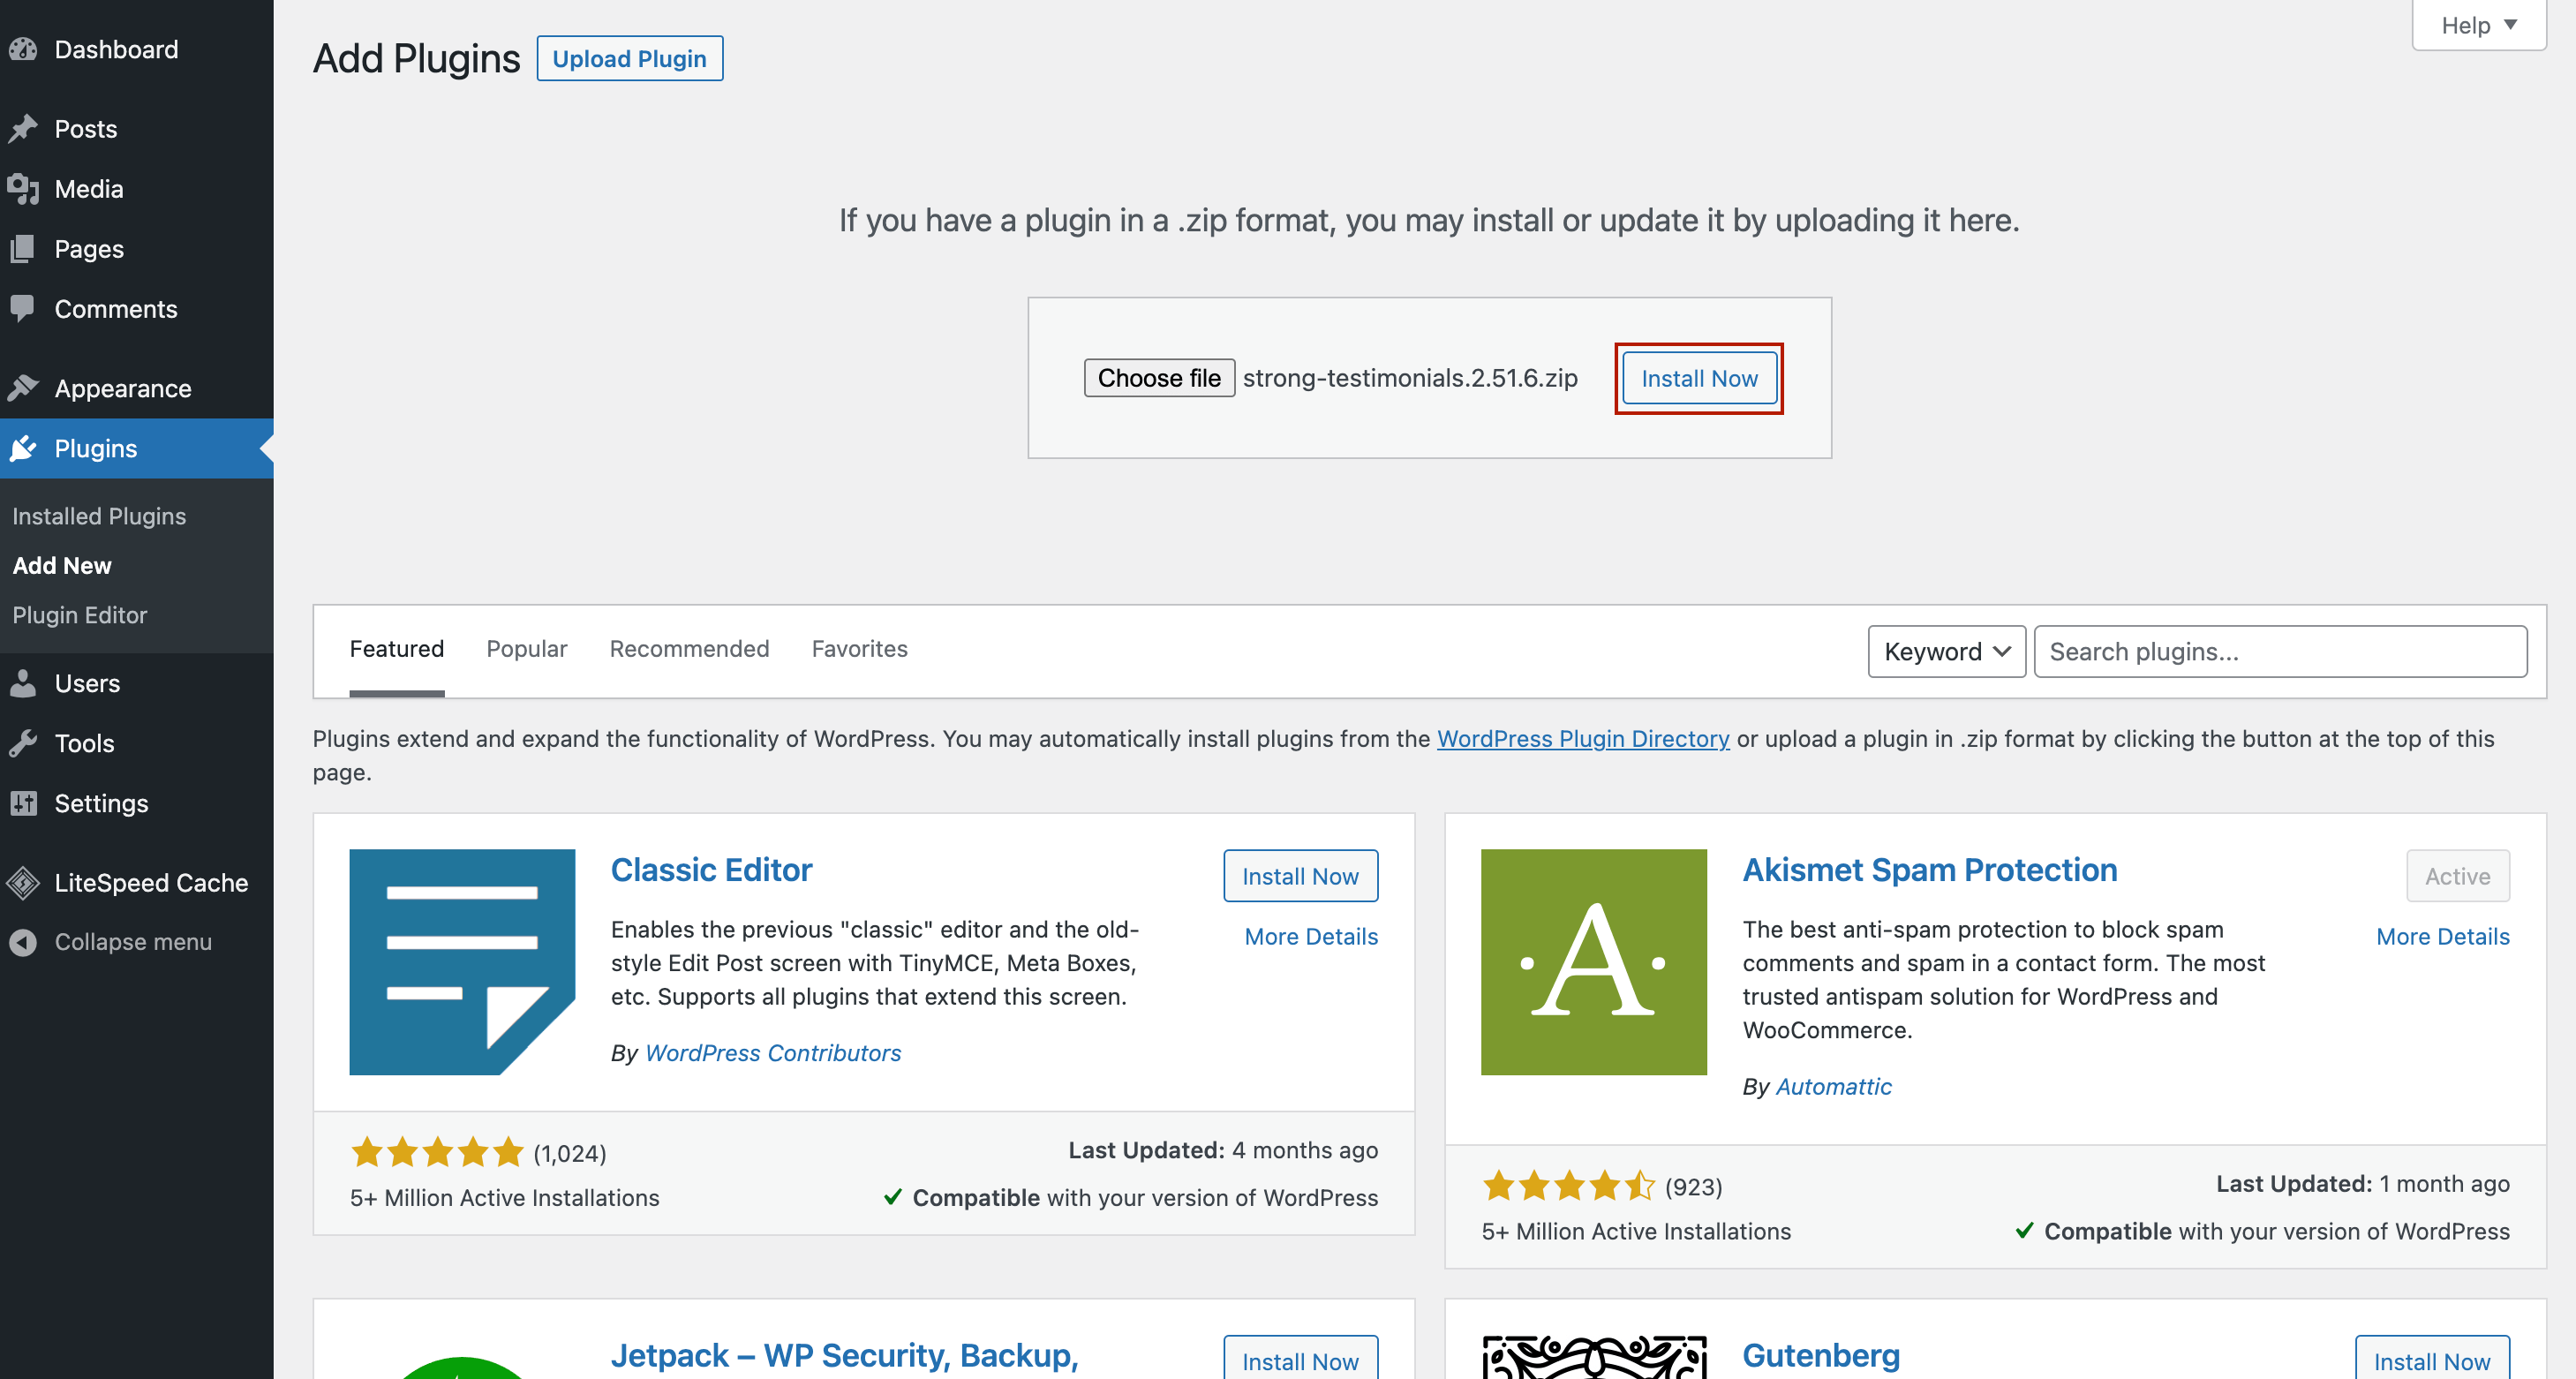
Click Install Now, wait a couple of seconds, and then click Activate.
So, this is how you can install and activate Strong Testimonials. If you bought the premium version of Strong Testimonials to benefit from more powerful features, you’d need to:
- Install and activate the free version as I showed you in this tutorial;
- Activate Strong Testimonials Pro.
