
Let’s say you are a new business and are eager to receive and showcase your testimonials. But what is the first step when people submit their testimonials through your testimonial request form? Find out about Strong Testimonials and how to approve pending testimonials in a few easy steps!
Table of contents
Any team that develops marketing or brand material relies heavily on the review and approval process. But why exactly there are so many businesses that fail to increase their profits?
Here are just some of the few common mistakes we’ve seen:
1.❌ Businesses’ websites are full of spam – If you don’t have a barrier that manages your incoming testimonials, you will wake up one day with people spamming on your website. This will decrease the website’s quality as well as the loading speed and you will lose customers.
2.❌ It allows grammatical errors to slip by – If you don’t work on a testimonial approval system, nobody will check the testimonials that go live on your website. You may find errors such as grammar and even profanity. New customers won’t like to see that.
3.❌ Businesses have a lot of testimonials that need input – In case you have a lot of testimonials that are ok, it might also be tiring to manually go through every single one of them. Some businesses don’t make use of any auto-approve tools.
How to get live testimonials
Getting positive reviews shouldn’t be a tricky thing. As long as the products/ services you provide are high quality, you will automatically get feedback from your customers.
But what if your business is still new and doesn’t have a brand image yet? Luckily, there are a few strategies you can implement to get great testimonials from your satisfied clients. Let’s take a look at them:
- Testimonial request form — You will simplify the customers’ work and even your own by placing a request form on your website. If you want to consider this method, I suggest following this tutorial on creating a testimonial request form.
- Just ask for them — If you ever want to get something, ask for it. Find the most remarkable clients from your customer list, then contact them and request a video testimonial or an extensive written one.
- Interview your clients — Interviews are video materials that serve the same purpose as testimonials but with greater control over the result. Users will also be far more likely to participate in interviews than create video testimonials independently.
- Check out the service’s/ product’s reviews — In most cases, when clients are satisfied with what they bought from you, they will leave a comment on your product’s page. All you have to do is make sure you are displaying only the best ones.
- Offer a free product in exchange for a testimonial — Brands nowadays know that influencers have a massive impact on their audience so, they are willing to send free products/ services in return for a testimonial or promotion.
How to approve pending testimonials
Strong Testimonials shows you how to approve pending testimonials in a few short and easy steps!
We will briefly show you how to set up your testimonials and approve pending ones. If you wish to learn more, you can check our documentation on how to get started with Strong Testimonials.

Strong Testimonials Plugin
We’ve built the #1 WordPress plugin for collecting, managing, and displaying testimonials. Drive more sales by leveraging your existing user audience.
Step 1: Set up role management
Once you have Strong Testimonials installed and activated, head over to Dashboard > Testimonials > Settings > Role Management.
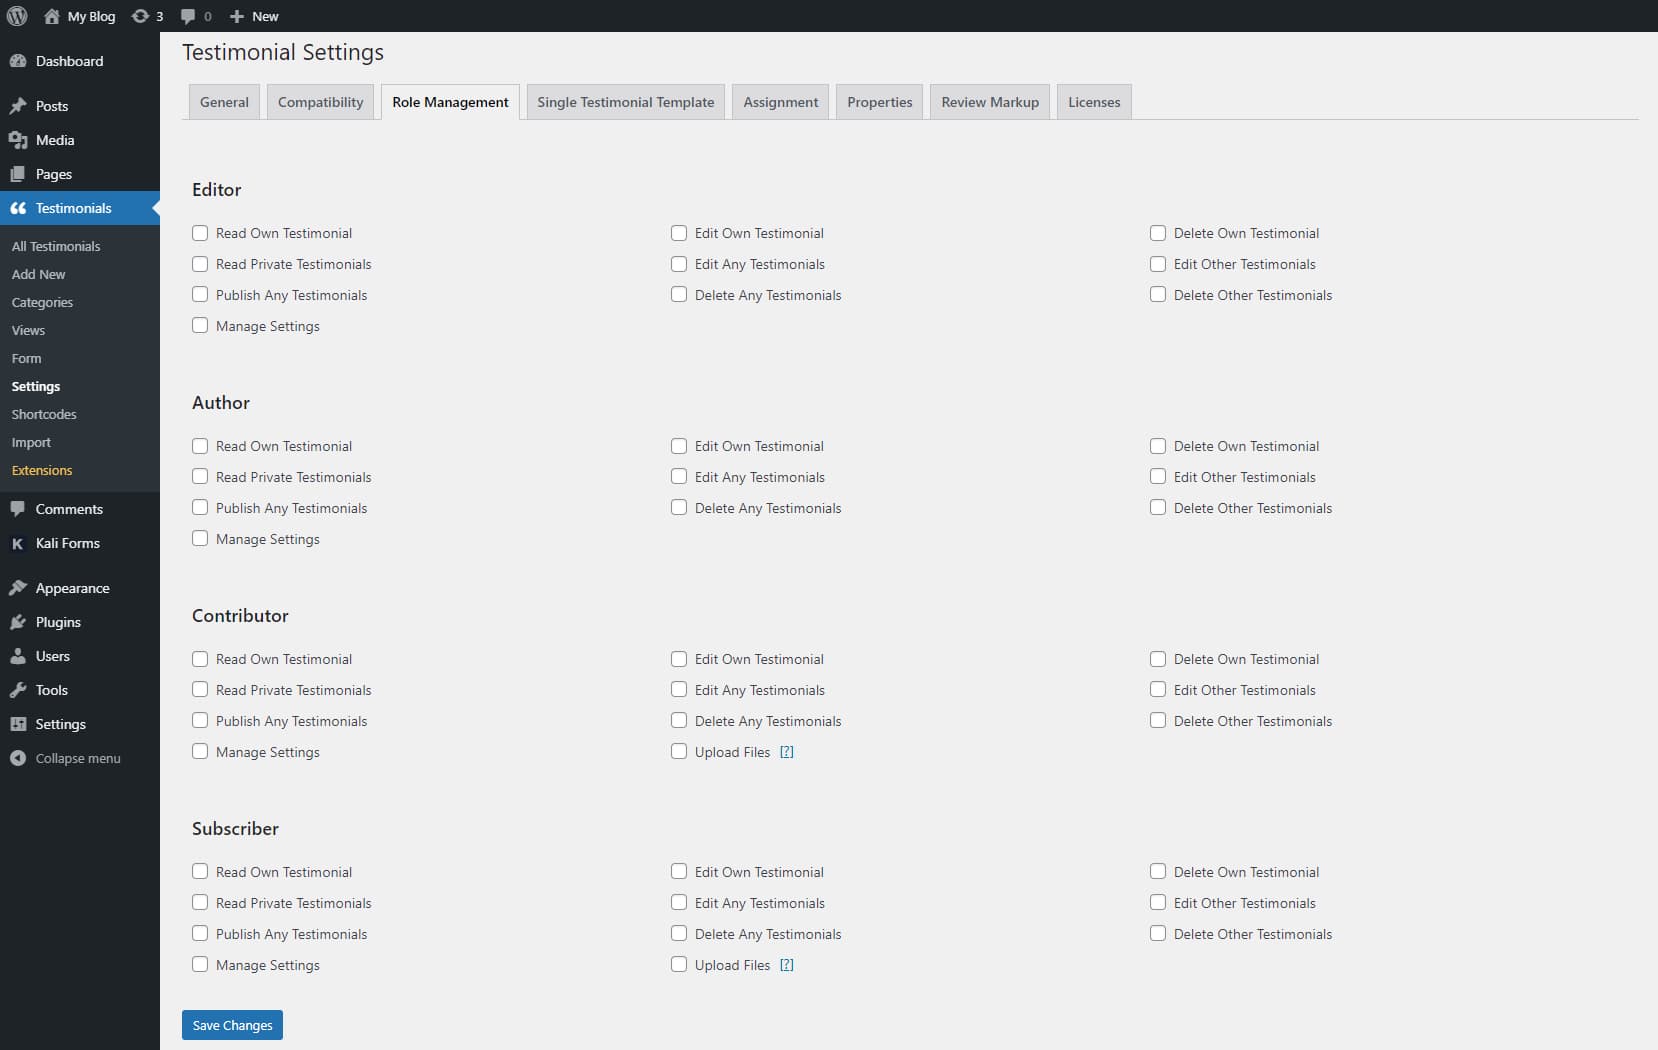
The title is pretty self-explanatory. You can decide who approves testimonials and access the plugins’ settings panel using this extension. This way you’ll have complete control over who has access to your testimonials.
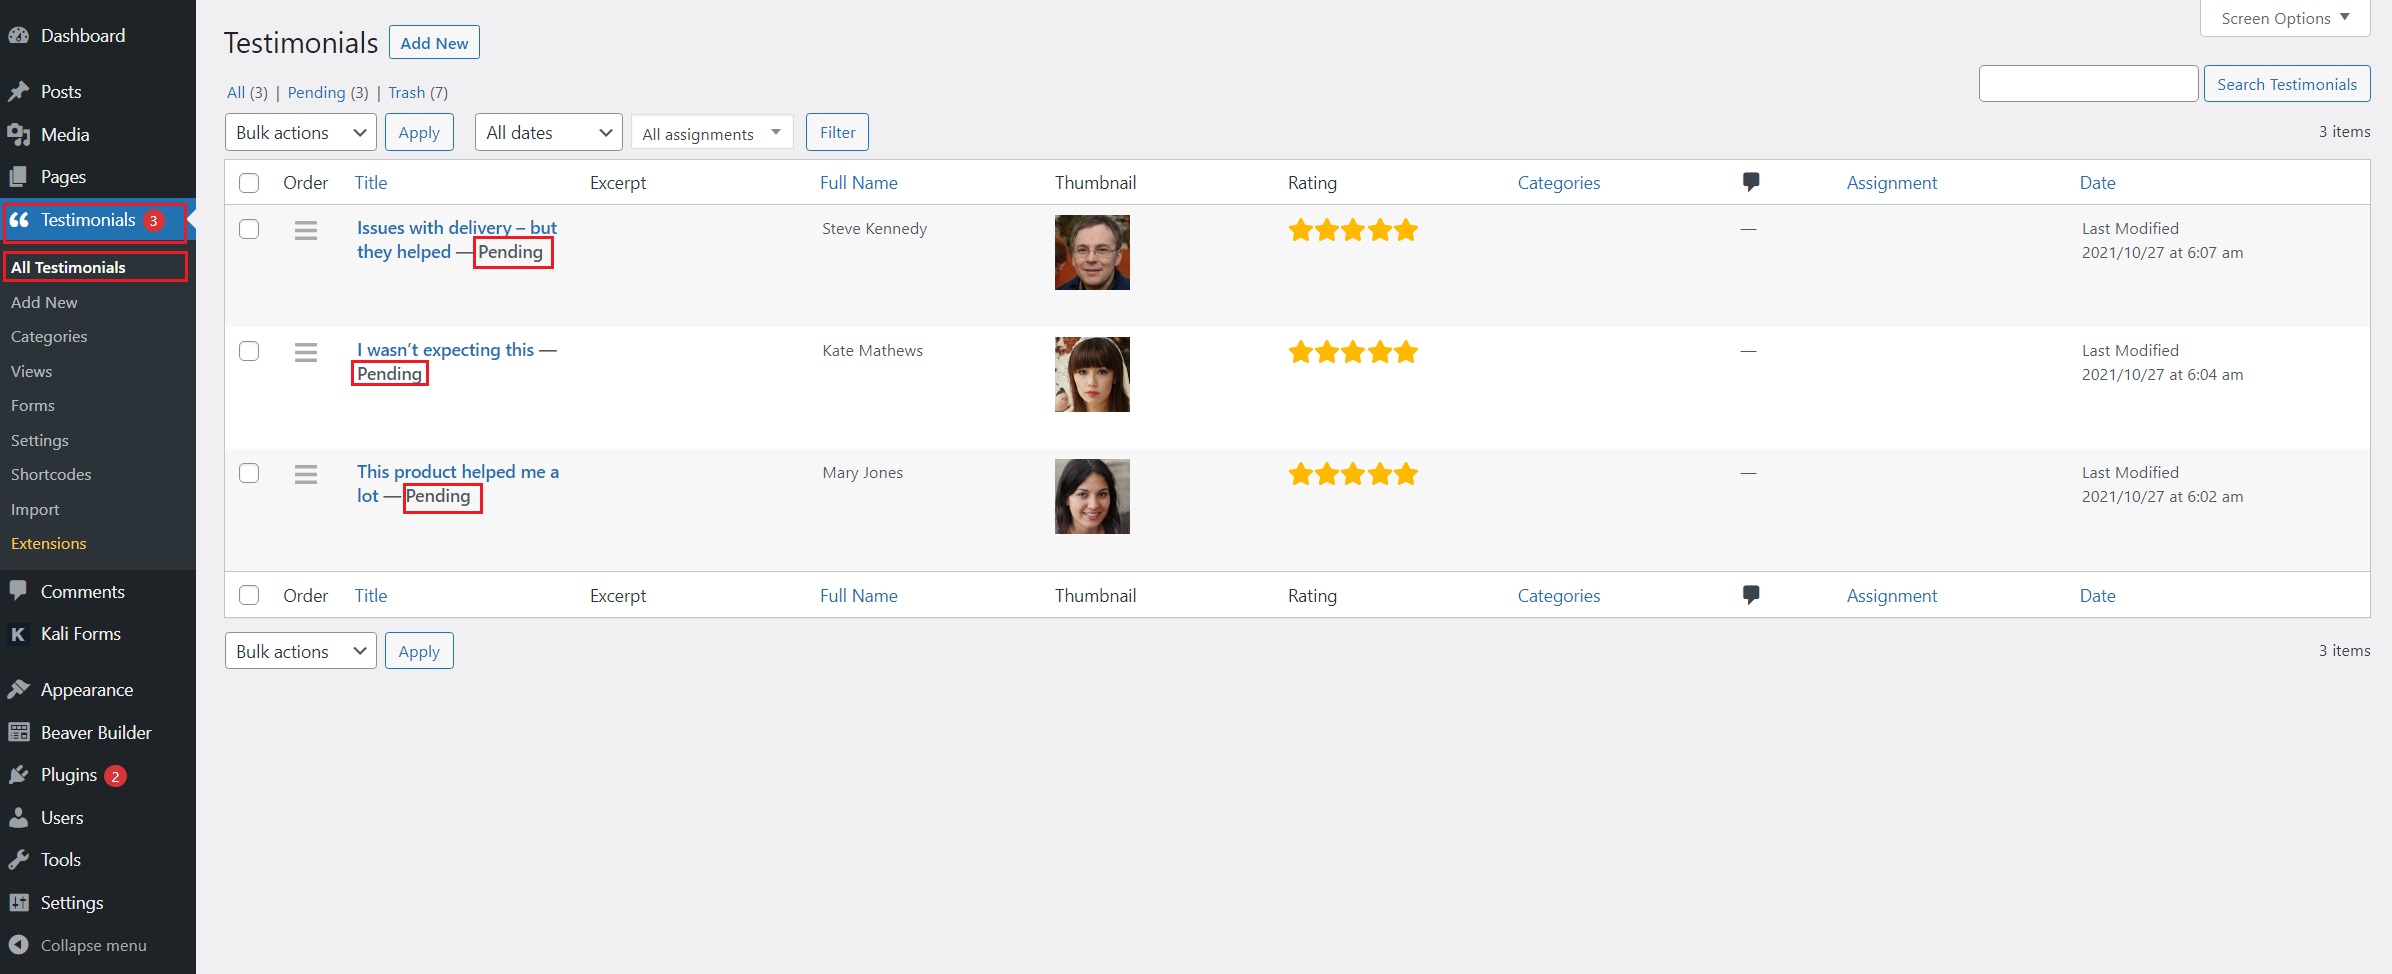
Step 2: How to approve testimonials
If you head over to Testimonials > All testimonials, you will have new ones on your list. How do you know that? In the title column, next to the title of the testimonial you will see the word “Pending” greyed out.
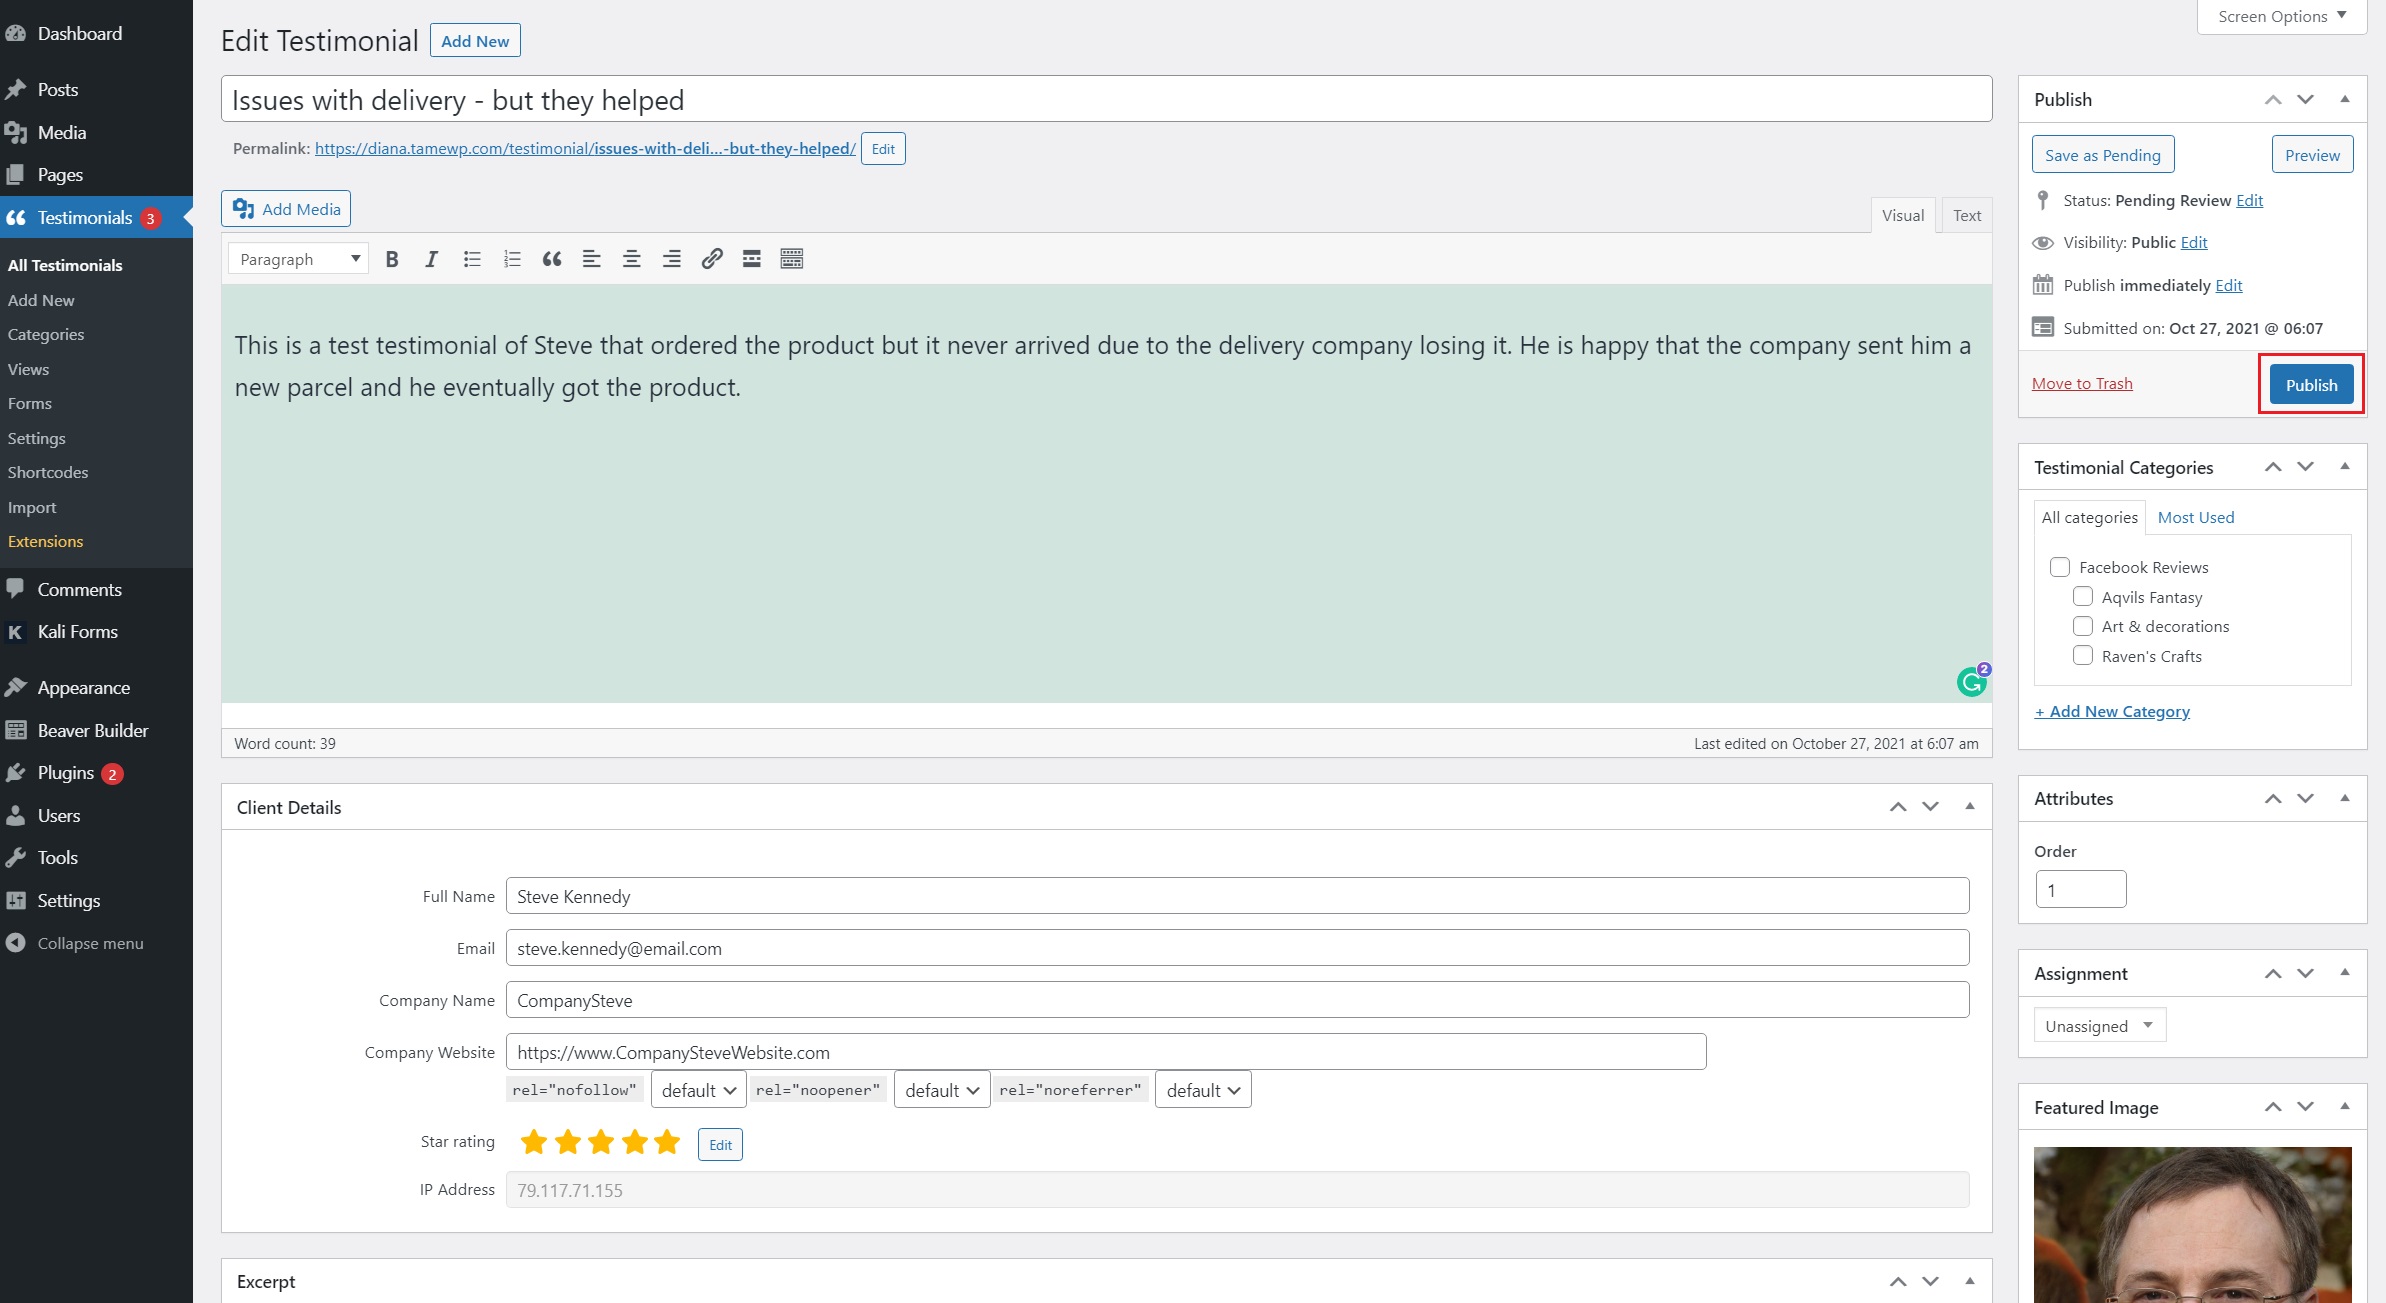
To manually approve them, simply pick one and click it. You will be redirected to the editor where you can check for grammatical errors, remove profanity or see if the information is correct.
Since the customer did most of the work for you, this part is fairly easy. You don’t have to add everything yourself all over again.
After you checked everything, you can simply hit the Publish button.
You can do this with the rest of the testimonials as well.
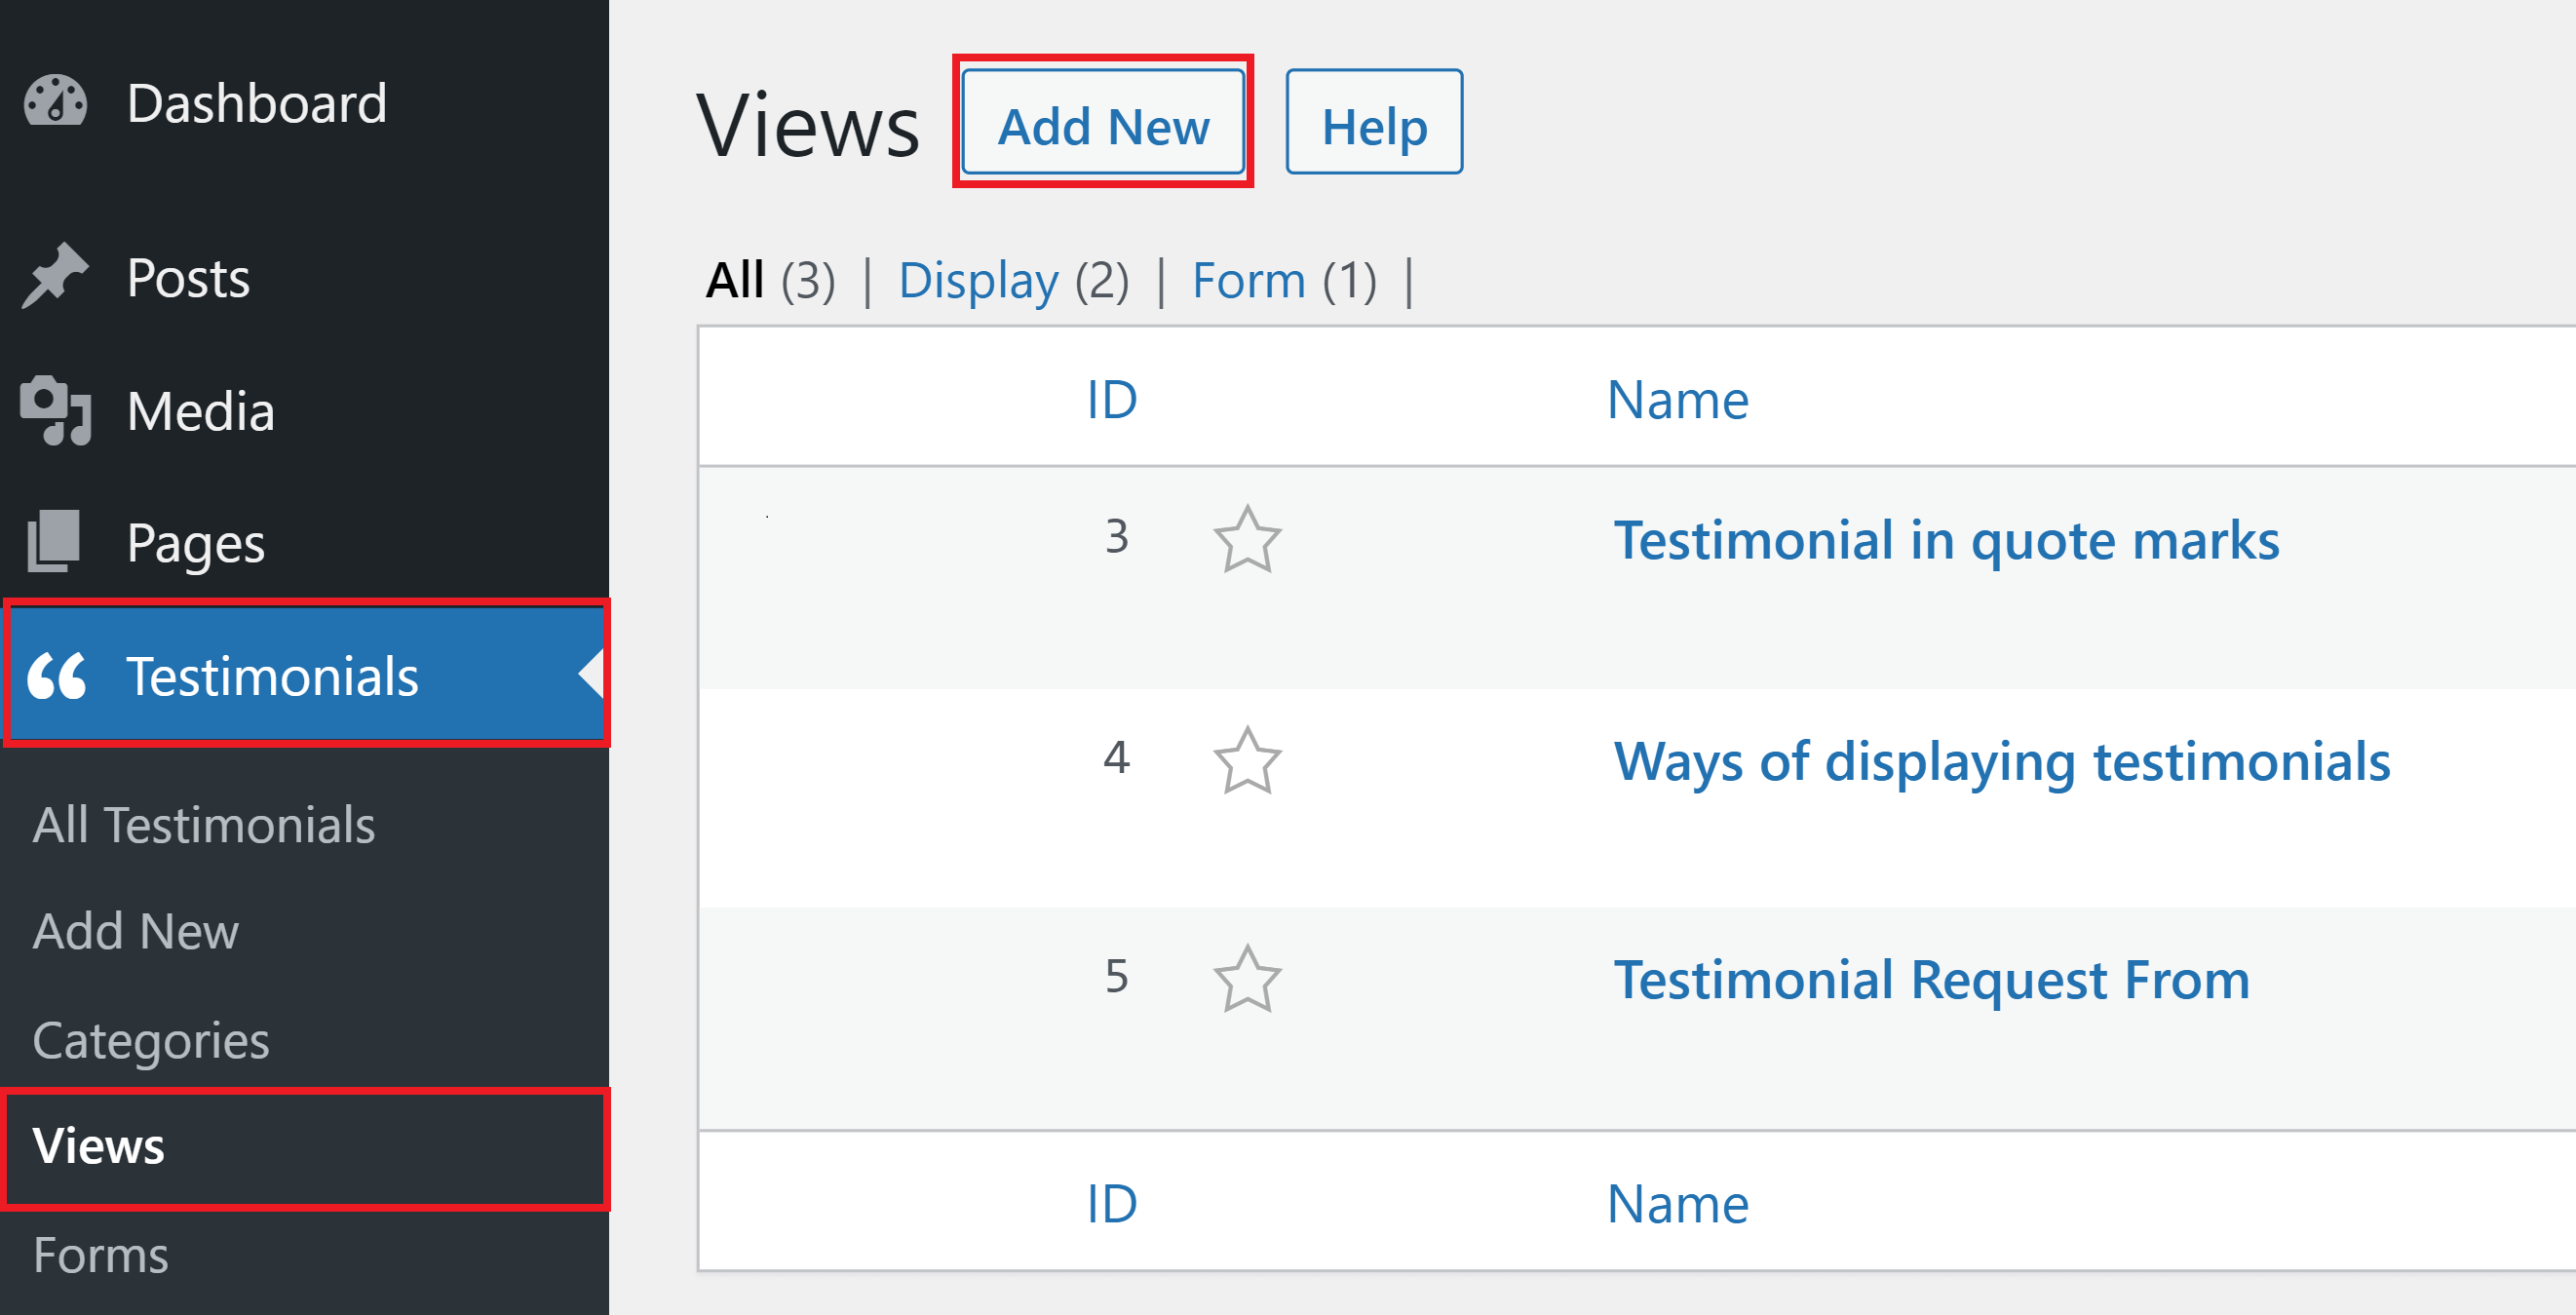
Step 3: Displaying the testimonials
Let’s assume you just upgraded your website and you already have a few testimonials approved but you don’t have a testimonial page. Stick with us and we will show you how easy it is to build one and display your newly approved testimonials.
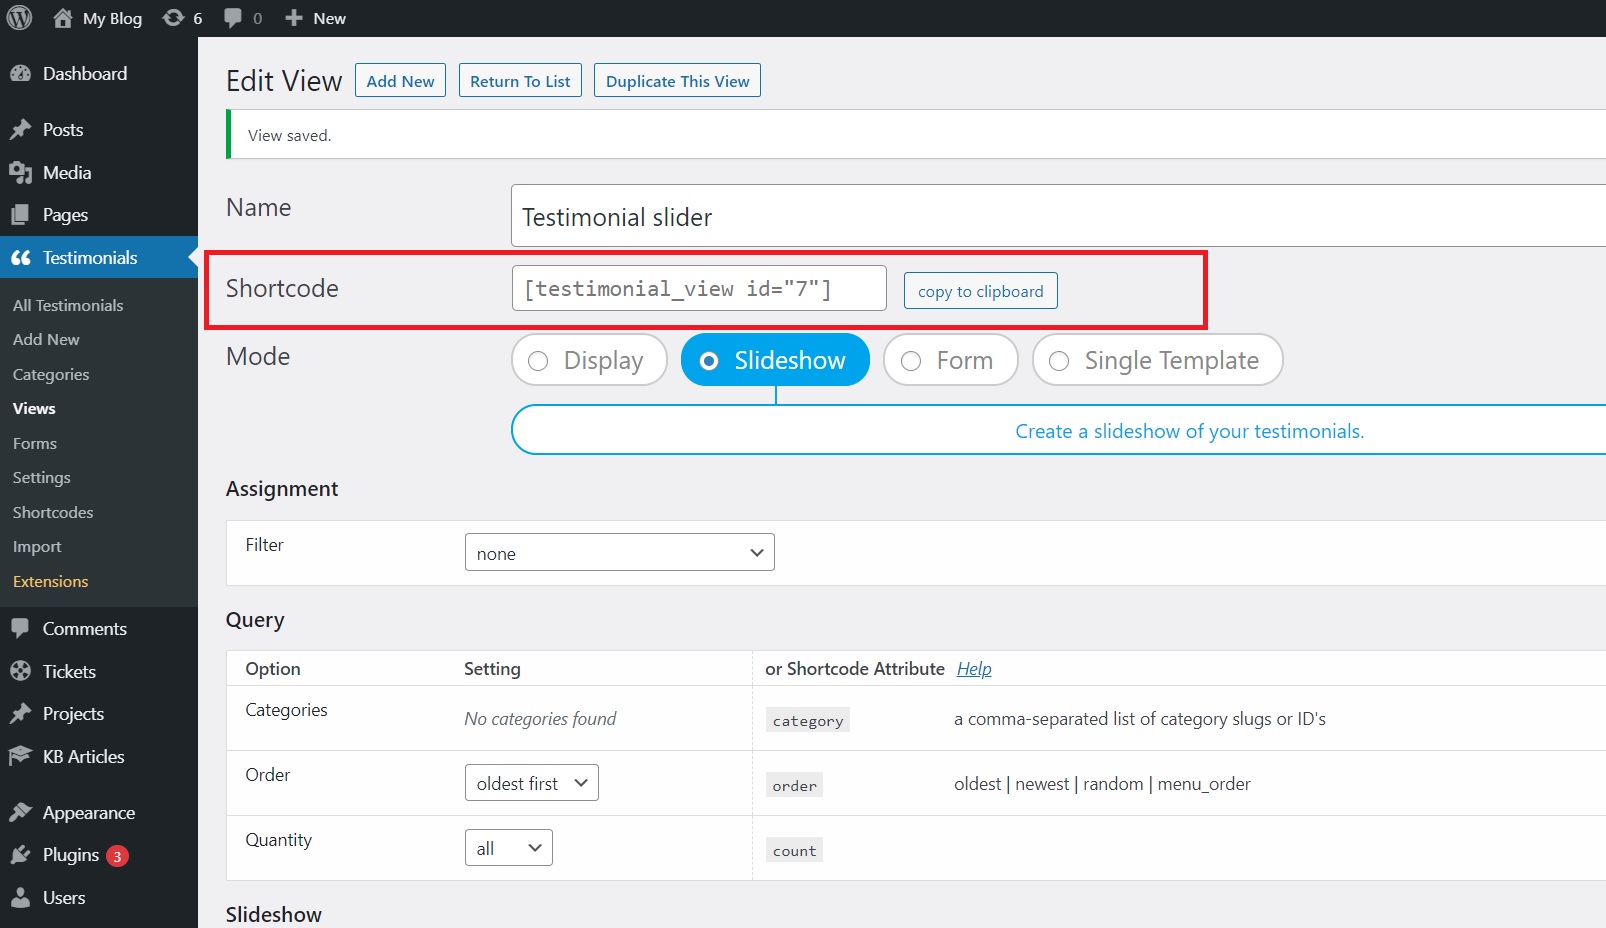
Firstly, head over to your Testimonials > Views > Add New.
After you have played with the customization options and picked what is right for your brand, make sure to click the Save Changes button.
Next, scroll back up and copy the Shortcode.
Once you have the shortcode, head over to Pages > Add New. A new blank page will appear and you can give it a title. Next, click on the “+” and search for the shortcode block or simply paste the shortcut in the blank space.
You can Preview your work to see if you need to make any changes or Publish your work straight away.
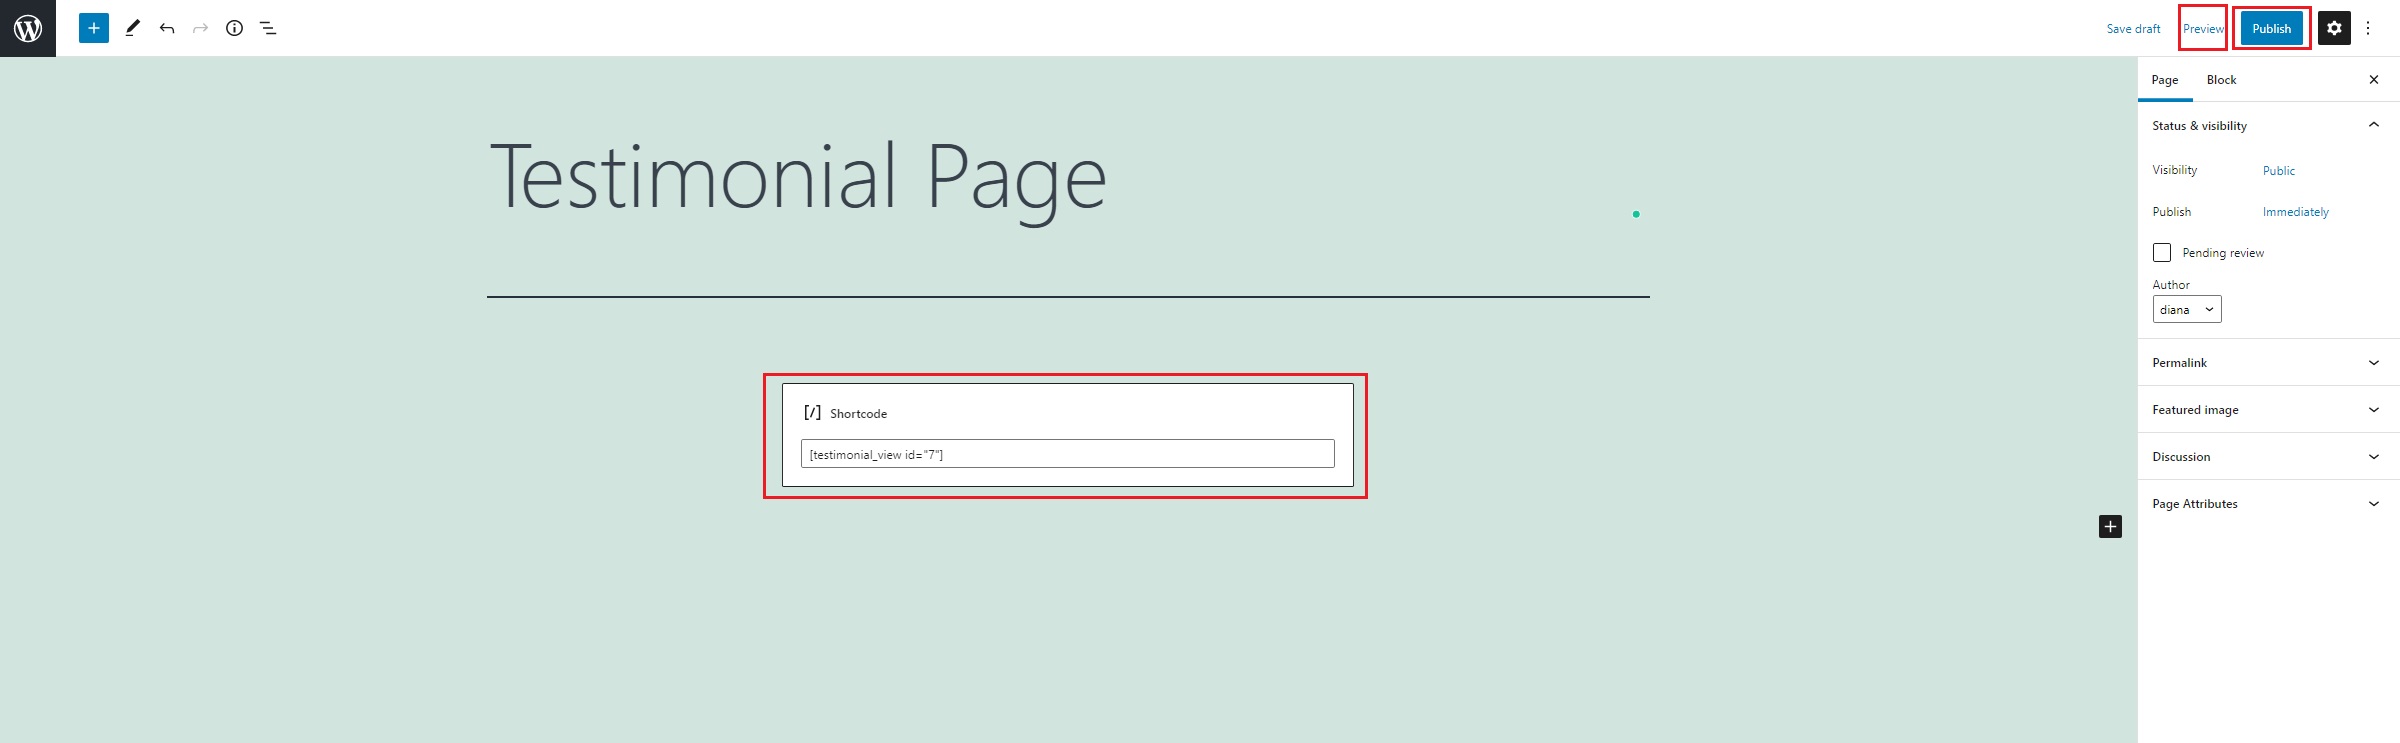
Your newly created test testimonial page should look like this.
Step 4: How to auto-approve testimonials (optional)
Even if this is an actual feature that may help in some cases, we still recommend giving important individual care to each of your testimonials. You never know who doesn’t wish for your success or wants to sabotage you.
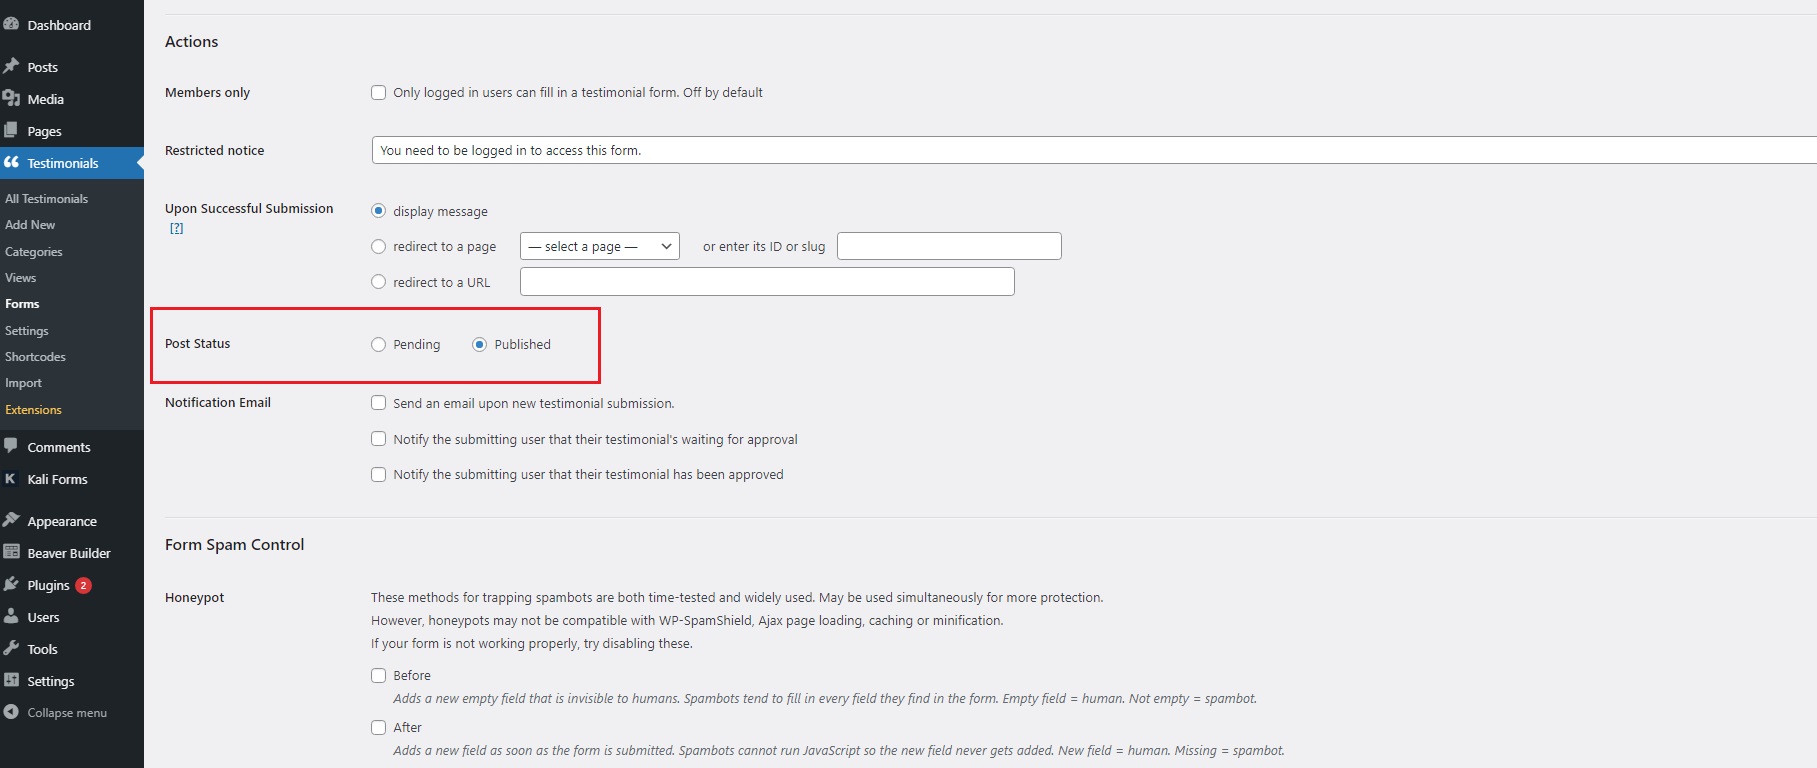
To make use of the auto-approve feature, head over to Testimonials > Forms. Once there, if you hover your mouse on the Custom Form, you will notice the Settings link appear and you can click it.
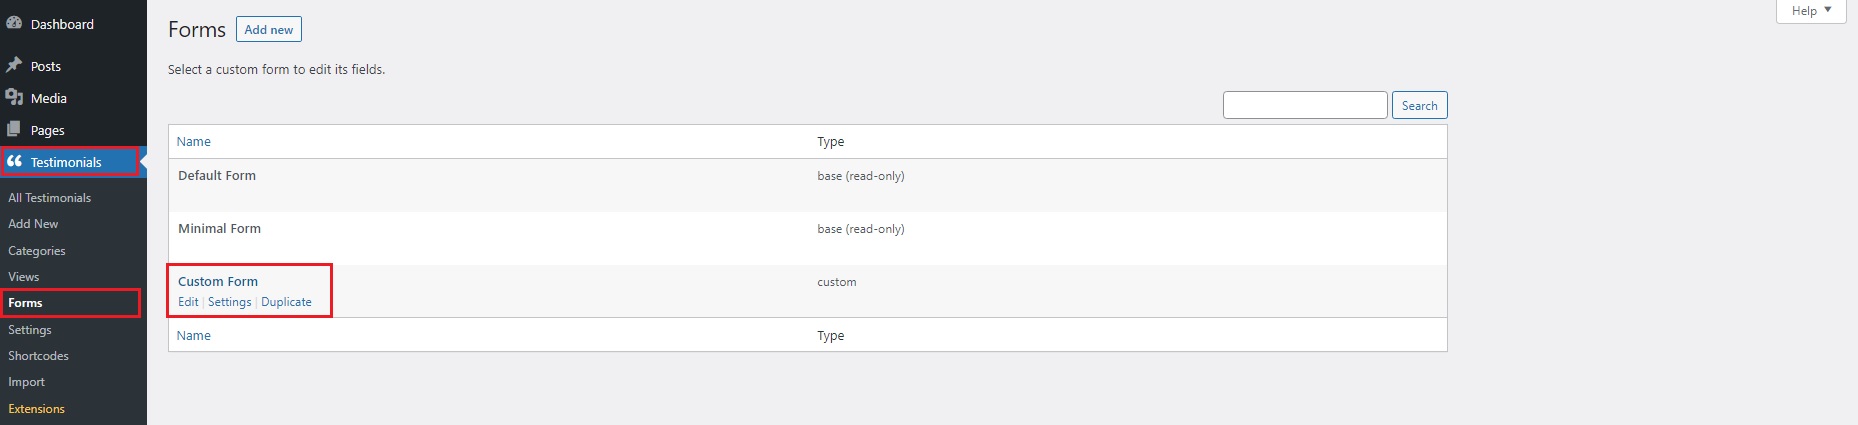
Once in the settings area, you will see many options such as spam control, captcha, IP restrictions, and other actions. Among these settings, you will find the Post Status. You can keep it on Pending if you wish to continue manually approving testimonials, or you can change it to Published, so any testimonial that gets registered on your form gets automatically published on your testimonial page.
Make sure to scroll all the way down and click on the Save Changes button if you’ve done any modifications to the settings.
So, what can I do using Strong Testimonials?
- Approve pending testimonials from customers – Manually verify and approve your incoming testimonials. Set up a barrier to catch spammers and to stop your website from loading slow or crashing because of them.
- A lot of anti-spam options– Scan your testimonials for incoming grammatical errors or profanity and remove them before the testimonials go live. Make use of our anti-spam options to keep a clean testimonials page and your future customers happy.
- Auto approve feature – If you are confident that you rarely get bad quality testimonials but still get a high volume of regular ones, make use of the auto-approve feature to save time.
Conclusion
And there you have it! The quick Strong Testimonials guide on how to approve pending testimonials. Thanks to the Strong Testimonials plugin, you can manually or automatically approve all of your testimonials, and after that, make them look exactly the way you want with the help of all the functions you have at your disposal. It’s as easy as that!
You can make use of all of these functionalities by getting our Plus Pricing Plan. So what are you waiting for? Get Strong Testimonials and skyrocket your business now at an amazing price! 😁
Strong Testimonials Plugin
We’ve built the #1 WordPress plugin for collecting, managing, and displaying testimonials. Drive more sales by leveraging your existing user audience.