If you want to enable users to add ratings and reviews to your website, you can achieve this by creating a form and adding it on your page. This step-by-step documentation will guide you through the process using the Strong Testimonials plugin.
Prerequisites
Before you begin, make sure you have the Strong Testimonials plugin installed and activated on your WordPress website.
Step 1: Access Your Dashboard
- Log in to your WordPress admin dashboard.
- Navigate to the “Testimonials” section in the left-hand menu.
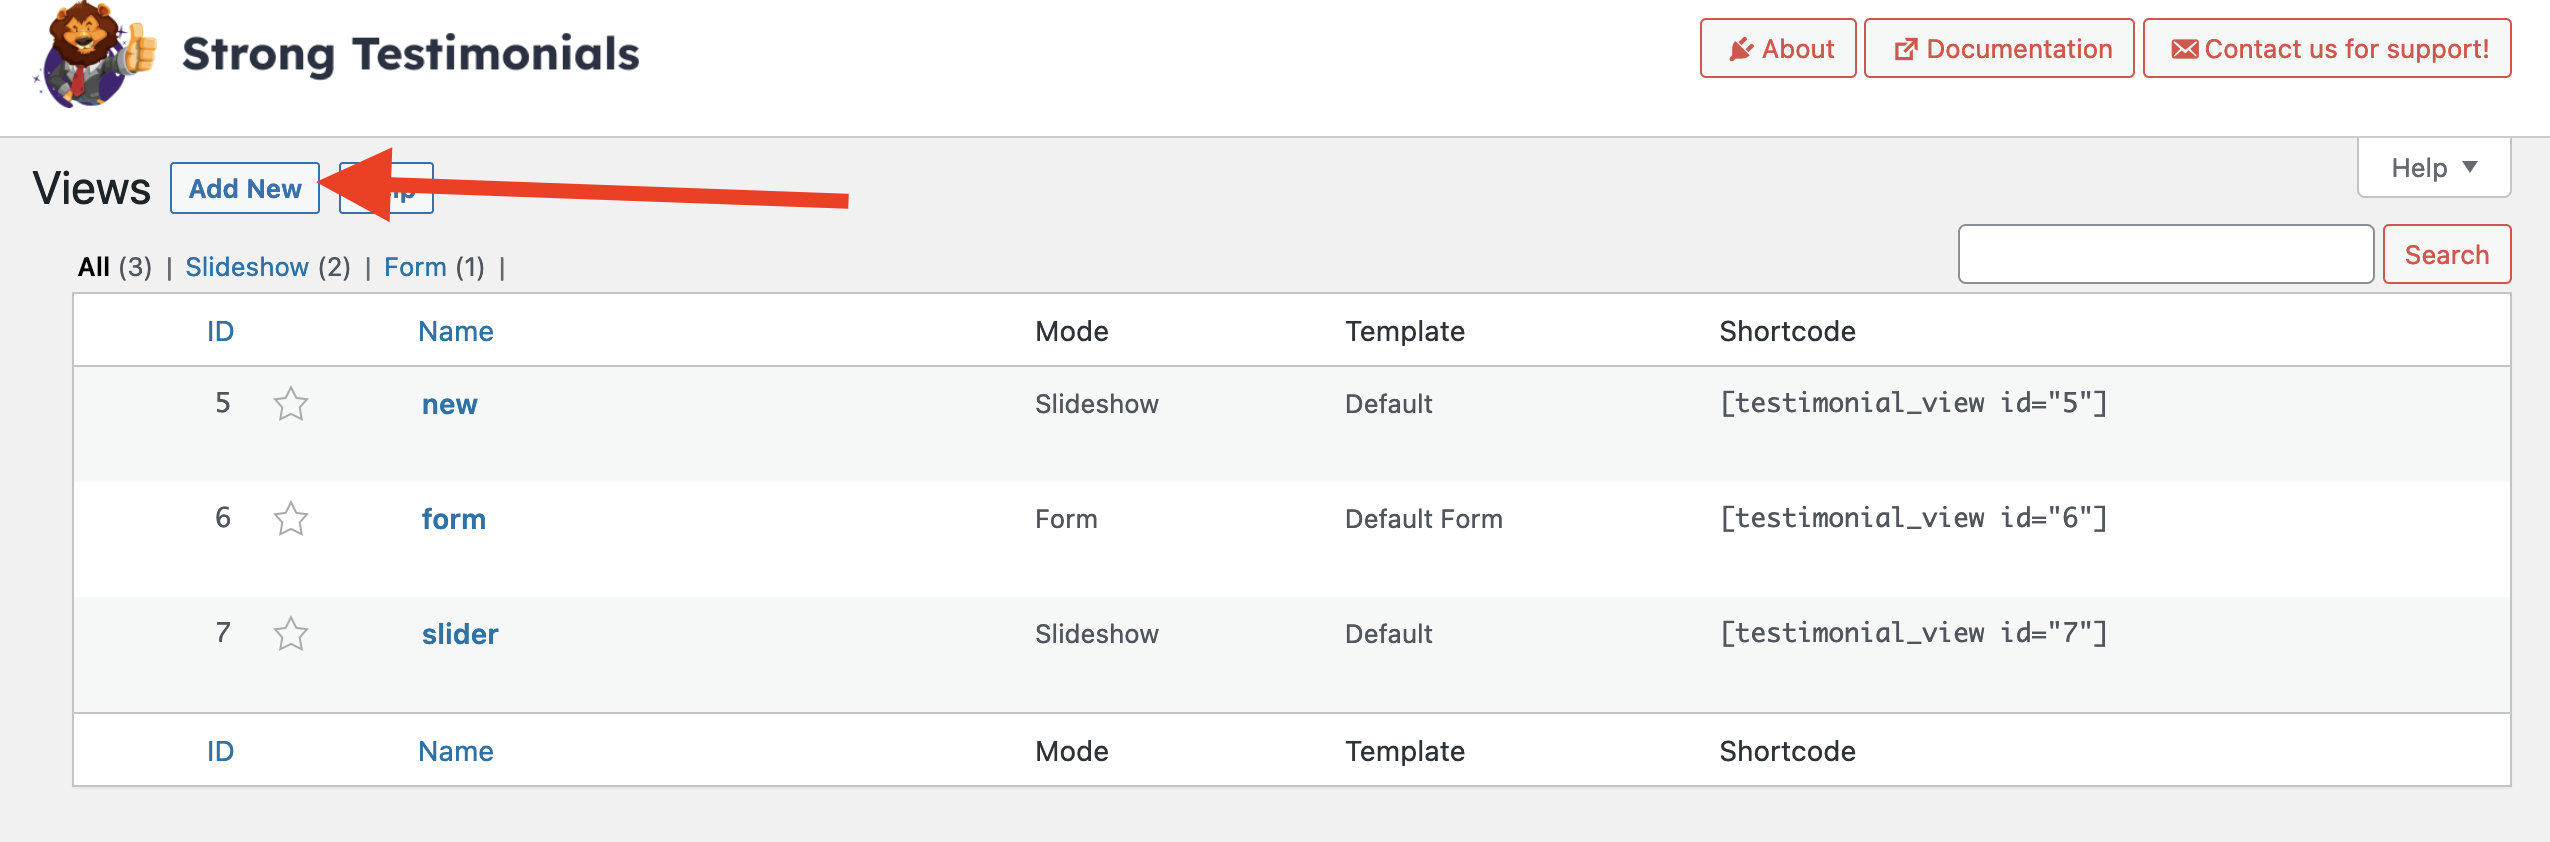
Step 2: Create a New View
- Within the “Testimonials” section, click on “Views.”
- Here, you can manage the different views for your testimonials. To create a new view, click the “Add New” button.
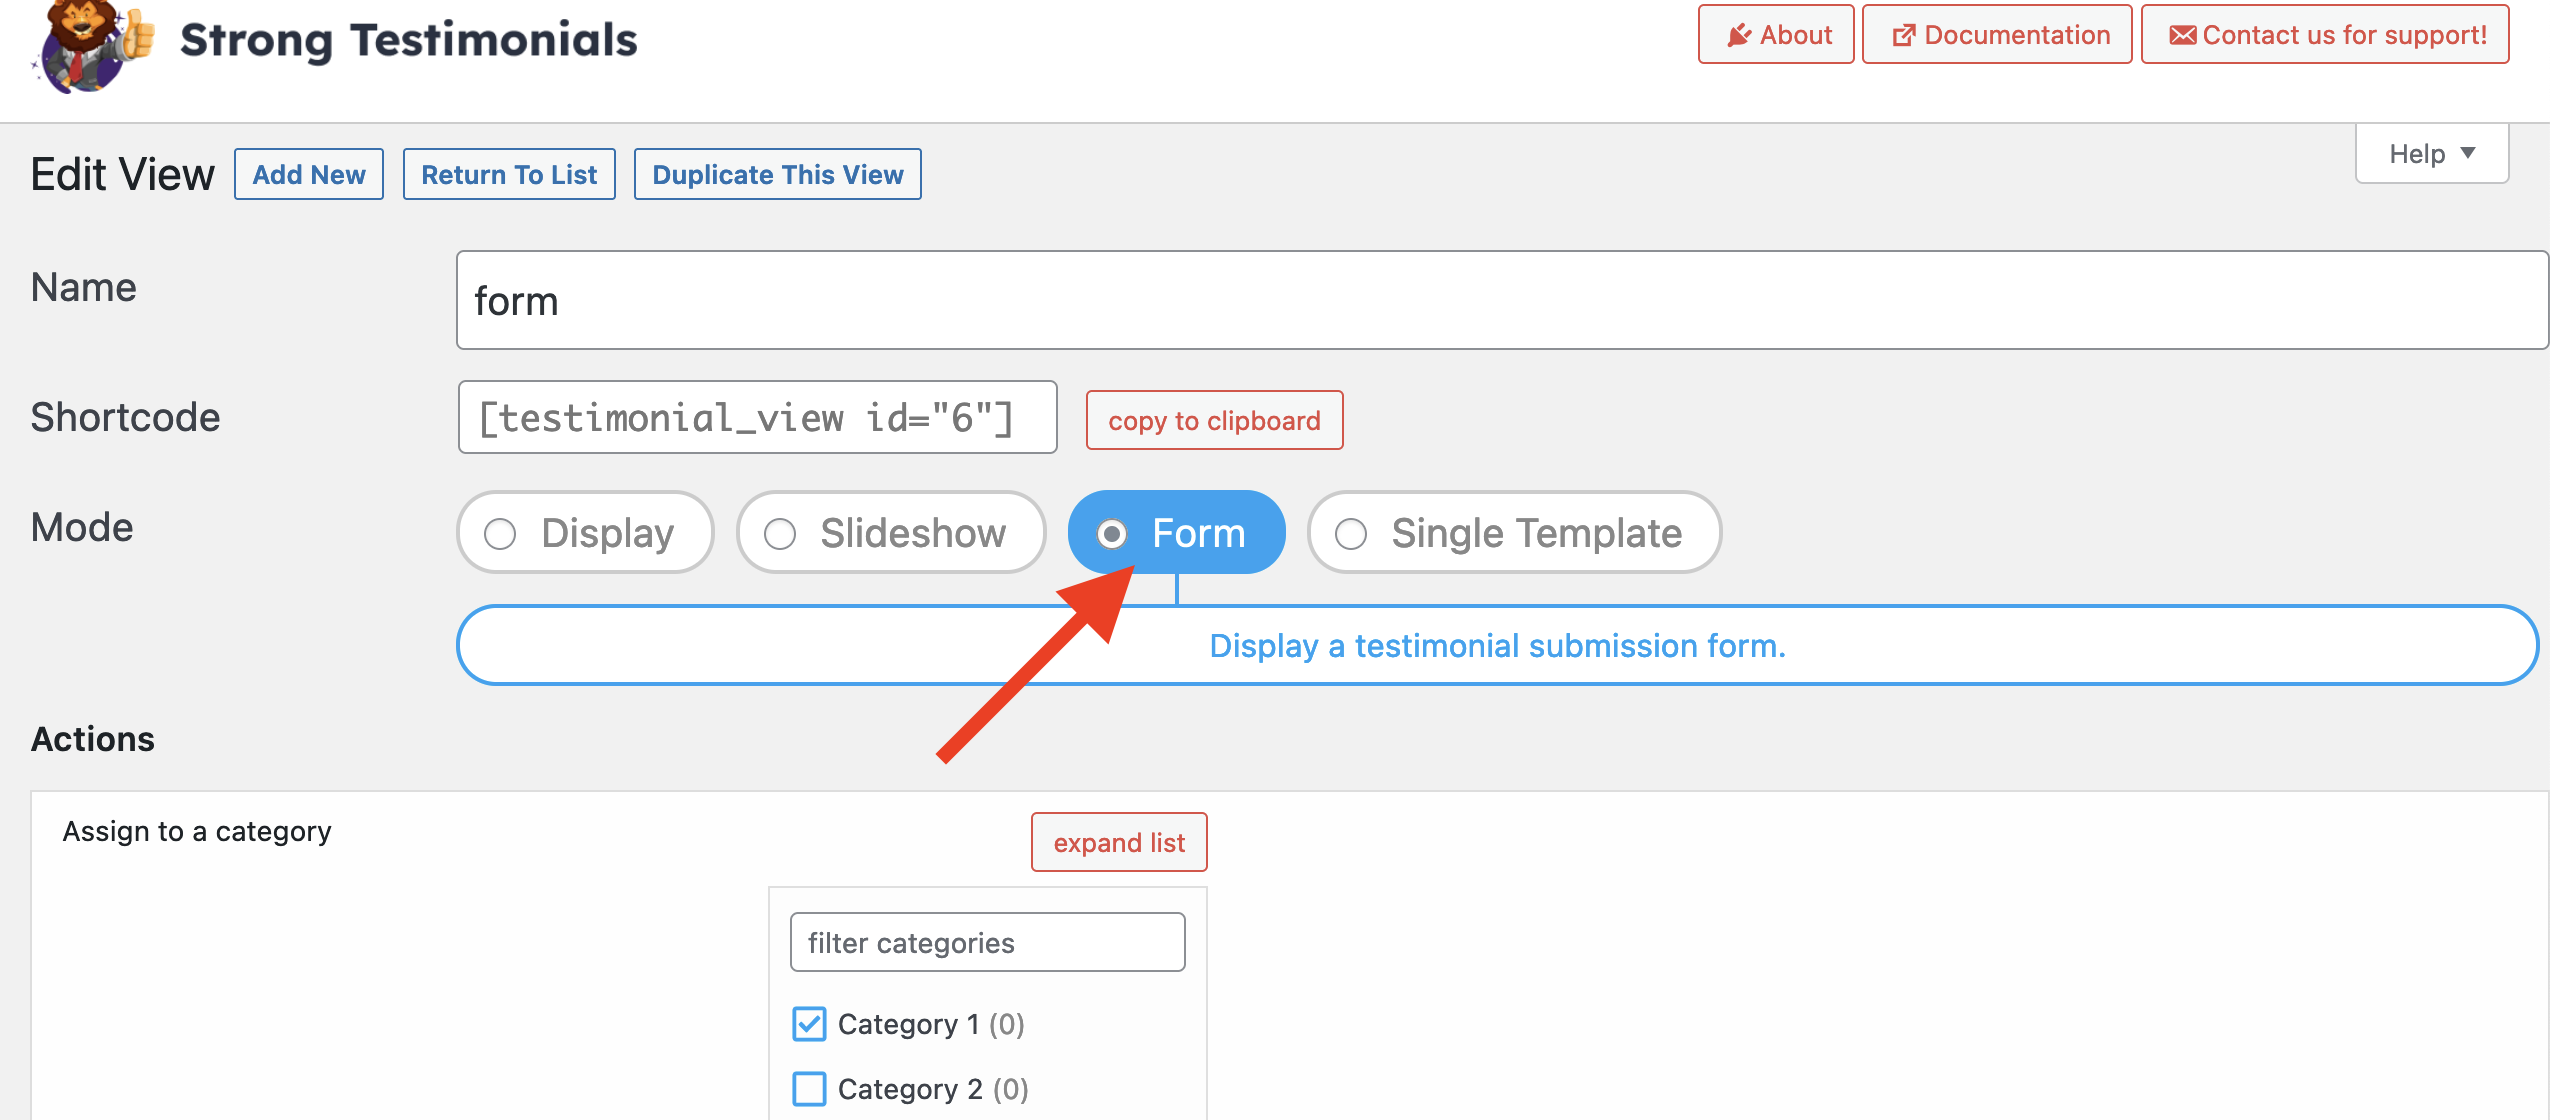
Step 3: Choose the Form Template
- After clicking “Add New,” the new view will be created and you will be able to set it up. Go to “Mode” and select “Form” as your template.
Step 4: Configure the Form
- Once you’ve selected the “Form” template, you’ll need to configure it according to your preferences and save it.
- Please keep in mind that customizing the form and fields is done from your dashboard > Testimonials > Form, not from the view settings. To further customize the fields and functionality of your form, refer to this documentation on customizing the form: Customizing the Form
Step 5: Add the Form to Your Page
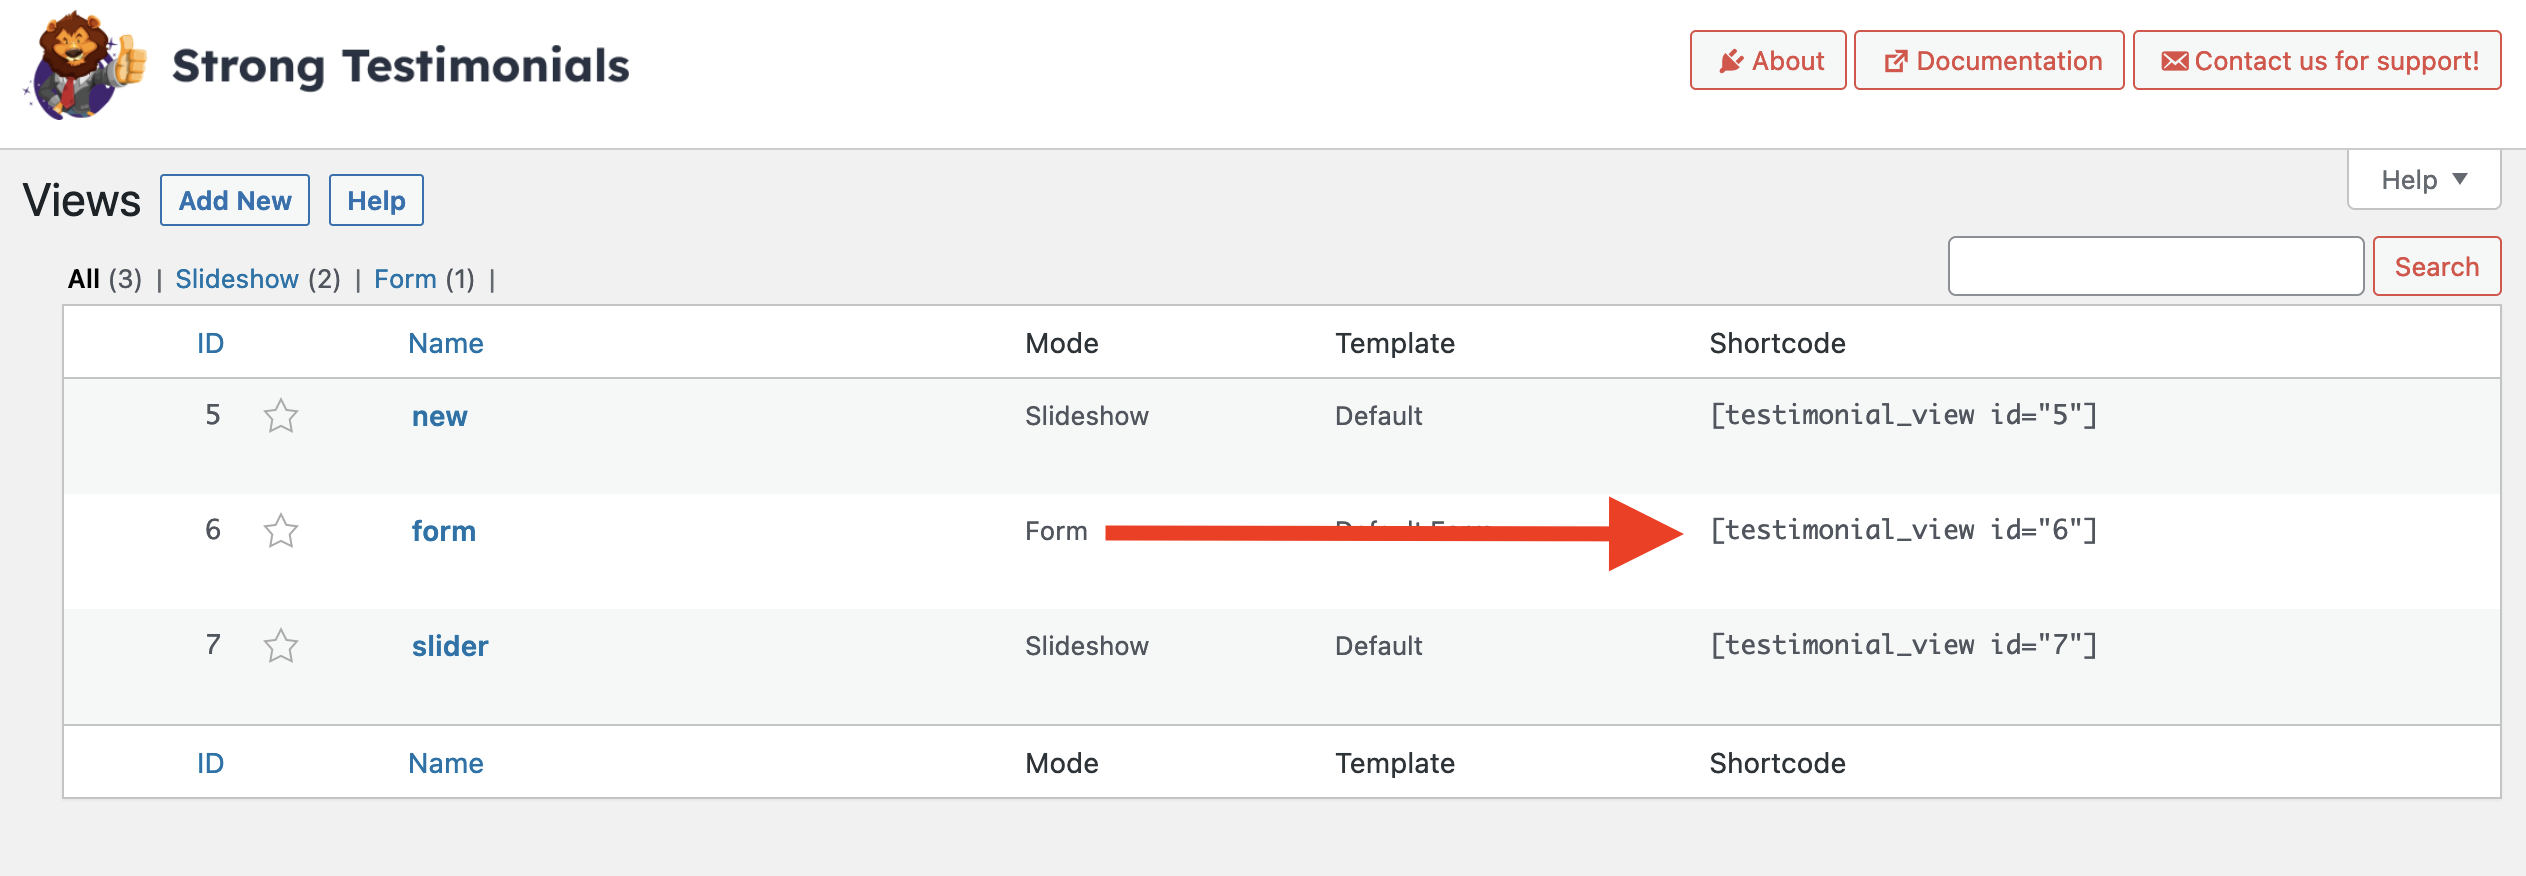
- After you’ve configured the view and saved it, you will notice it has assigned a shortcode.
- Copy this shortcode.
Step 6: Paste the Shortcode on Your Page
- Create or edit the page where you want to display the form on.
- In the page editor, paste the shortcode you copied from the form configuration.
- Update or publish the page to make the form live.