As much as we love solving problems and fighting bugs, some issues can be easily discovered by you. If you have some problems with Strong Testimonials, we advise you to check where the problem comes from. Debugging and troubleshooting Strong Testimonials will help you find and solve the problem as well as help our support team know if there’s a bug or an incompatibility.
We do try our best to make Strong Testimonials compatible with every theme and plugin, but WordPress provides over 58,000 free plugins, which makes it hard to promise that it will integrate perfectly with every single one or with every available theme.
1. Check for plugin or theme conflicts
As we said before, WordPress offers a big bunch of plugins and themes for various needs, and some of them may not be compatible with Strong Testimonials. So, before writing a support ticket, make sure there is no conflict with a plugin or a theme.
Step 1: Disable (don’t uninstall) the other plugins and keep Strong Testimonials activated.
Step 2: Change your WordPress theme to a default one.
Step 3: Remove the cache and refresh your browser.
Step 4: Go to the browser page with the problem. You can check on multiple browsers to find out if the problem is the same on every page.
Step 5: If the issue has disappeared, reactivate each plugin one by one, and verify the problem until you find out which theme or plugin caused the error.
2. Debugging in the Browser
Did you know that web browsers include tools intended to help you debug code? We recommend you to use Google Chrome for debugging frontend code like JavaScript, an important part of WordPress and Strong Testimonials. You can debug any problems with your WordPress website and frontend issues.
Step 1: Navigate to the page where the error appears in your browser.
Step 2: On the space with the error, if possible, right-click and select Inspect Element from the options that appear.
Step 3: Select the Console tab.
All your errors will be highlighted in red. What’s next? You can solve the problem on your own or you can include it in a support ticket.
3. Use troubleshooting and debugging plugin
Health Check and Troubleshooting is a WordPress plugin specially made to detect errors and issues on your website and allows themes and plugins to add their checks. It also offers a Troubleshooting mode where all plugins are deactivated and a default theme is used, but only for their users. This way, you can check errors and issues without disabling anything on the actual website.
Step 1: Install and activate Health Check WordPress plugin
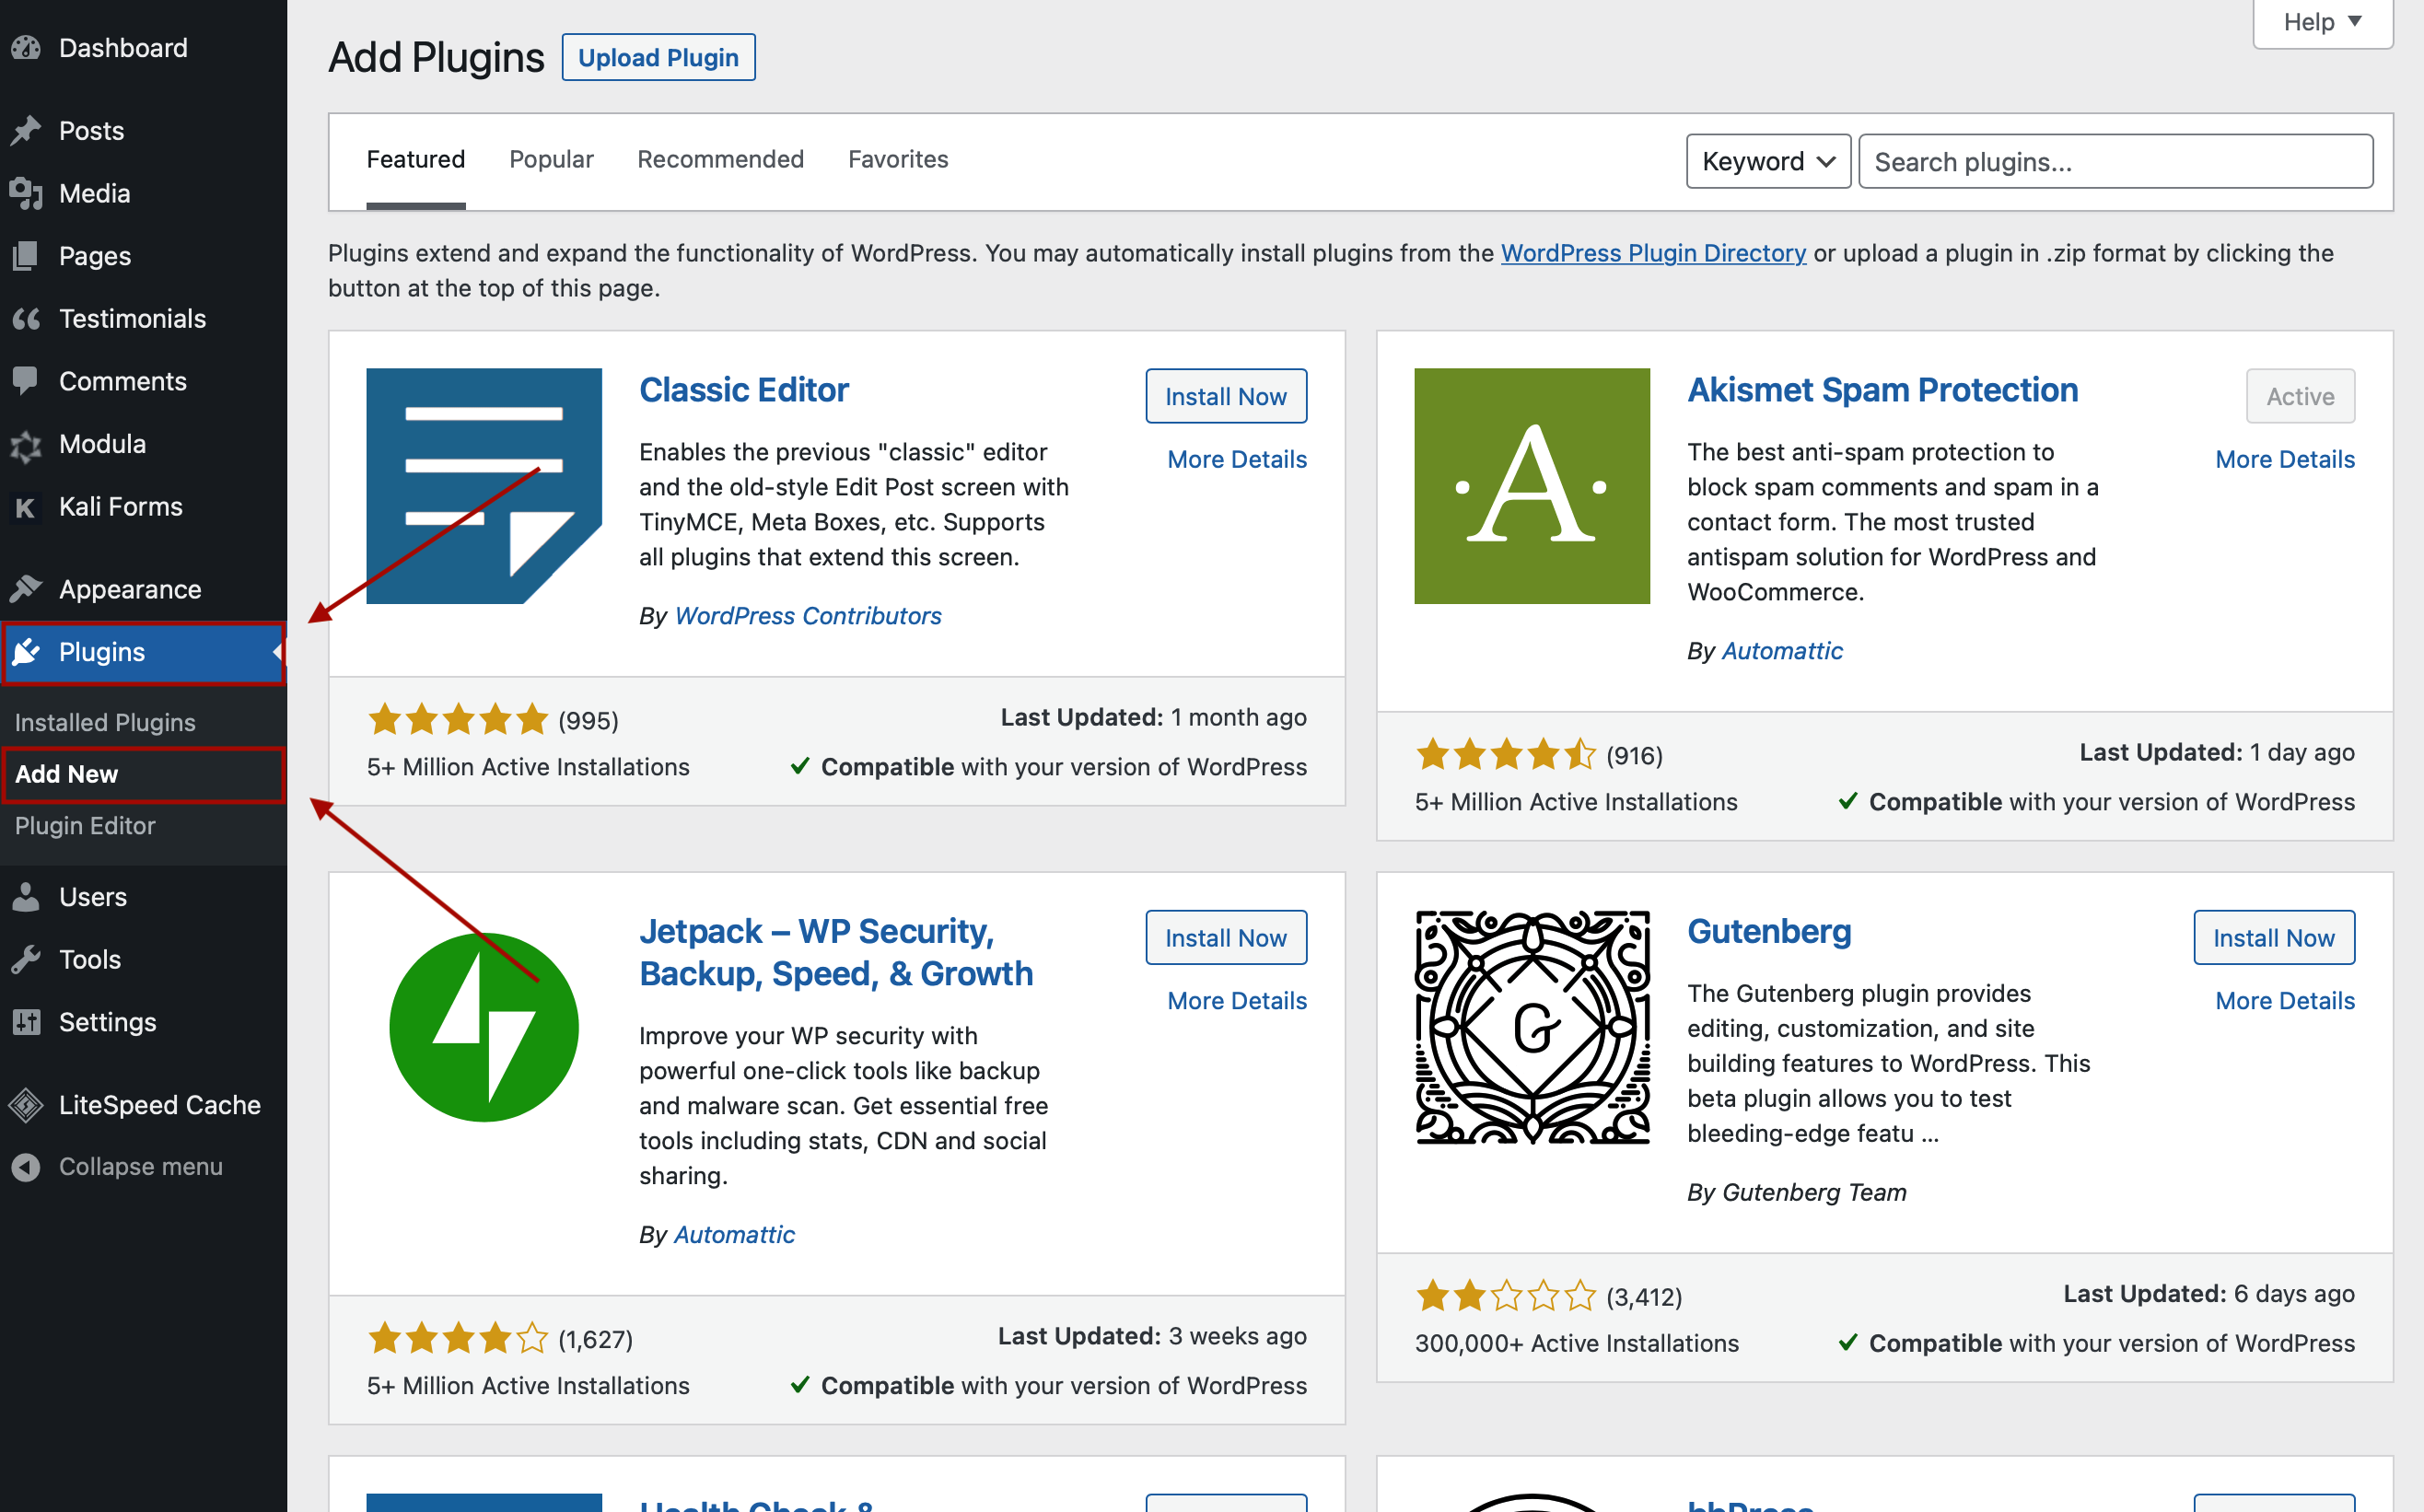
First of all, you’ll need to install and activate the plugin. It is a free WordPress plugin, so you can find it in the WordPress repository. Go to your WordPress menu > Plugins > Add New.
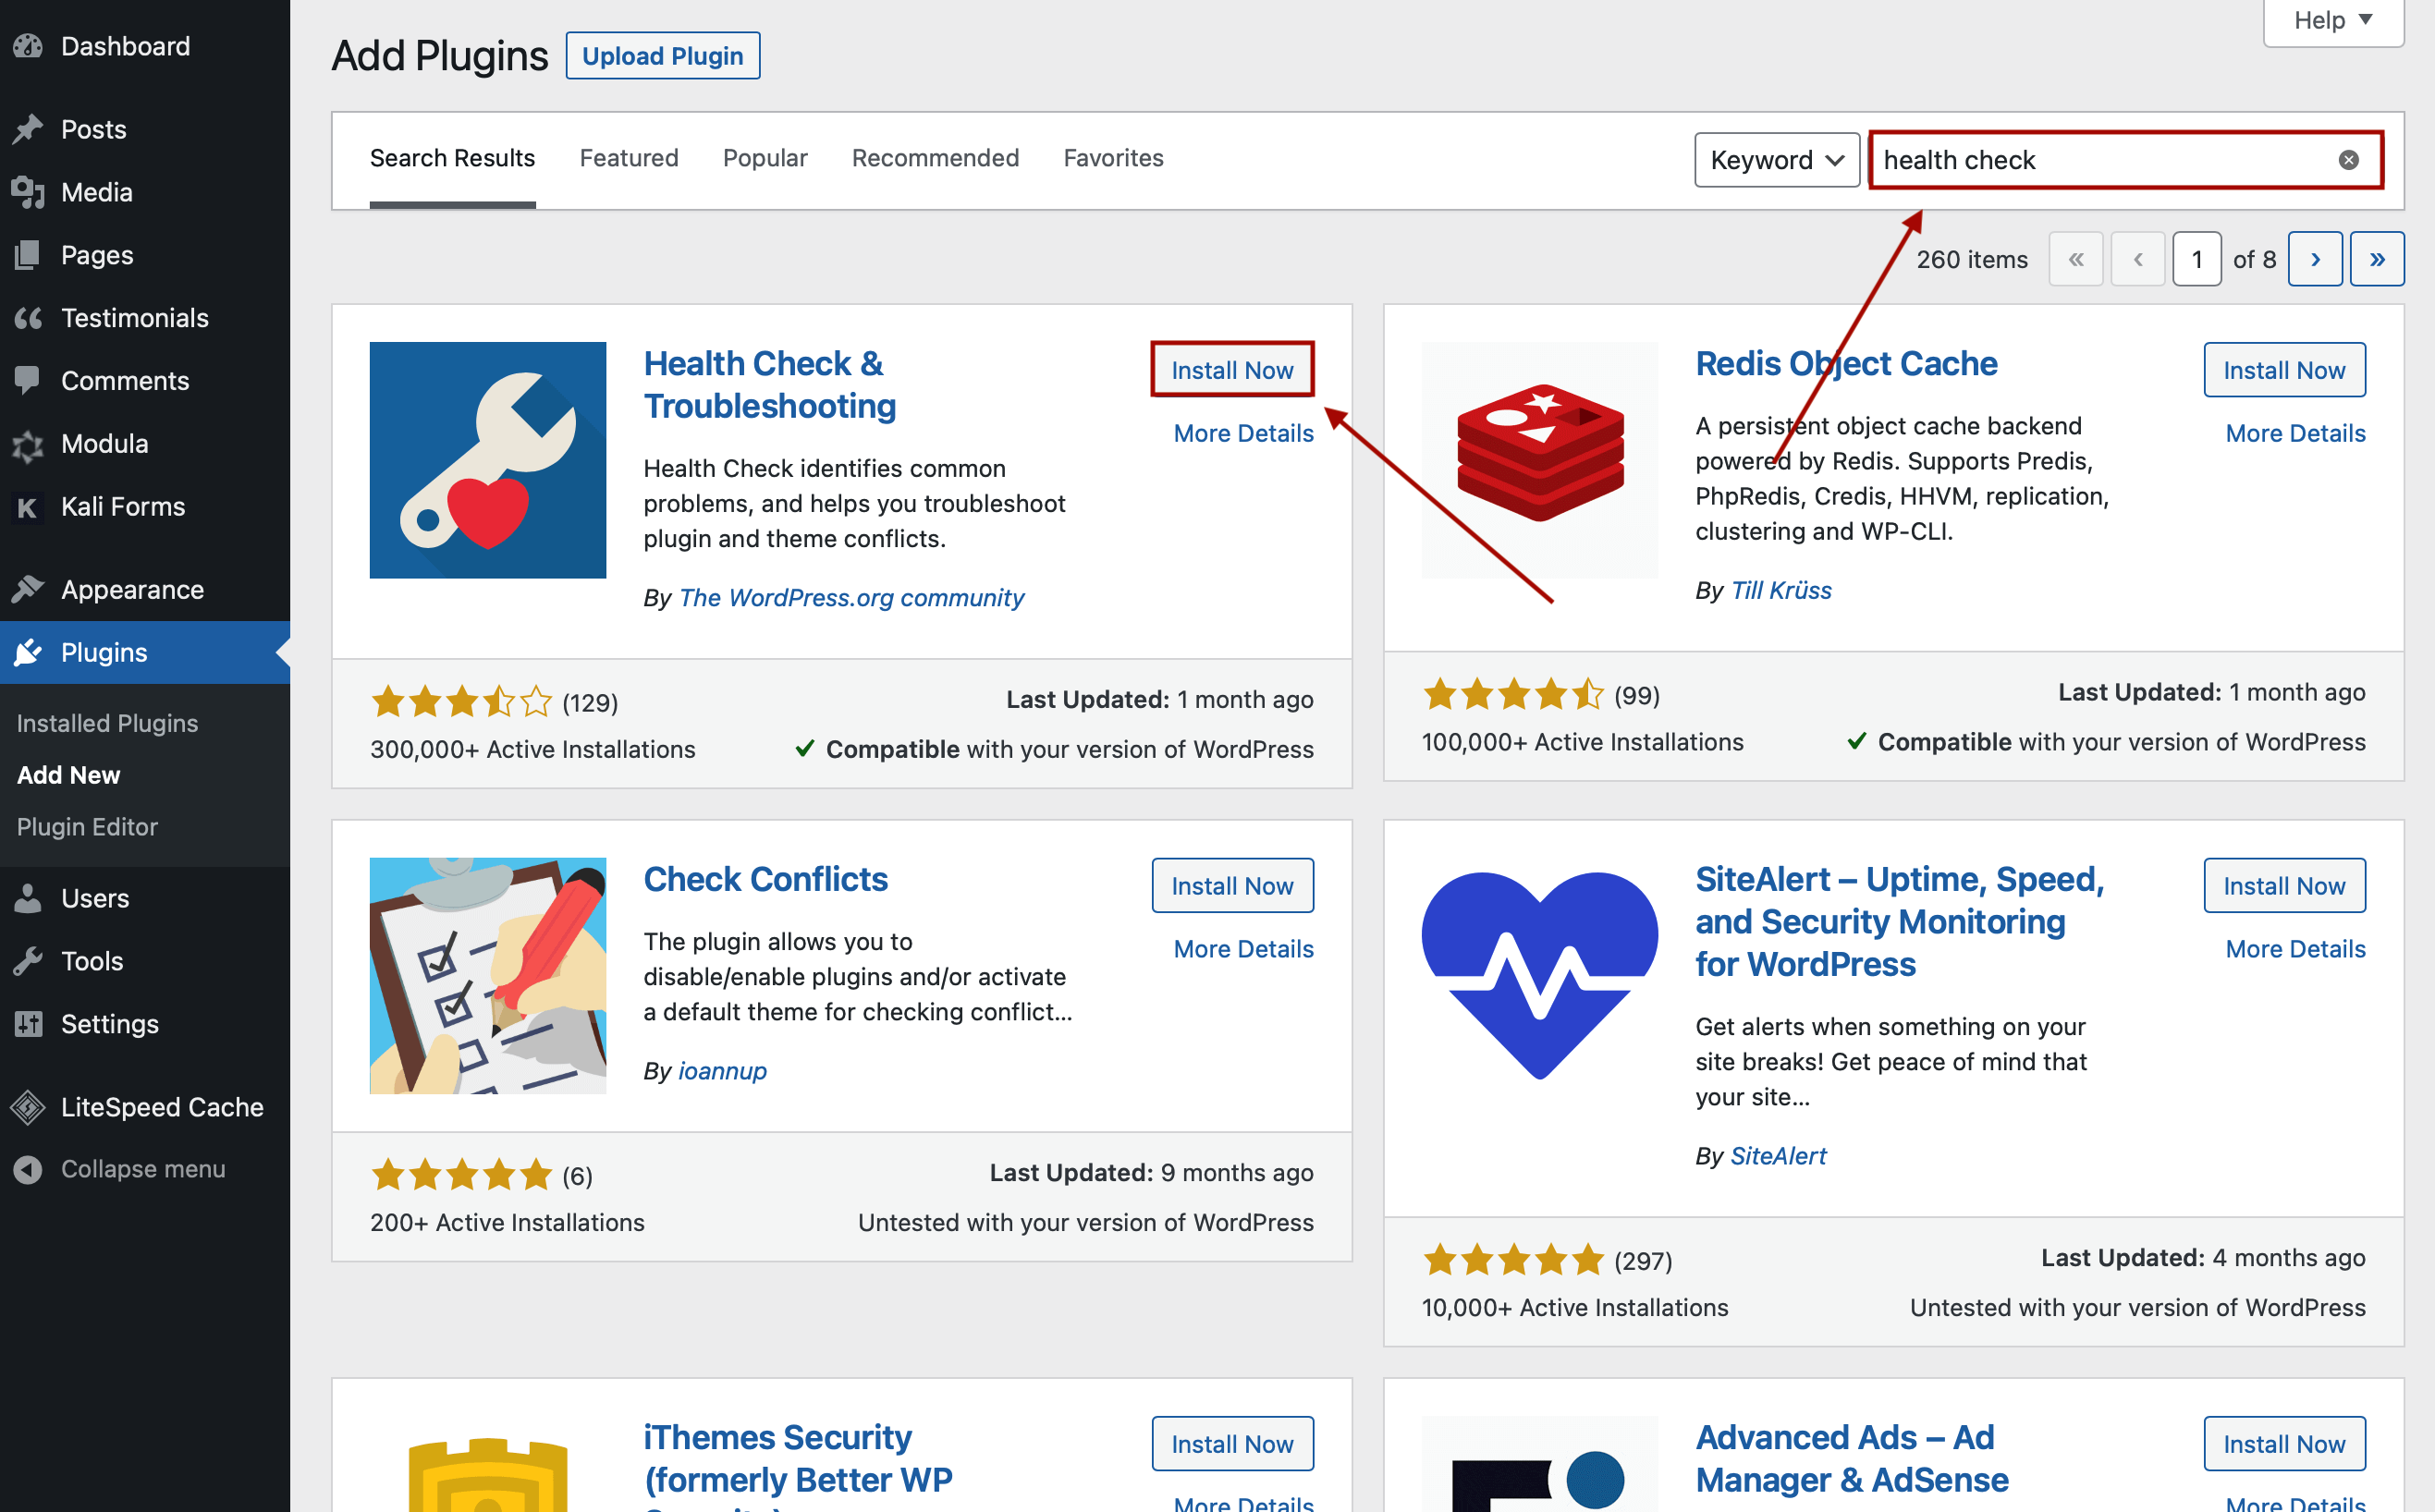
In the search bar on the upper right corner, type Health Check. When you find it, click on Install Now.
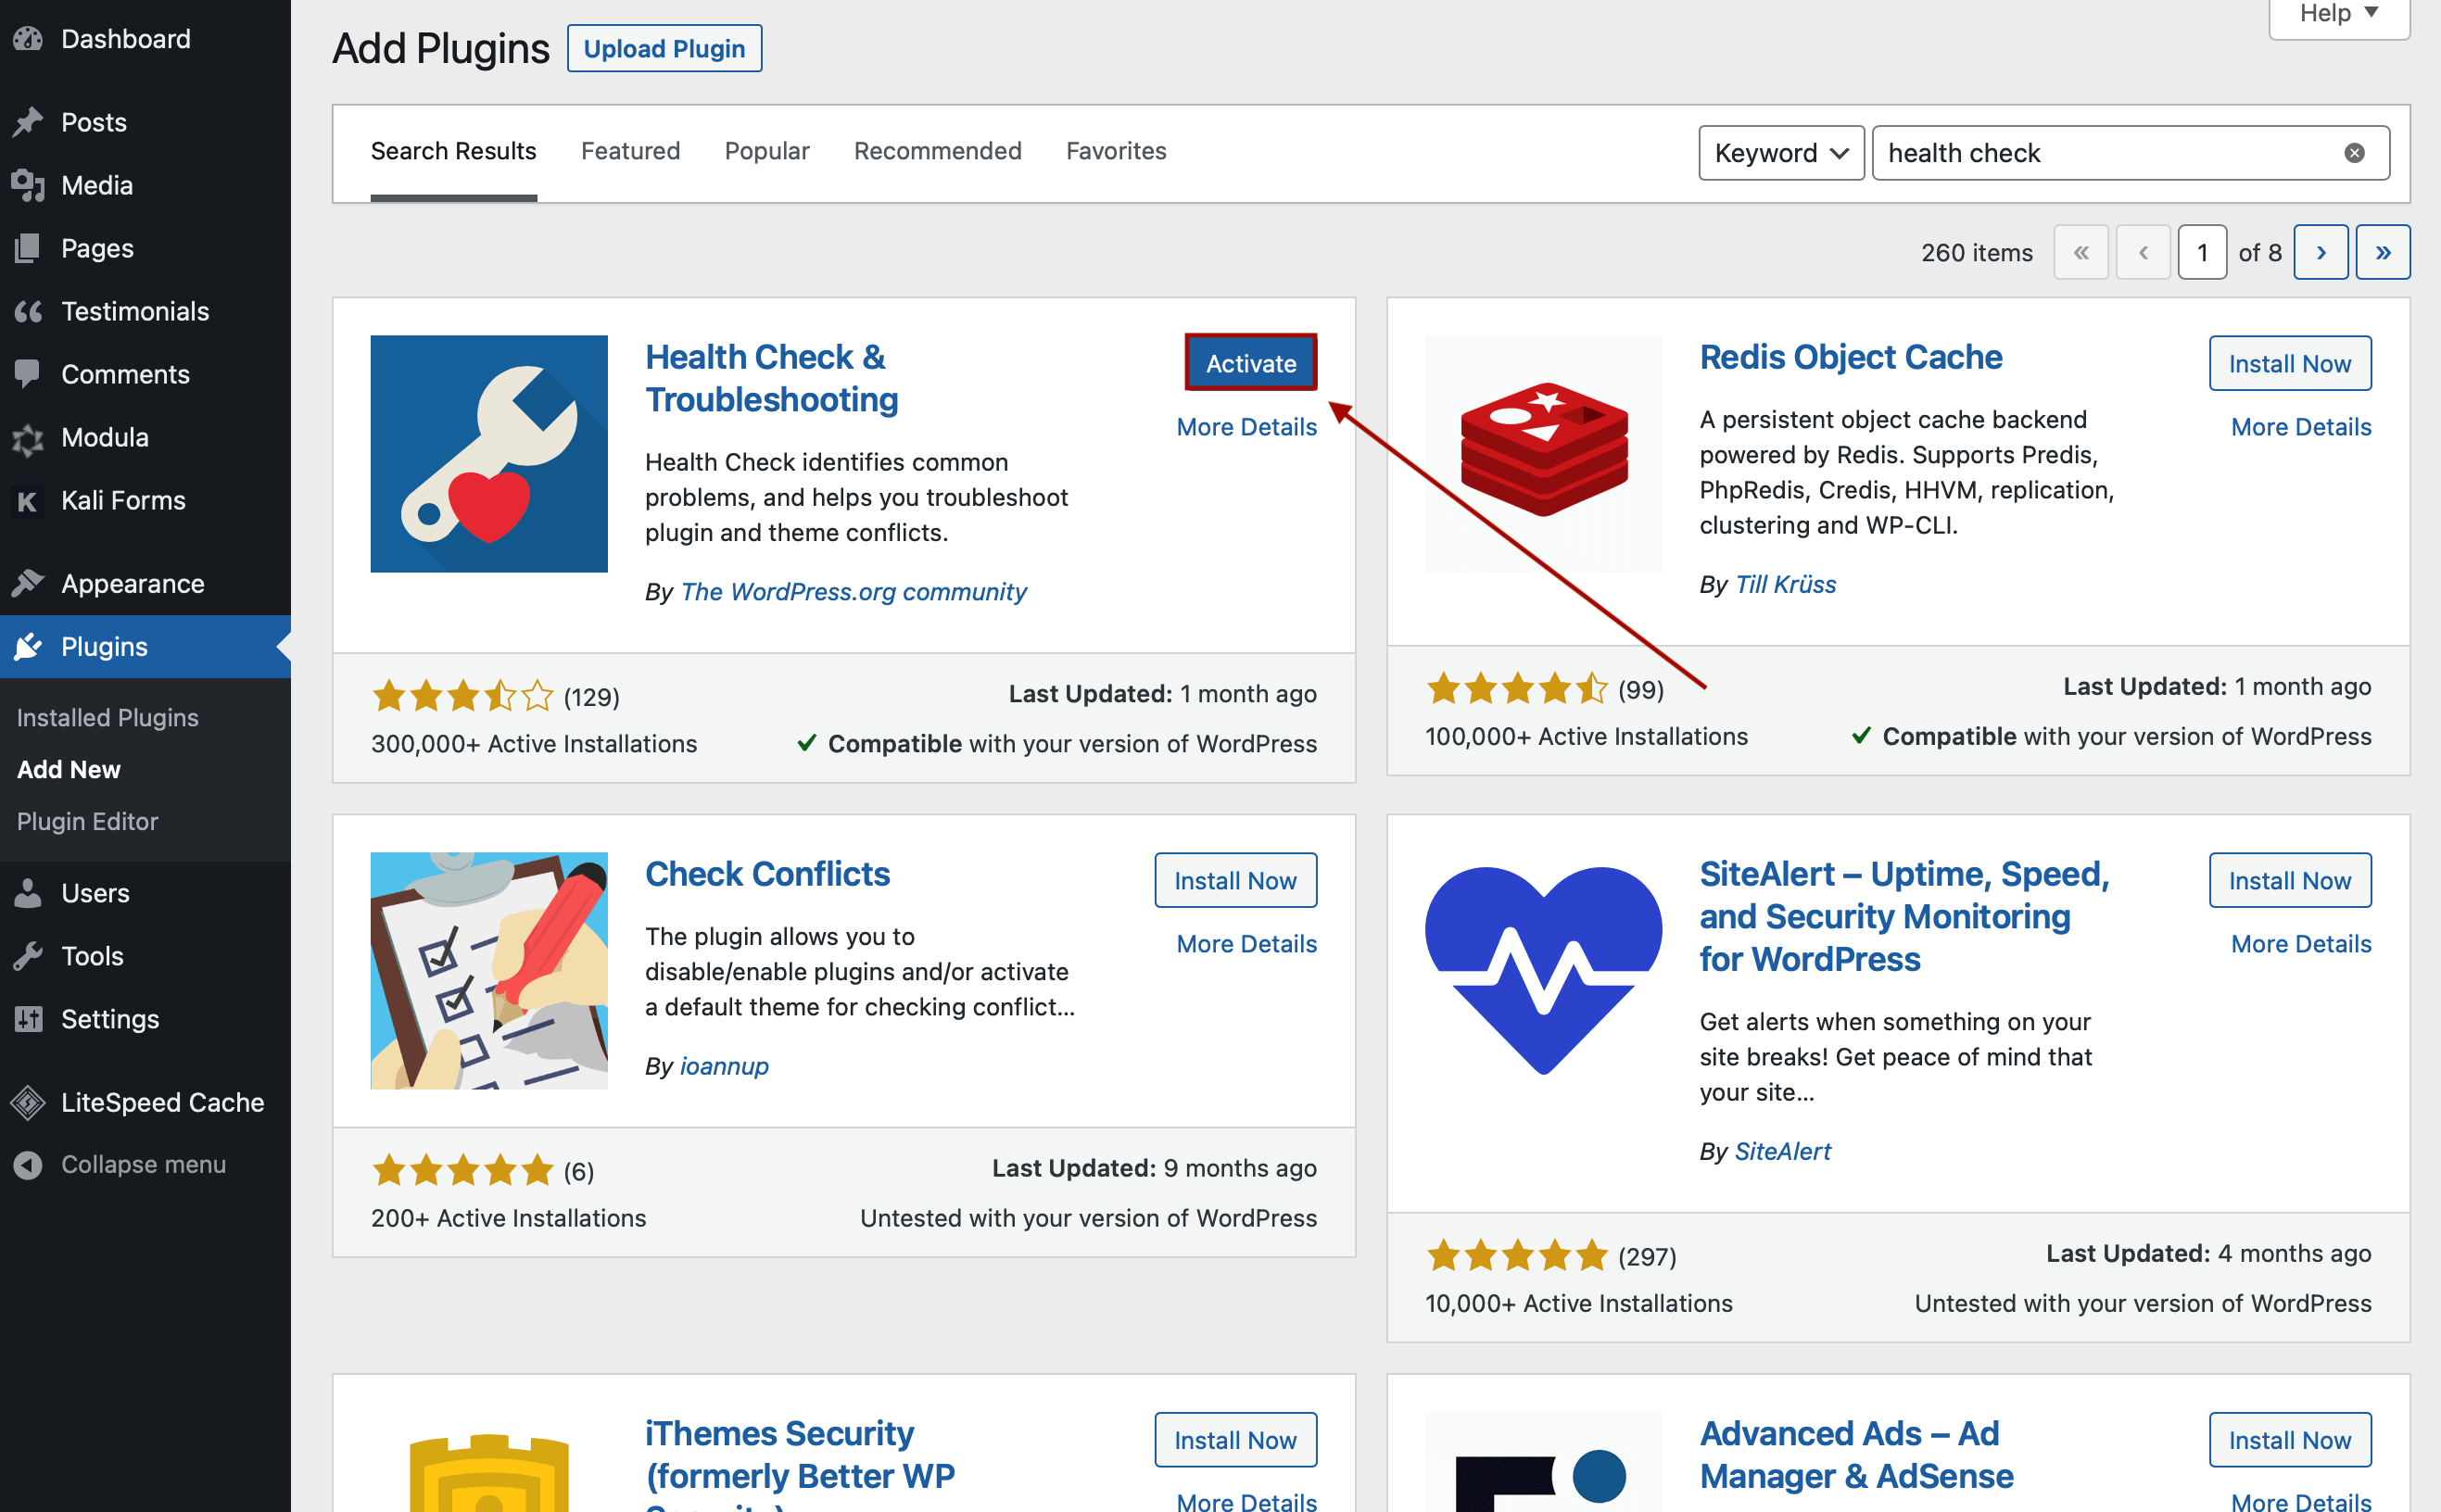
Wait until it’s installed and then Activate it.
Step 2: Usage
As a fail-safe, we recommend making a backup of your website before troubleshooting. The simplest method is to use a plugin, there are many available for free, such as: UpdraftPlus.
Another option is to ask your hosting company to make a backup of your website or generate one by yourself from your cPanel if it’s possible.
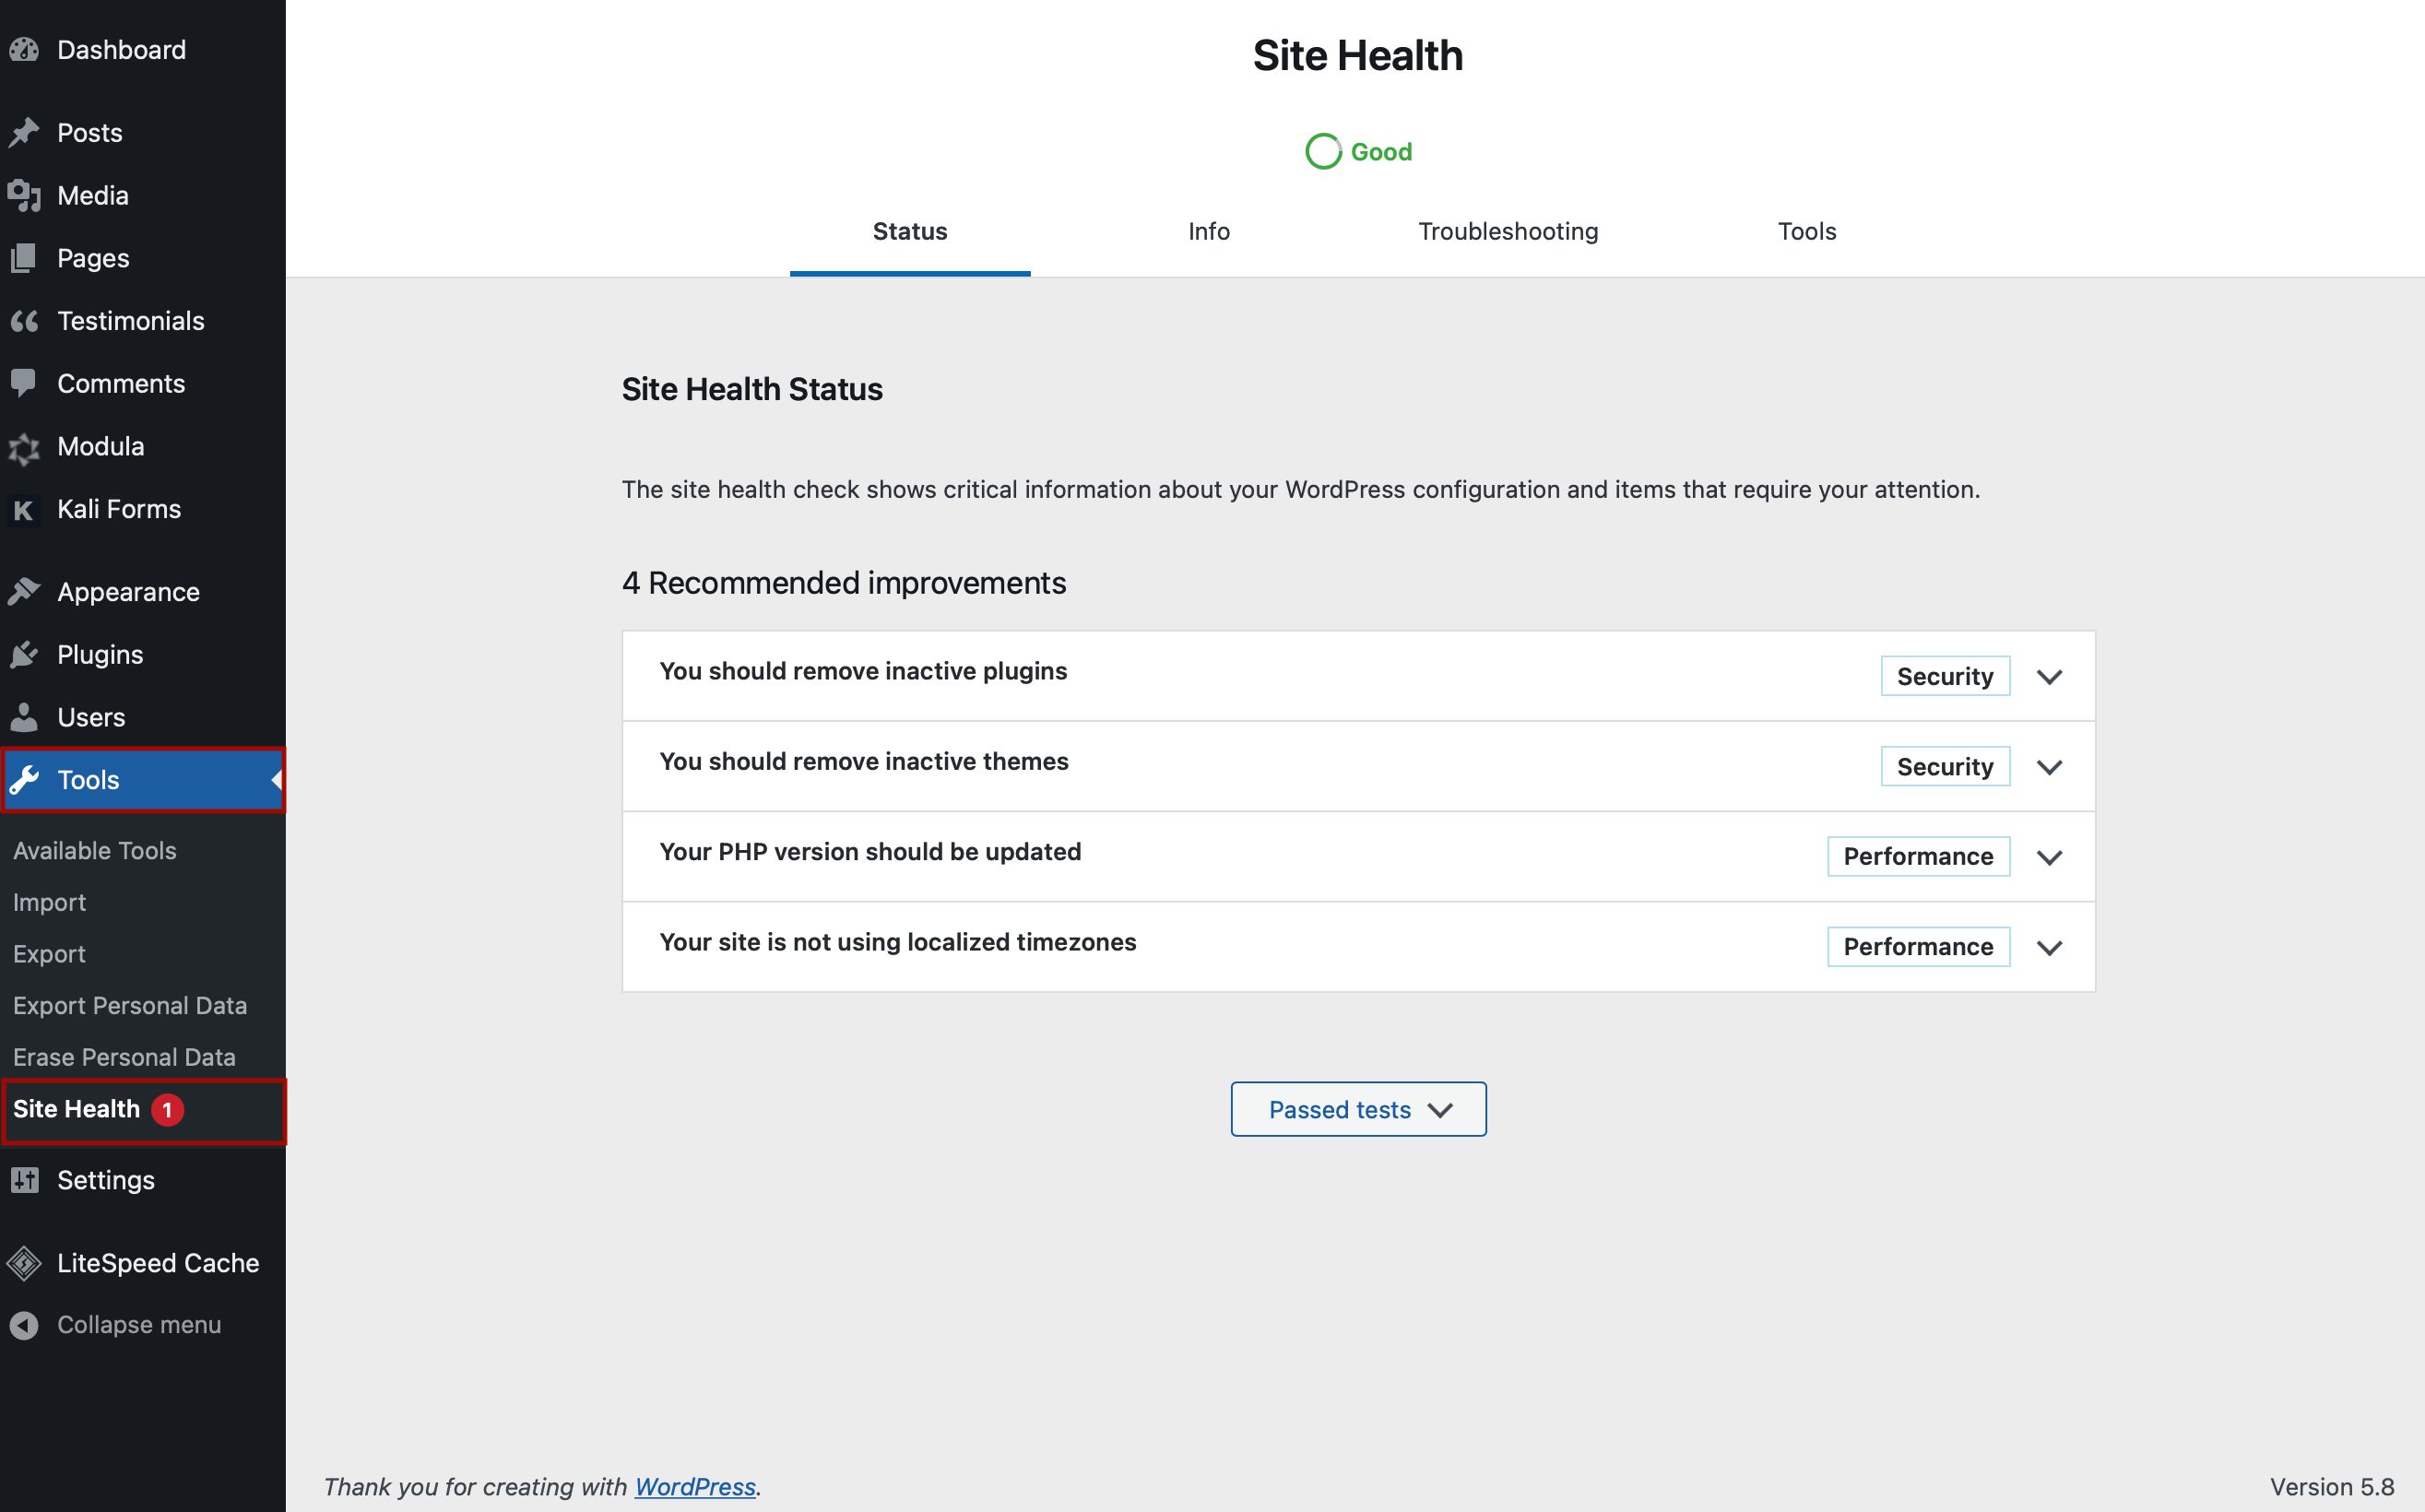
Step 3: Check issues
With this plugin, you’ll get an overview of your WordPress installation. Go to Tools > Site Health to be able to see any issues, recommendations for improvements, and items that haven’t been identified as having any problems.
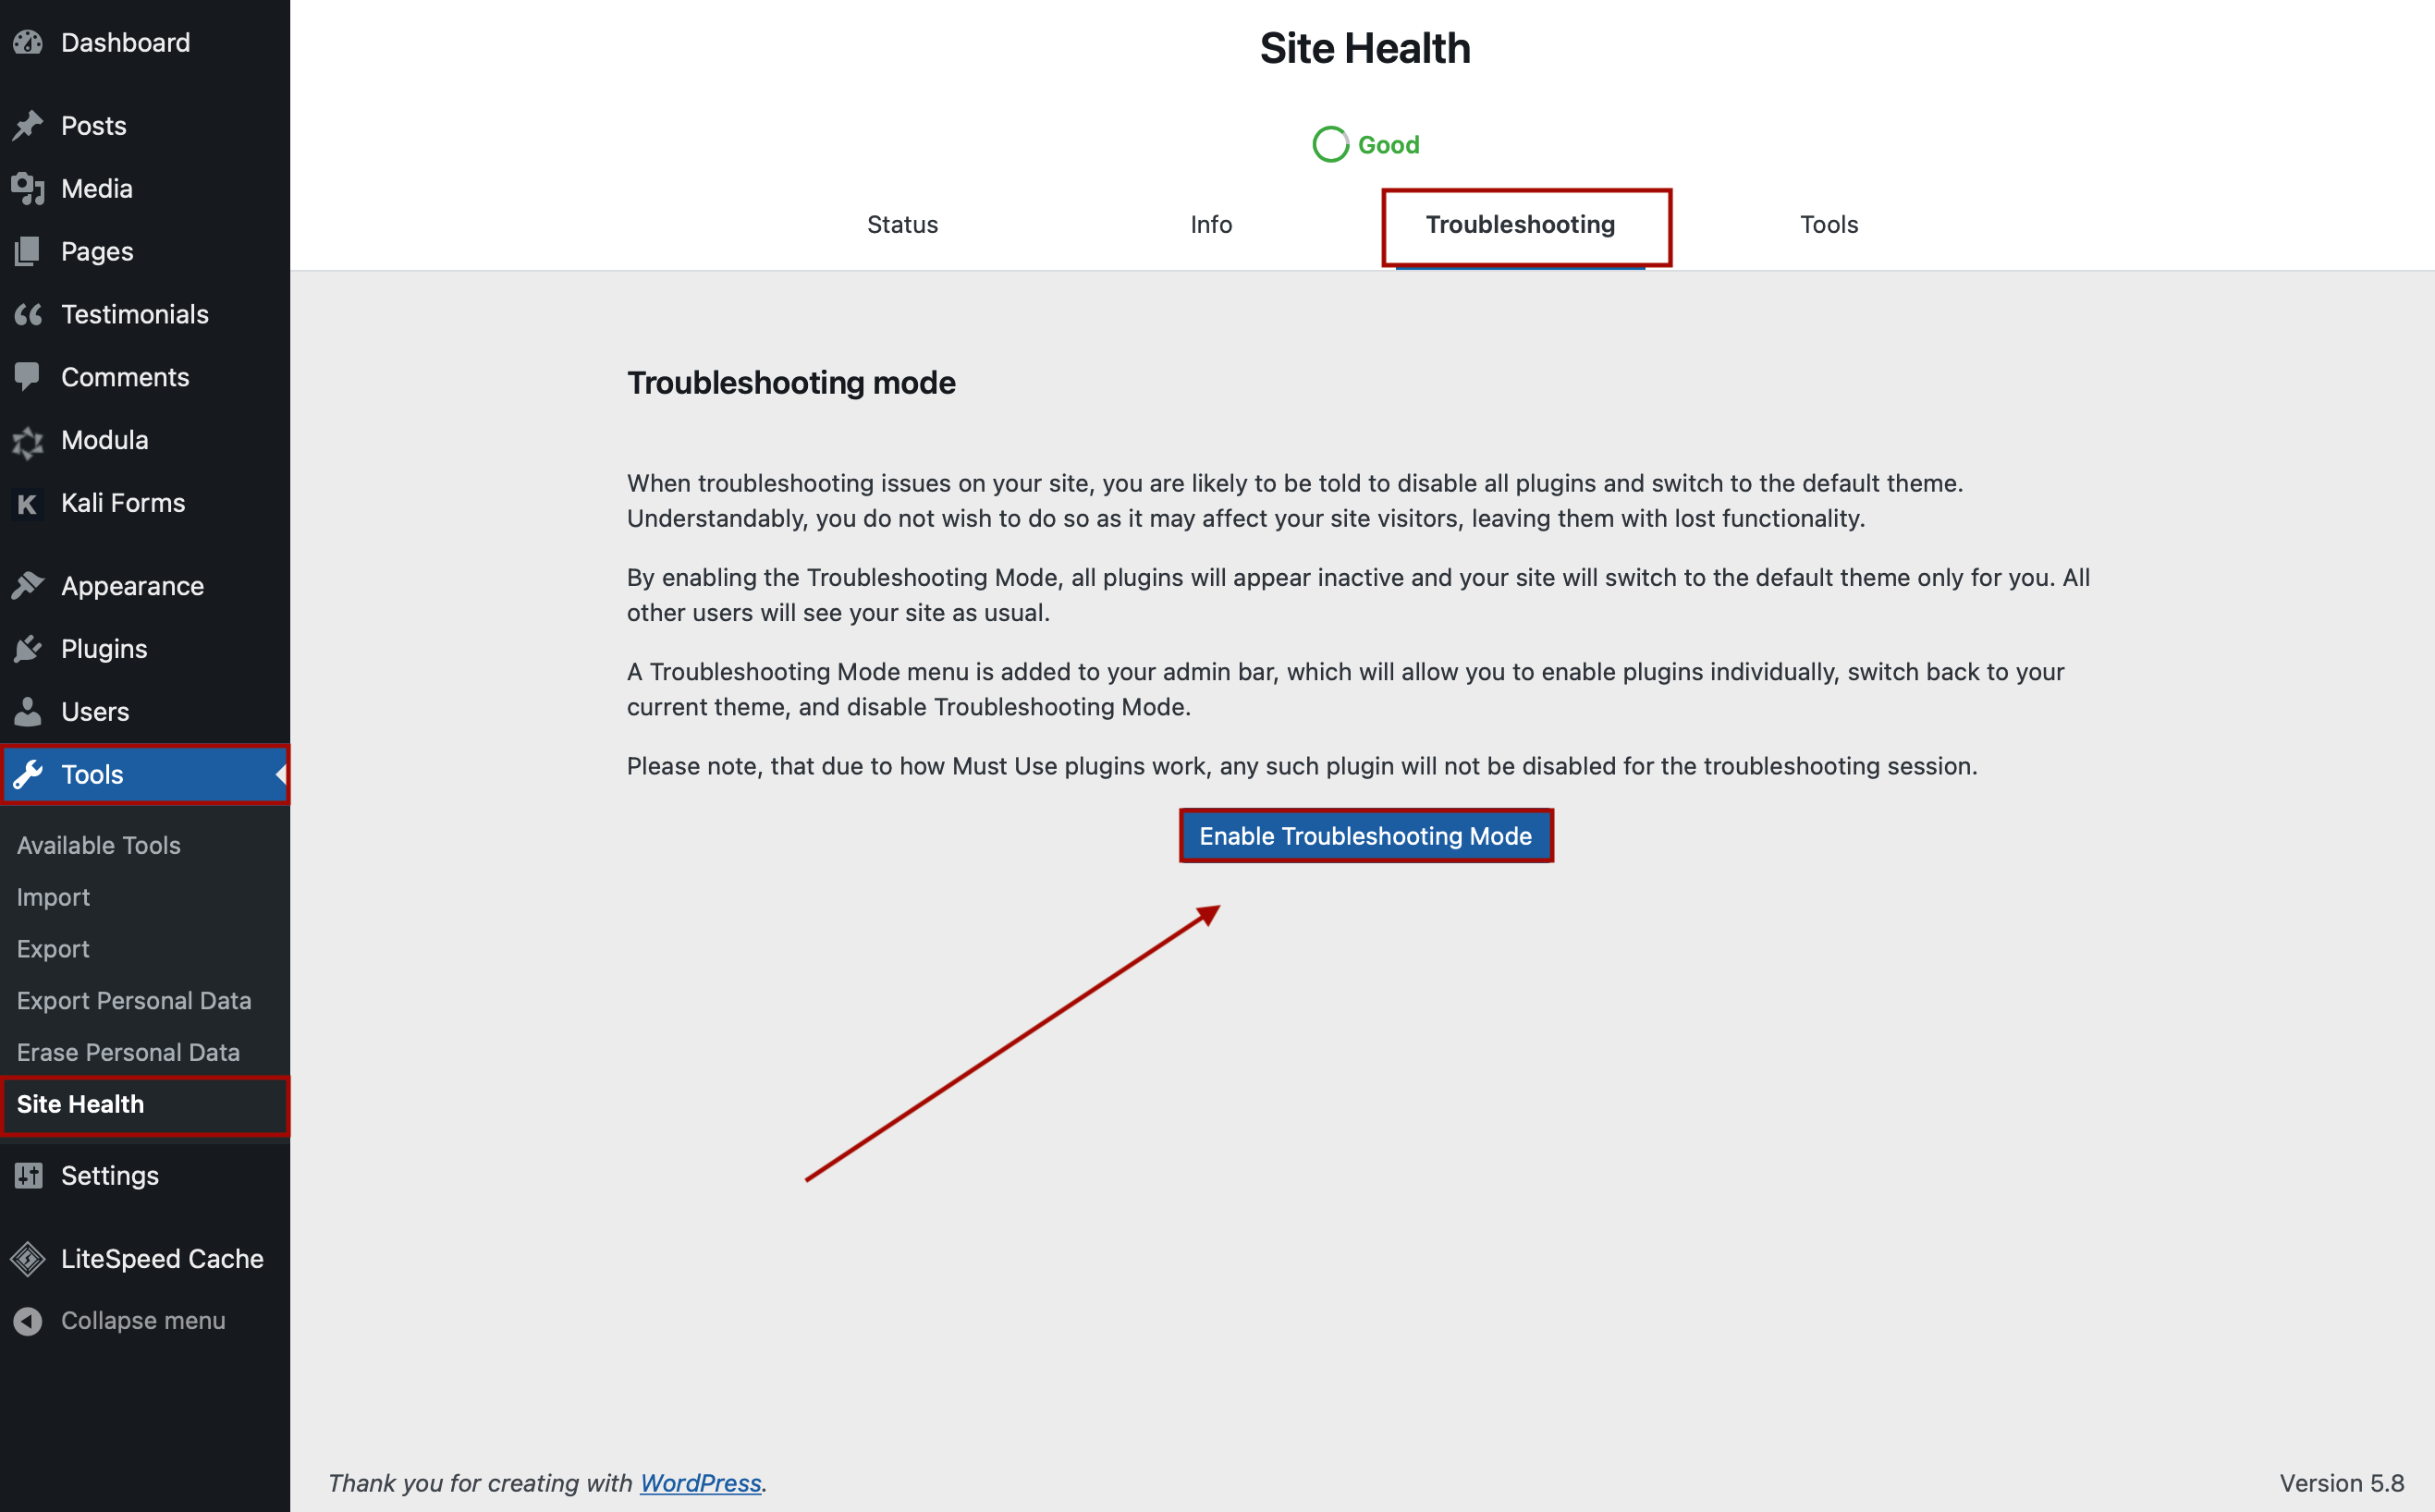
Step 4: Take advantage of the Troubleshooting mode
This mode allows you to deactivate plugins or switch to a default theme to check out if the issue comes from them. The best thing about this mode is that it will have no effect on the way your visitors see your website.
So, go to Tools > Site Health > Troubleshooting and click on Enable Troubleshooting Mode.
Once you activate this mode, you can control which themes and plugins are enabled in the troubleshooting session.
Let’s test Strong Testimonials! Go to Plugins and click Enable while Troubleshooting.
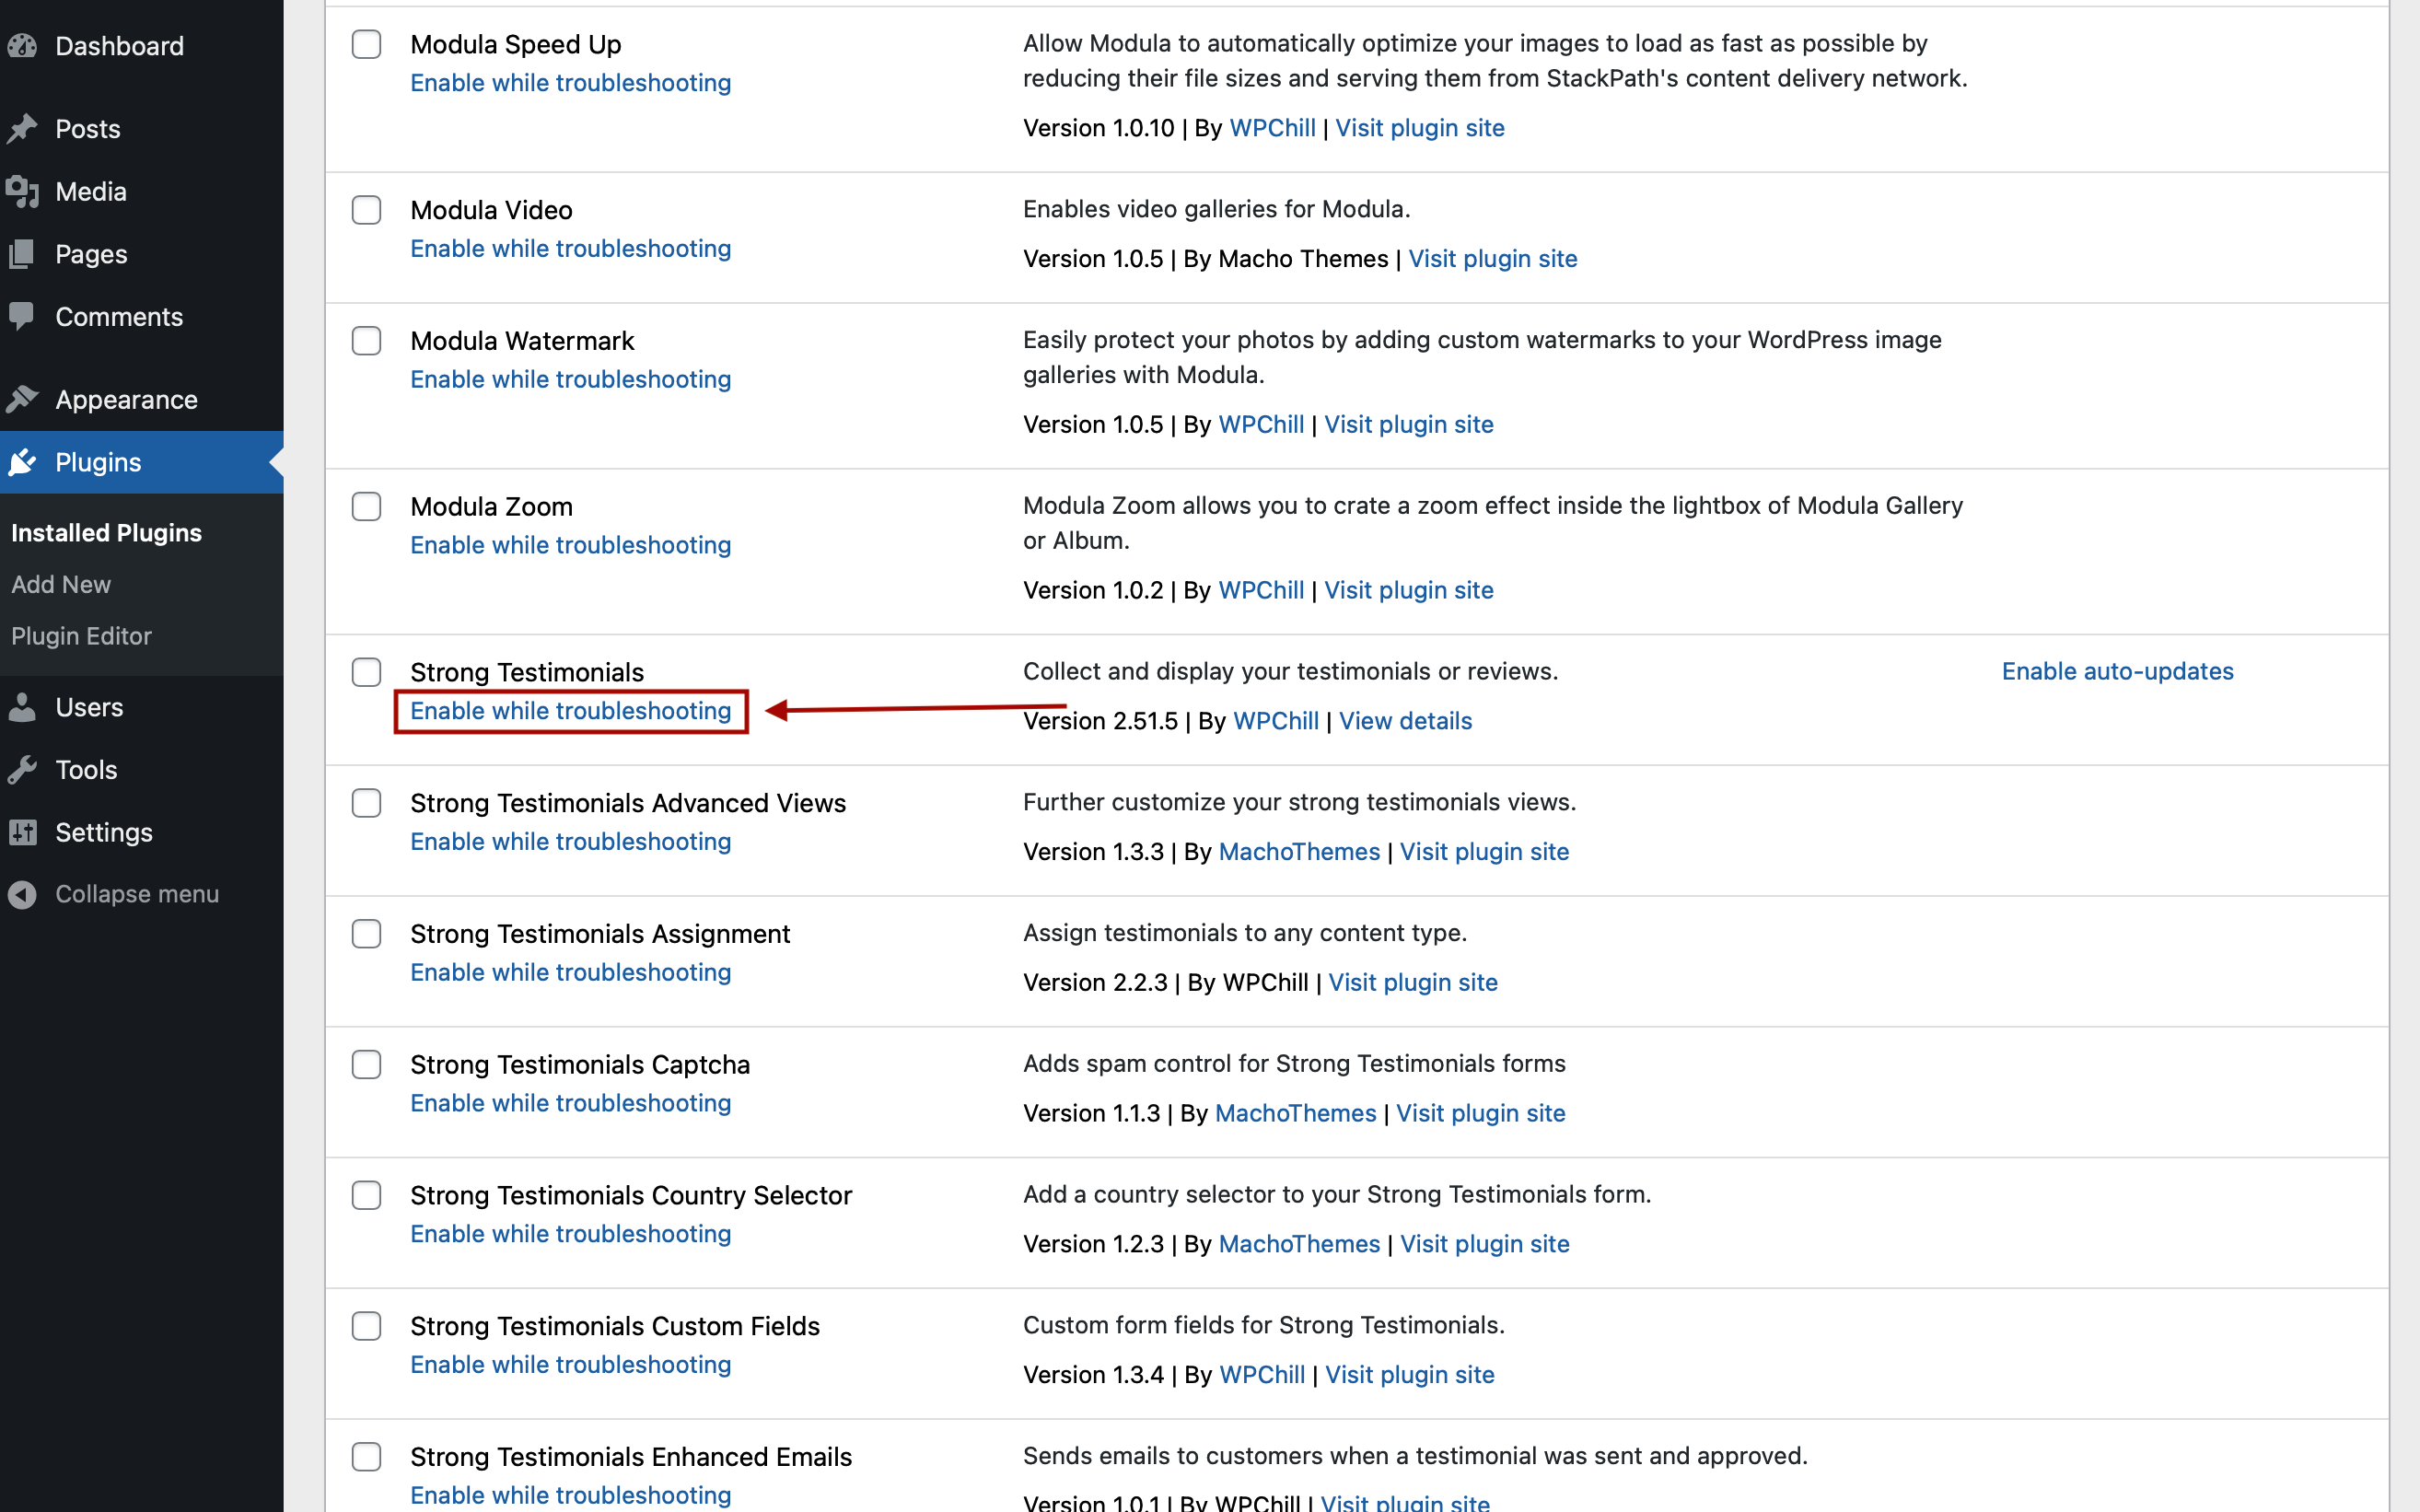
After you enable Strong Testimonials/Strong Testimonials PRO while troubleshooting, check if they behave normally when a default theme is used and the other plugins are deactivated. If they do, it means there is an incompatibility with another plugin or a theme. All you need to do is enable every plugin one by one until you locate the issue.
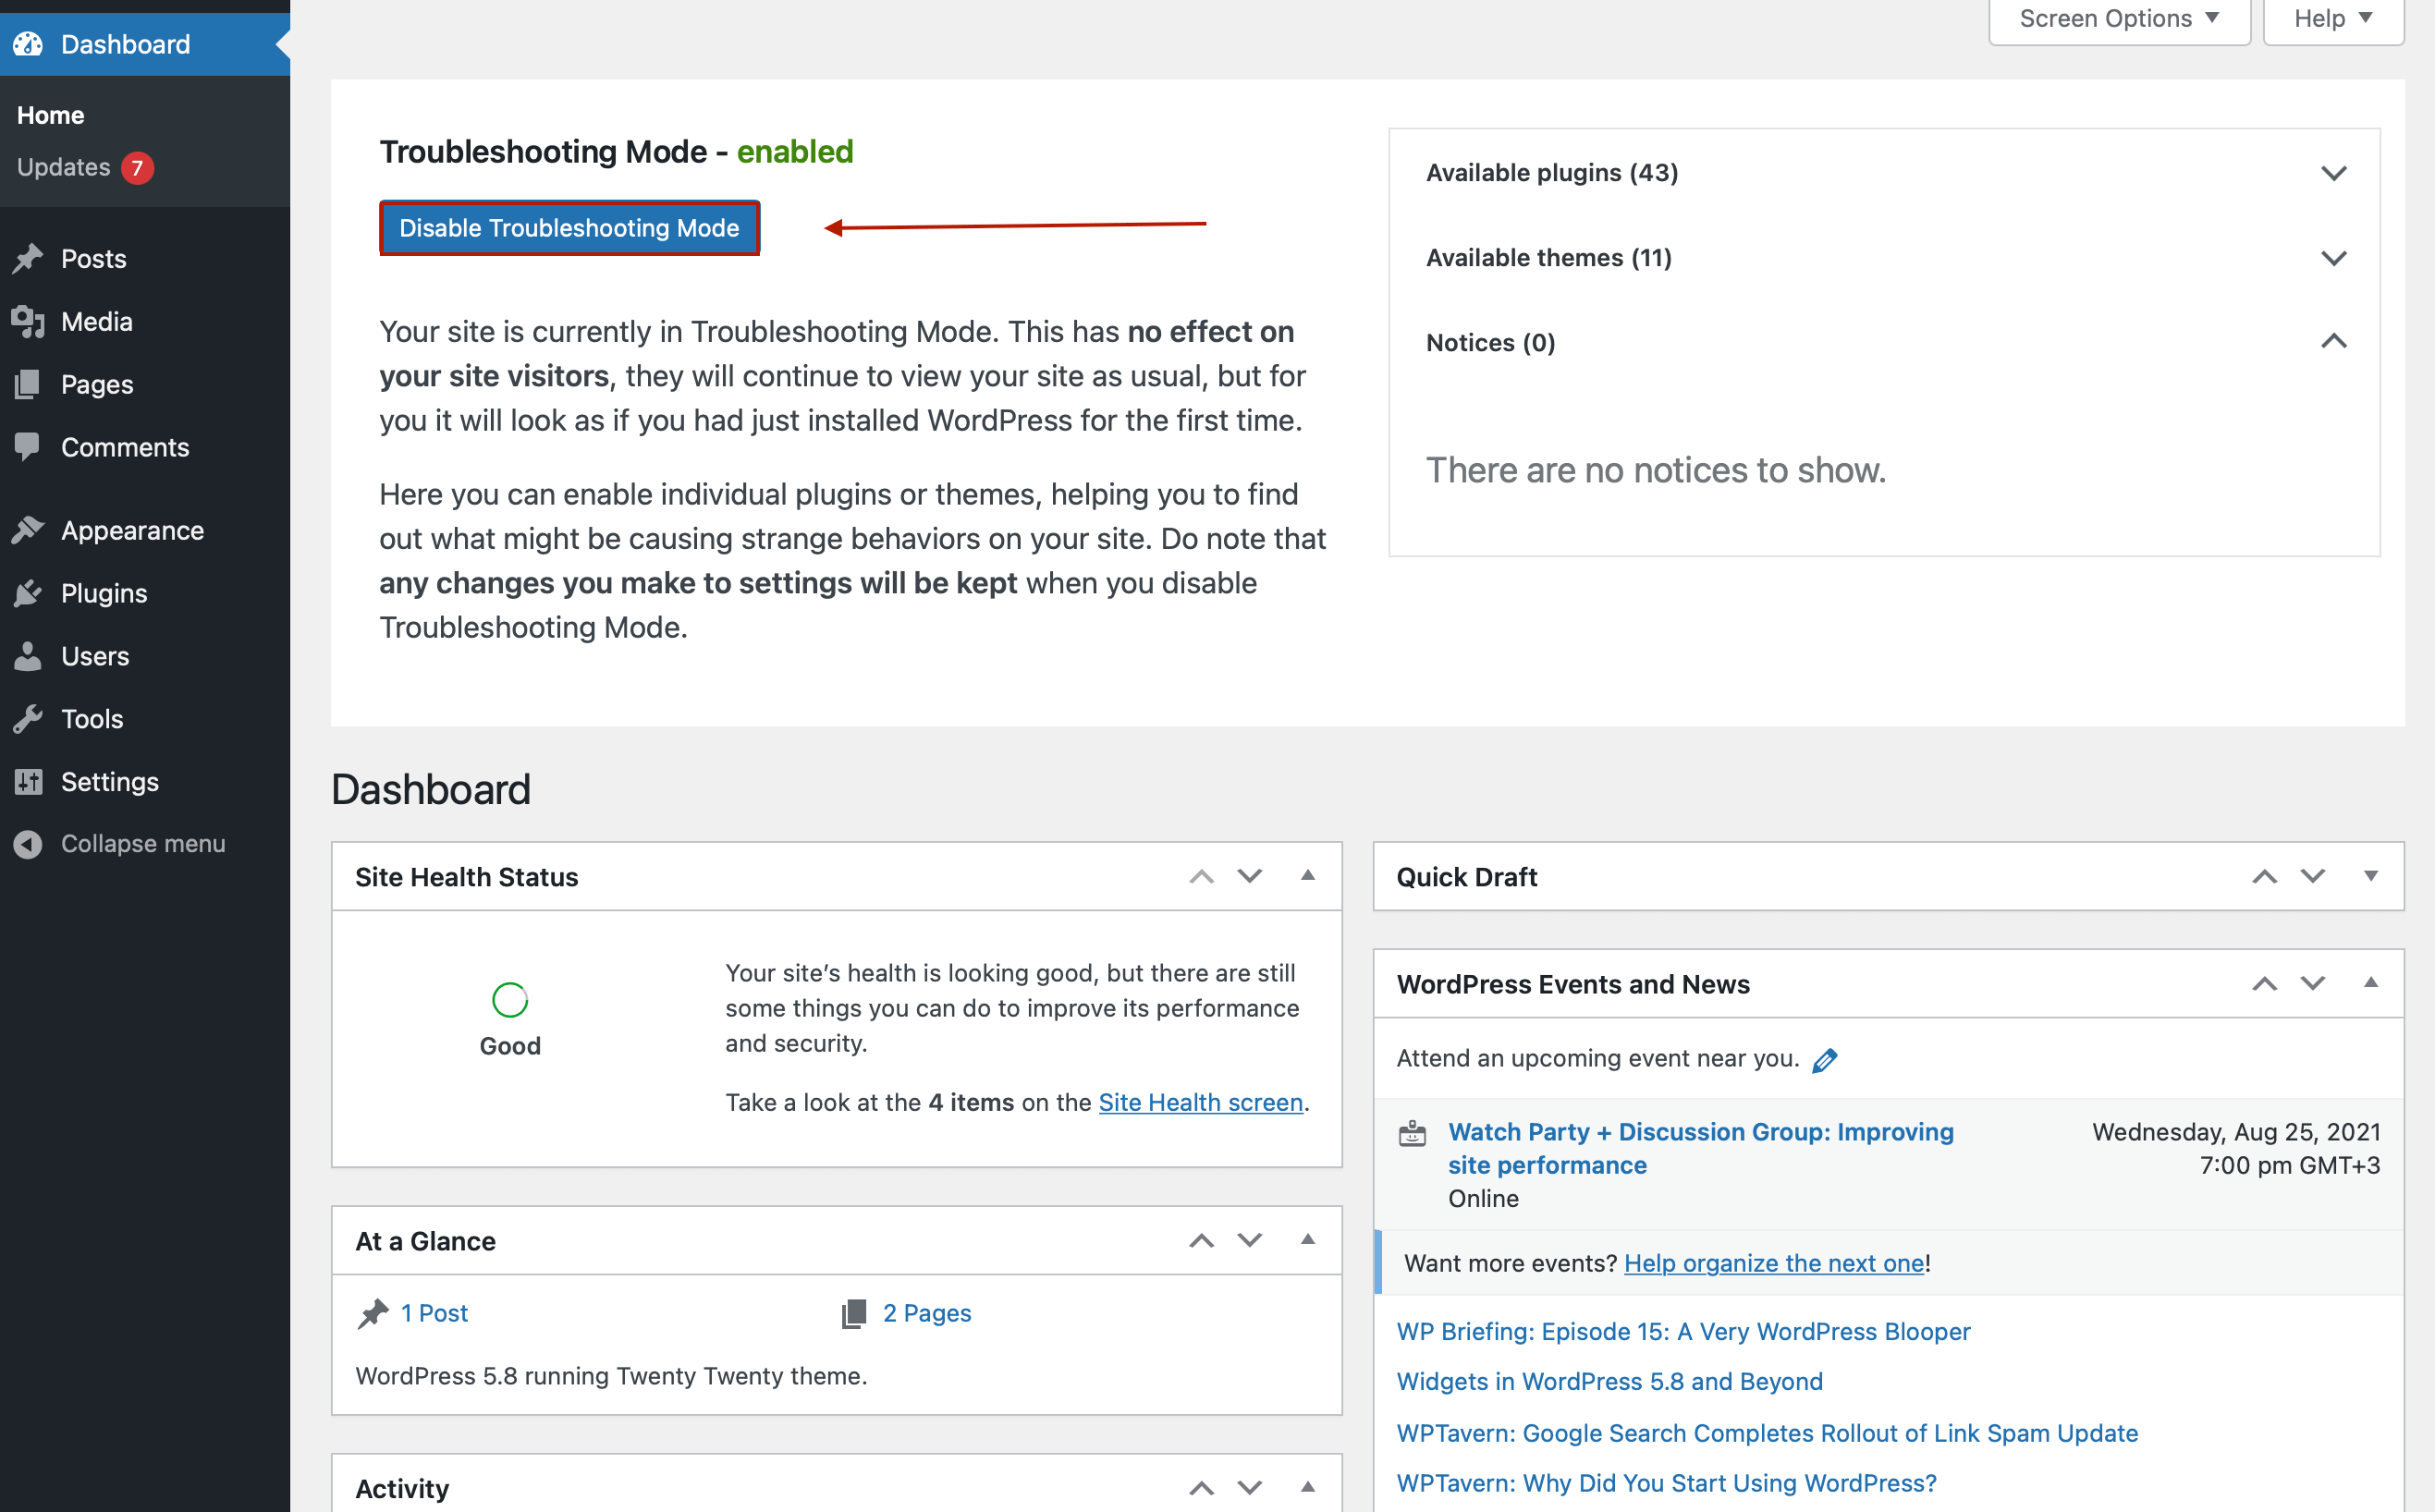
In the end, if you want to disable this mode, just go to your Dashboard > Disable Troubleshooting Mode.