This plugin is different. Instead of multiple shortcodes and widgets with dozens of attributes, there is one main shortcode and one widget.
1. Add testimonials
First of all, you must add testimonials. There are 3 possibilities of adding testimonials with Strong Testimonials.
- add testimonials manually;
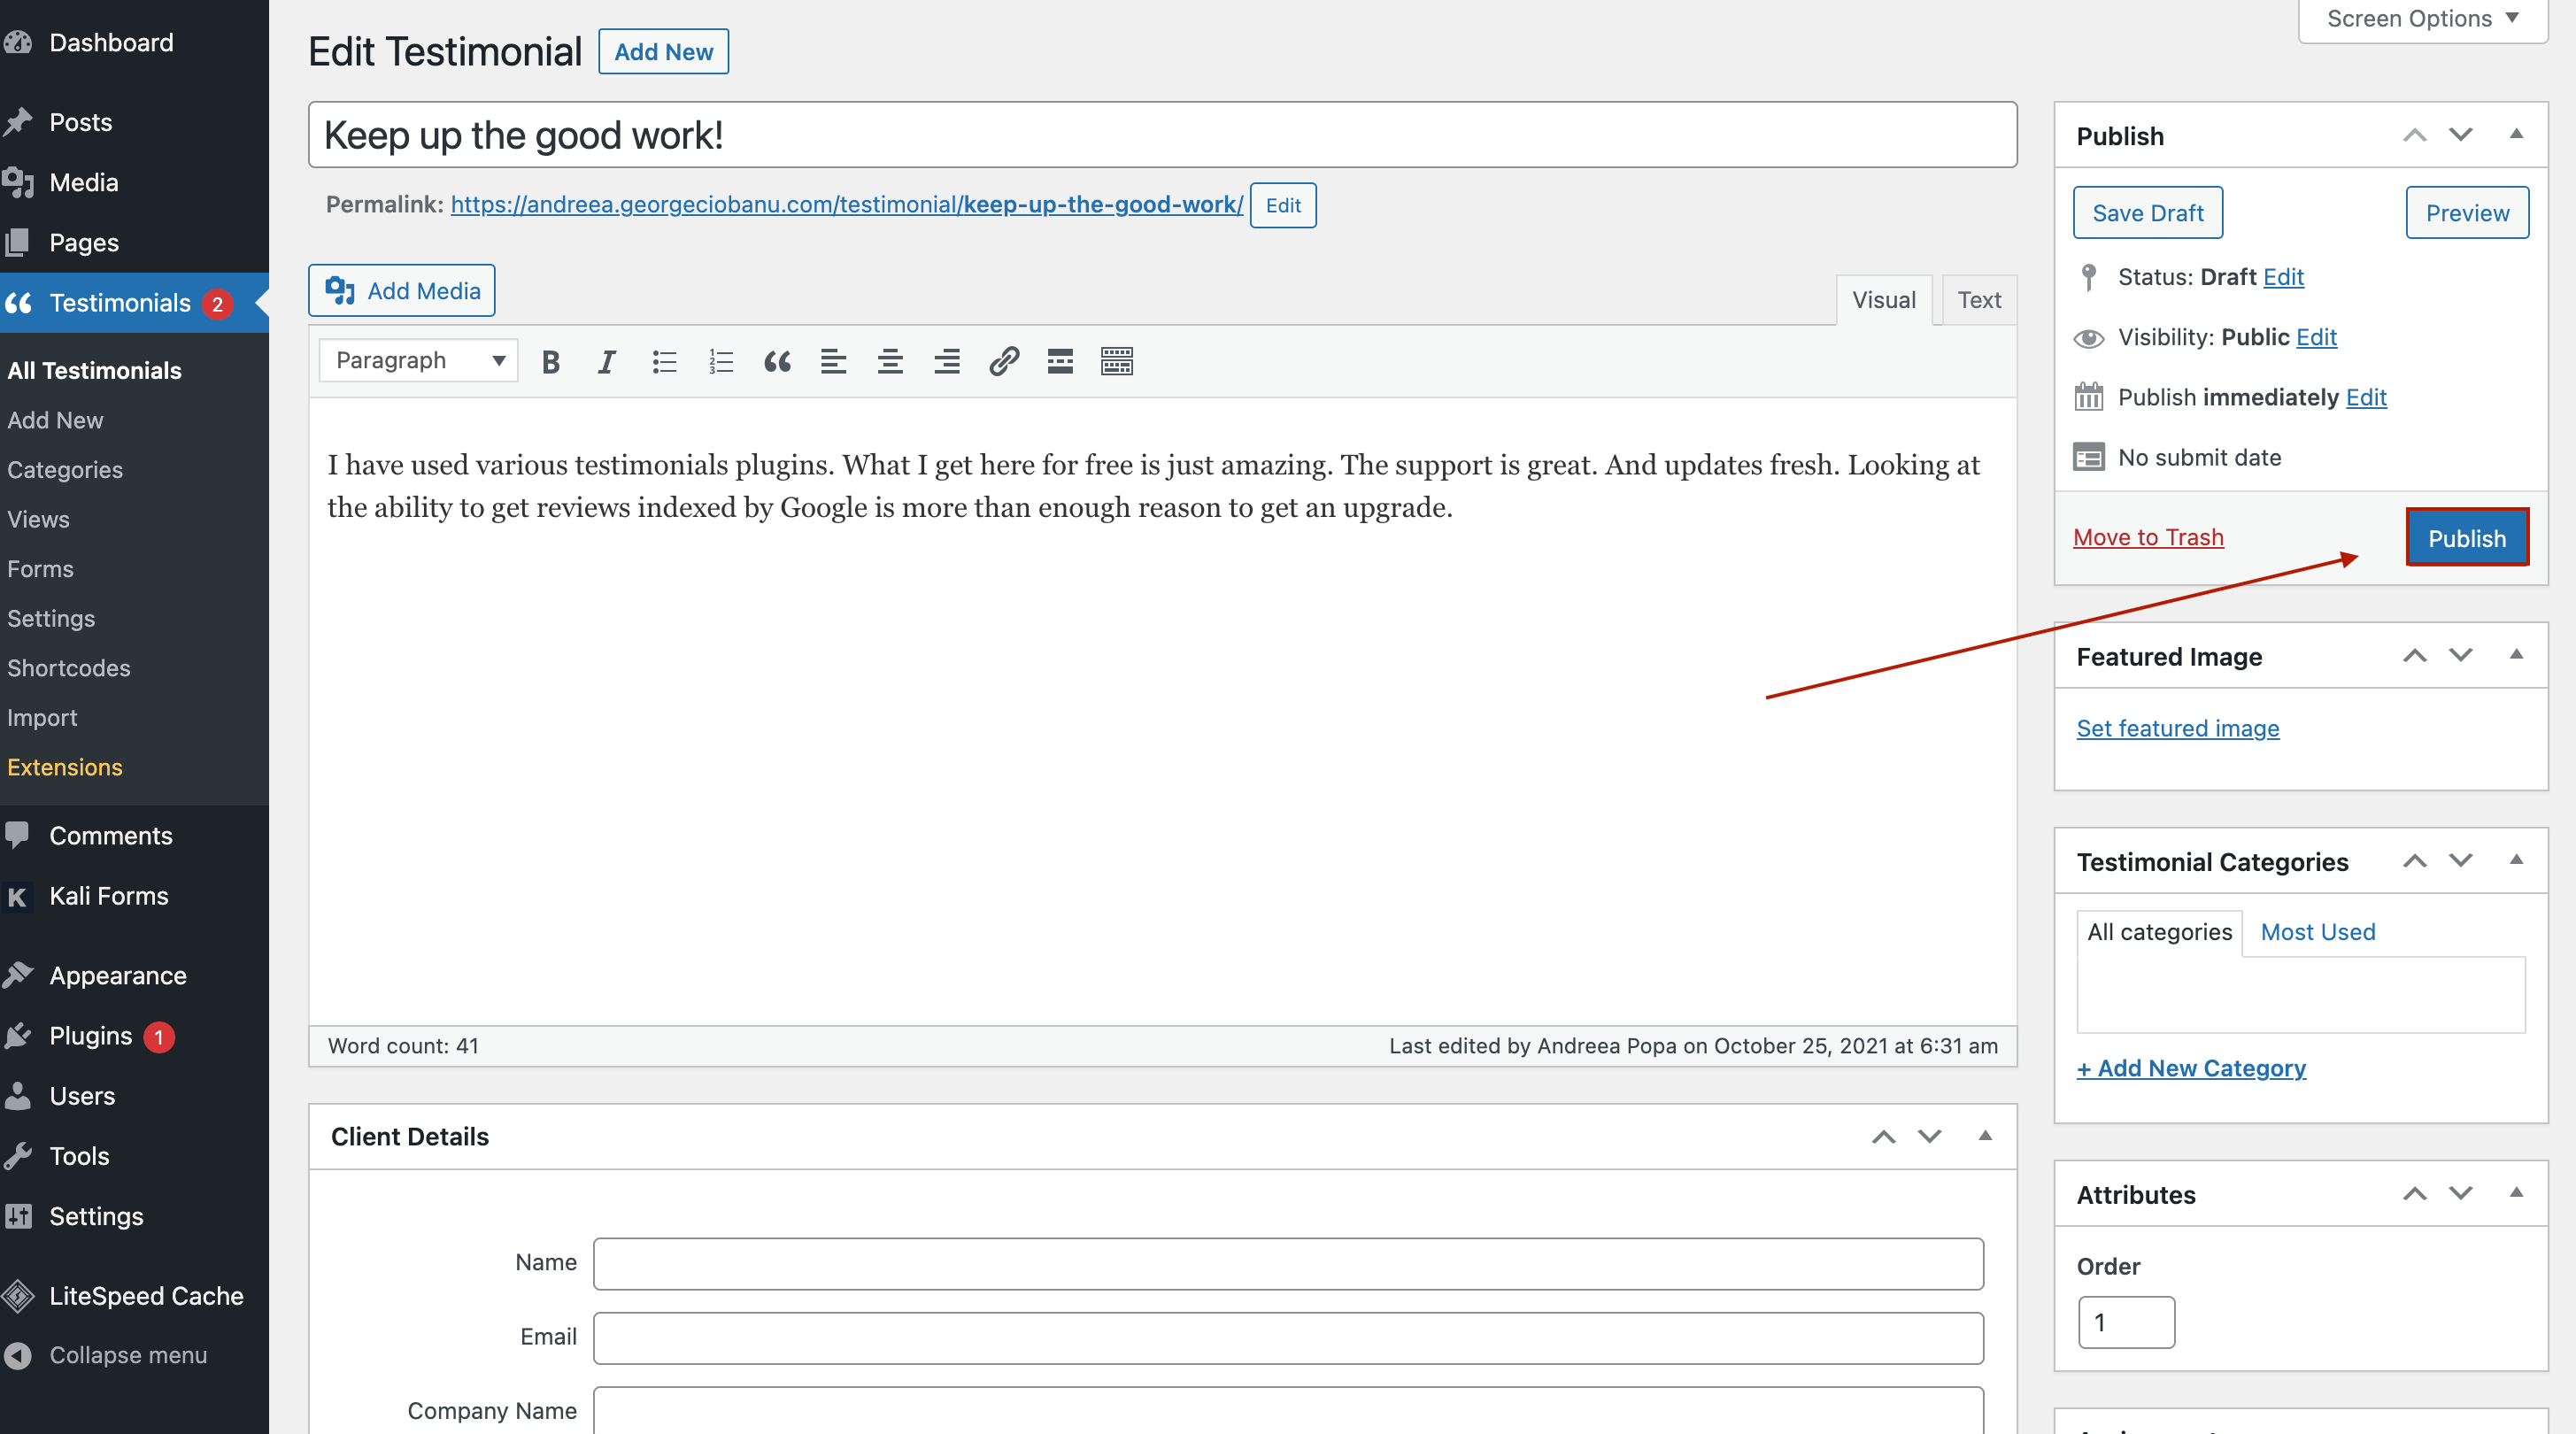
If you go to your Dashboard > Testimonials > Add New, you can add testimonials along with your client details.
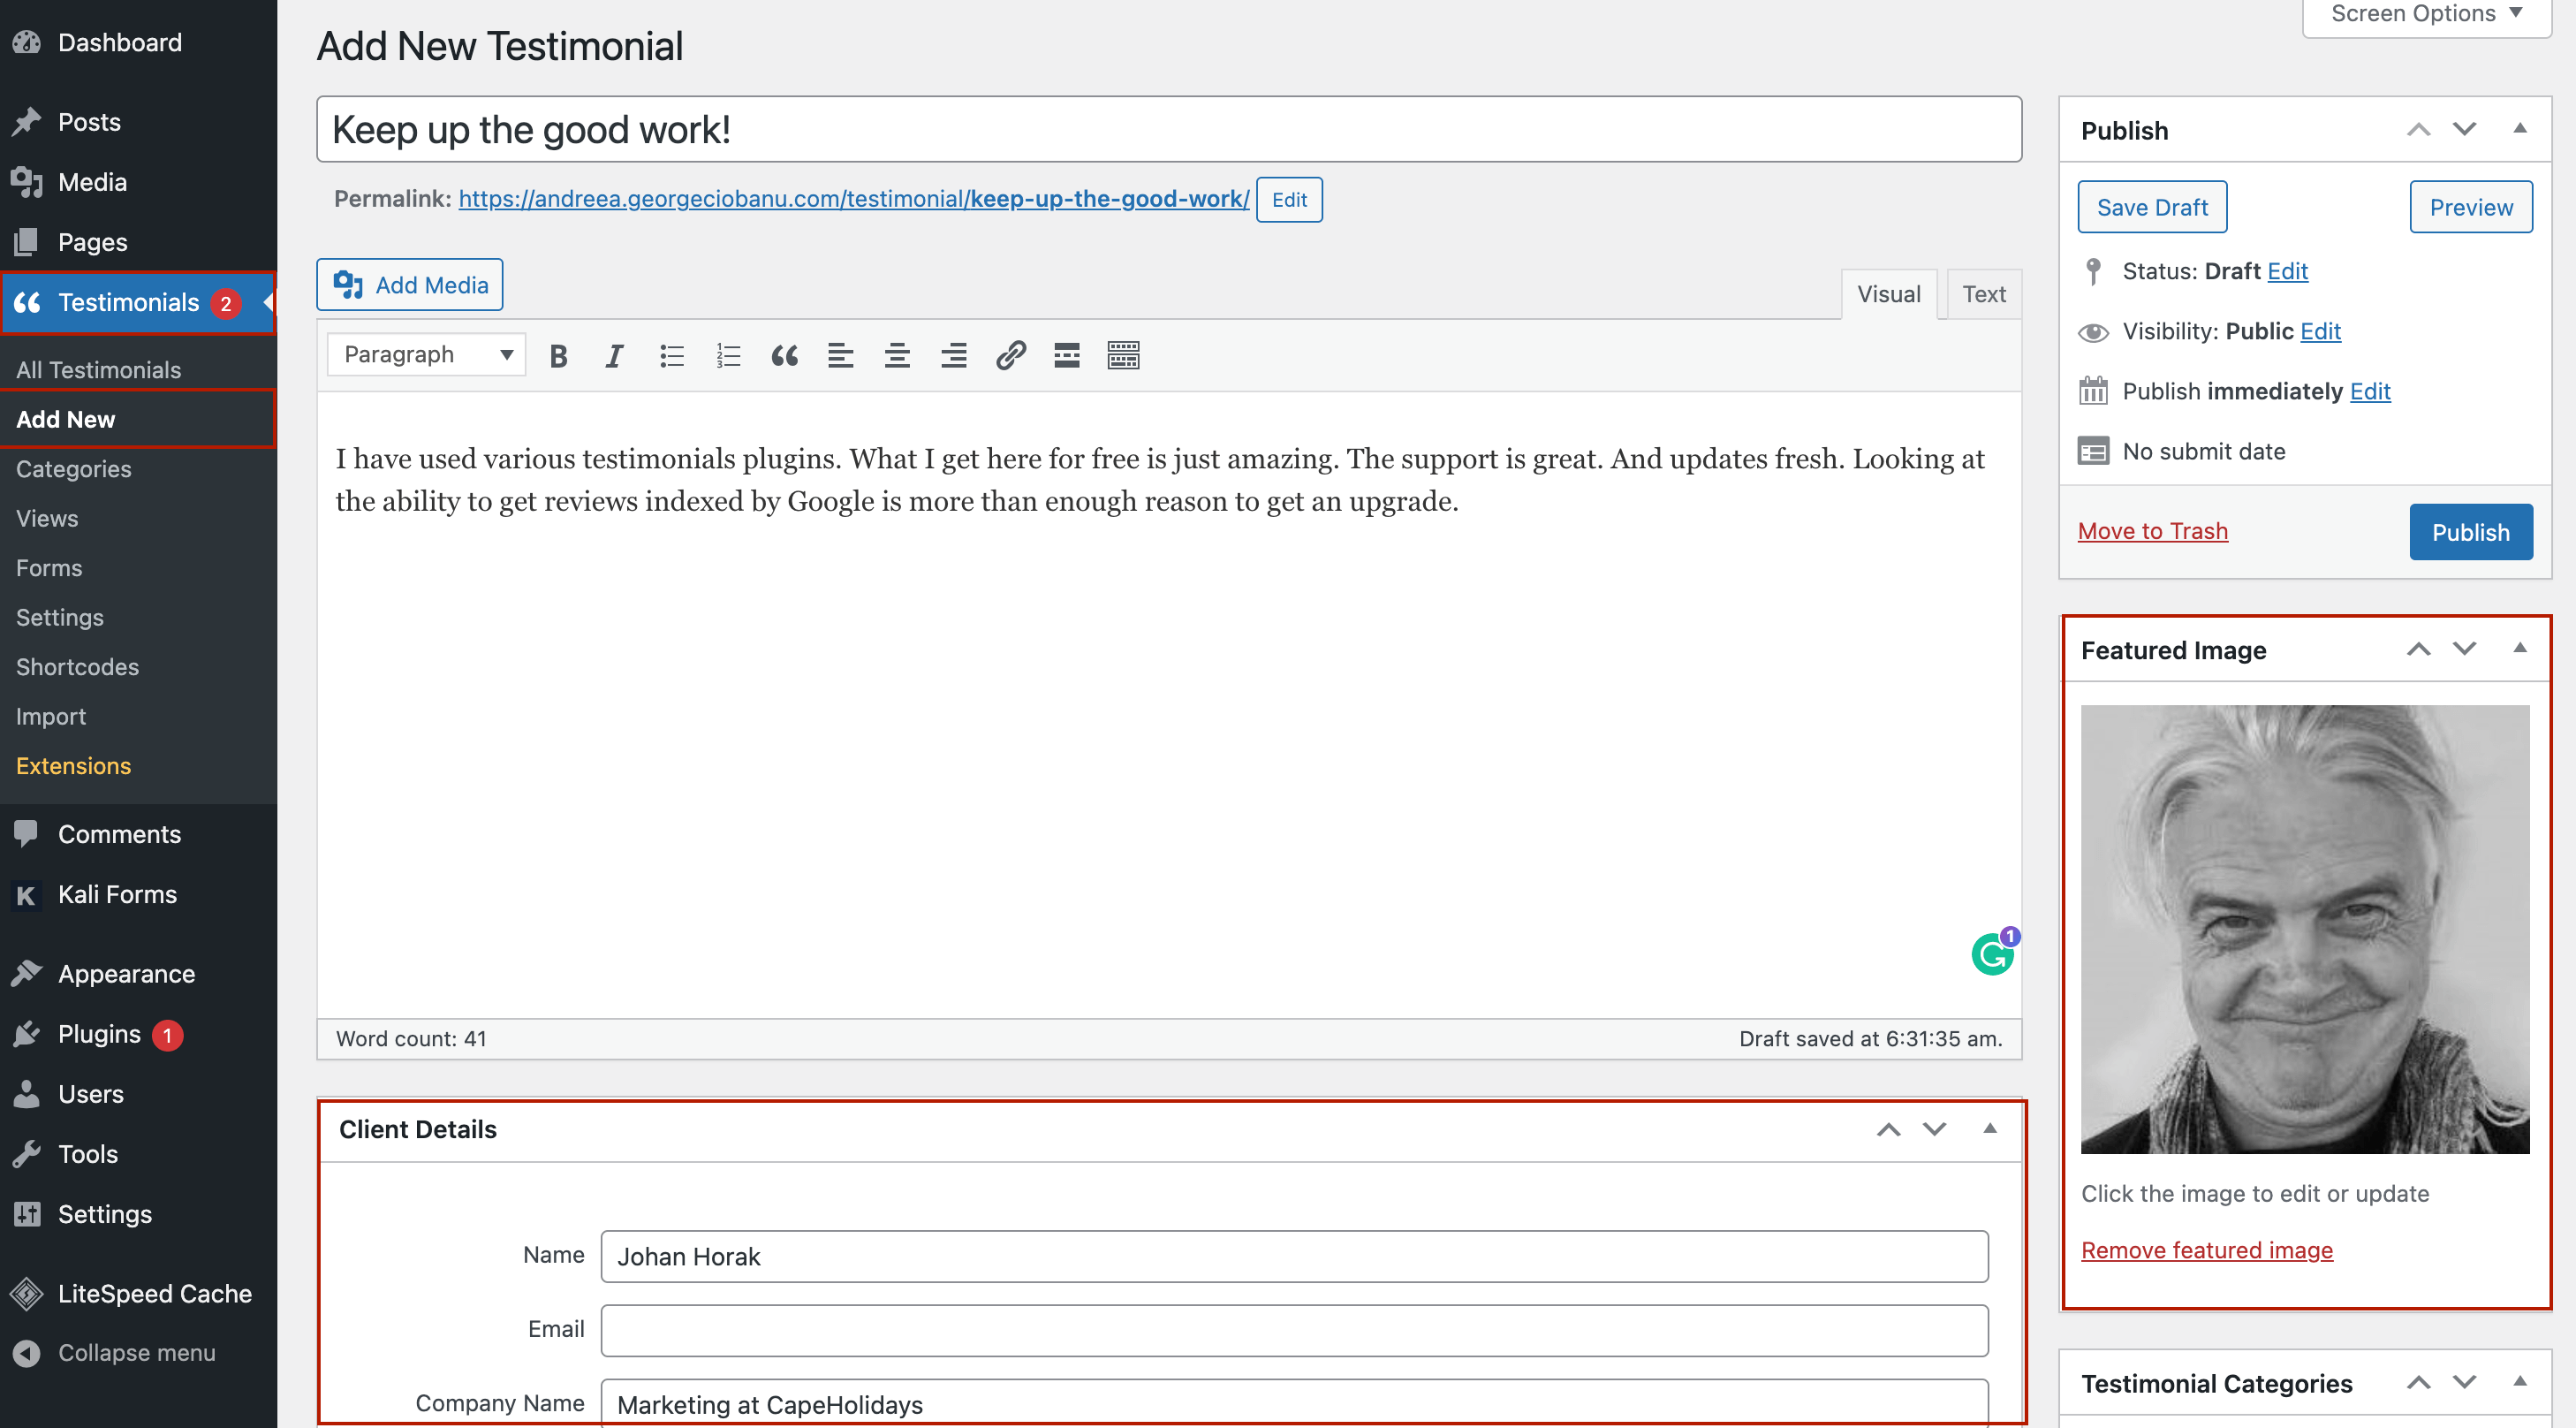
After you’re done, click Publish.
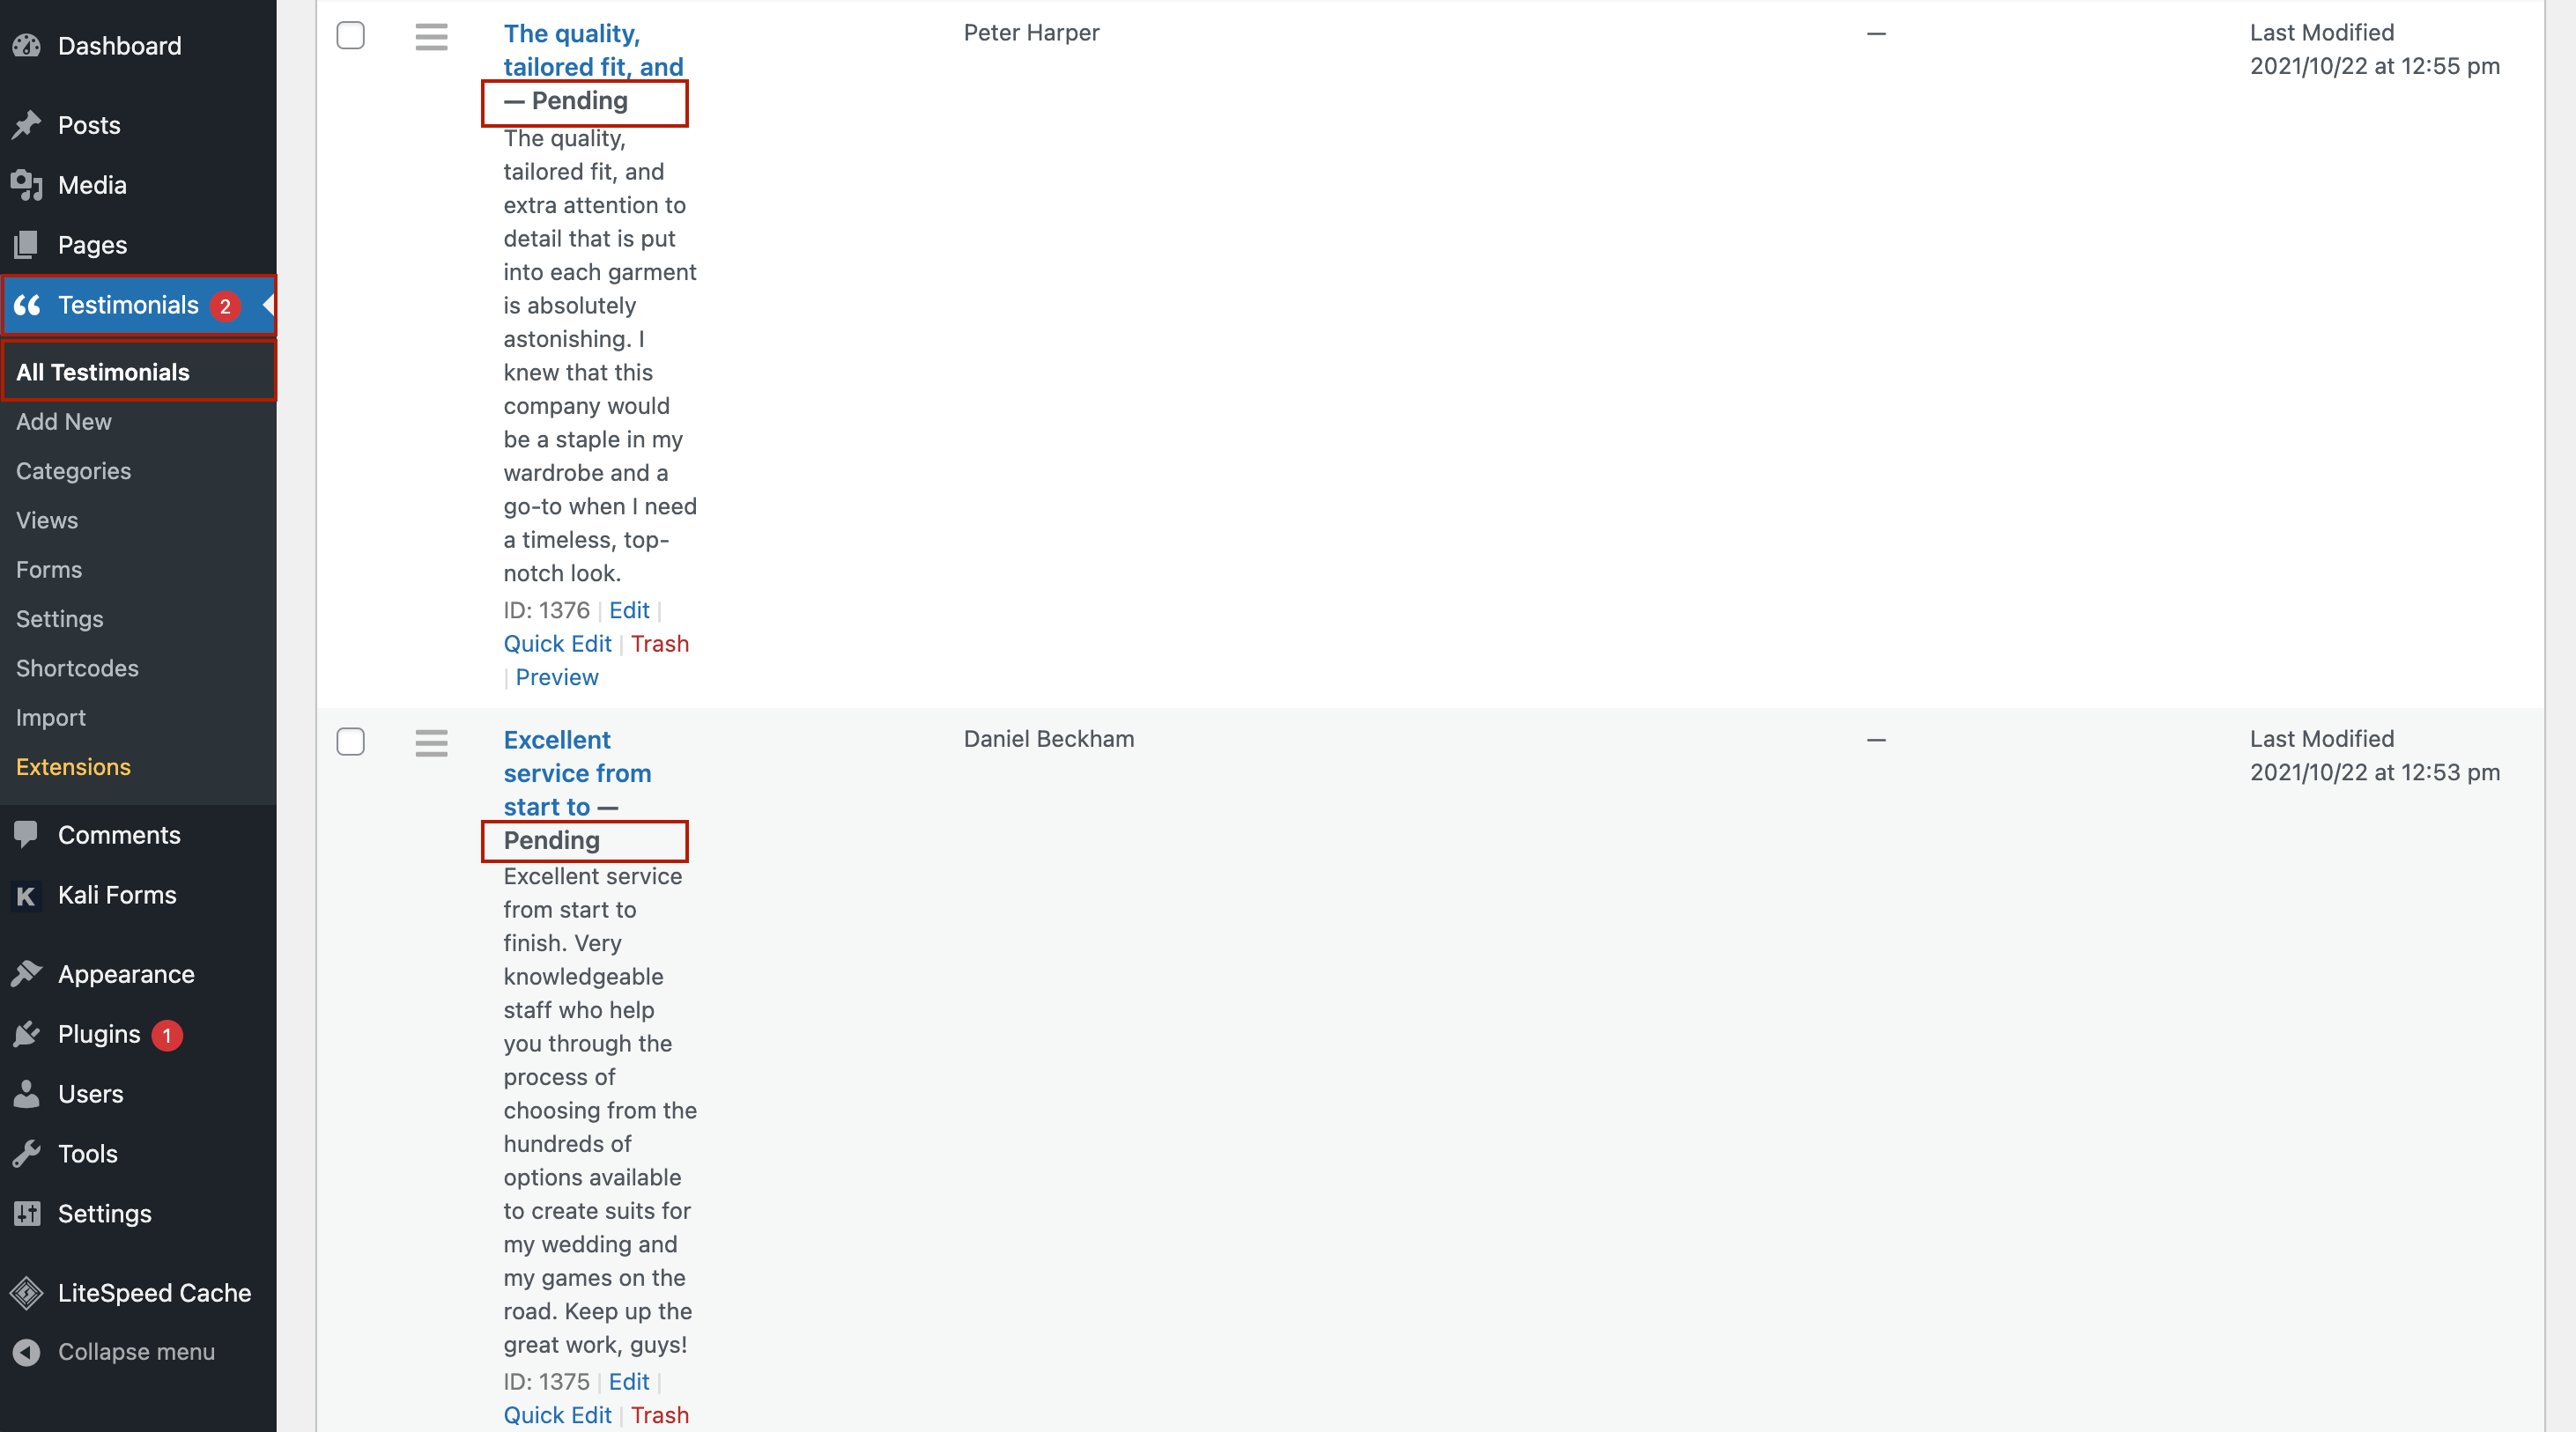
- approve testimonials through a testimonial form;
You can create a testimonial form and post it on your website to allow customers to share their thoughts. Once people fill in the form, if you go to Testimonials > All Testimonials, you’ll see pending testimonials that wait for your approval.
Click on a pending testimonial and then Publish it.
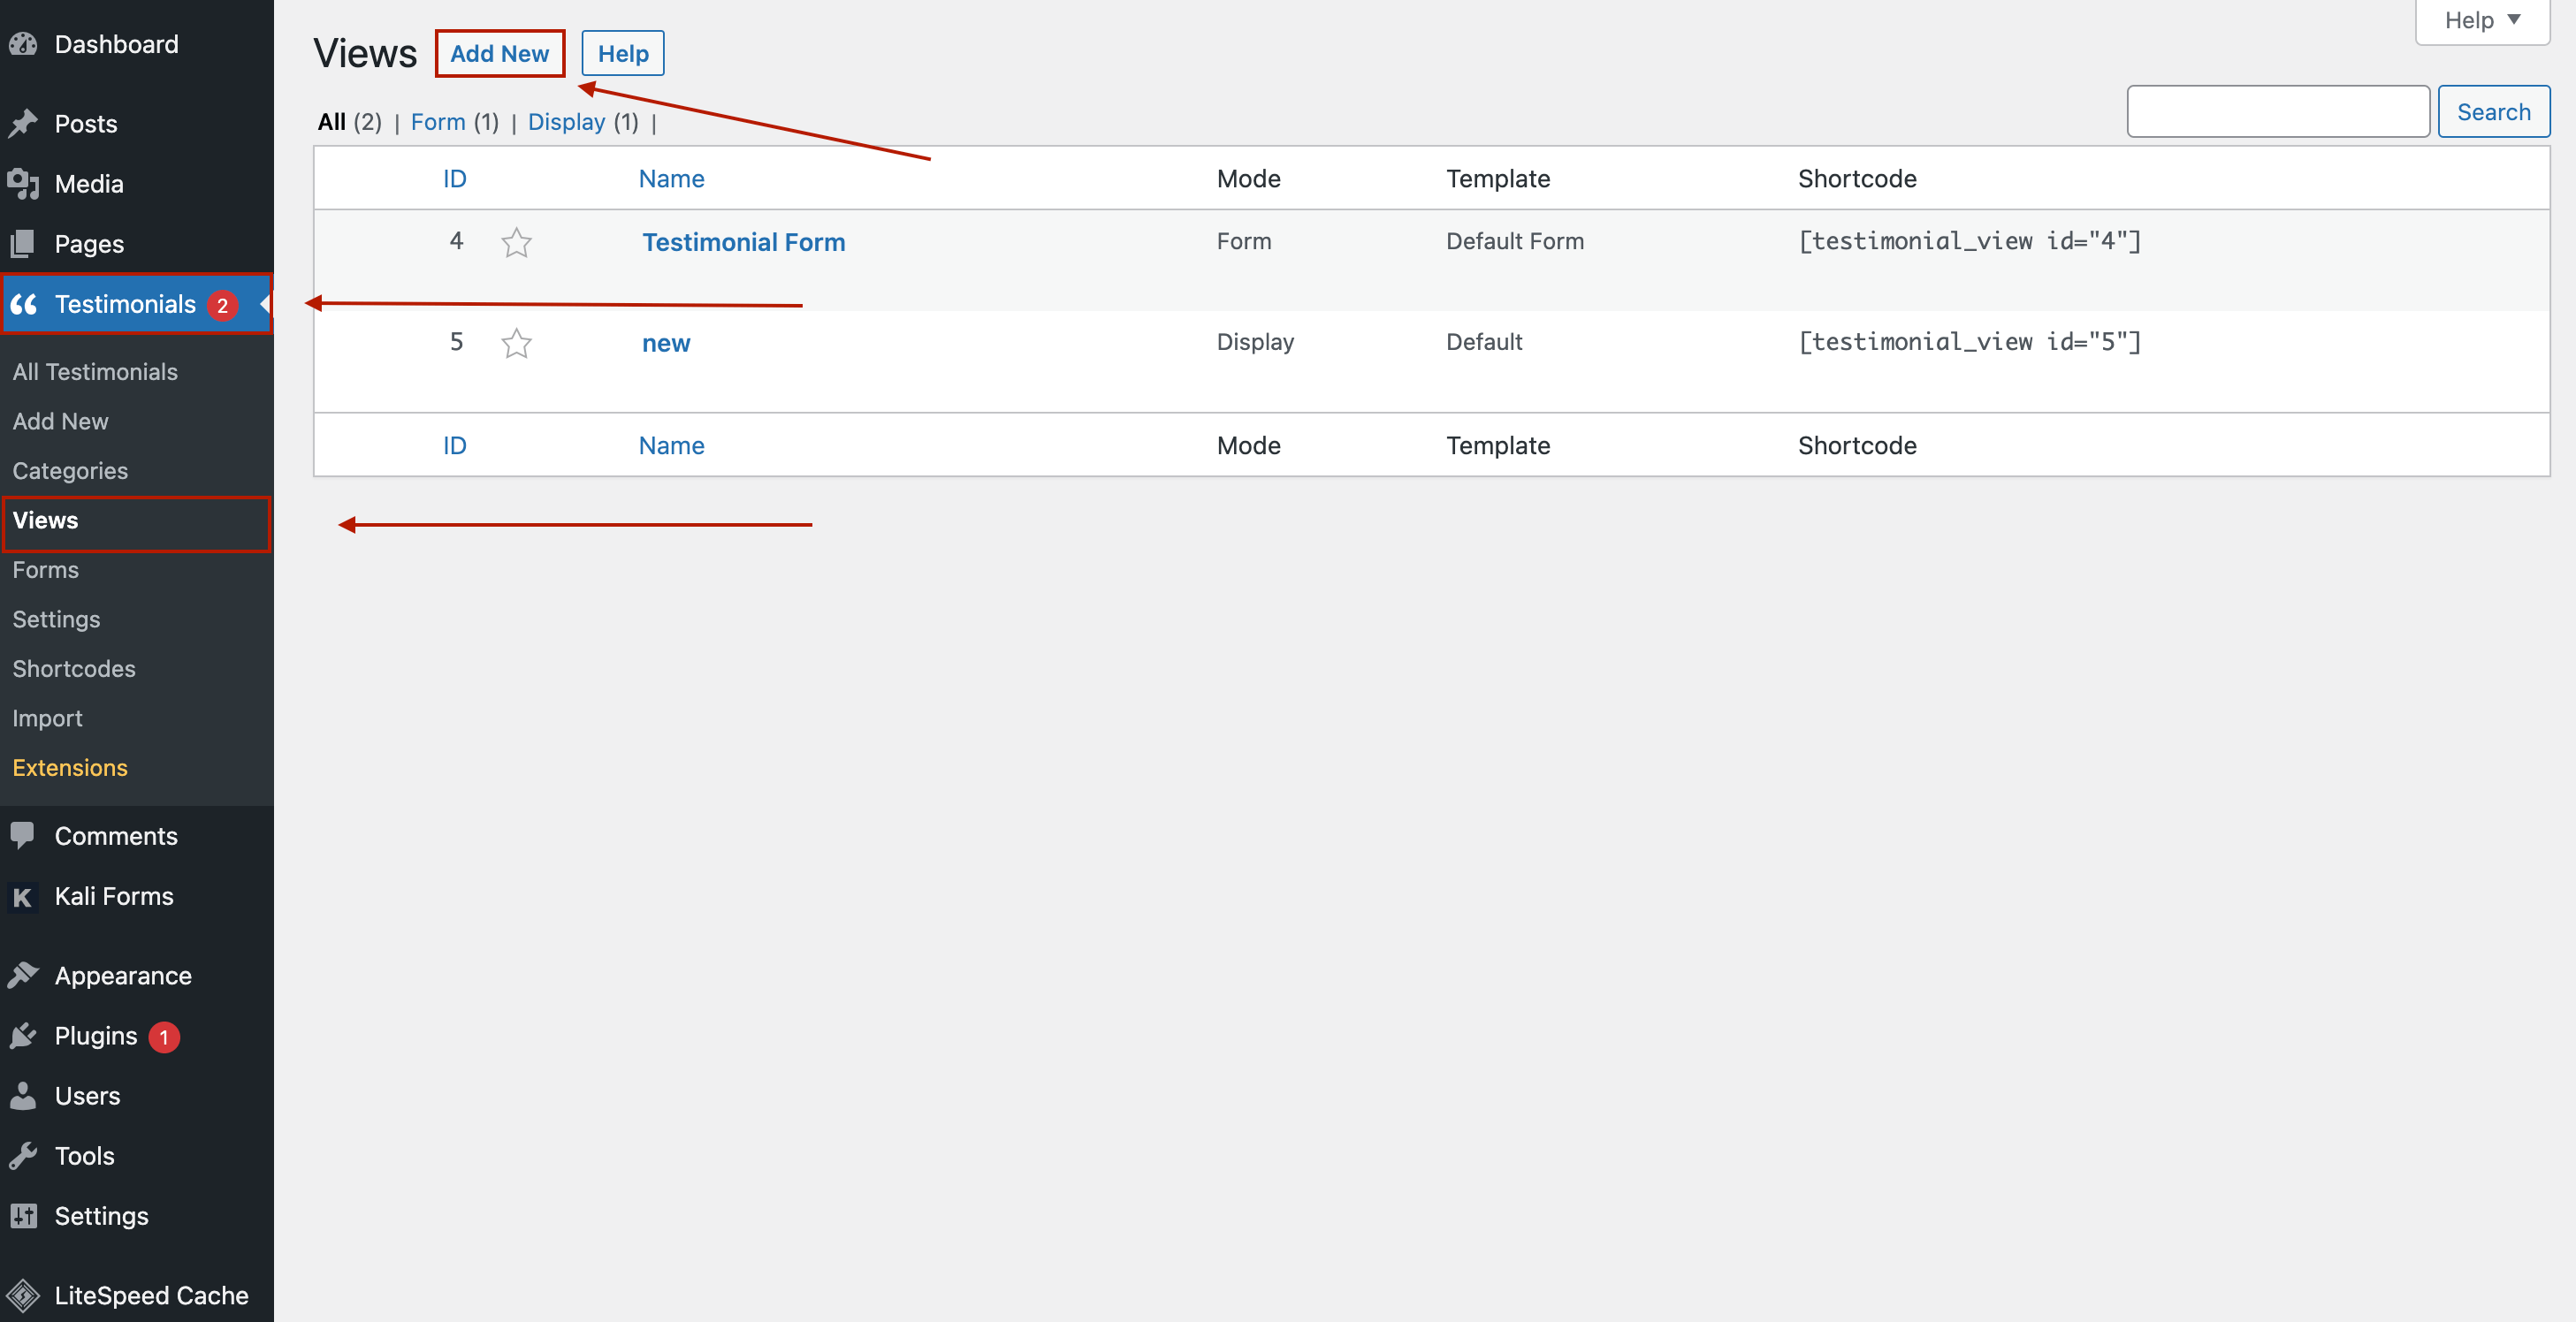
2. Create a view
A view is simply a group of settings with an easy-to-use editor. You can create an unlimited number of views.
For example, one view to display your testimonials, another view for the testimonial submission form, another view for a slideshow widget.
Go to wp-admin > Testimonials > Views > and click Add New. Give the view a name to help you identify it later, such as “form” or “home page testimonials”.
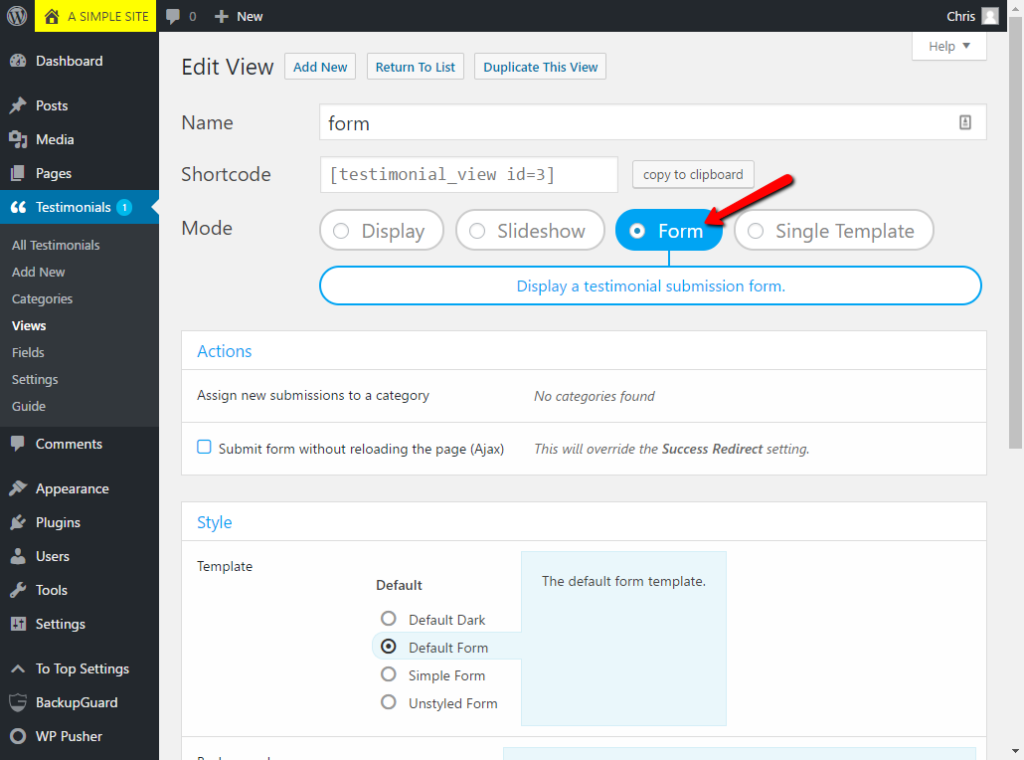
2. Select a mode
Display, Slideshow or Form. The available options will change based on the current mode. Then simply go through the options one by one to configure your view. The default settings are a good place to start.
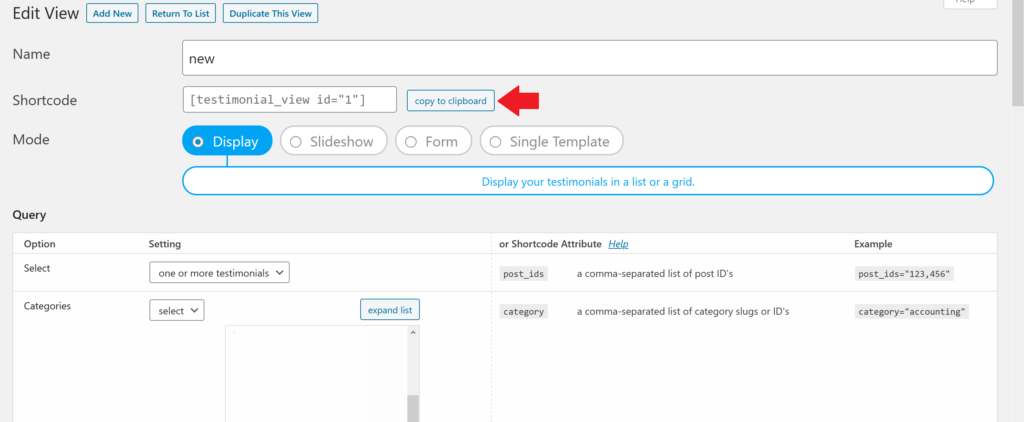
3. Shortcode or widget
To use the shortcode, click the copy to clipboard button or manually copy the shortcode and paste it into your page.
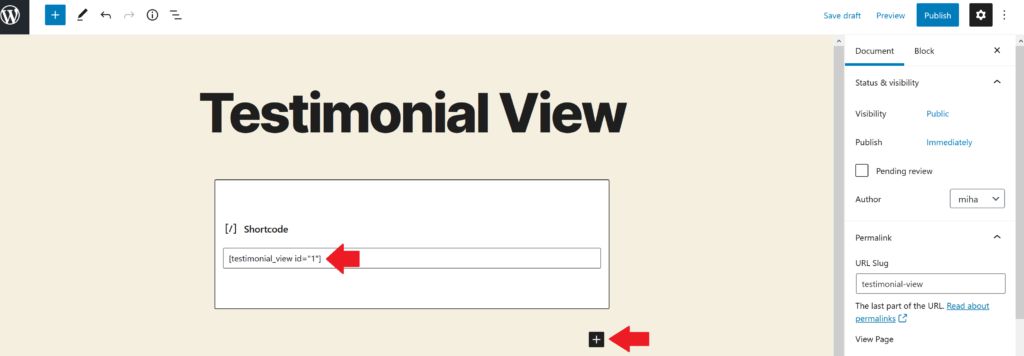
With the shortcode copied to your clipboard go to Pages > add new or edit a page > click the ‘+’ icon to choose a block > search the Shortcode block > and paste there the shortcode.
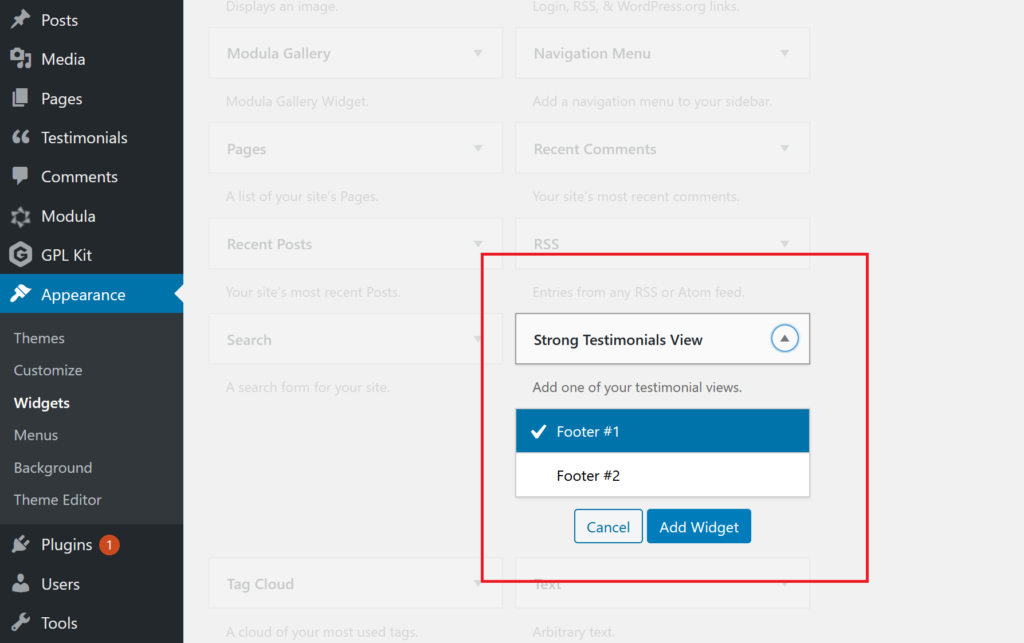
Or add the Strong Testimonials View widget to a sidebar and select the view by name (that’s why you gave it a descriptive name).
To add it in a sidebar go to Appearance > Widgets > click on the Strong Testimonials View widget > and select where to add it.